Hi folks, David Bynoe here, you might remember be from such projects as the “Sign out front” and “Banishing the Tentacle Demons from the 13th dimension that were living in our side yard”
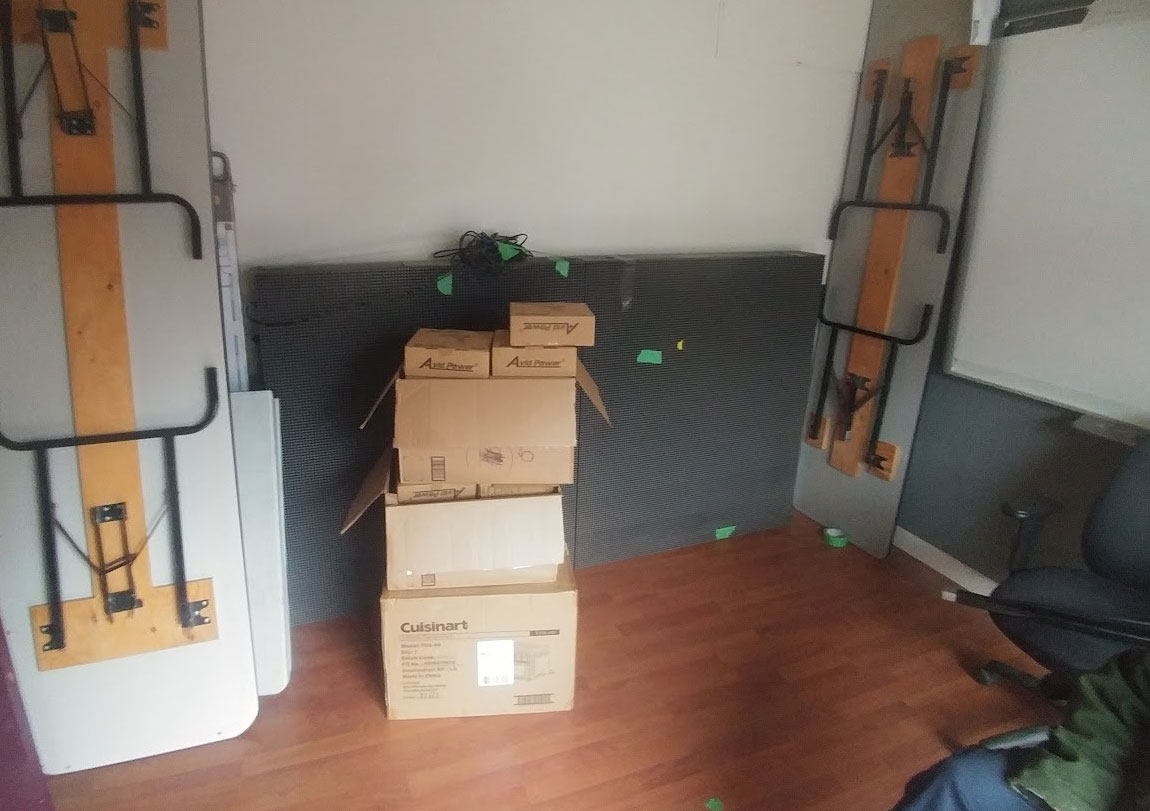
Back at the start of March we were talking about doing something with the remaining video wall panels:
Being as its now the 295th day of March I want to move this ahead before the month is out.
The plan
Install two of the panels in the upstairs class room, on a ceiling track allowing them to be slid from the back (north) wall, to the other side of the room up against the window @Metal_Janet has volunteered to help with the structural parts of this. Set it up so we can play sidewalk pong and use it as a promotion thing for the hackspace. I view this as a month or two promotion thing, and if we decide we don’t like it we can dispose of the panels, or break them up for a workshop or something.
What I need help with
The computer and its software that’s driving this
@Arrgh are you still in to build a websocket back end?
Who wants to do the front end/web interface stuff?
The Hardware
The current video wall is running on DBStar hardware, which works, but doesn’t give us control over the brightness and refresh rate because its configuration software is a nightmare
I am going to gamble and order new cards from Linsn, this will require writing a new panel configuration, which might (probably will) suck, but Linsn does have downloadable configurations available which might work out of the box.
The advantage is if we can get the configuration working we will have control over the refresh rate (so we can make the wall camera friendly, I know a video studio was discussed), brightness steps, and more importantly the configuration/layout of the panels. This would allow us to potentially do fun party tricks like disassemble the panels and put them up in a different physical layout like a 2 high band across the top of the front windows for example.
I am going to upfront the cost, when I know what it is I’ll post the total and if people want to chip in awesome, otherwise I’ll cover it all to make this happen. Probably no more than $250 CAD though
Parts are ordered, came out to 220 Canukistanian pesos.
If anyone wants to chip in I’m running a tip jar shoot me a pm or post below and I can send you my email address.
I ended up going for a Linsn TS921 sender card, and I ordered 3 RV908M32 receivers so we can do the two screens plus an extra for shenanigans/fuckups.
These are about a decade newer design than the parts we got in the screens now, and they also support up to 12 rows of panels, the existing screens only support 8 so that’s like… more.
Here is a system overview I came across for the curious about how these things are rigged, its written for novastar products but its on a Linsn website and the process is the same, apparently the led controller industry is a many headed hydra of incestuous companies.
So, new cards have been aquired.
Im going to take some parts home to work on the configuration.
Meanwhile some elves have volunteered to move a couple of the panels to a better home.
They are also planning to strip the final two panels for parts (posible workshop bait, make your own mini animated blinky) and recycle the steel frames.
If you have a better idea for the last two panels, Now would be a good time to speak up, I think the elves mean business.
Keep in mind that to set them up as a video wall we might not have enough fully functional led modules, and you will have to aquire an additional sender card (~$200) and configure it.
New plan, forget the ceiling rail, we are thinking we can build some legs and mount these on the back wall a bit higher up. Its totally visible through the front windows and makes for an easier build
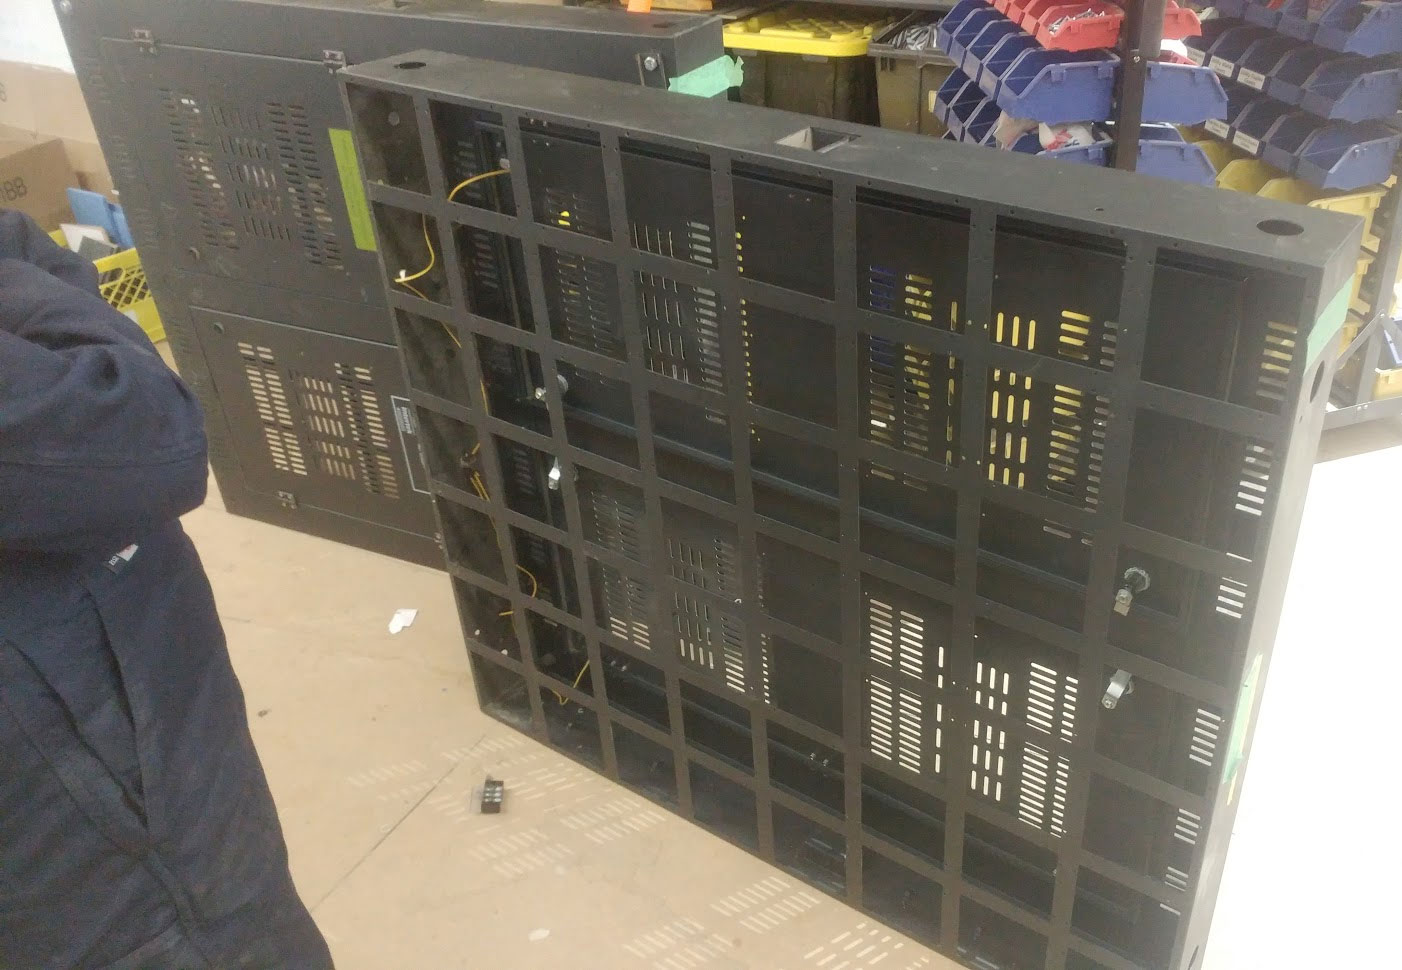
Next, we removed more than 896 screws from the two remaining panels and came up with this:
That there is 90 or so working led modules in one amazon box, as well as a box of power supplies, borked modules, and odds and sods. We have placed these in the beaver room for now.
The other two boxes I am stealing for a bit so I can set up the new sender cards and test all the modules in the iron mountain box to see which are working.
If anyone has a use for one or both of these fine steel frames with hinged back panels feel free to grab them, otherwise they are going to the great scrap heap down the road. Currently they are over by the electronics bench as there seemed to be a pile of scrap destined for a similar destination.
The new video sender and receiver card will work with our display!*
*Works for our display is only valid if we build adapter cables for the 16 feed lines that go into each row, hence the FU summing up my experience discovering this
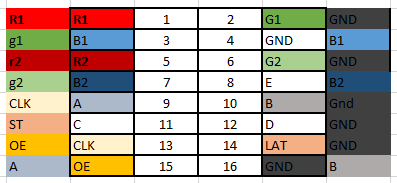
The issue is the pinout on Hub 75 connectors is not standardized (because of course it isn’t).
Inner pins are for our new sender, outer is our display, as you can tell they don’t match
I had a go at repunching down the connector to make a bastard hybrid adapter cable, and I learned some things:
These connectors are designed for one assembly, and dismantling them whilst leaving them intact is possible, its not fun
Punching in the wires one by one does not work as well as pressing in the whole ribbon in one go
Its unsurprisingly easy to accidently short datalines to adjacent pins.
So following the suggestions of Lukecyca, Jarrett and Erin on the #electronics slack channel I am going to make some PCB adapter boards as I need 16 of these things.
Given the whole New Year thing it might take a bit to show up.
Also fun fact about how these operate, because they refresh only when new data gets clocked in, you can actually load data surprisingly fast (like 16mHz) to get per pixel PWM and end up with really really nice colour levels if its set up right. We couldn’t do that on our old display for reasons. Not gonna lie, I am pretty excited.
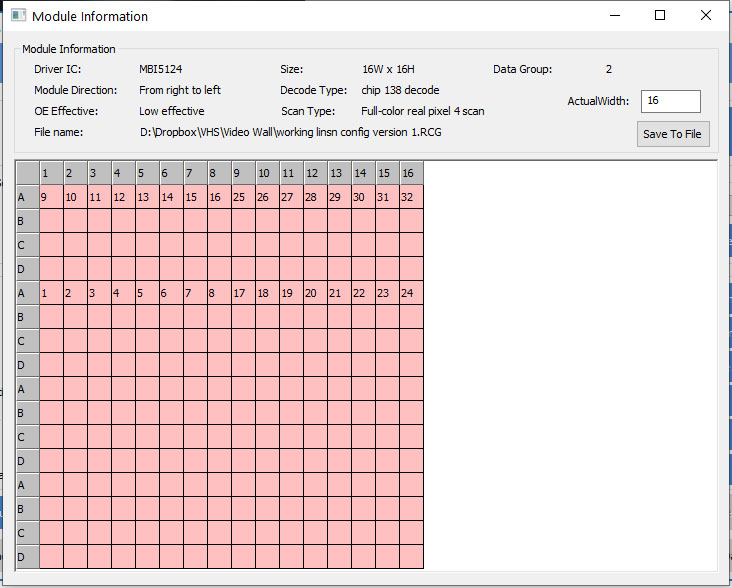
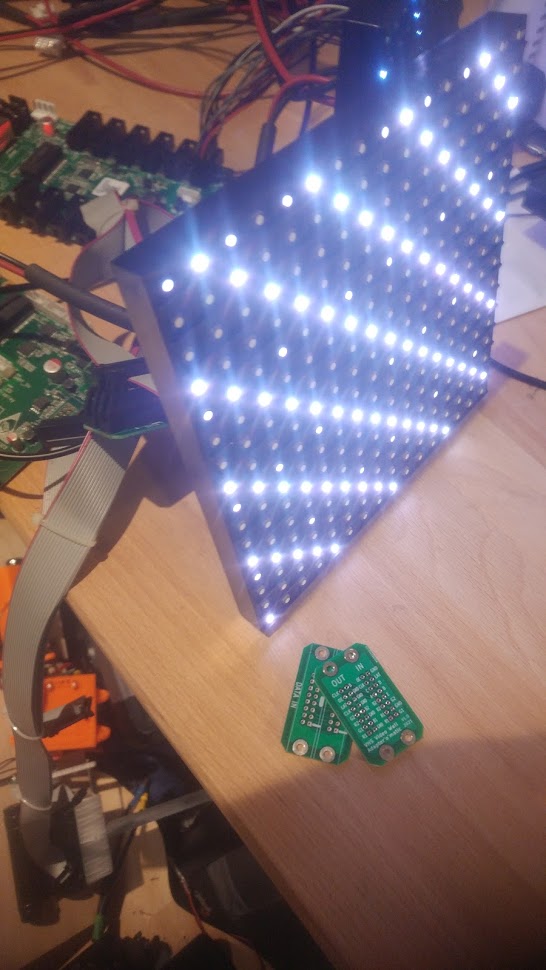
And my working but needs tweaks RCG file (it doesn’t have the mutiple panels set up yet and is missing a bunch of things, but it makes module 1 light up and work) VHS Video Wall for Linsn Sender RCG version 1.zip (2.3 KB)
I disassembled the steel frames last week and put them in the alley, so they’re gone now. I saved the hinges and cabinet latches and sorted them into the appropriate bins for use on a future project. The spare brackets are currently in the “Brackets” bin in the CNC area.
Thanks! Its not that bad really, two 16pin connectors per board and 16 boards required. I just state the total pin count because it sounds cooler and more impressive
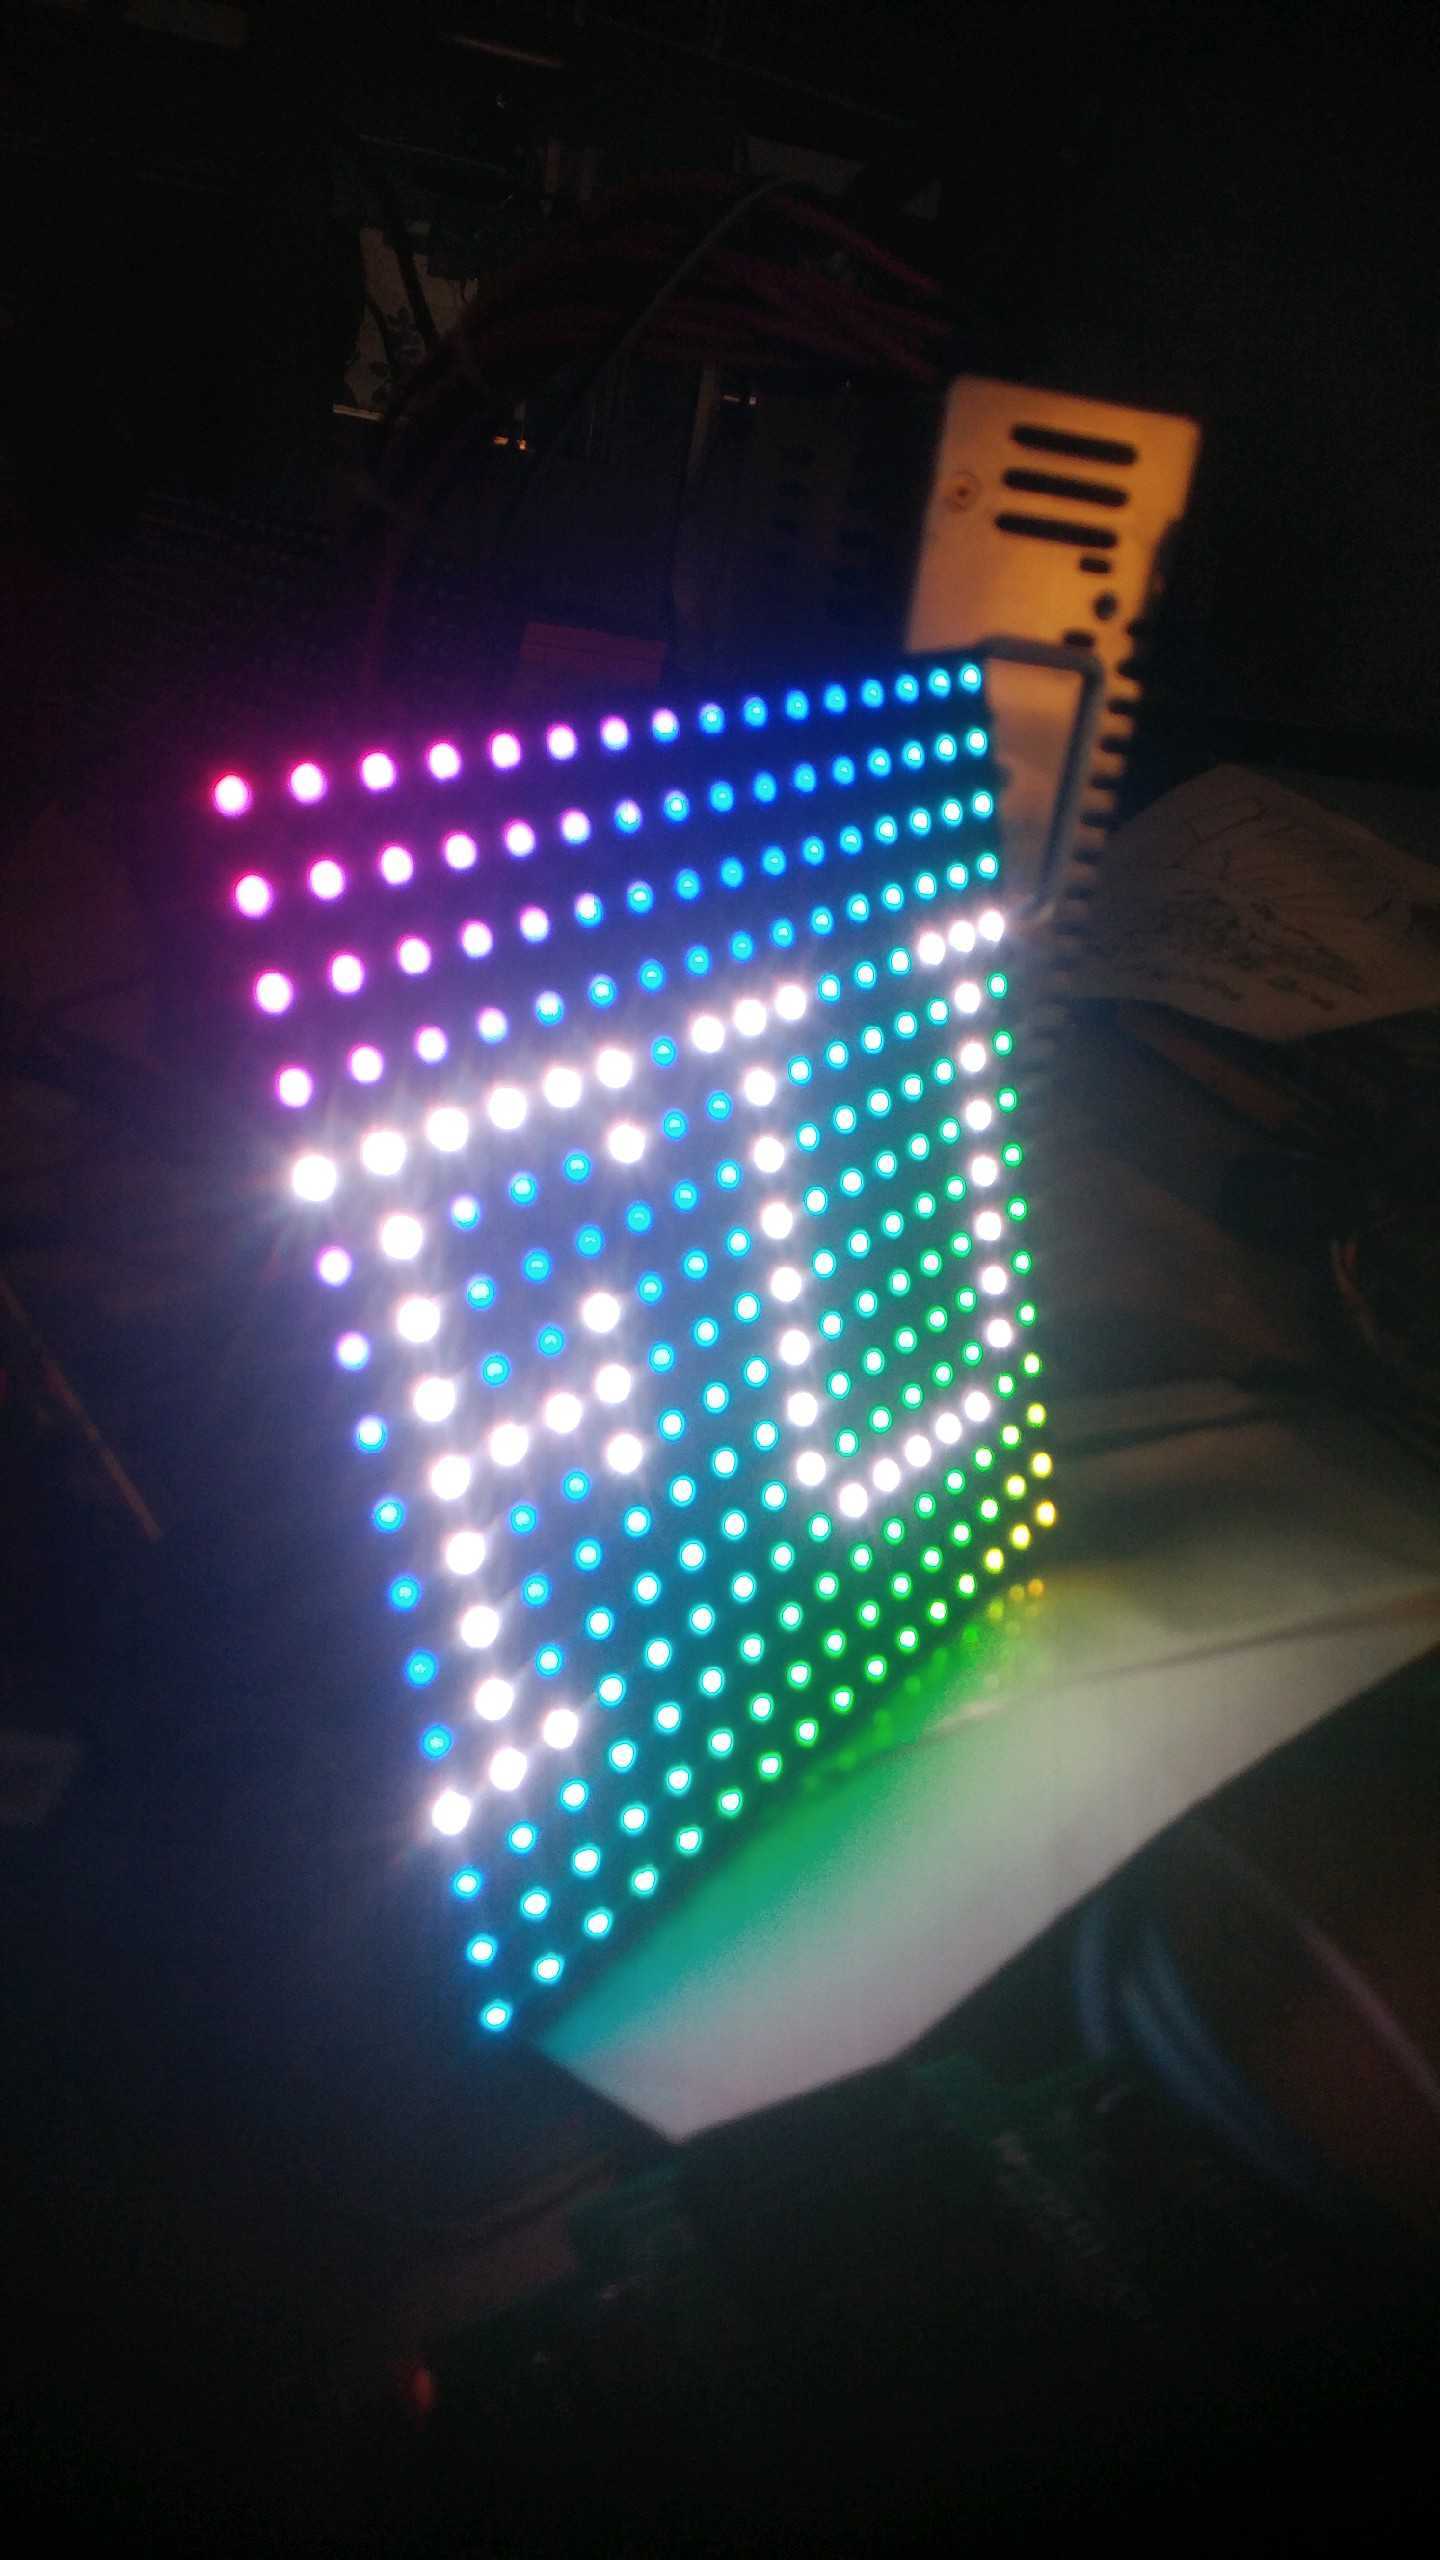
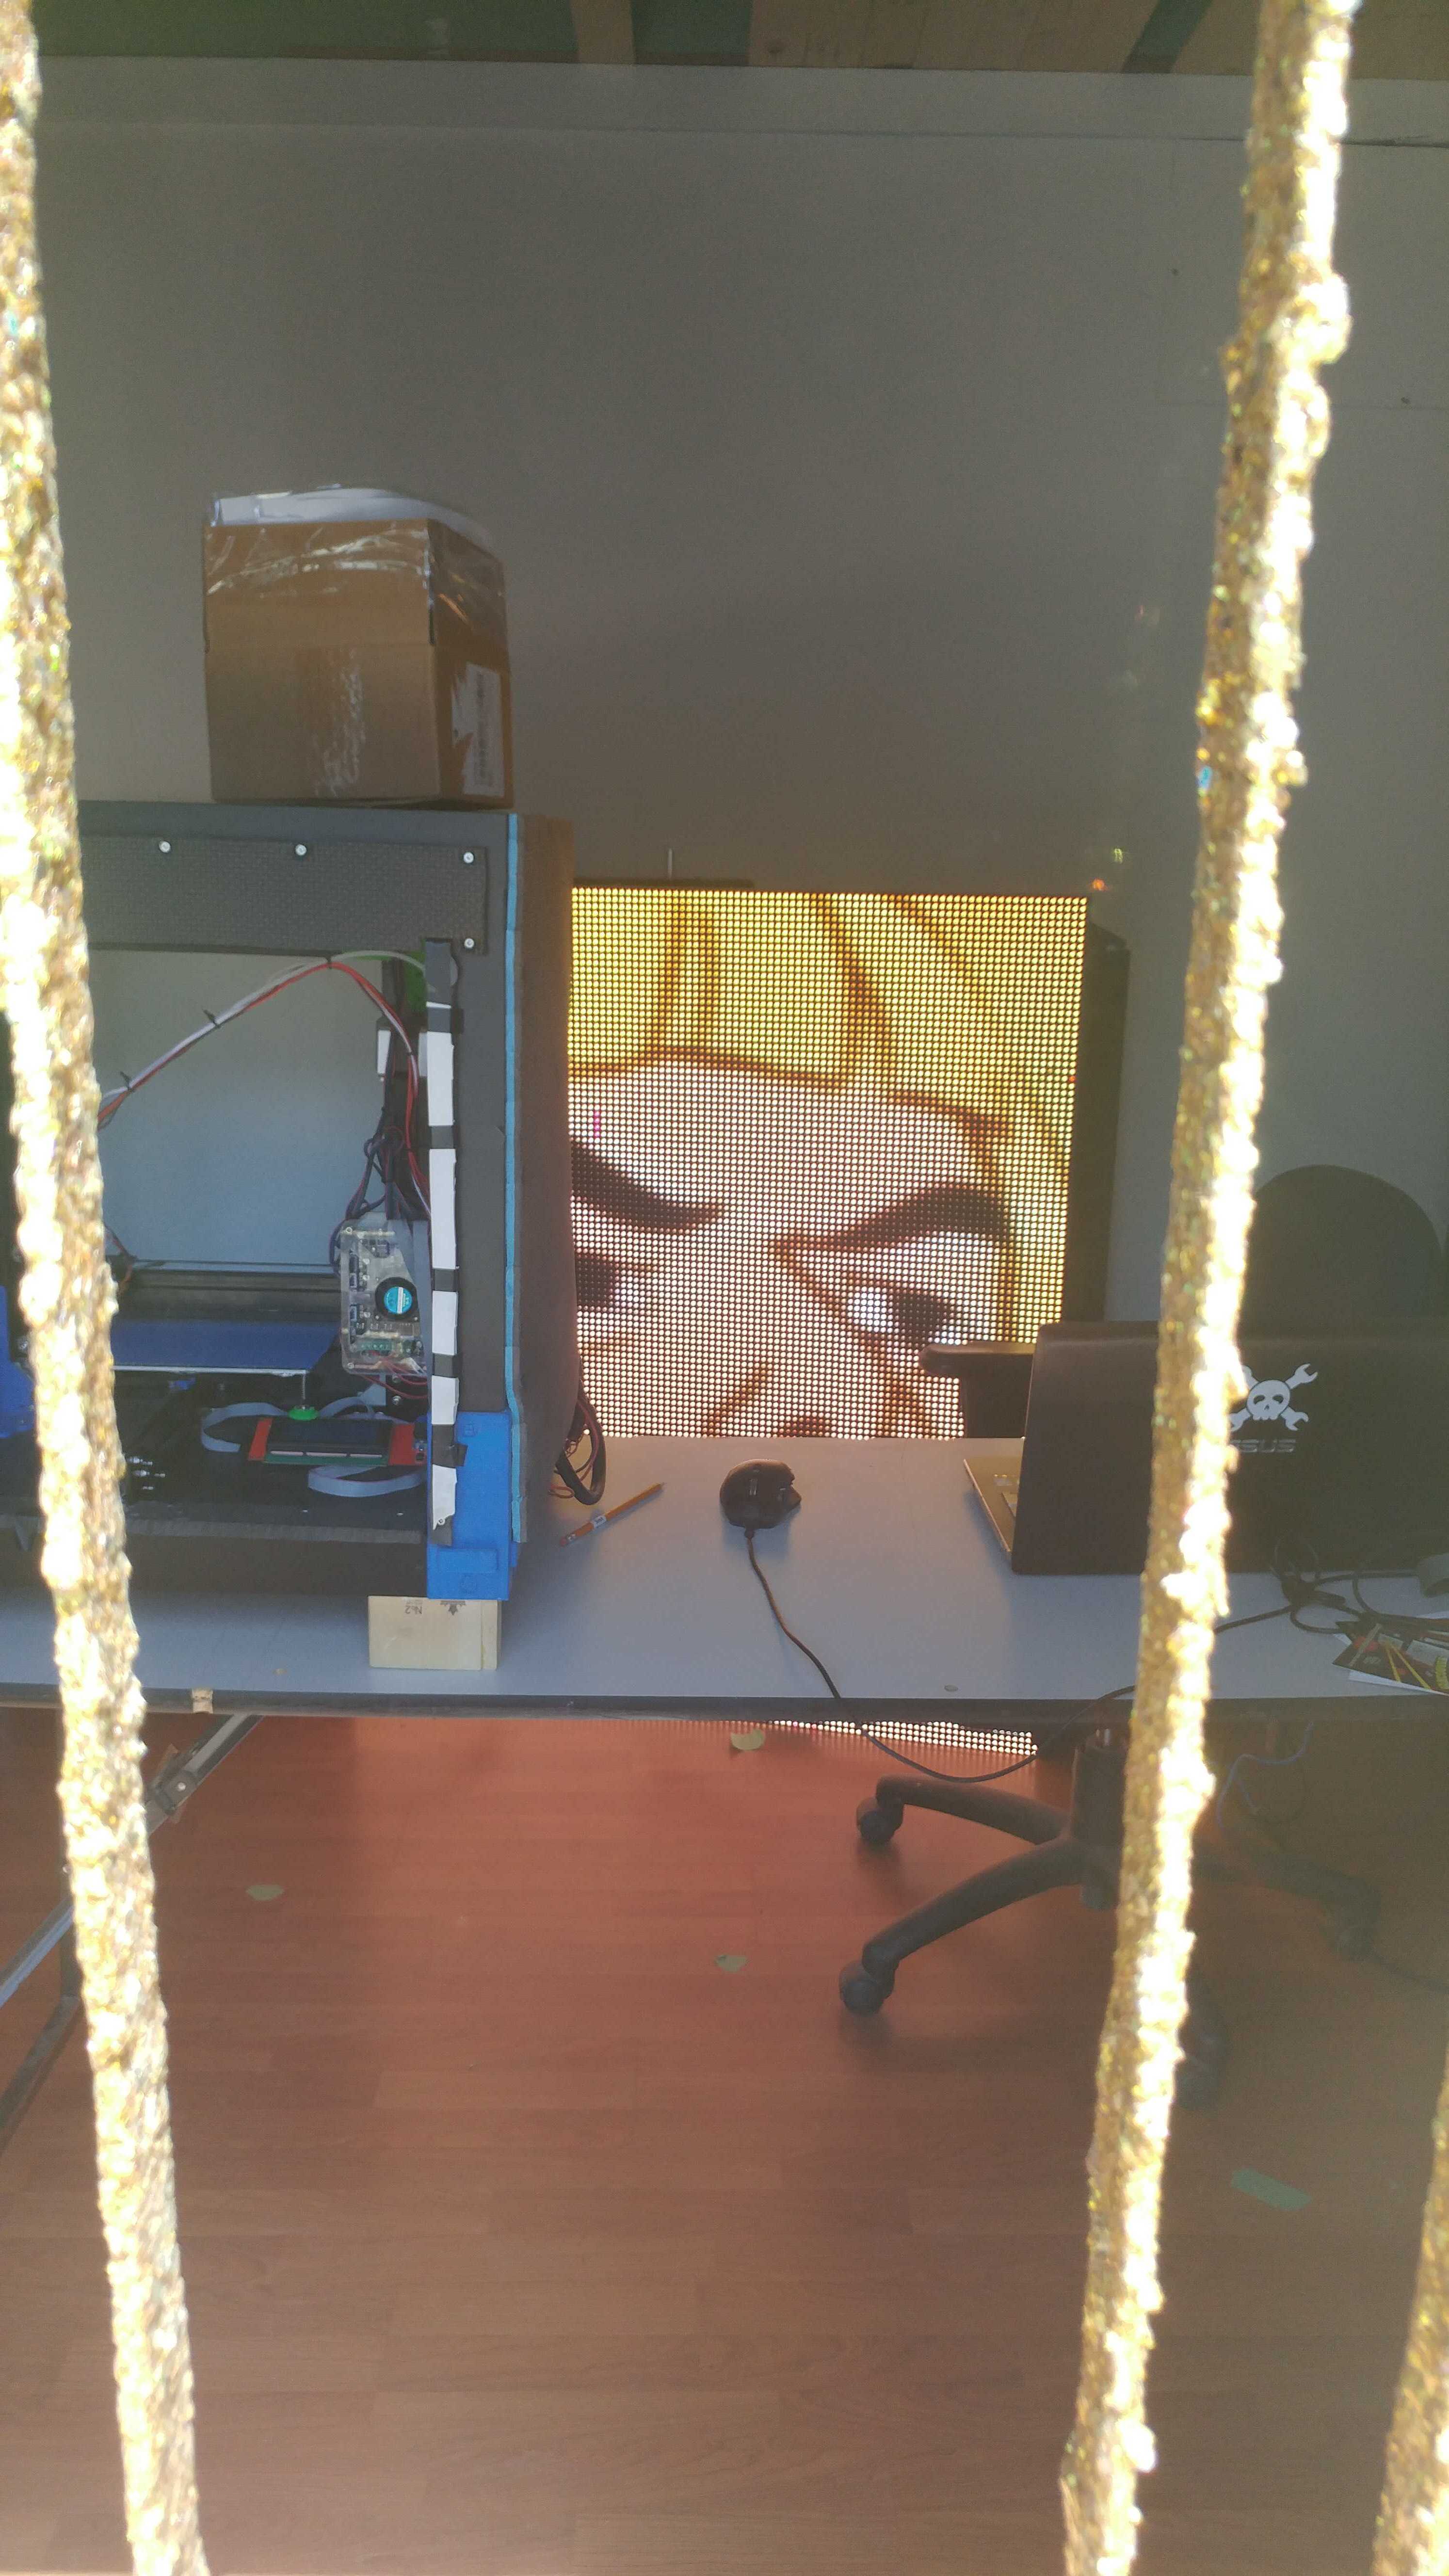
Got the new receivers configured, they are capable of running at 10mhz and get fairly nice greyscale as a result.
Next step is to get this installed in the panels at the space and figure out a stand and computer to run it.
I had to play with the settings some, this is now running at 21.4 MHZ scan clock, and a 6720HZ refresh rate. Running it this way does drop the colour range but it makes it sing the song of its people way less which makes me happier.
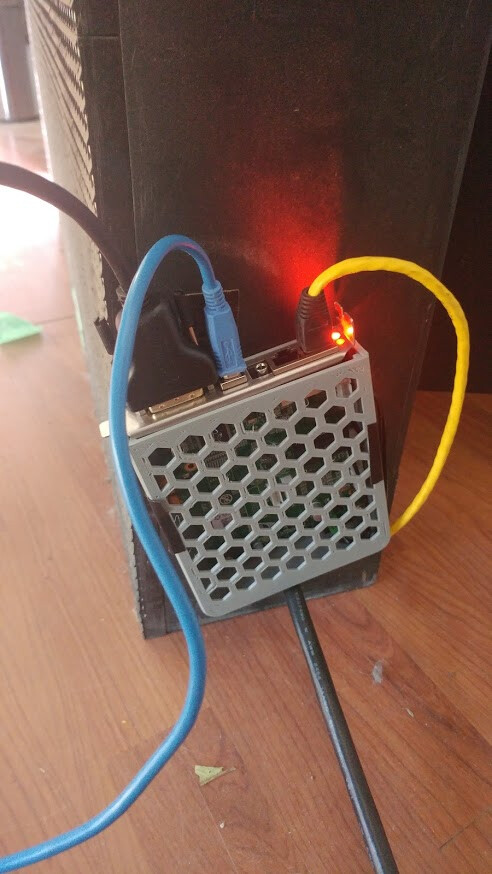
Sender card is on the side, you just have to plug it into power and plug into the DVI port. I am going to loan a DVI to HDMI cable.
Its basically just a big low res monitor at this point. USB is only needed for configuration and the Ethernet is what’s communicating to the screen itself.