The last two scrap challenges were great successes for reminders, here they are!
First one:
Second one:
We’ve now had two donations of high-quality scraps; the first is from www.westcoastwoodslabs.com and the most recent one is from a member: @Hekseskudd. Westcoast Woodslabs gave us a bunch of Walnut, and @Hekseskudd gave us Walnut and Oak pieces. Additionally,
I challenge you to use the woodscraps we’ve been given to make something. It can be decorative, useful, both, etc. While the judging will be entirely up to the membership, I recommend the following to be considered:
Use of the ‘least useful’ scraps is encouraged. If you can use all the tiny little bits that nobody will have use for, that’s amazing! However, you can use any of the available woodscraps. Making use of any interesting ‘found’ shapes is also super-cool. The use of existing curves likely led to @hughl87 winning the last wood scrap challenge (plus it was pretty and functional).
Woodturning is a great way to utilize some of the scraps, if you do, consider going to the turning guild meeting and showing it off too! You can check them out at www.gvwg.ca
The available wood scraps are currently on the cart near the entrance to the shop, as well as on the shelf in the back behind the back wall of the shop. I’ll be consolidating all of them to the shelf behind the back wall soon. More high-quality wood scraps may become available soon; if they do; I’ll be sure to post here.
Let’s see what you can come up with! Give us a shout if you need ideas! Feel free to submit as a response to this post, or if you want to keep a build log, create your own topic and add a link to your topic here when you submit. Keeping a build log helps inspire others to join in!
I recommend making laminations, irregular and multi colored strips look great together when joined into a board. Second chance to make something out of, or just have pressure free prototyping. There will be more to come in the future, so use them up!
Just to stir this one a bit so others get inspired. I laminated a bunch of pieces together. Some of those pieces work well if you spend some time to glue them up.
I might be making a small hallway table out of these, but if my other half decides on a different treatment, at least I’ll have good pieces to make something else for this challenge.
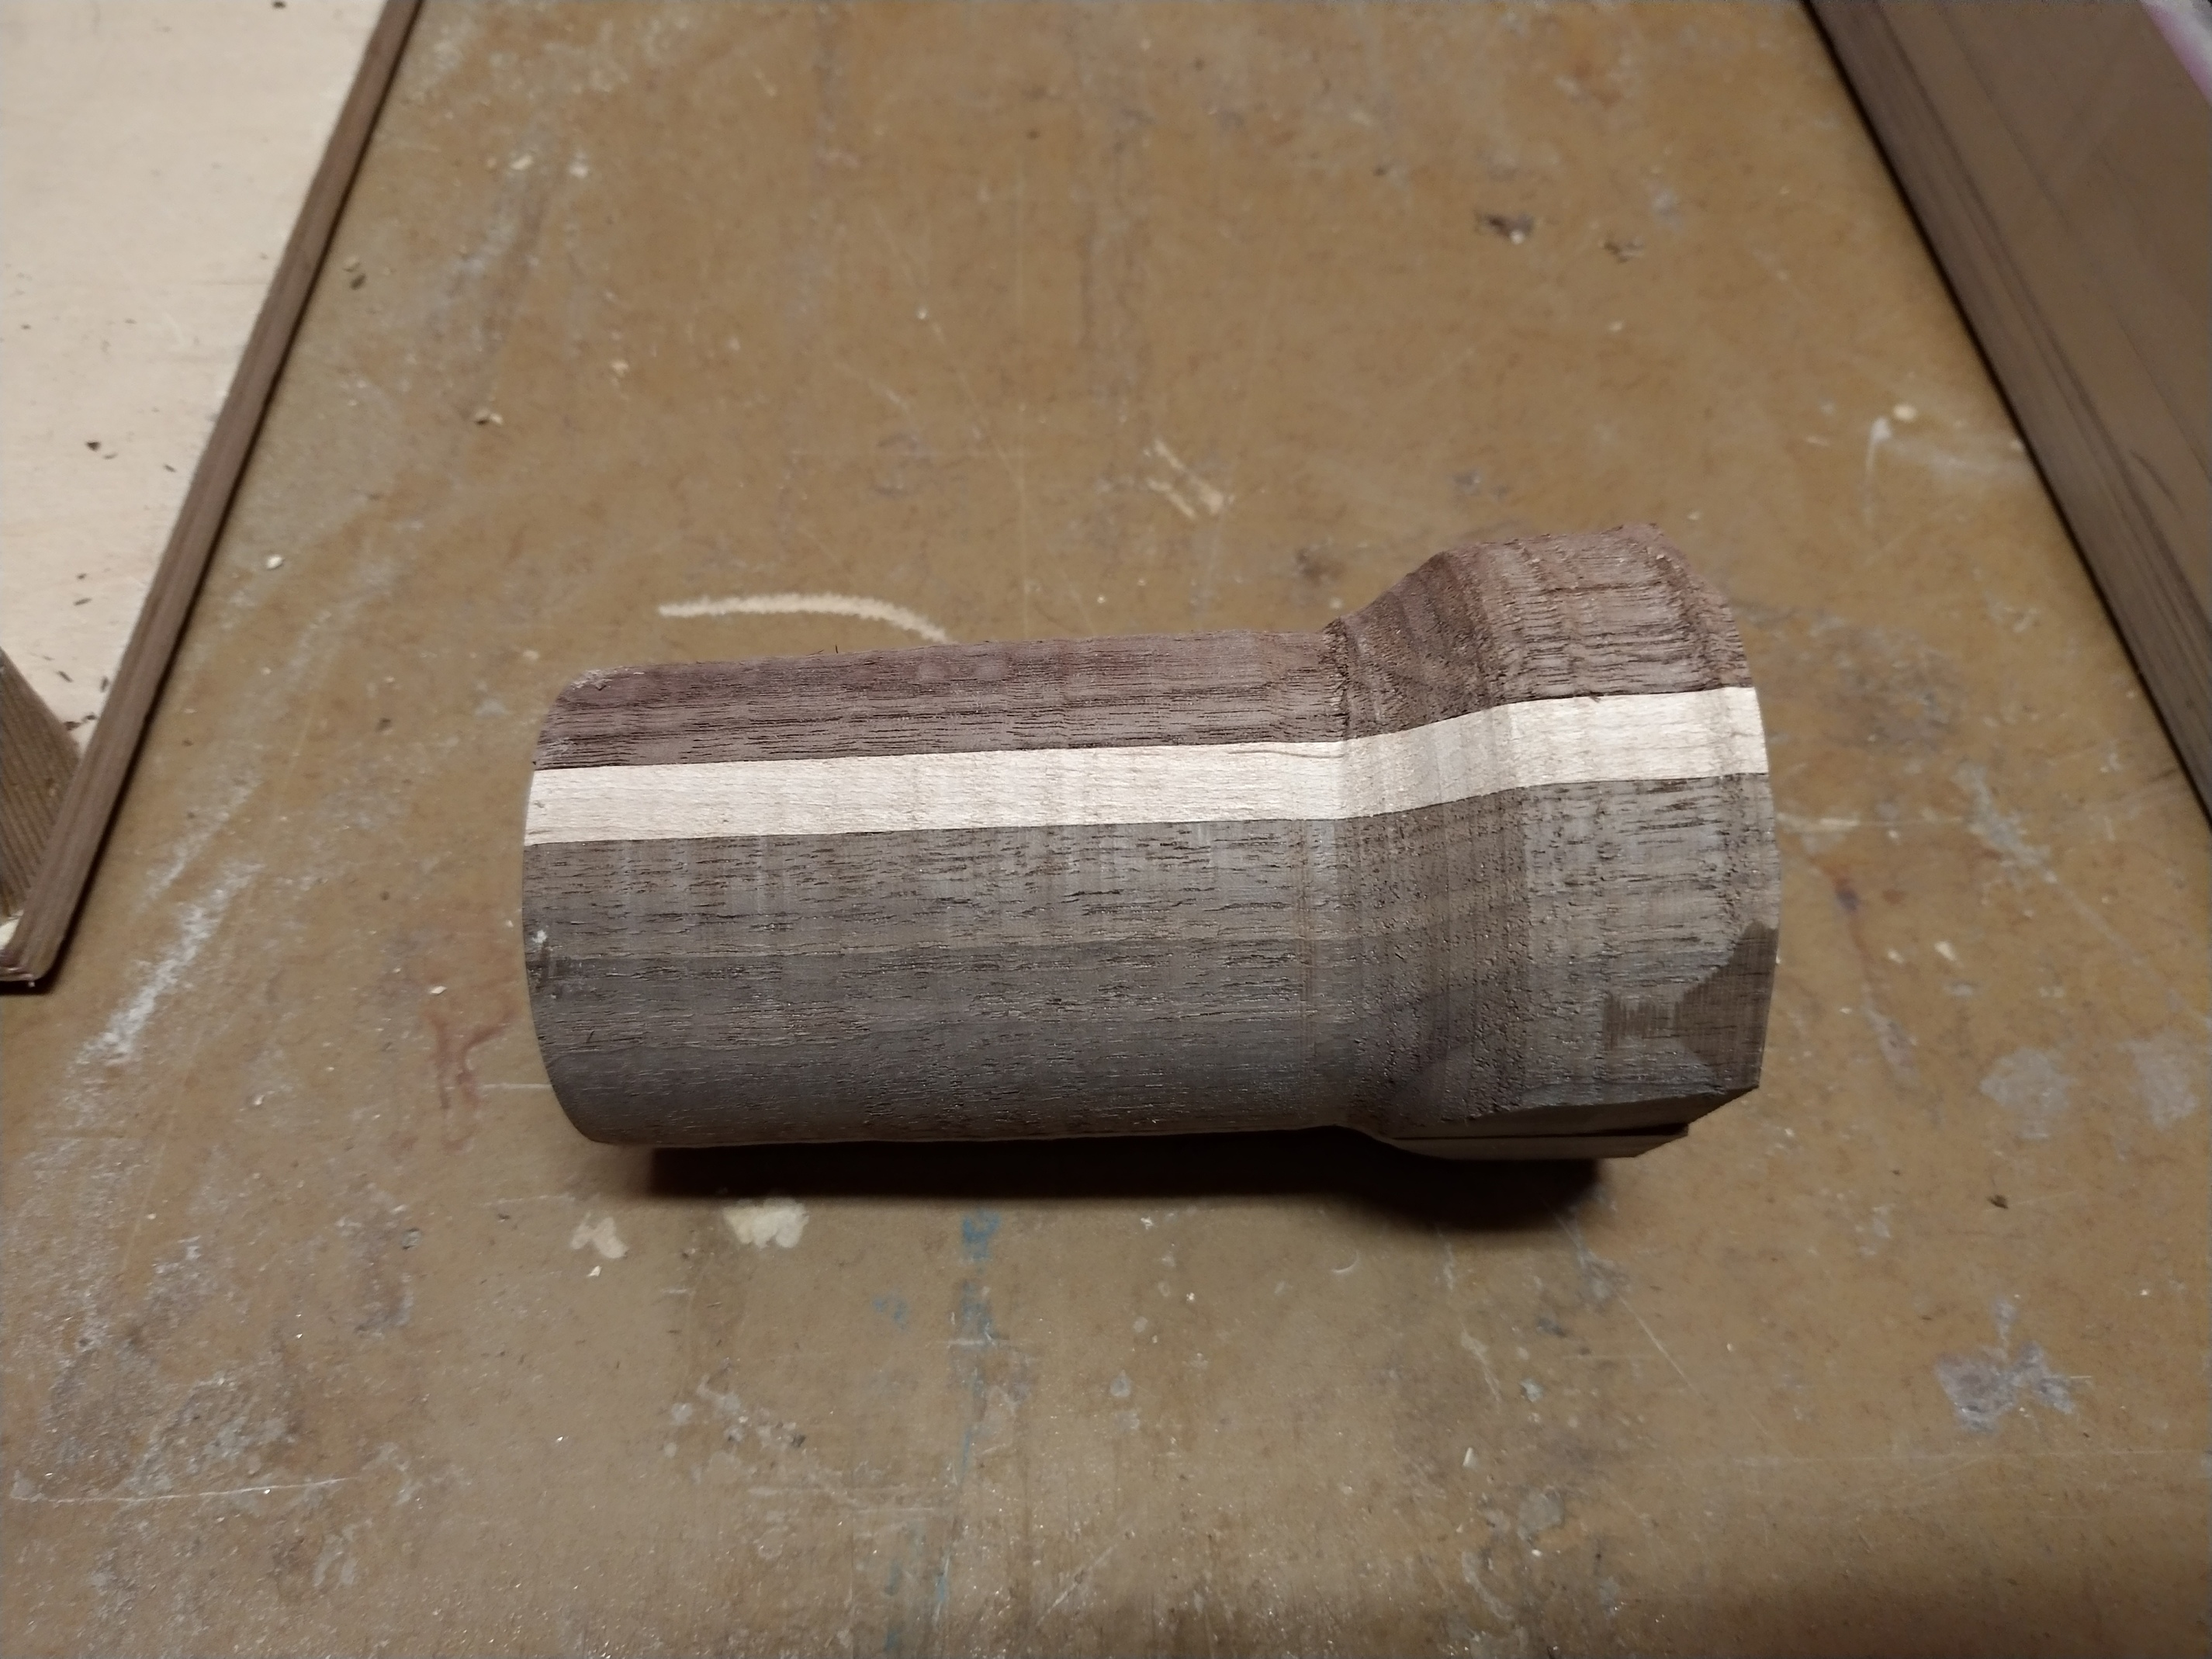
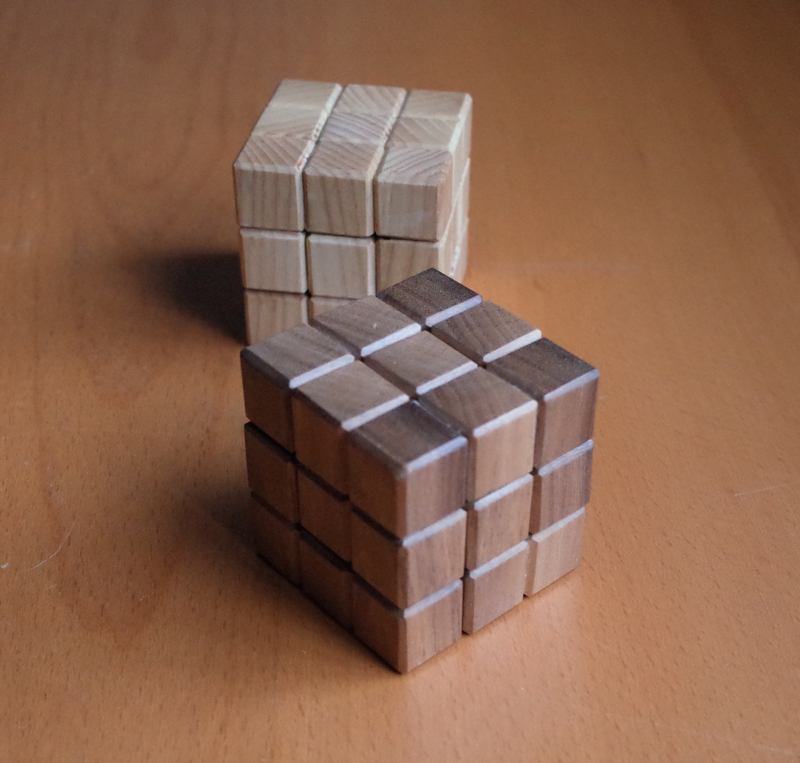
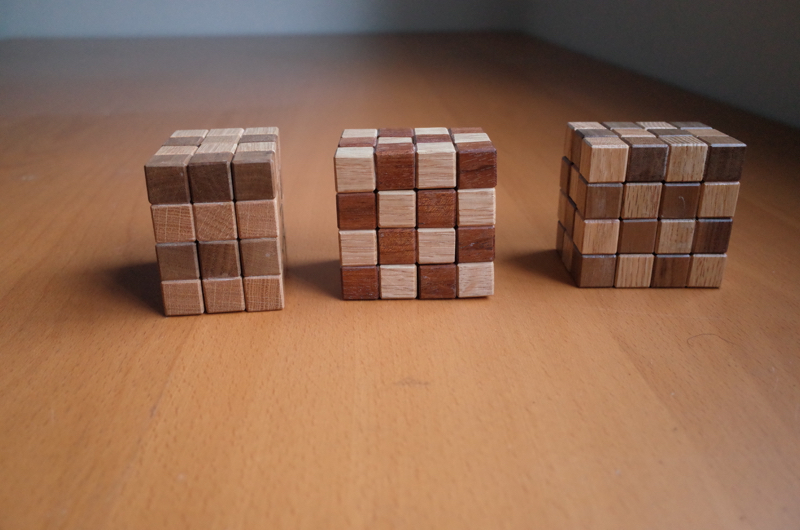
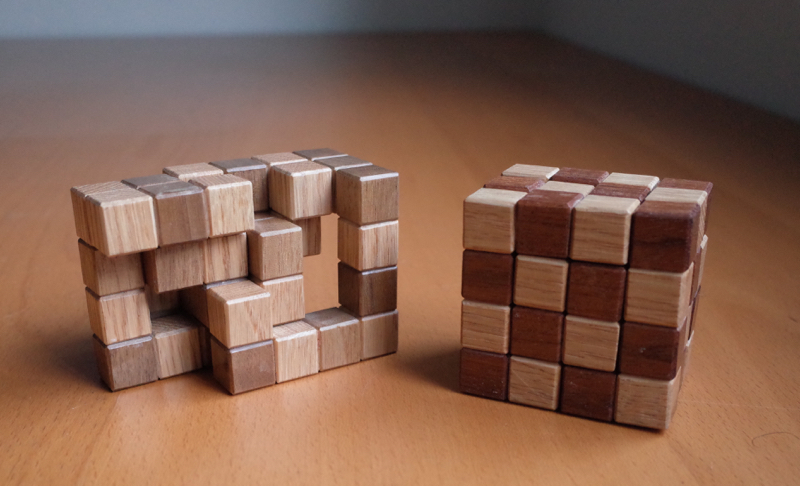
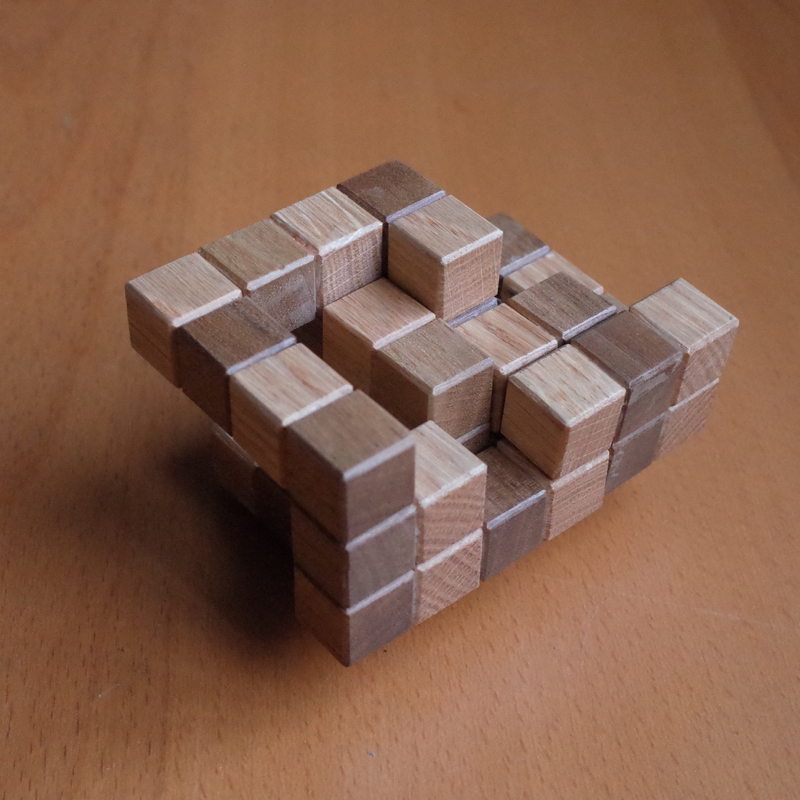
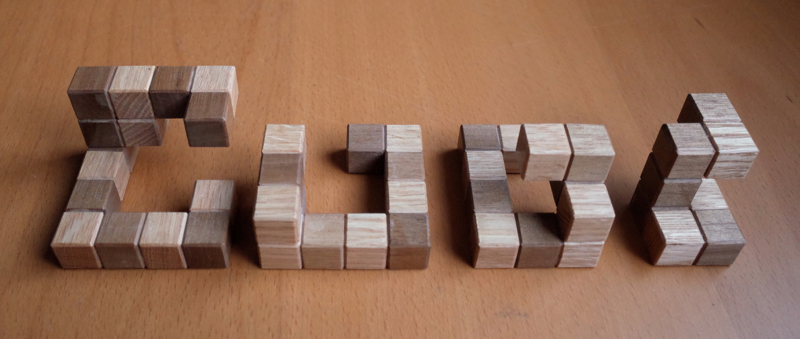
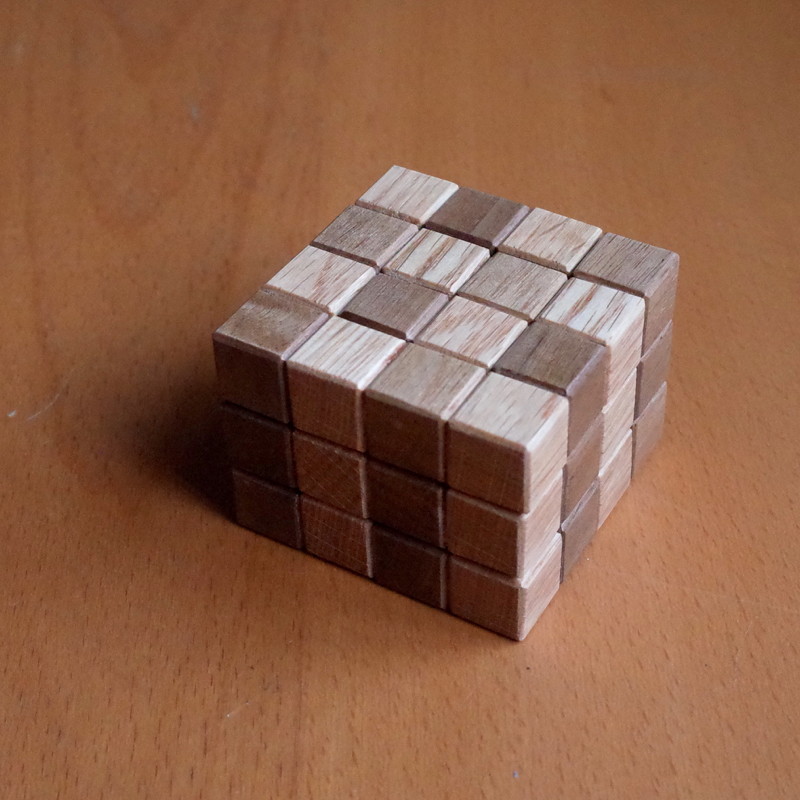
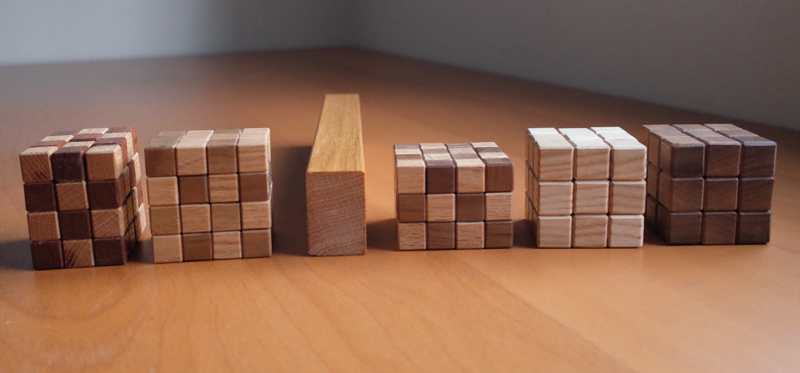
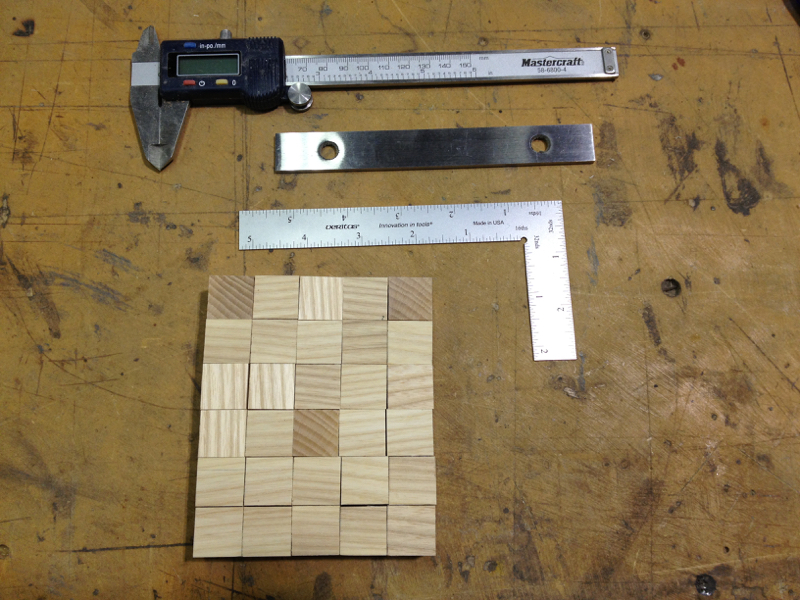
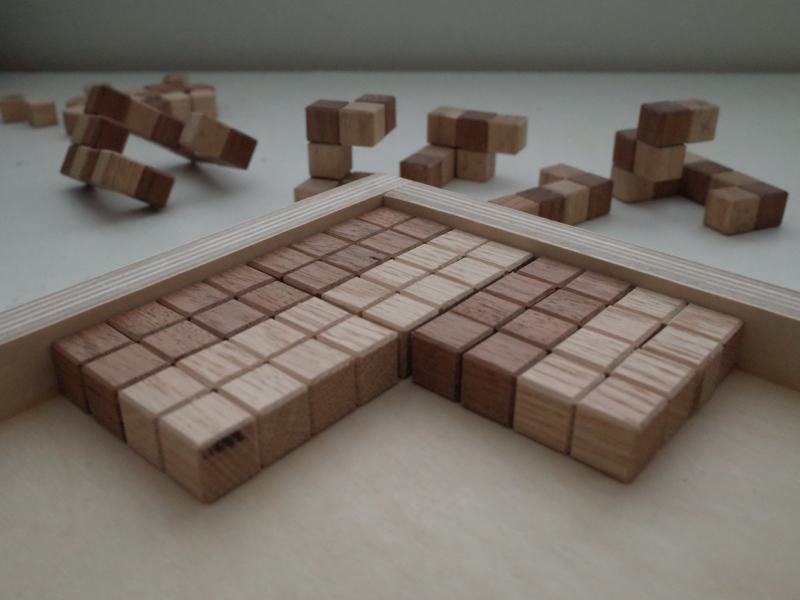
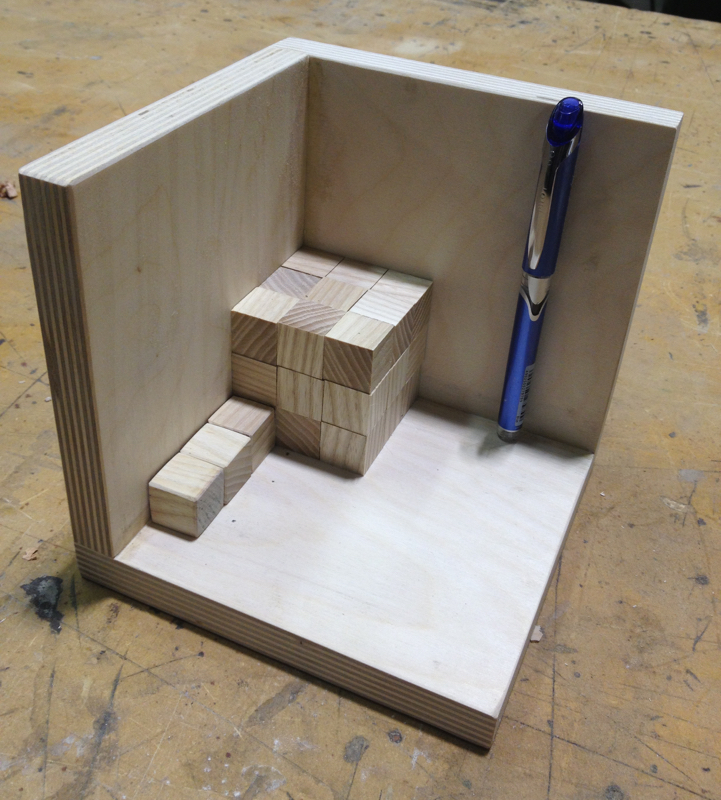
I used mostly red oak (the light coloured wood), Ash and Walnut for these. There is one puzzle which is 1/2 Paduak wood which was not from the scrap challenge pile
There are three Little Kenny puzzles and two 5 piece solid block puzzles.
The Little Kenny puzzles are sliding locking puzzles which are really hard to solve. It took me a while to make these as I discovered that cube dimensional tolerances have to be much tighter. So my first three attempts I had to break apart with screwdriver and shave cubes an with an exacto knife and reglue the puzzles.
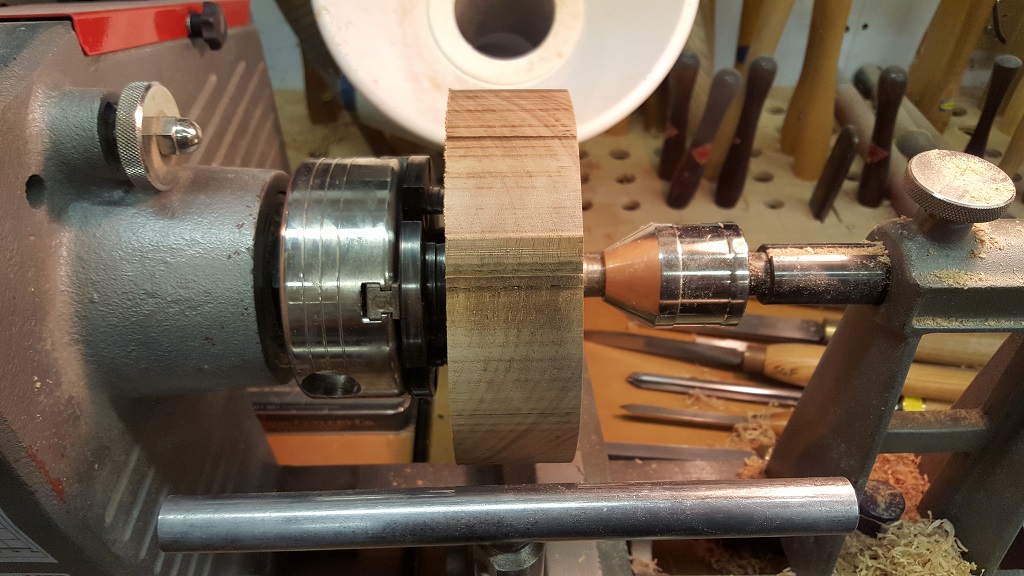
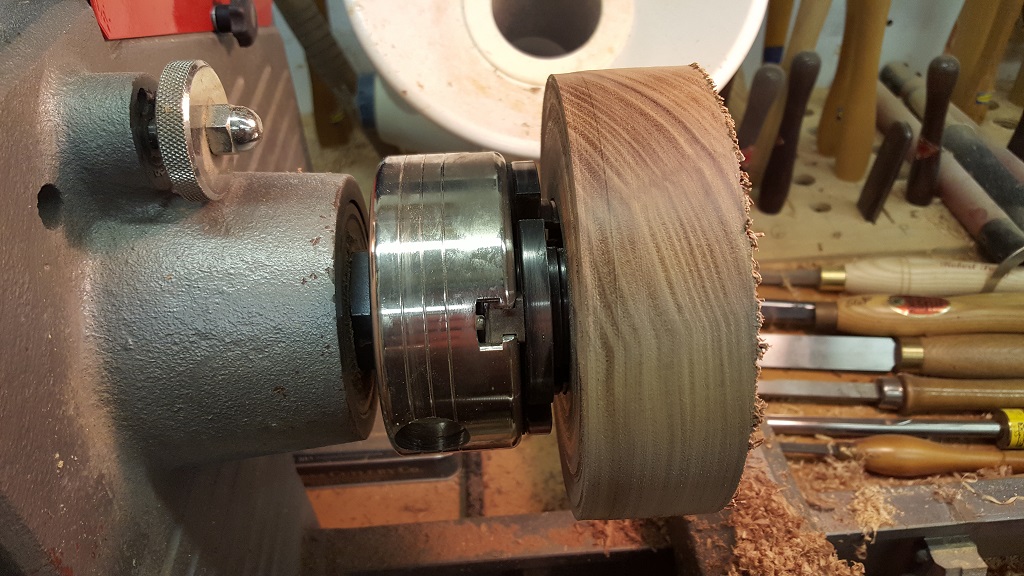
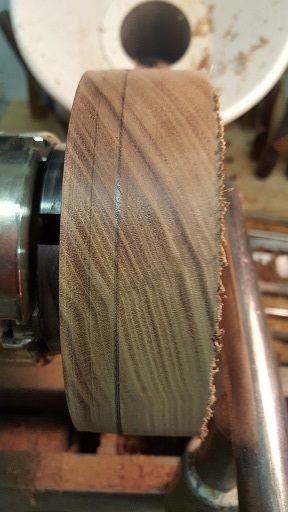
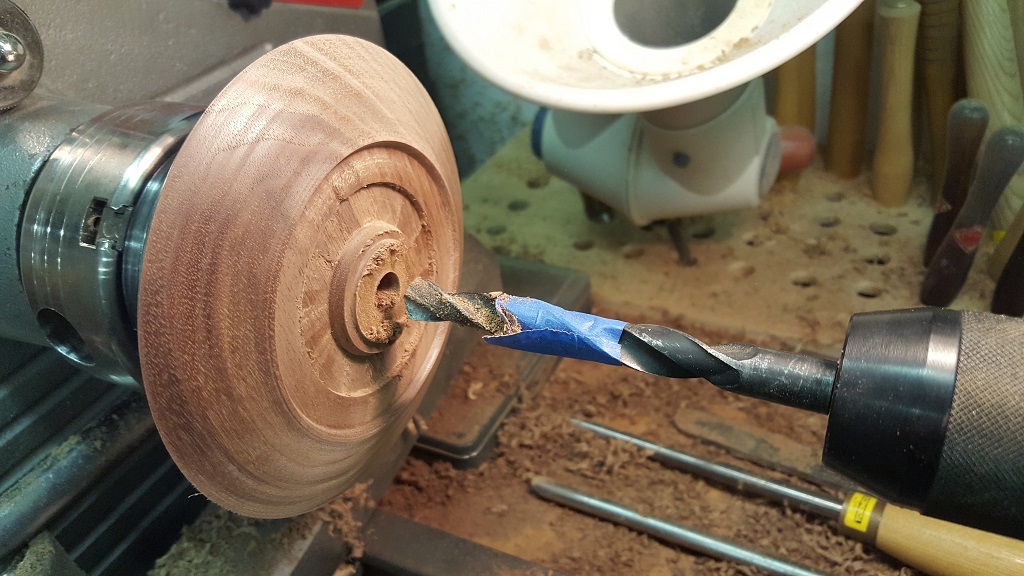
Then I mounted it on the lathe by pressing it against the chuck jaws with the tailstock. This is not a very secure mounting so full face shield and light cuts were in order.
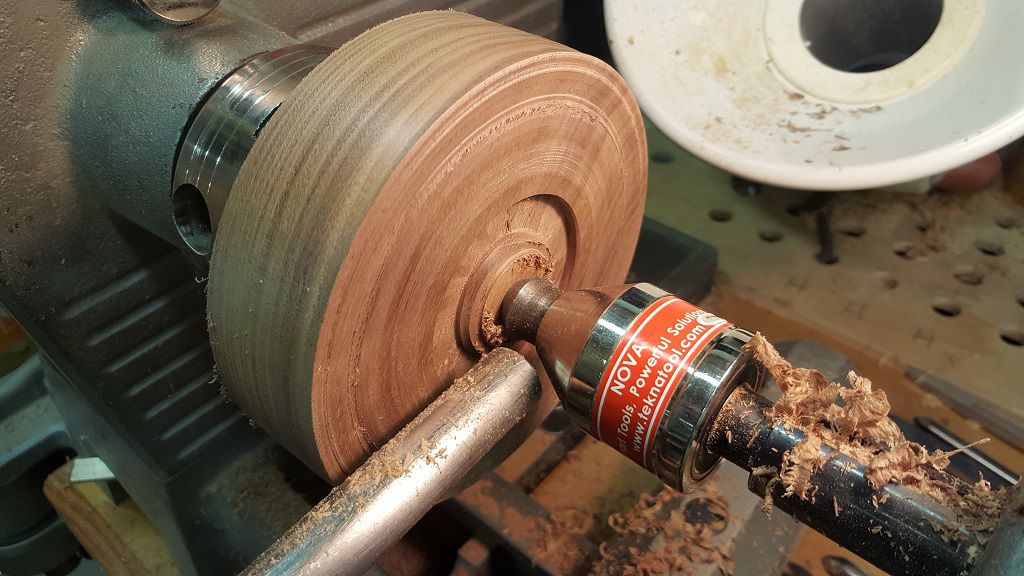
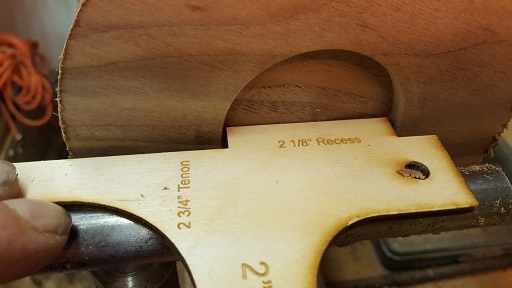
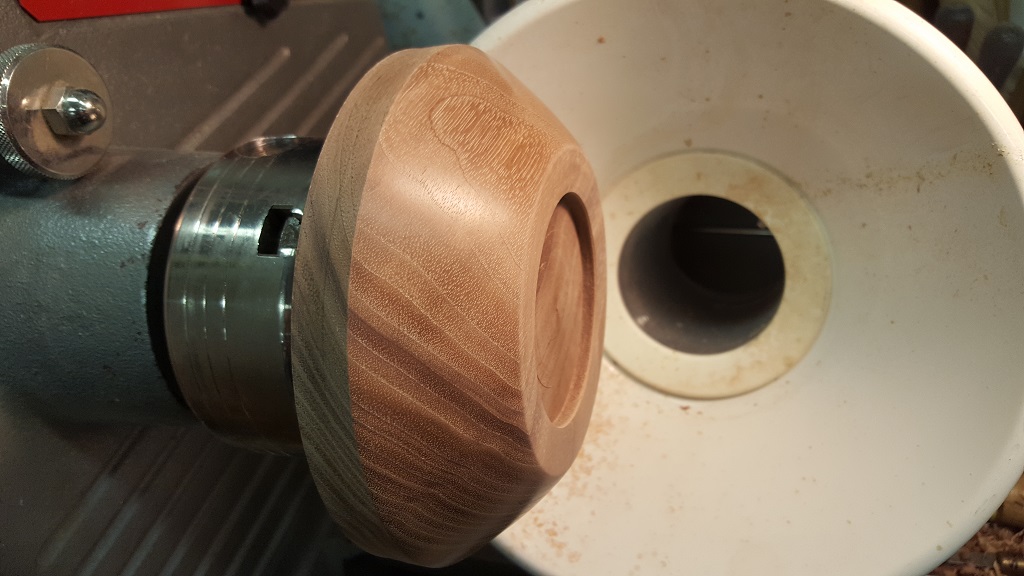
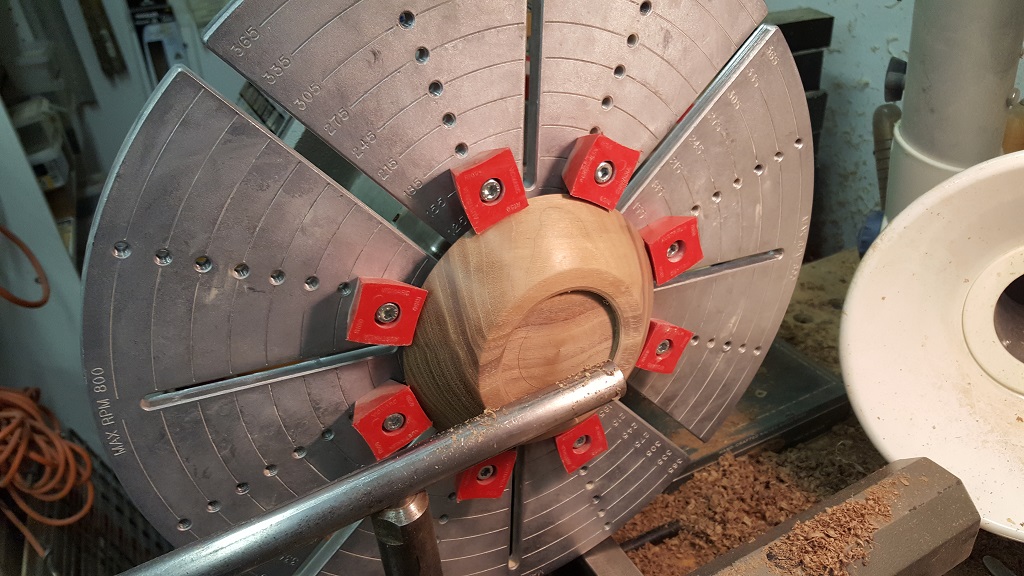
Then I turned another mortise for the chuck in what would become the base of the dish. Pictured is a gauge that I made to determine maximum and minimum mortises or tenons for the 2" chuck jaws.
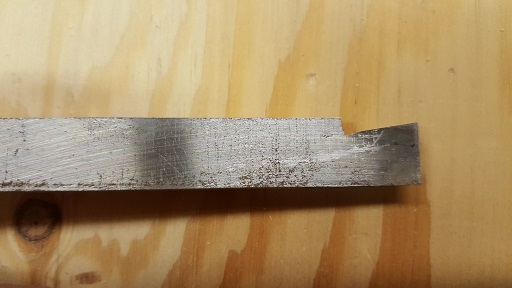
The mortises on the top and base were given a dovetail edge using a homemade dovetail scraper to give the chuck jaws a more secure hold.
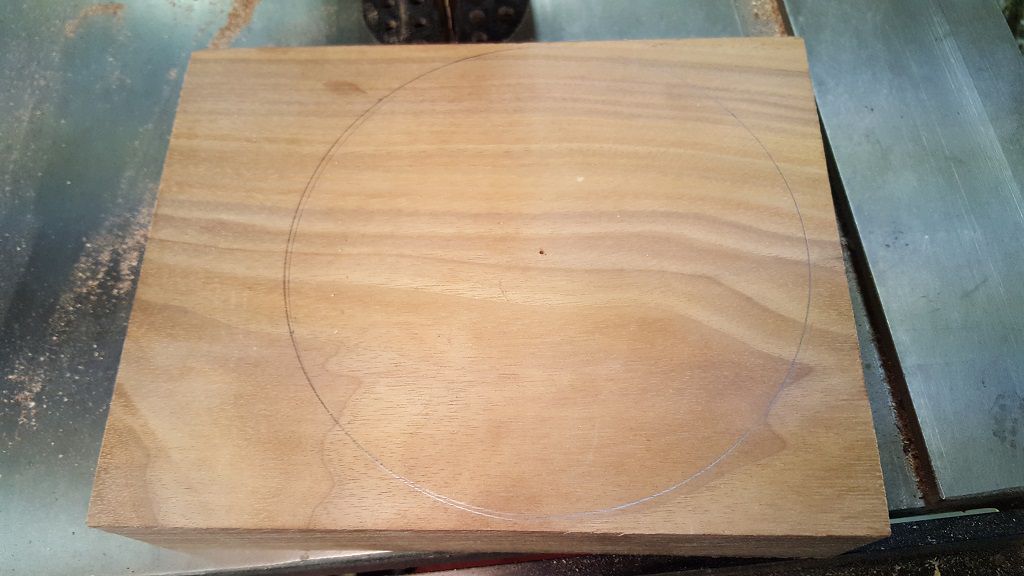
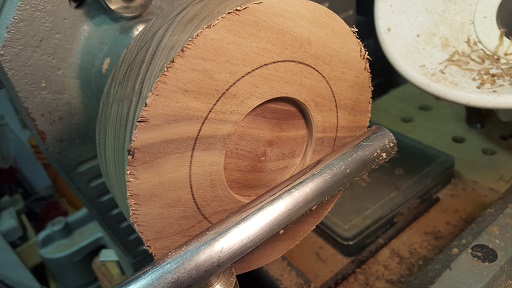
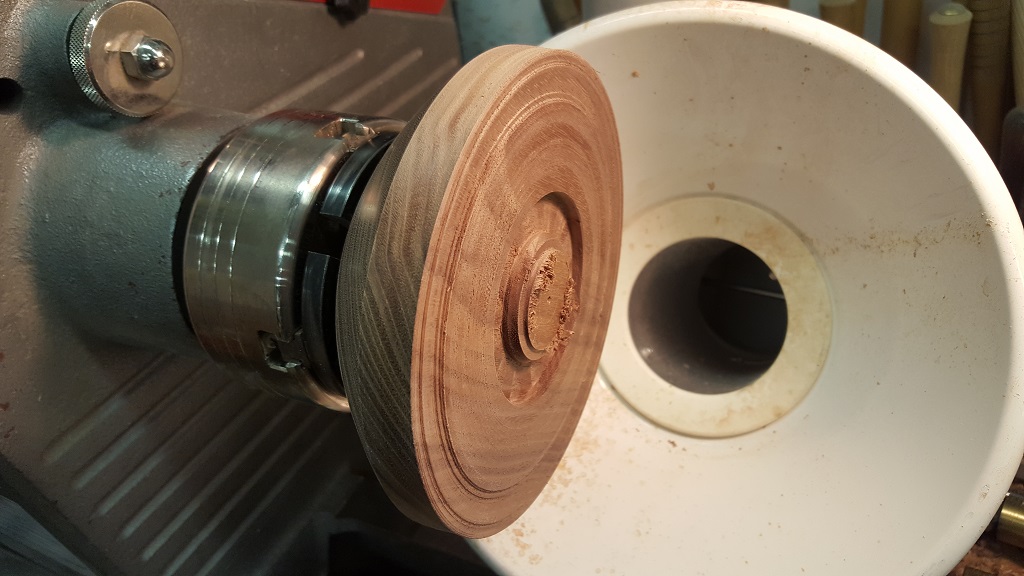
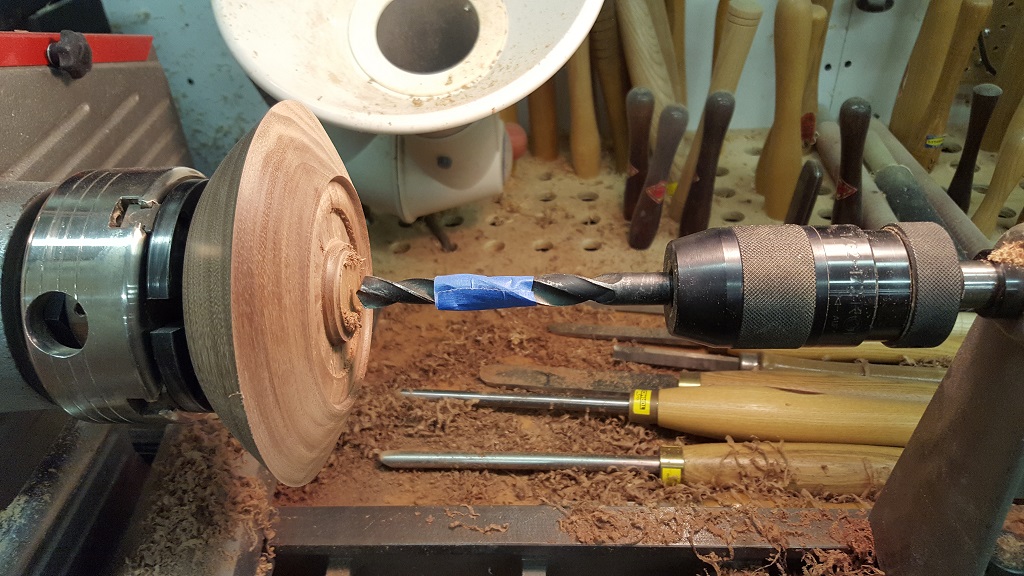
Next I laid out guidelines for the foot and the outside rim.
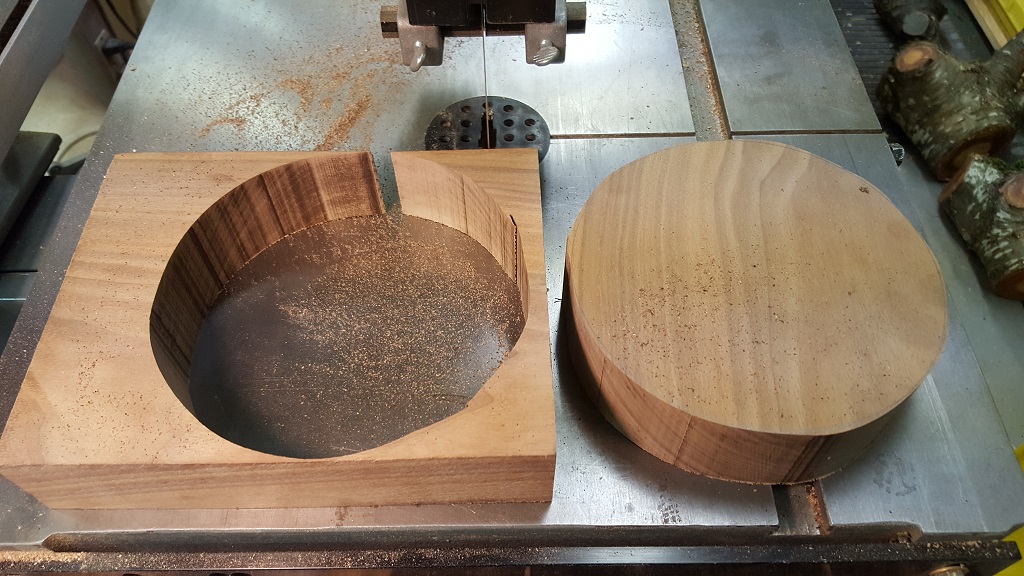
Before starting to hollow the dish, I mounted a drill chuck in the tailstock and drilled a hole to the depth I wanted to hollow to. This helps prevent making funnels.
To finish the base I put a Cole Jaw chuck with soft plastic jaws on the lathe to grip the edge of the dish since there was no longer anything on the topside I could use to hold the dish on the lathe using a conventional chuck of jamb chuck.
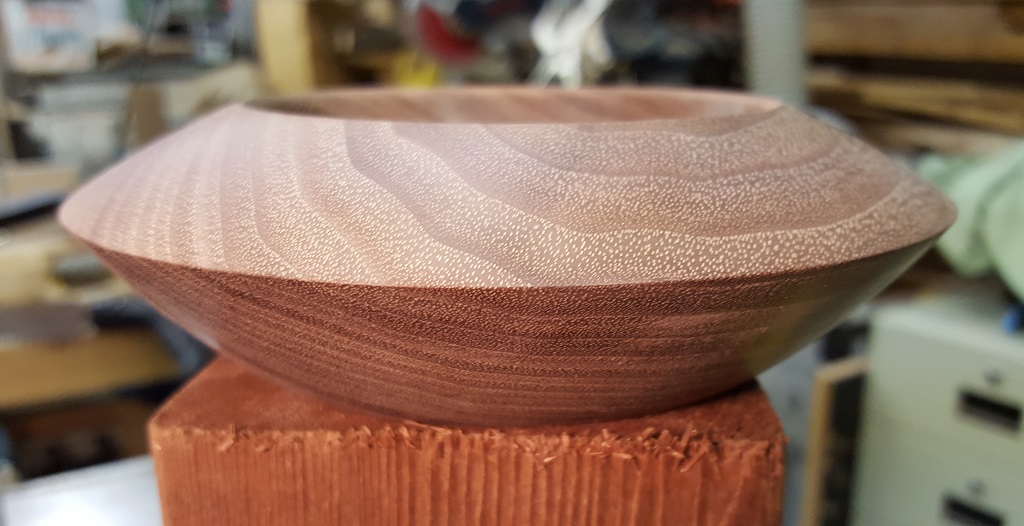
Here is the bottom after the mortise was enlarged to the diameter of the base and the hard edges removed. I added a few decorative rings. This is an ego thing that turners do to show off to other turners that they took the time to clean up and finish the bottom. Non-turners generally don’t notice or care if the base chuck mortise is left as-is.
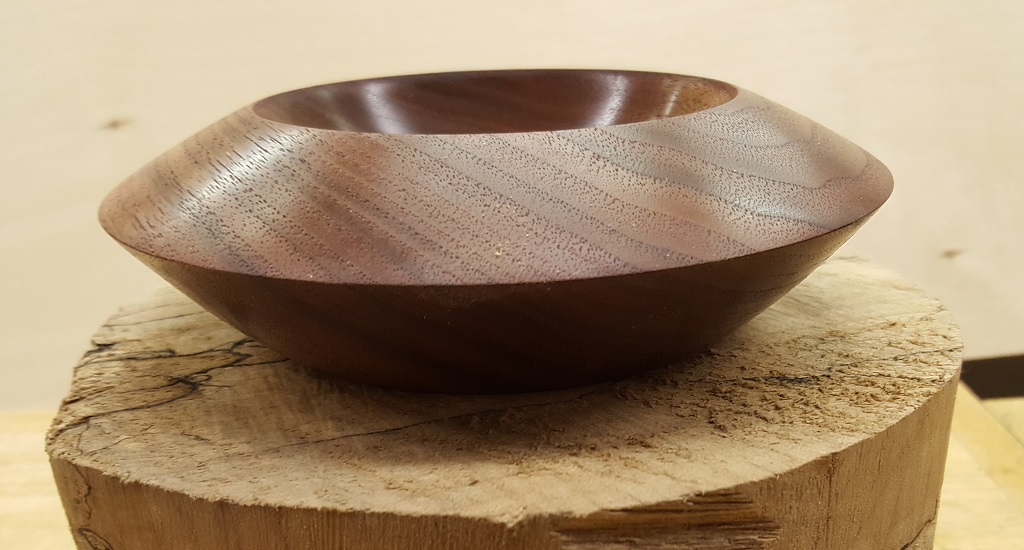
I applied a couple coats of Red Mahogany Danish Oil. I generally prefer ‘Natural’ Danish Oil but I ran out and had this stuff sitting around. It gave the walnut a nice tint and I kind of like the shade.
I left the bottom unsigned as I will laser engrave my signature on the bottom during a laser engraving demo I’m giving at the Greater Vancouver Woodturners Guild meeting next week.
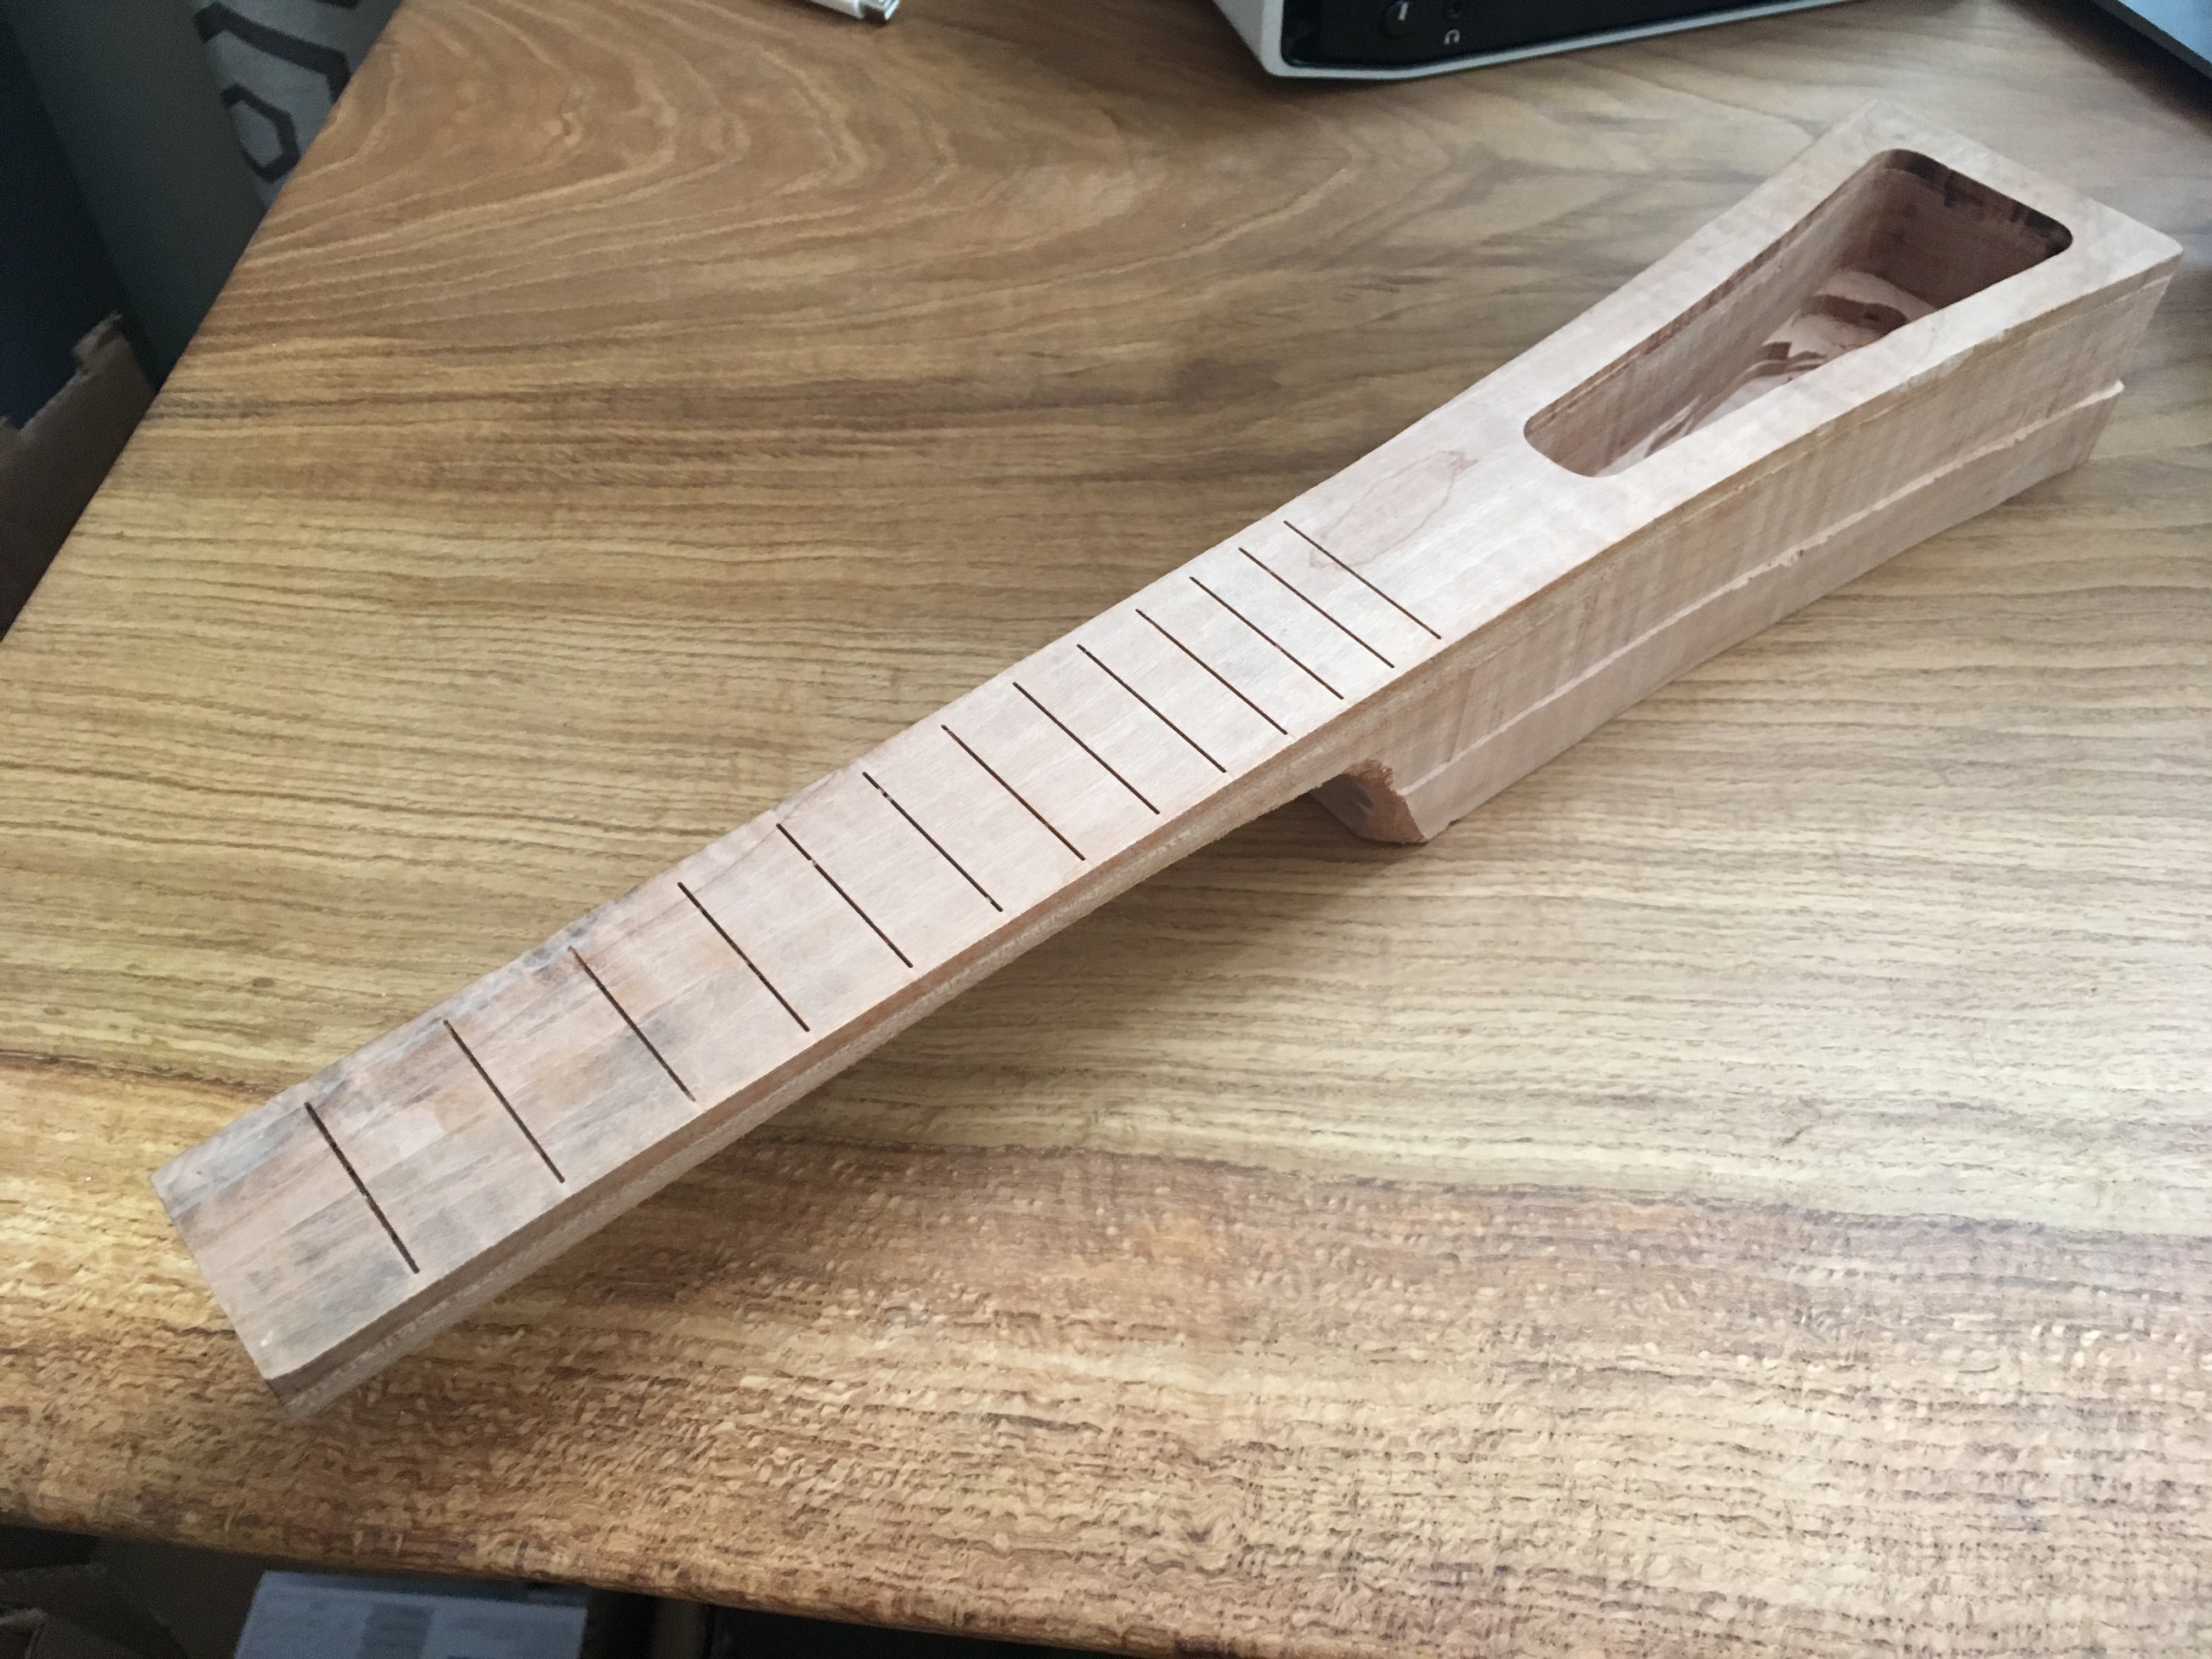
Well, I have to say I failed this challenge. I was going to make either a table or a travel ukulele out of black walnut.
The table I was going to make, I got the word that it should be painted white. I couldn’t in good conscience paint black walnut white, so I ended up using plywood for that.
The ukulele I started to do, but a really silly CAM mistake caused it to drive the bit right through the side wall of the ukulele. You can find my failure redeposited in the scraps. I learned quite a bit setting this up.
After utterly failing with Black Walnut, I fixed up the CAM, calibrated the machine, and went at it again.
While I don’t think this can be included in the scrap challenge, since this uses material I purchased awhile ago for the purpose of making instruments, I did want to share where my failures led me. I love these challenges. For those who put effort into finishing their projects, thank you; they are absolutely inspirational. I’m sorry I failed to finish a scrap challenge in time, but I do still think I got a lot out of it.
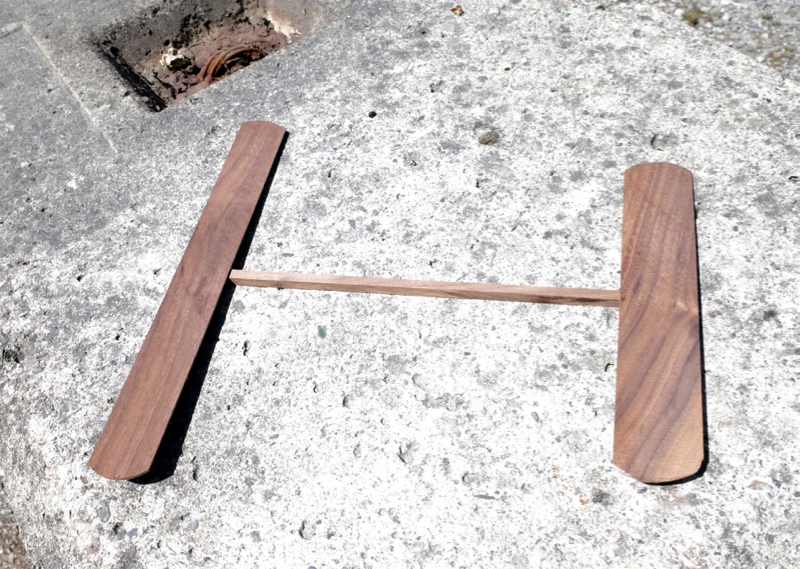
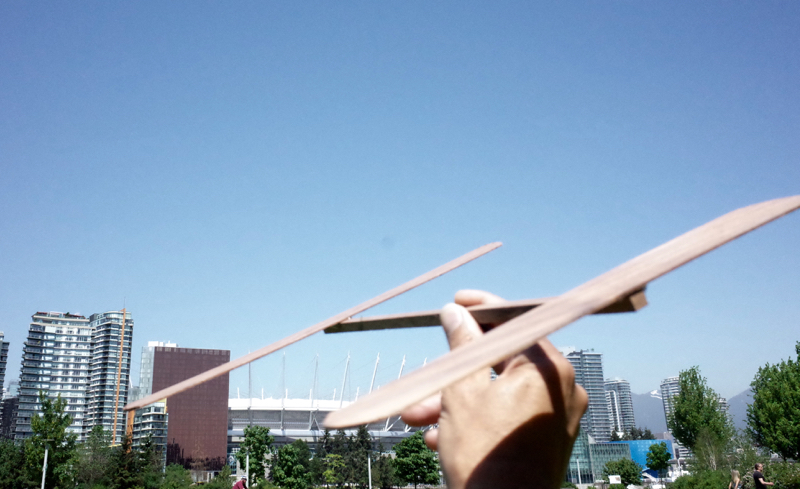
In the spirit of documenting failed projects I tried to do a quick and dirty glider using a couple of the thin pieces of walnut. Needless to say it did not fly well. It did manage to get airborne for a bit (10 ft’) but definitely not a gliding motion. On researching balsa wood gliders it was apparent that I needed a different geometry but there wasn’t time to redo this.