Wearable lighthouse [Build log]

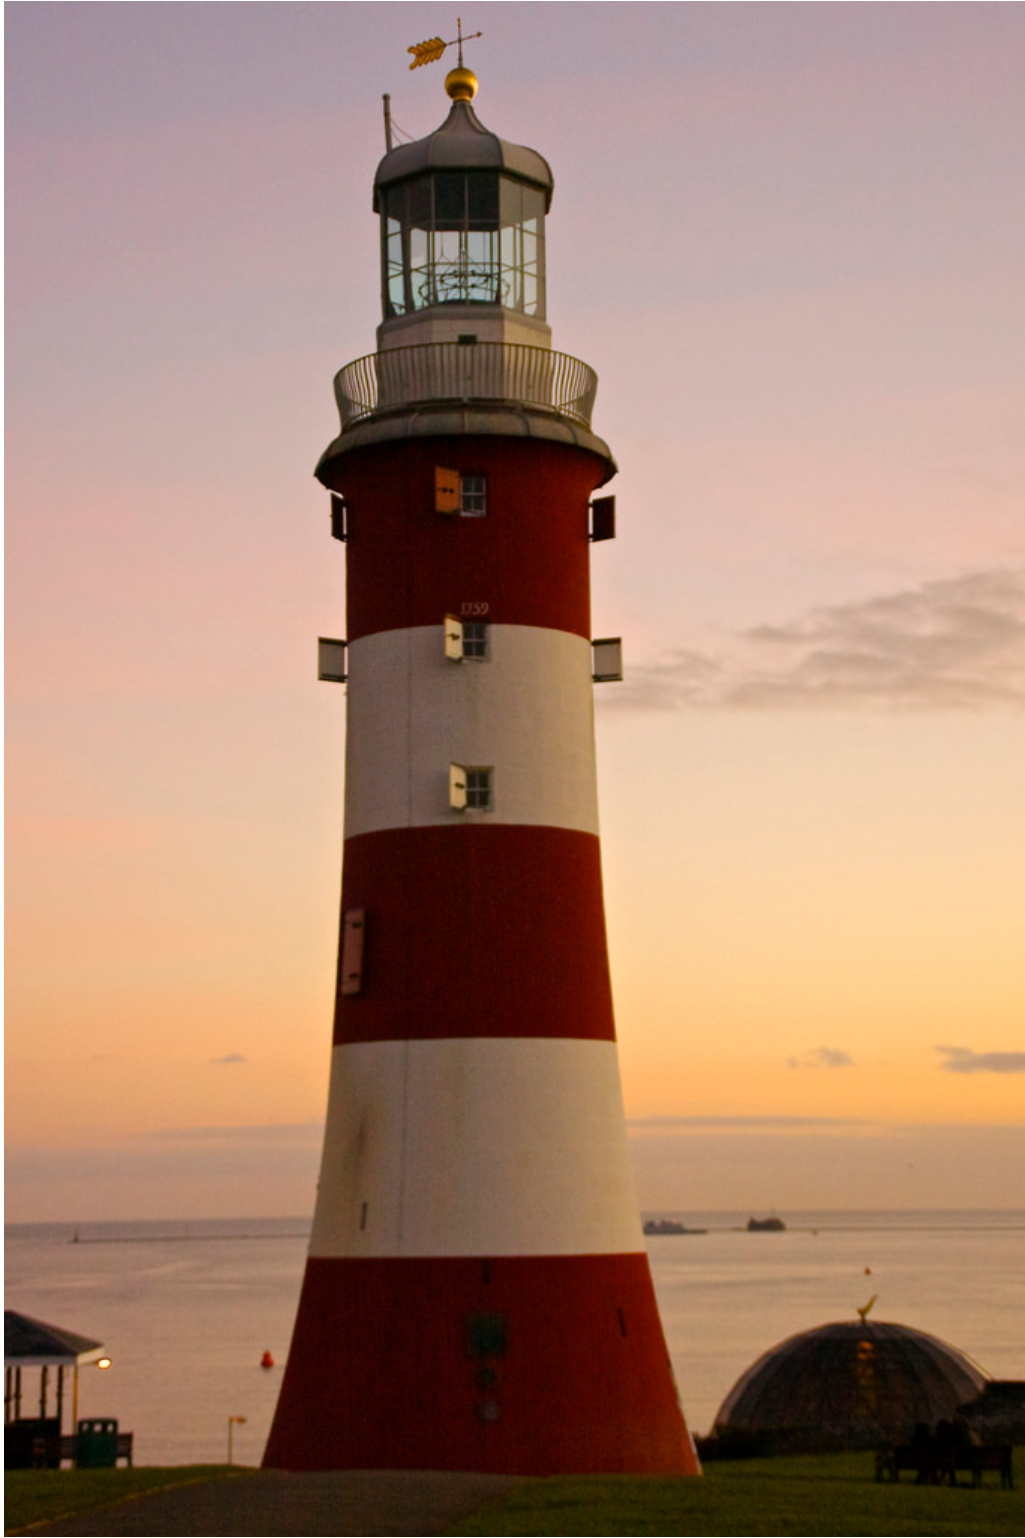
At my kids school they don’t celebrate Halloween, but they have a yearly crazy hair (or hat) day. And of course I can’t simply get some purple hair spay and be done with it. Not even close.

Last year I made a Mr Krupp hat from Captain underpants for my daughter:

And a lawn mower for my son:

This year my daughter will be wearing a lighthouse, specifically this one:

In Fusion 360 it currently looks like this:

Inside there are two AAA batteries, a Boost converter and an Arduino Pro Micro clone:

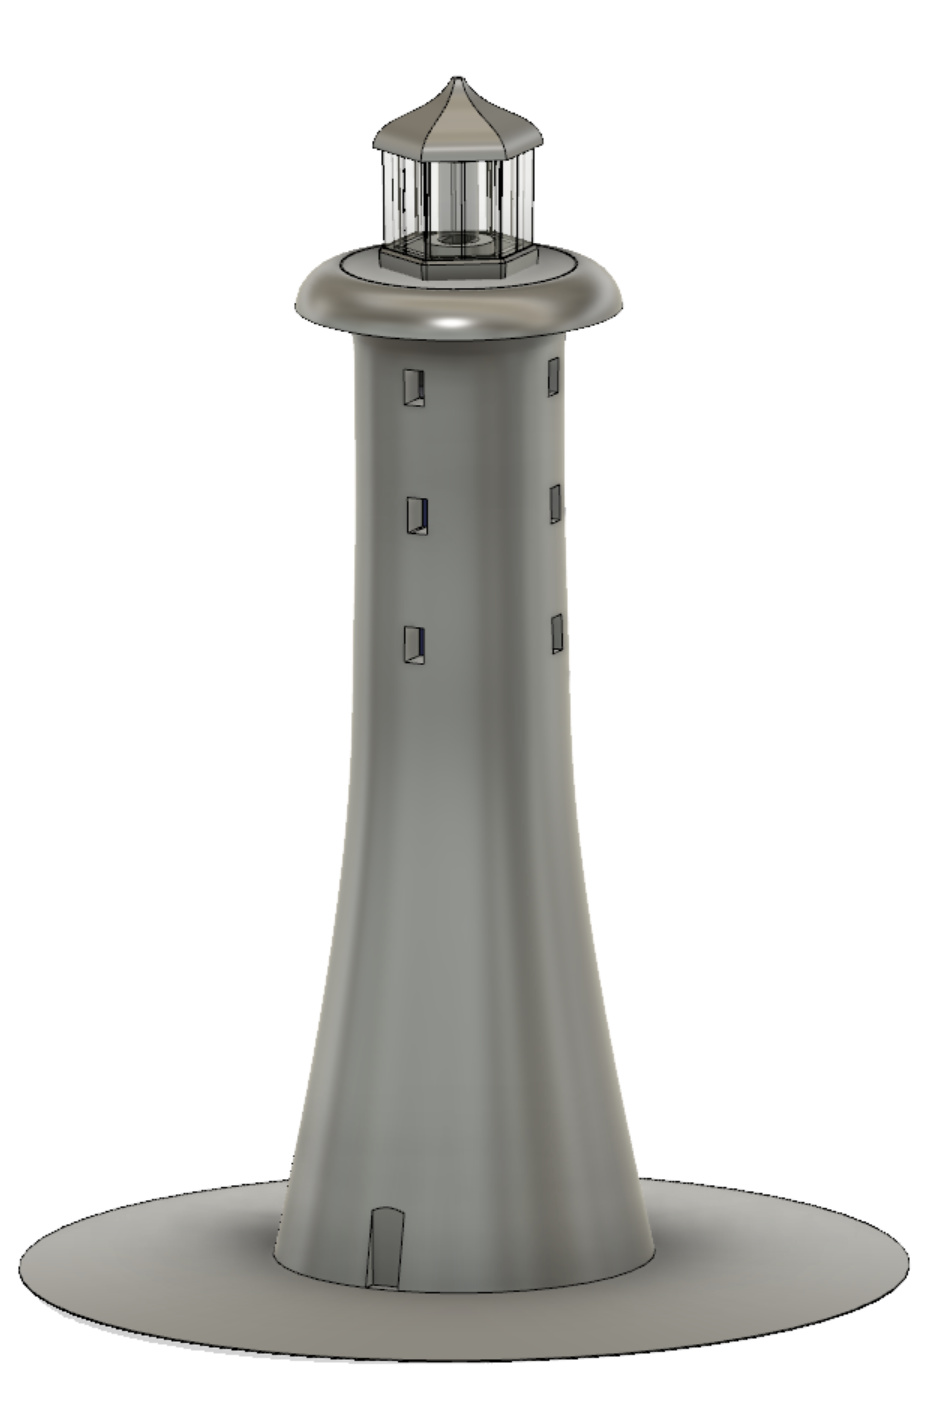
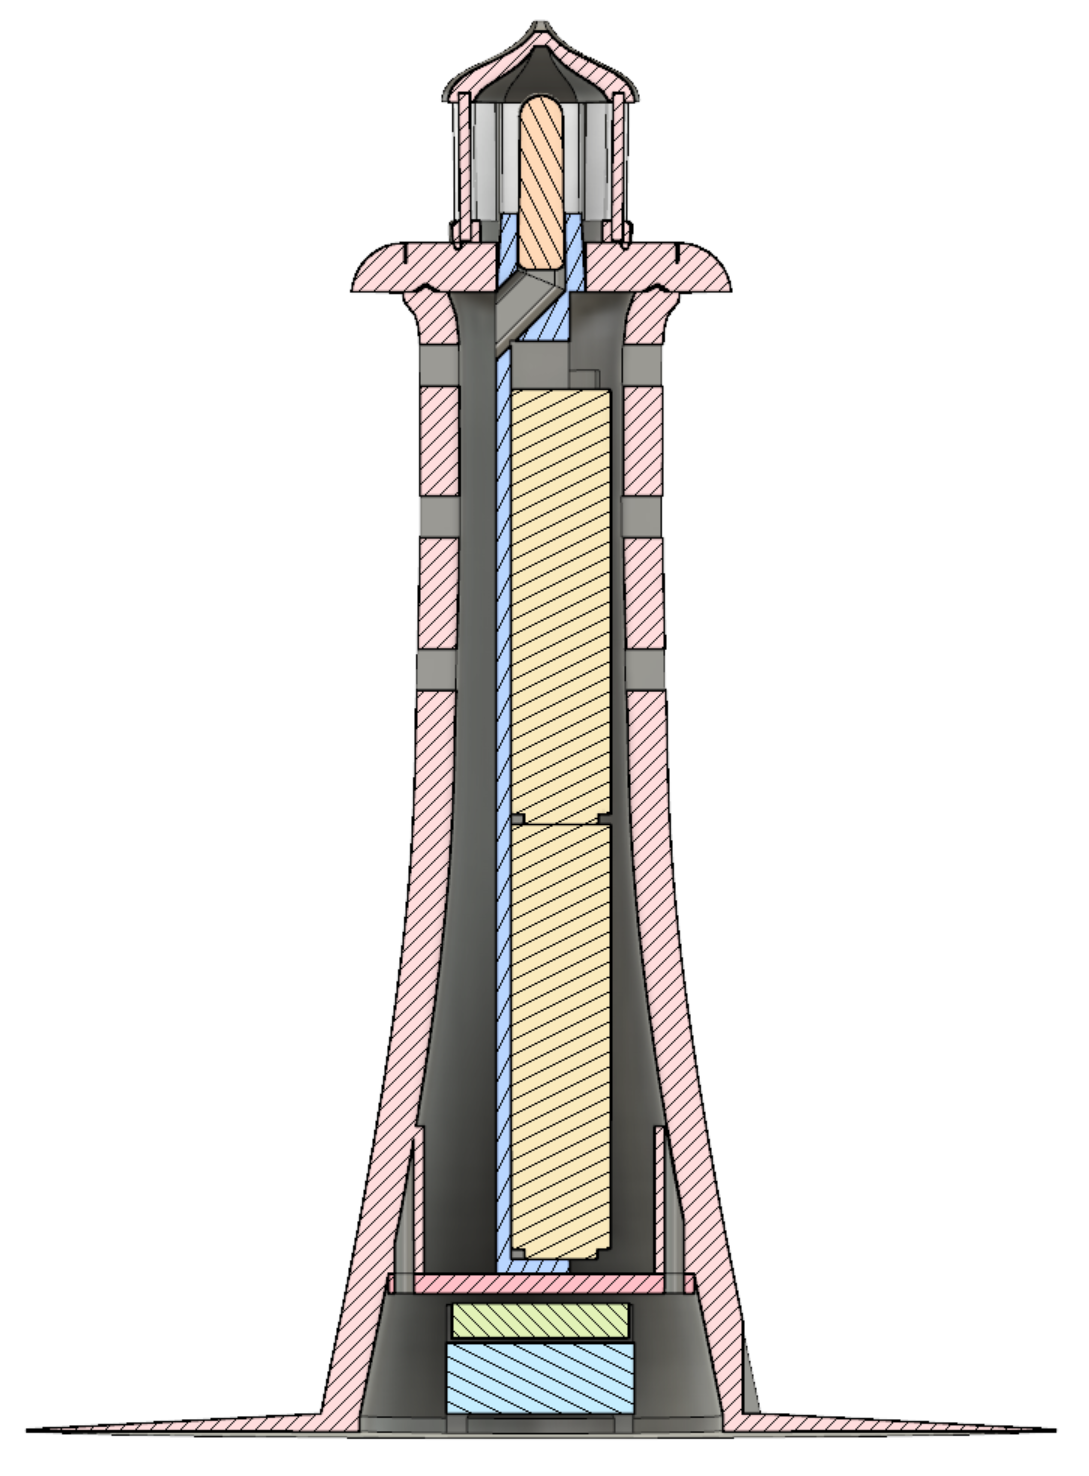
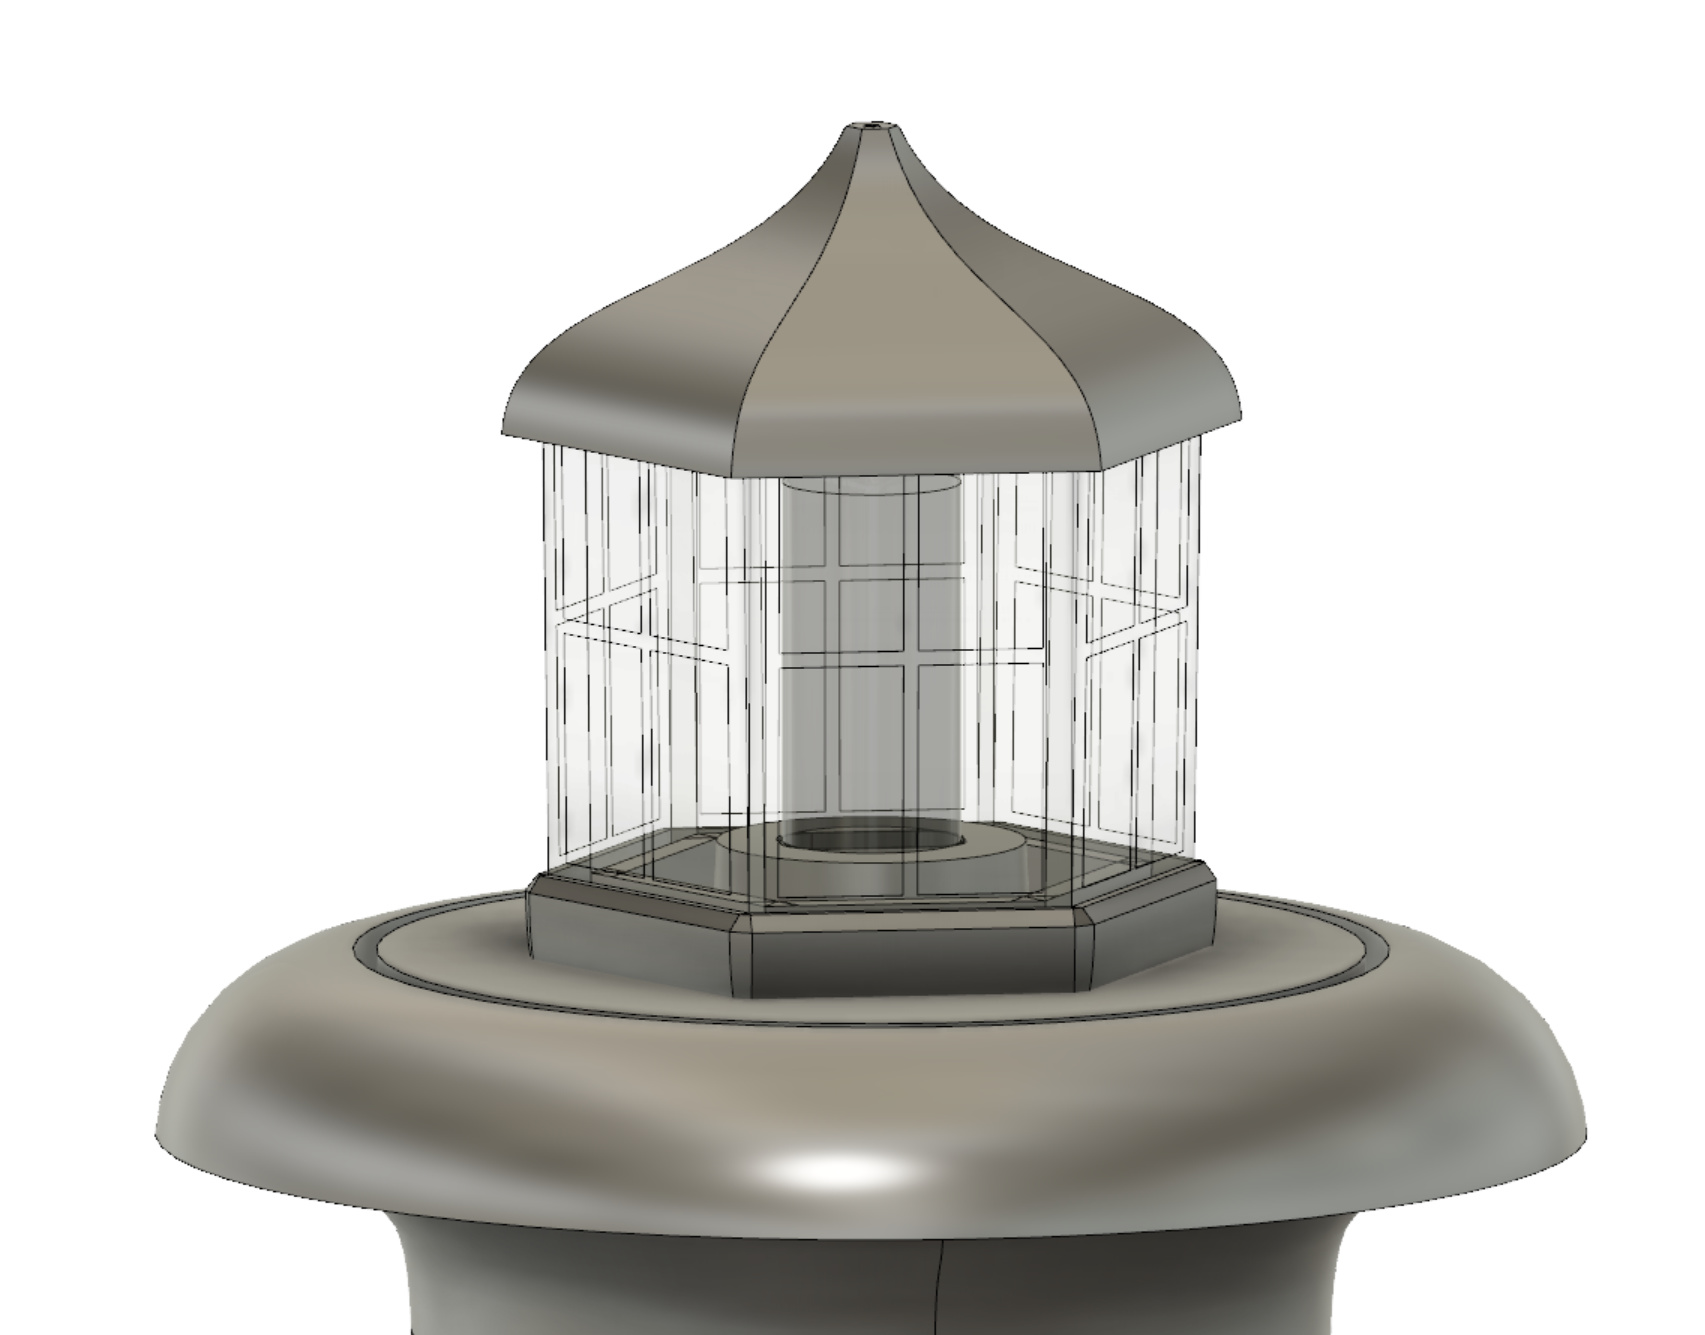
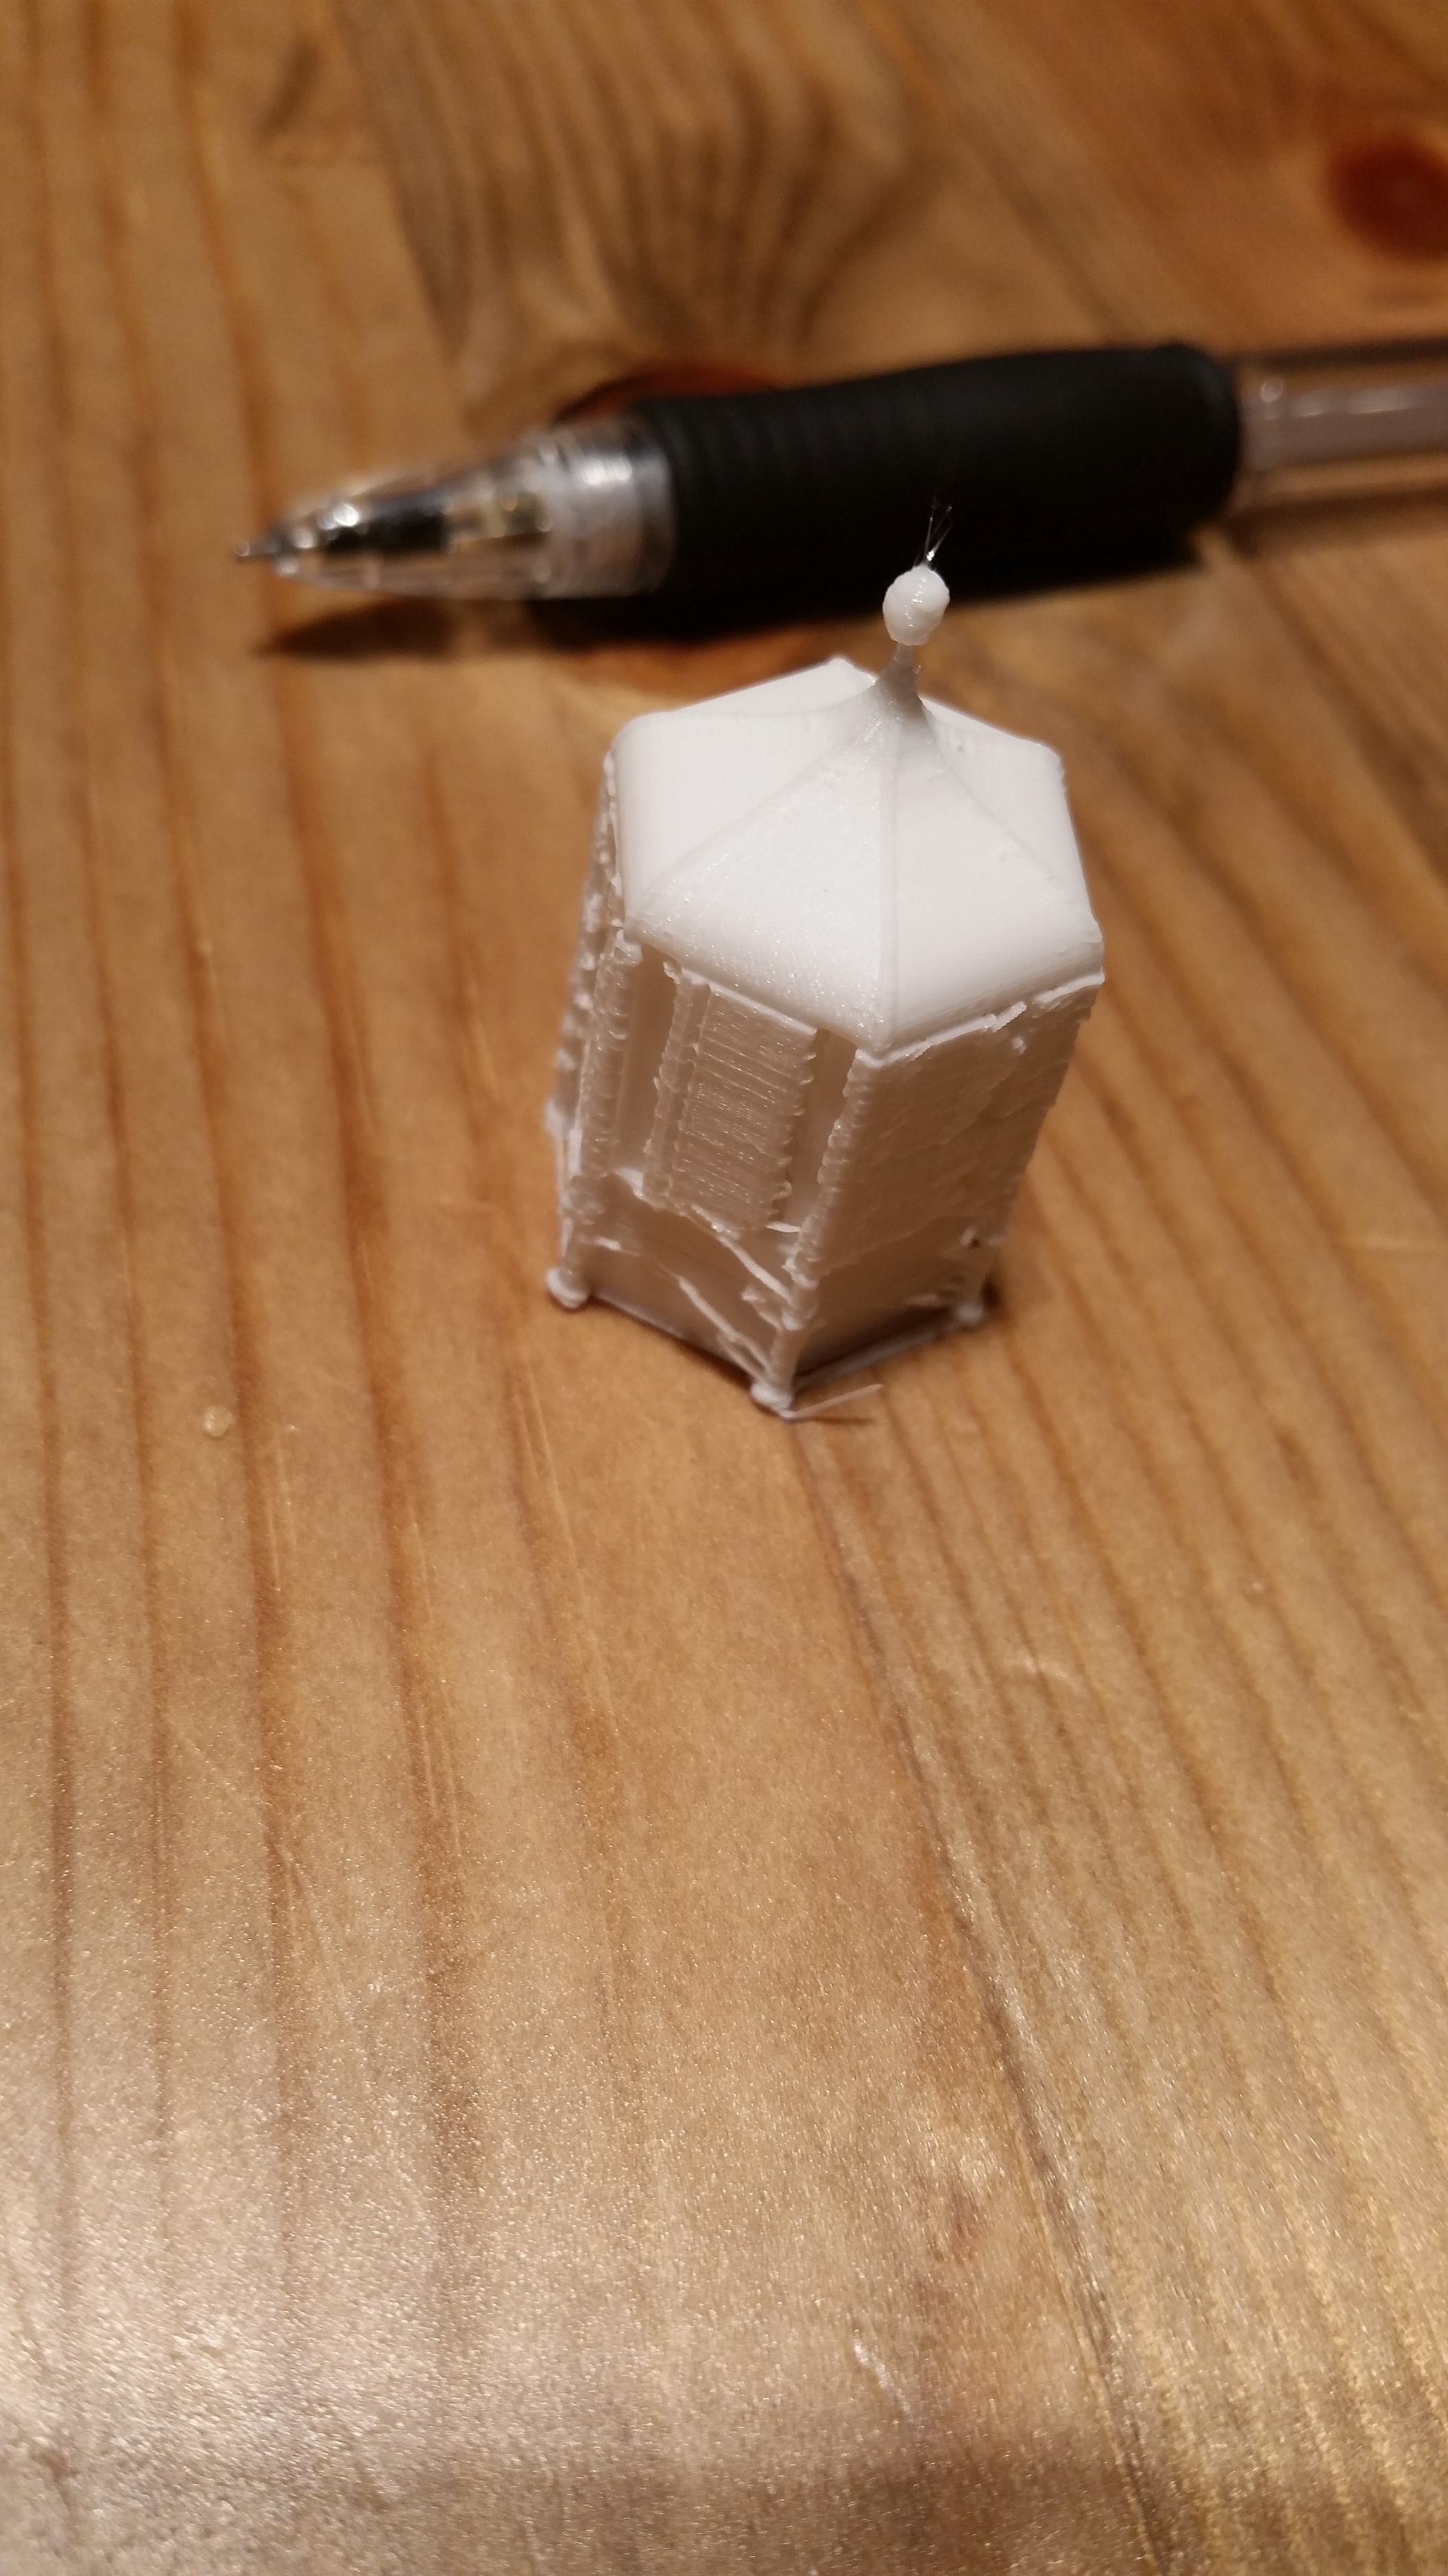
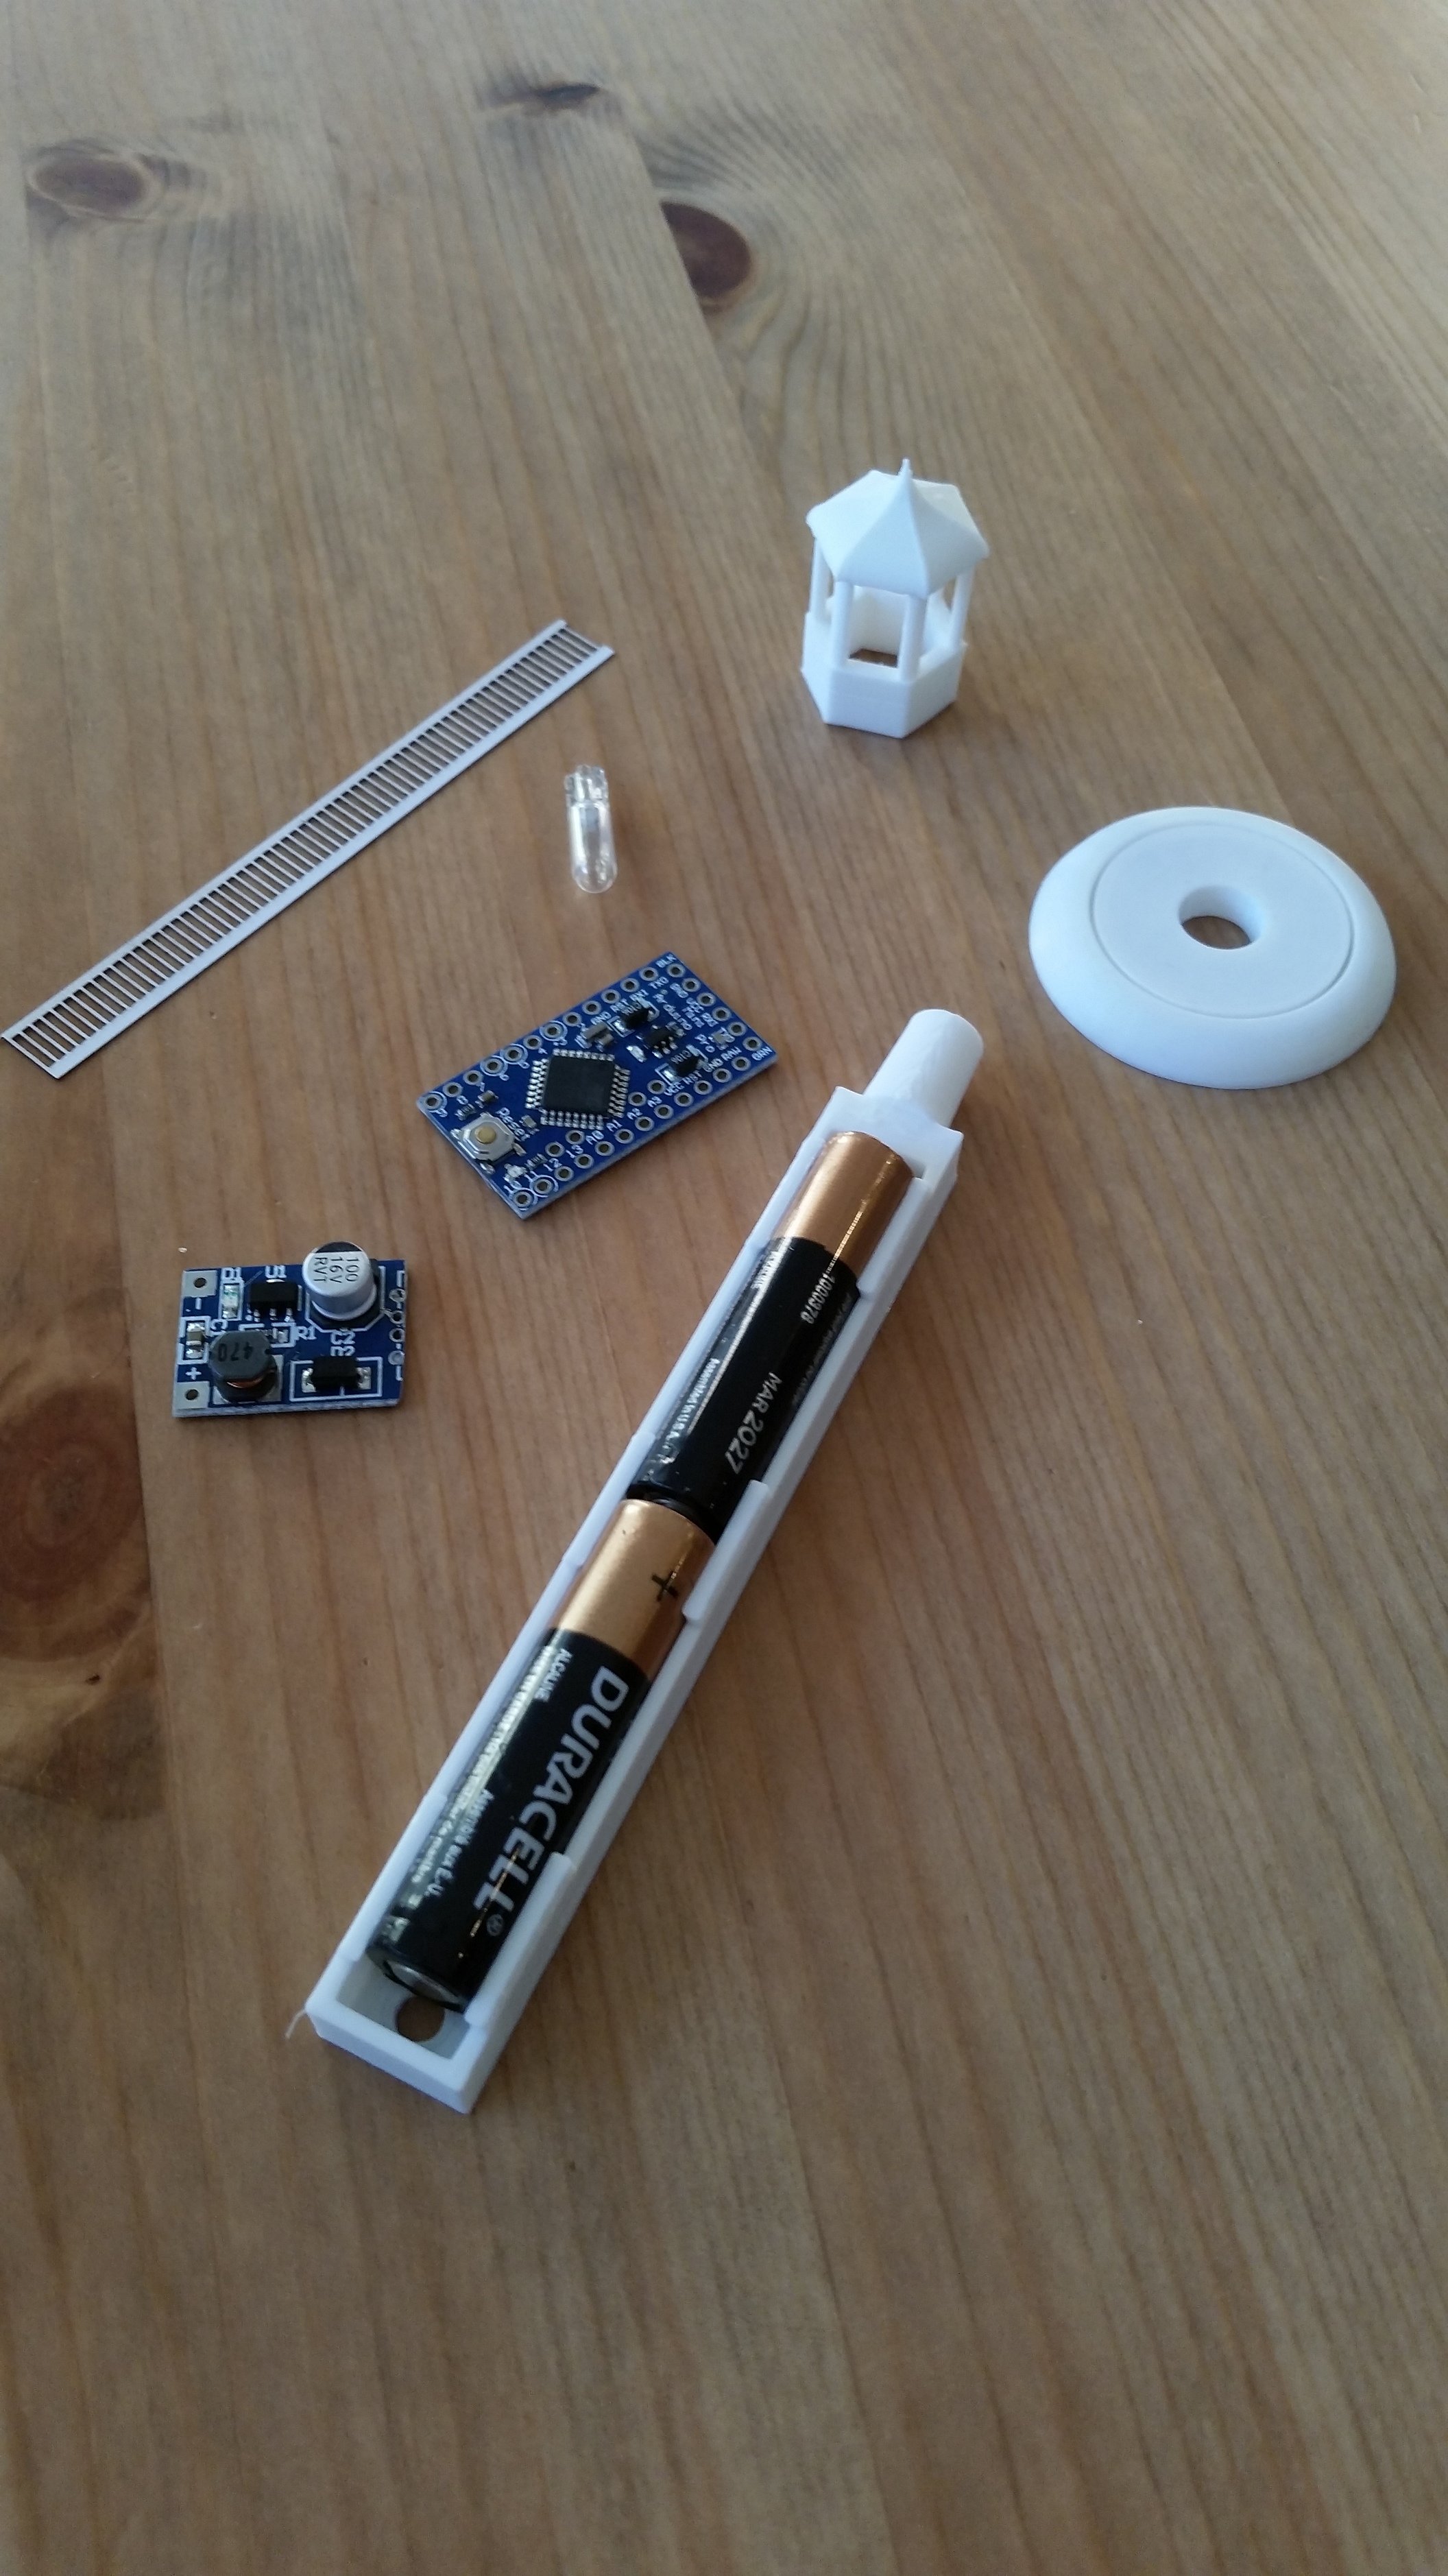
A small incandescent light bulb makes the light, the windows will be laser cut out of some sort of transparent plastic. The small groove is for inserting some hand rails laser cut from heavy paper.

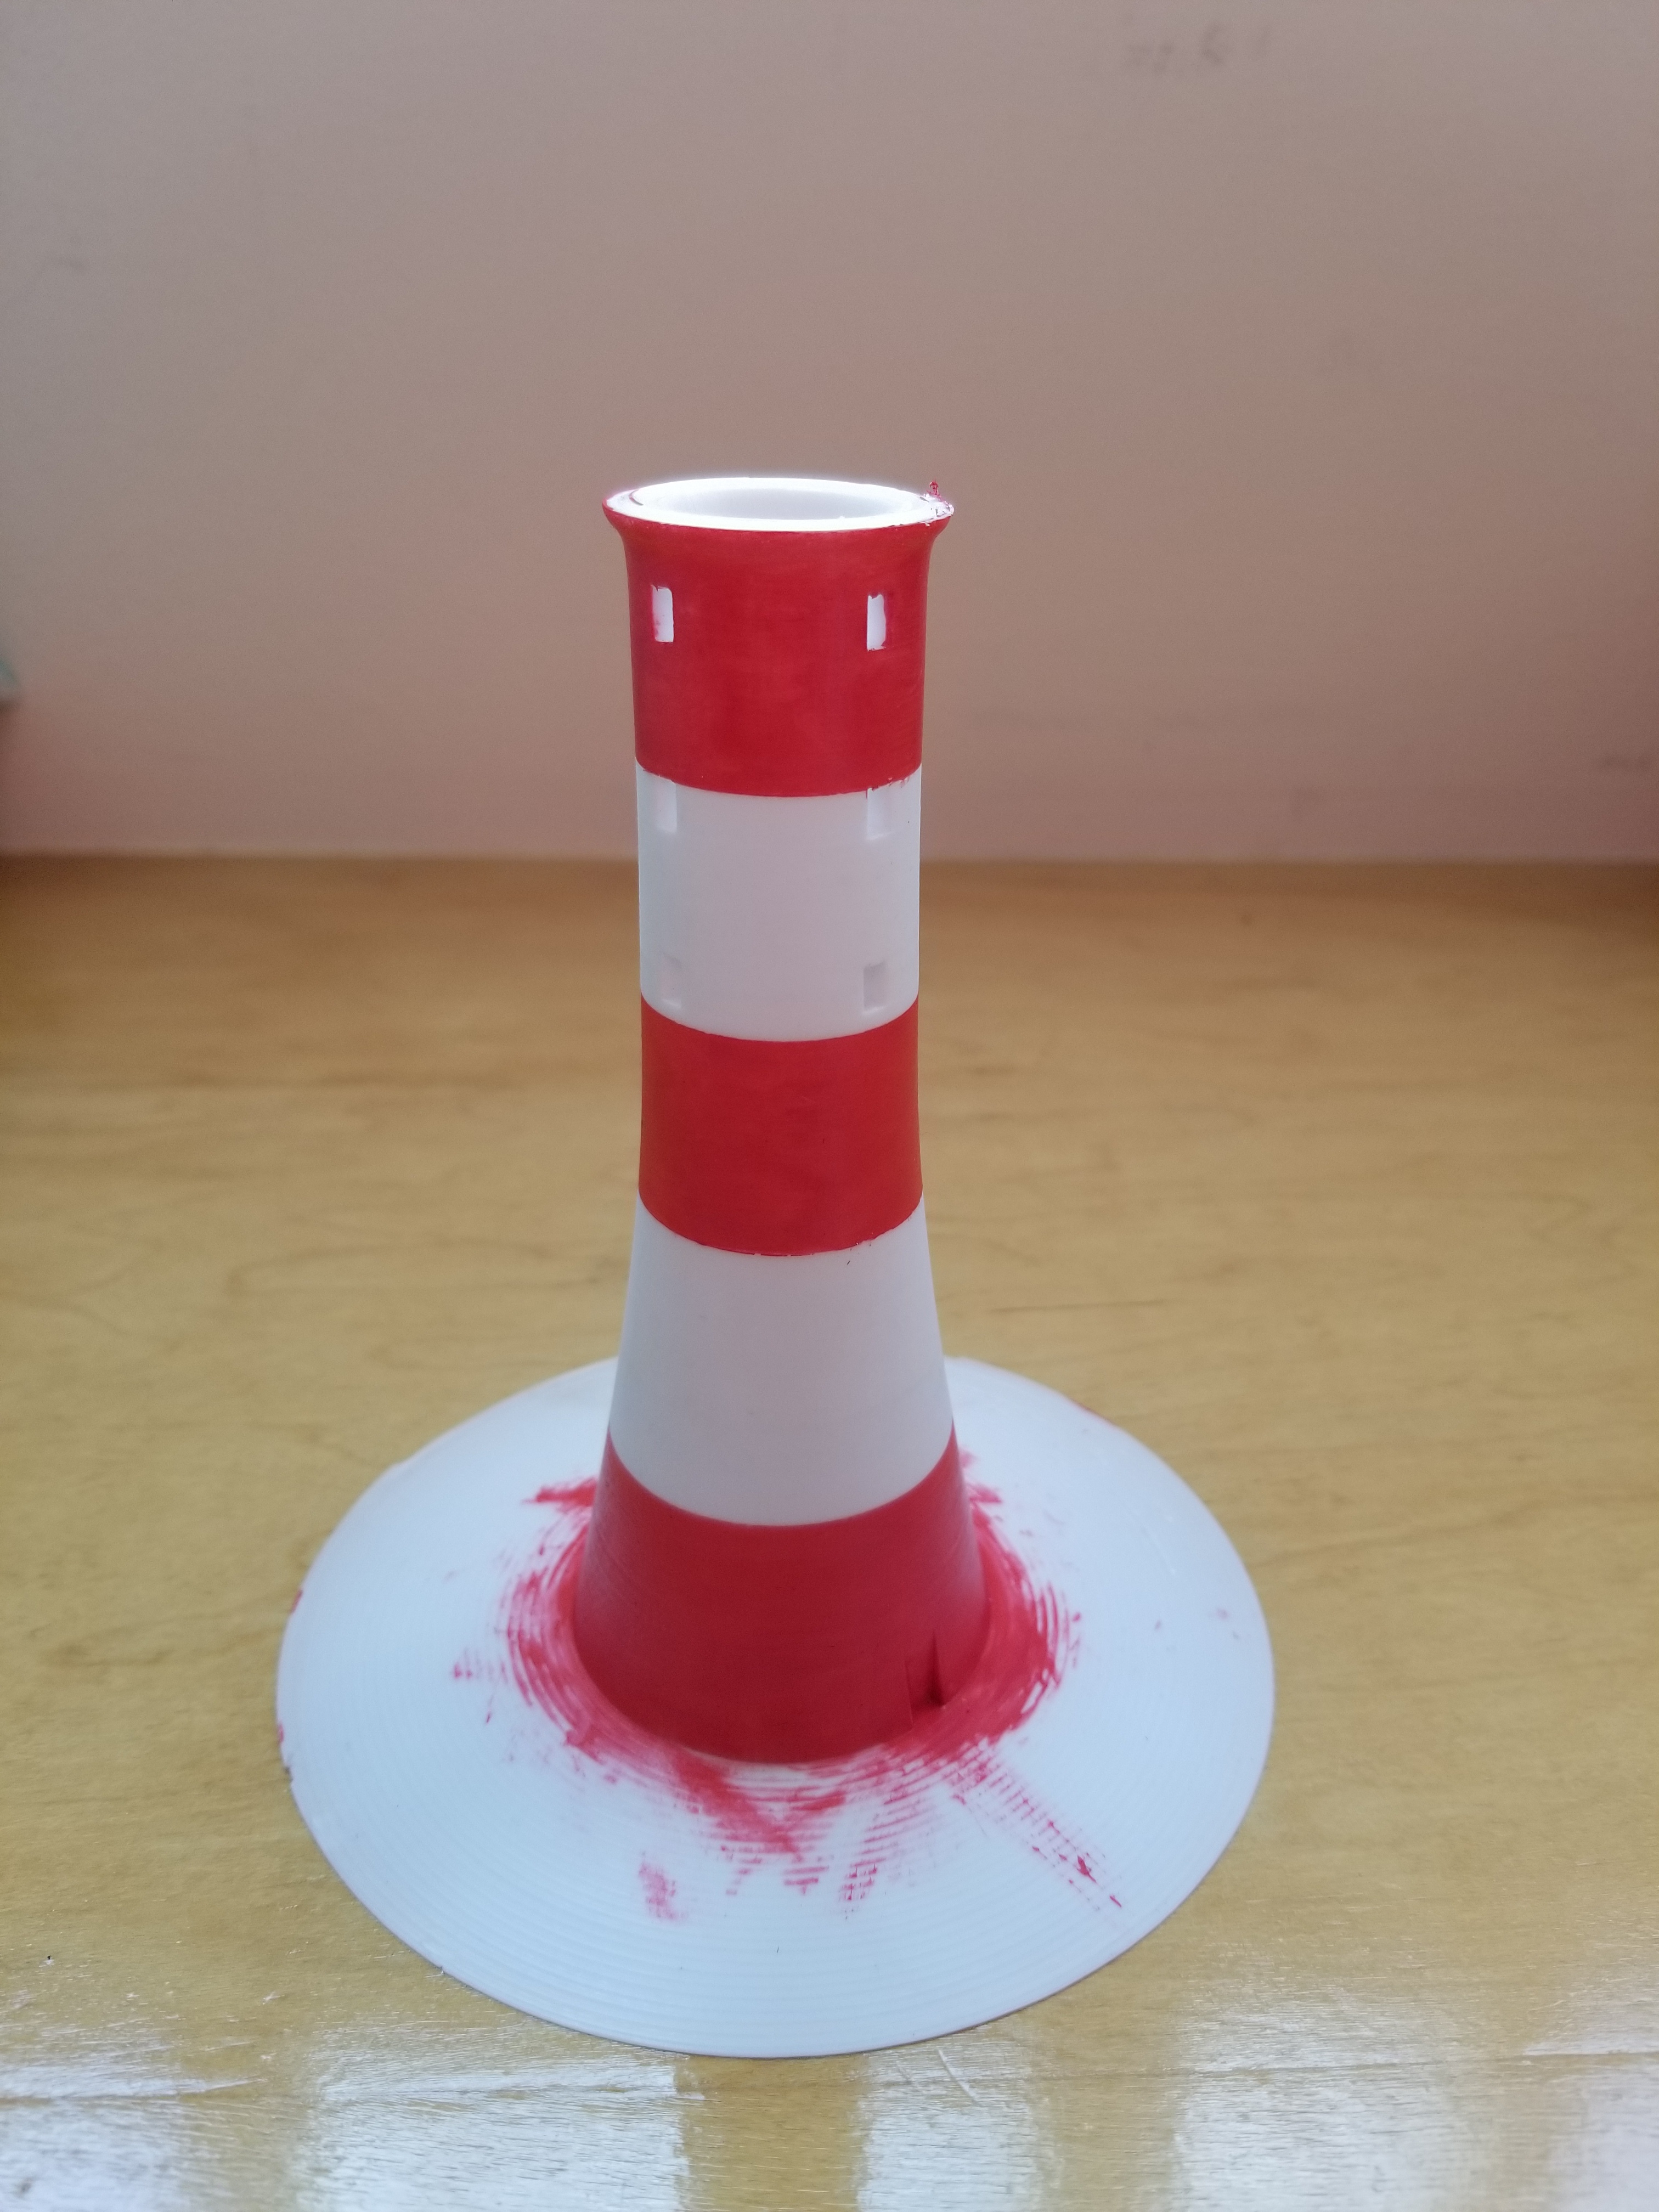
Everything else will be laser printed in white PLA, then painted with acrylic paint. The whole thing is only 15 cm tall, which makes many of the features a bit small.

12 Likes

bring your kids in, they need to learn how to make “best dad ever” paraphernalia with the tools we offer

3 Likes

I may need to make this hat and then watch a few episodes of Round the Twist

1 Like

After fiddling some more with the Fusion 360 model, my printer is now beginning to spit out some parts.

The tower took 15 and a half hour to print because I had turned the layer height all the way down to 0.06 mm. I’m very pleased with the job it did.

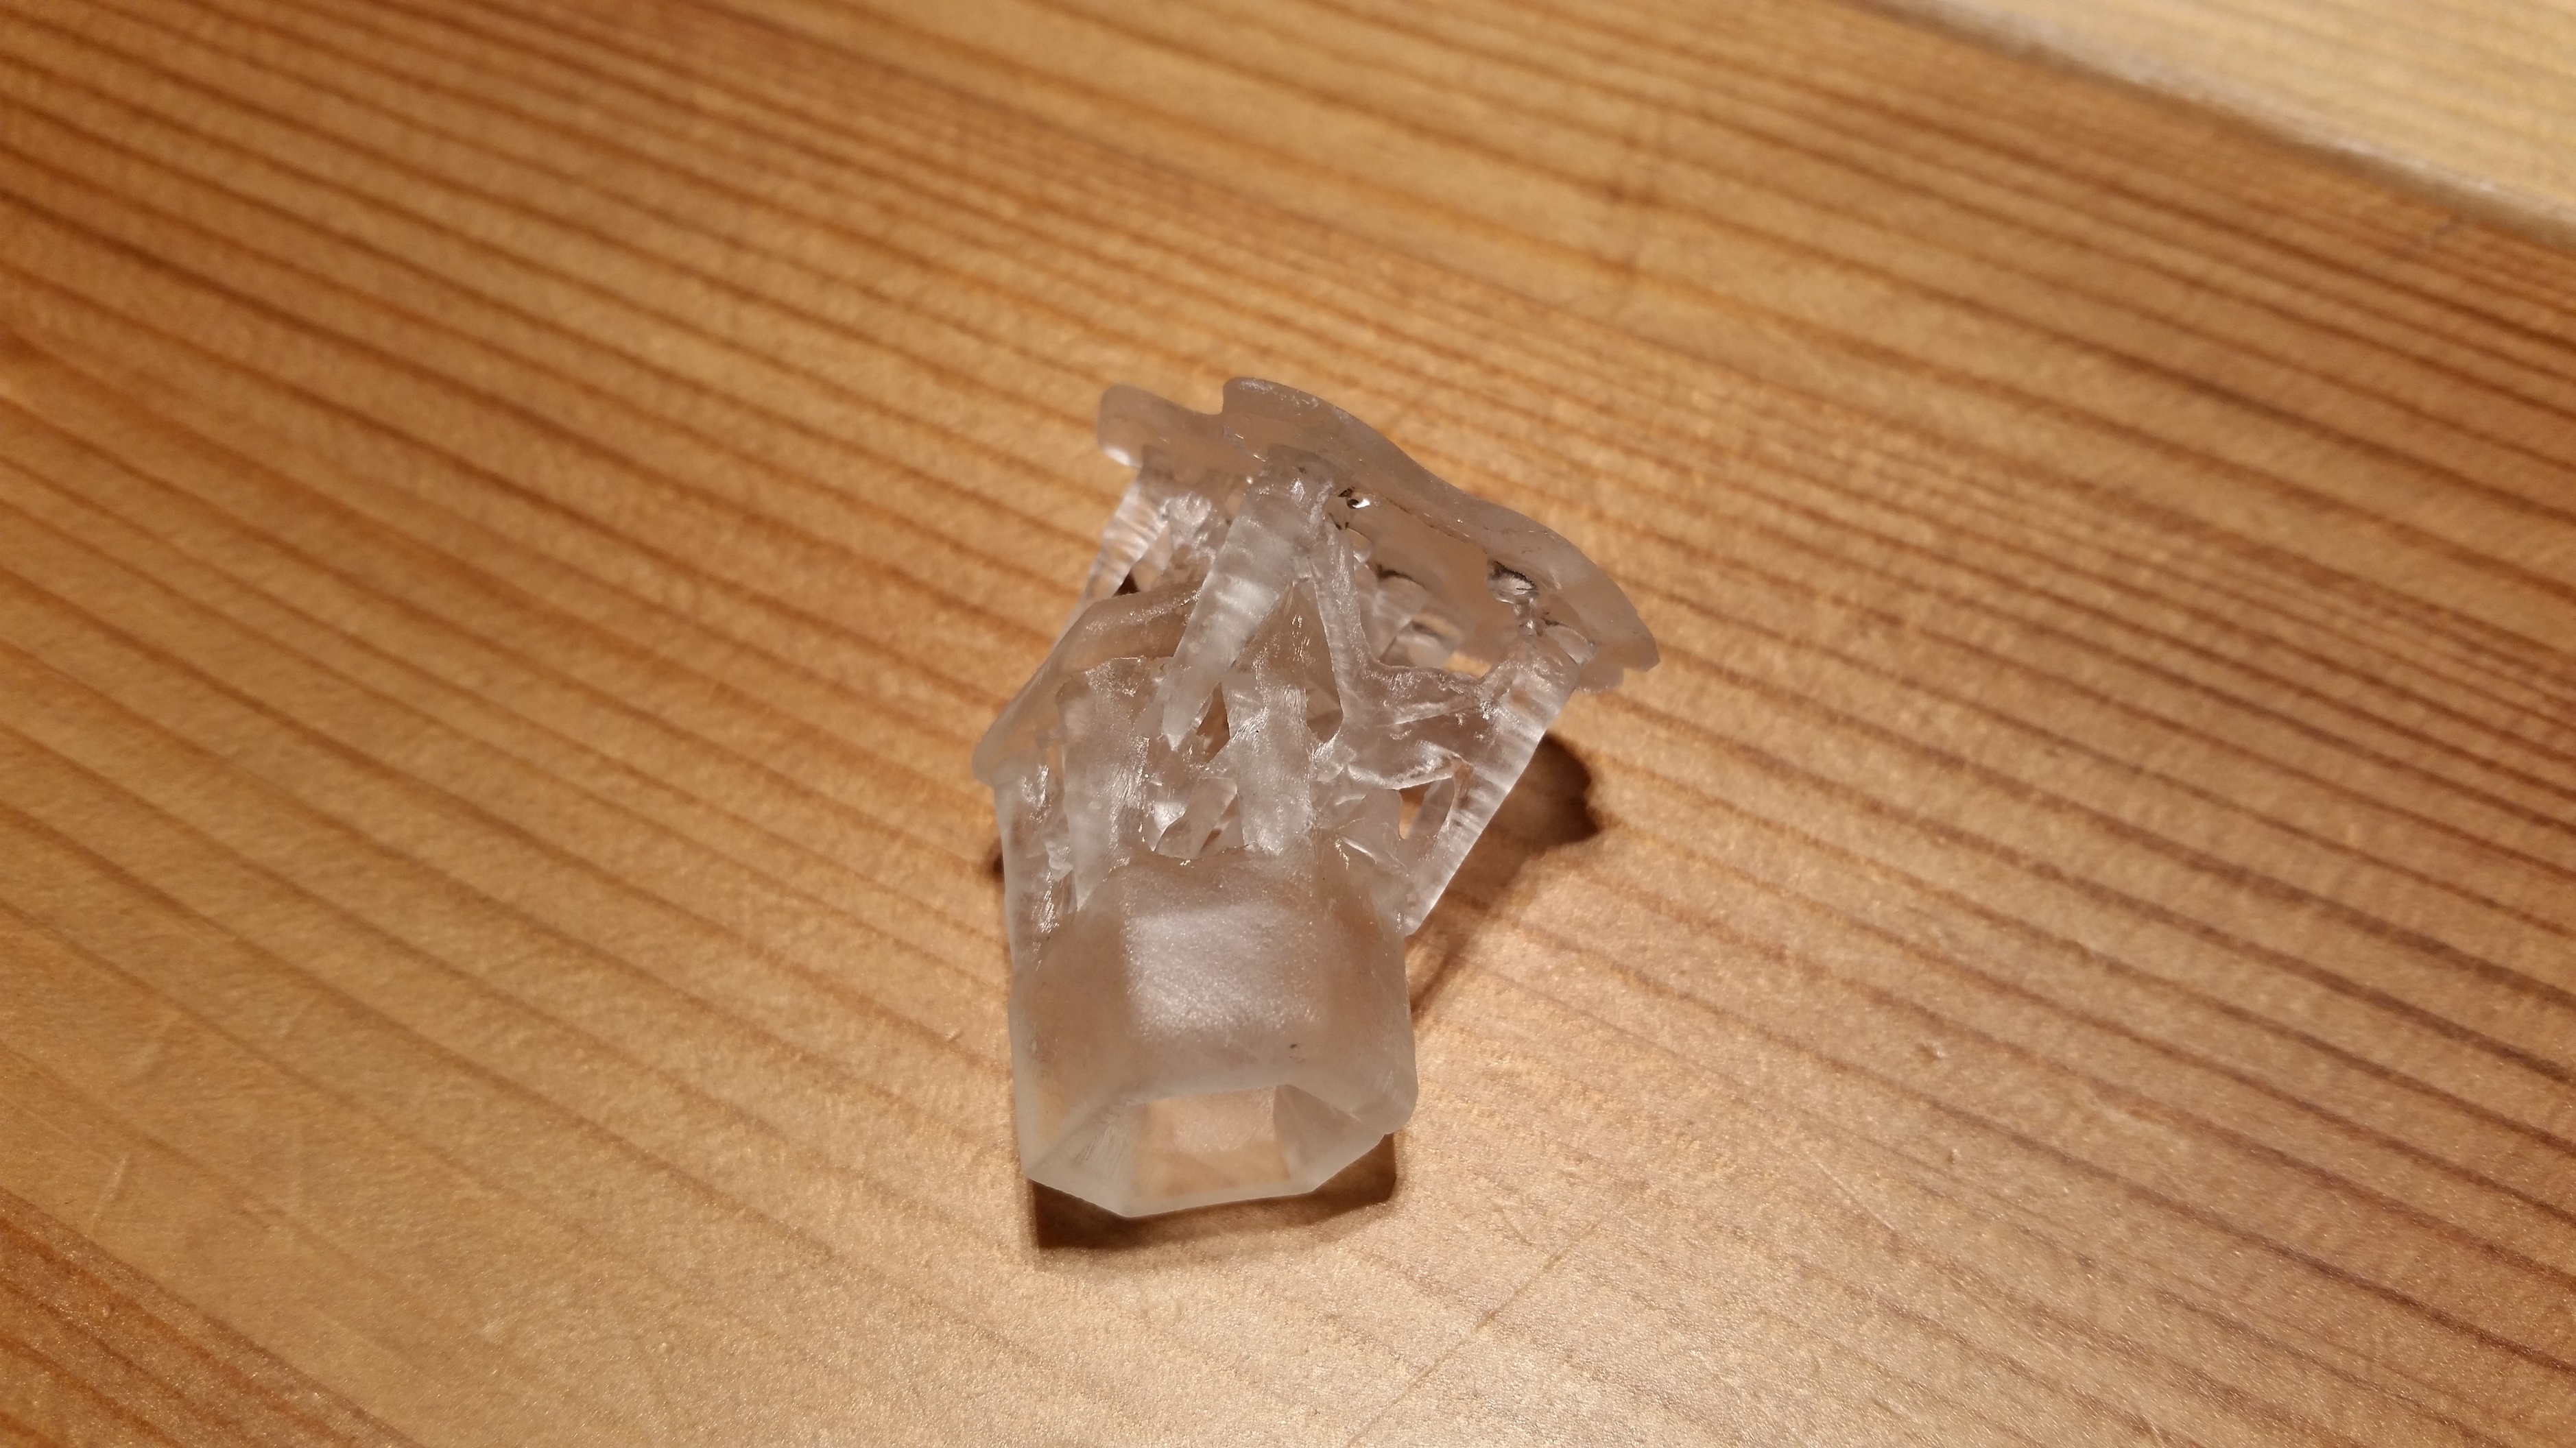
I decided to try the Form 1 at the space for the little housing at the top, since it has some quite small features. But the Form1 still had the expired resin in it, so the end result was not great:

I tried my FDM printer instead, and to my surprise it did a fantastic job. Here it is right off the print bed with supports and everything:

And here it is with the support removed (yeah, the ball broke off. That thing was just too tiny anyways):

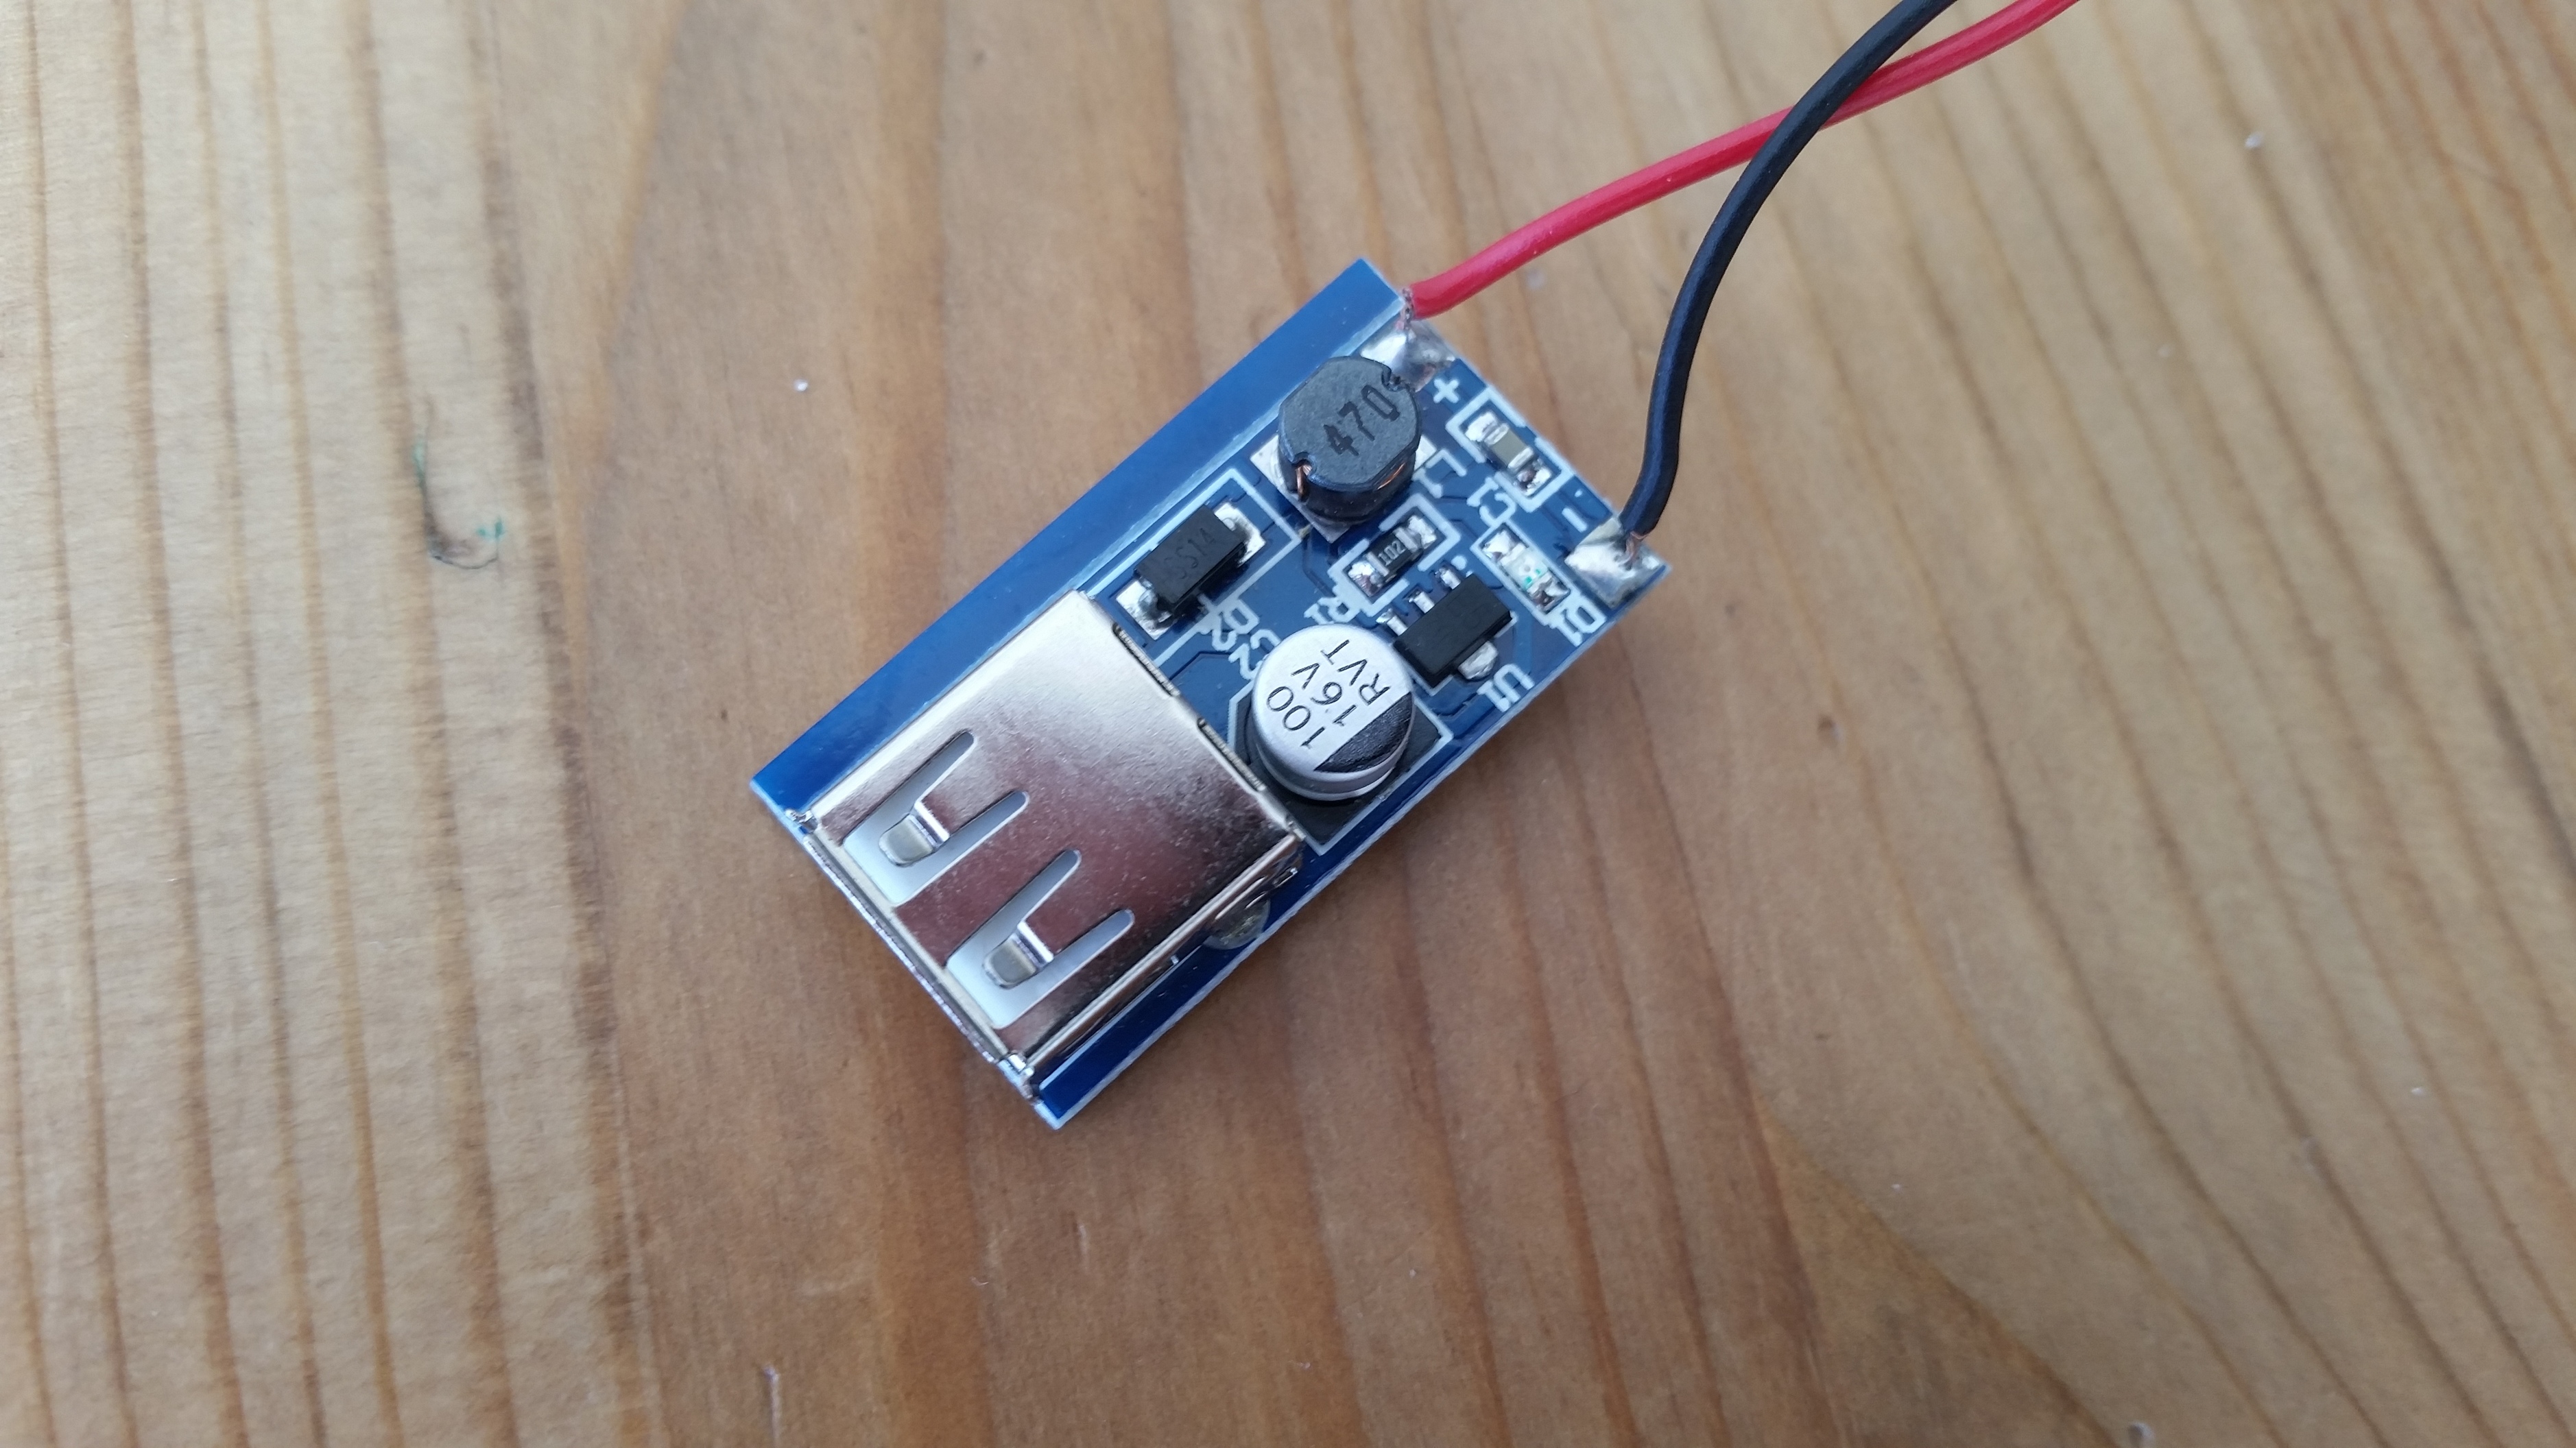
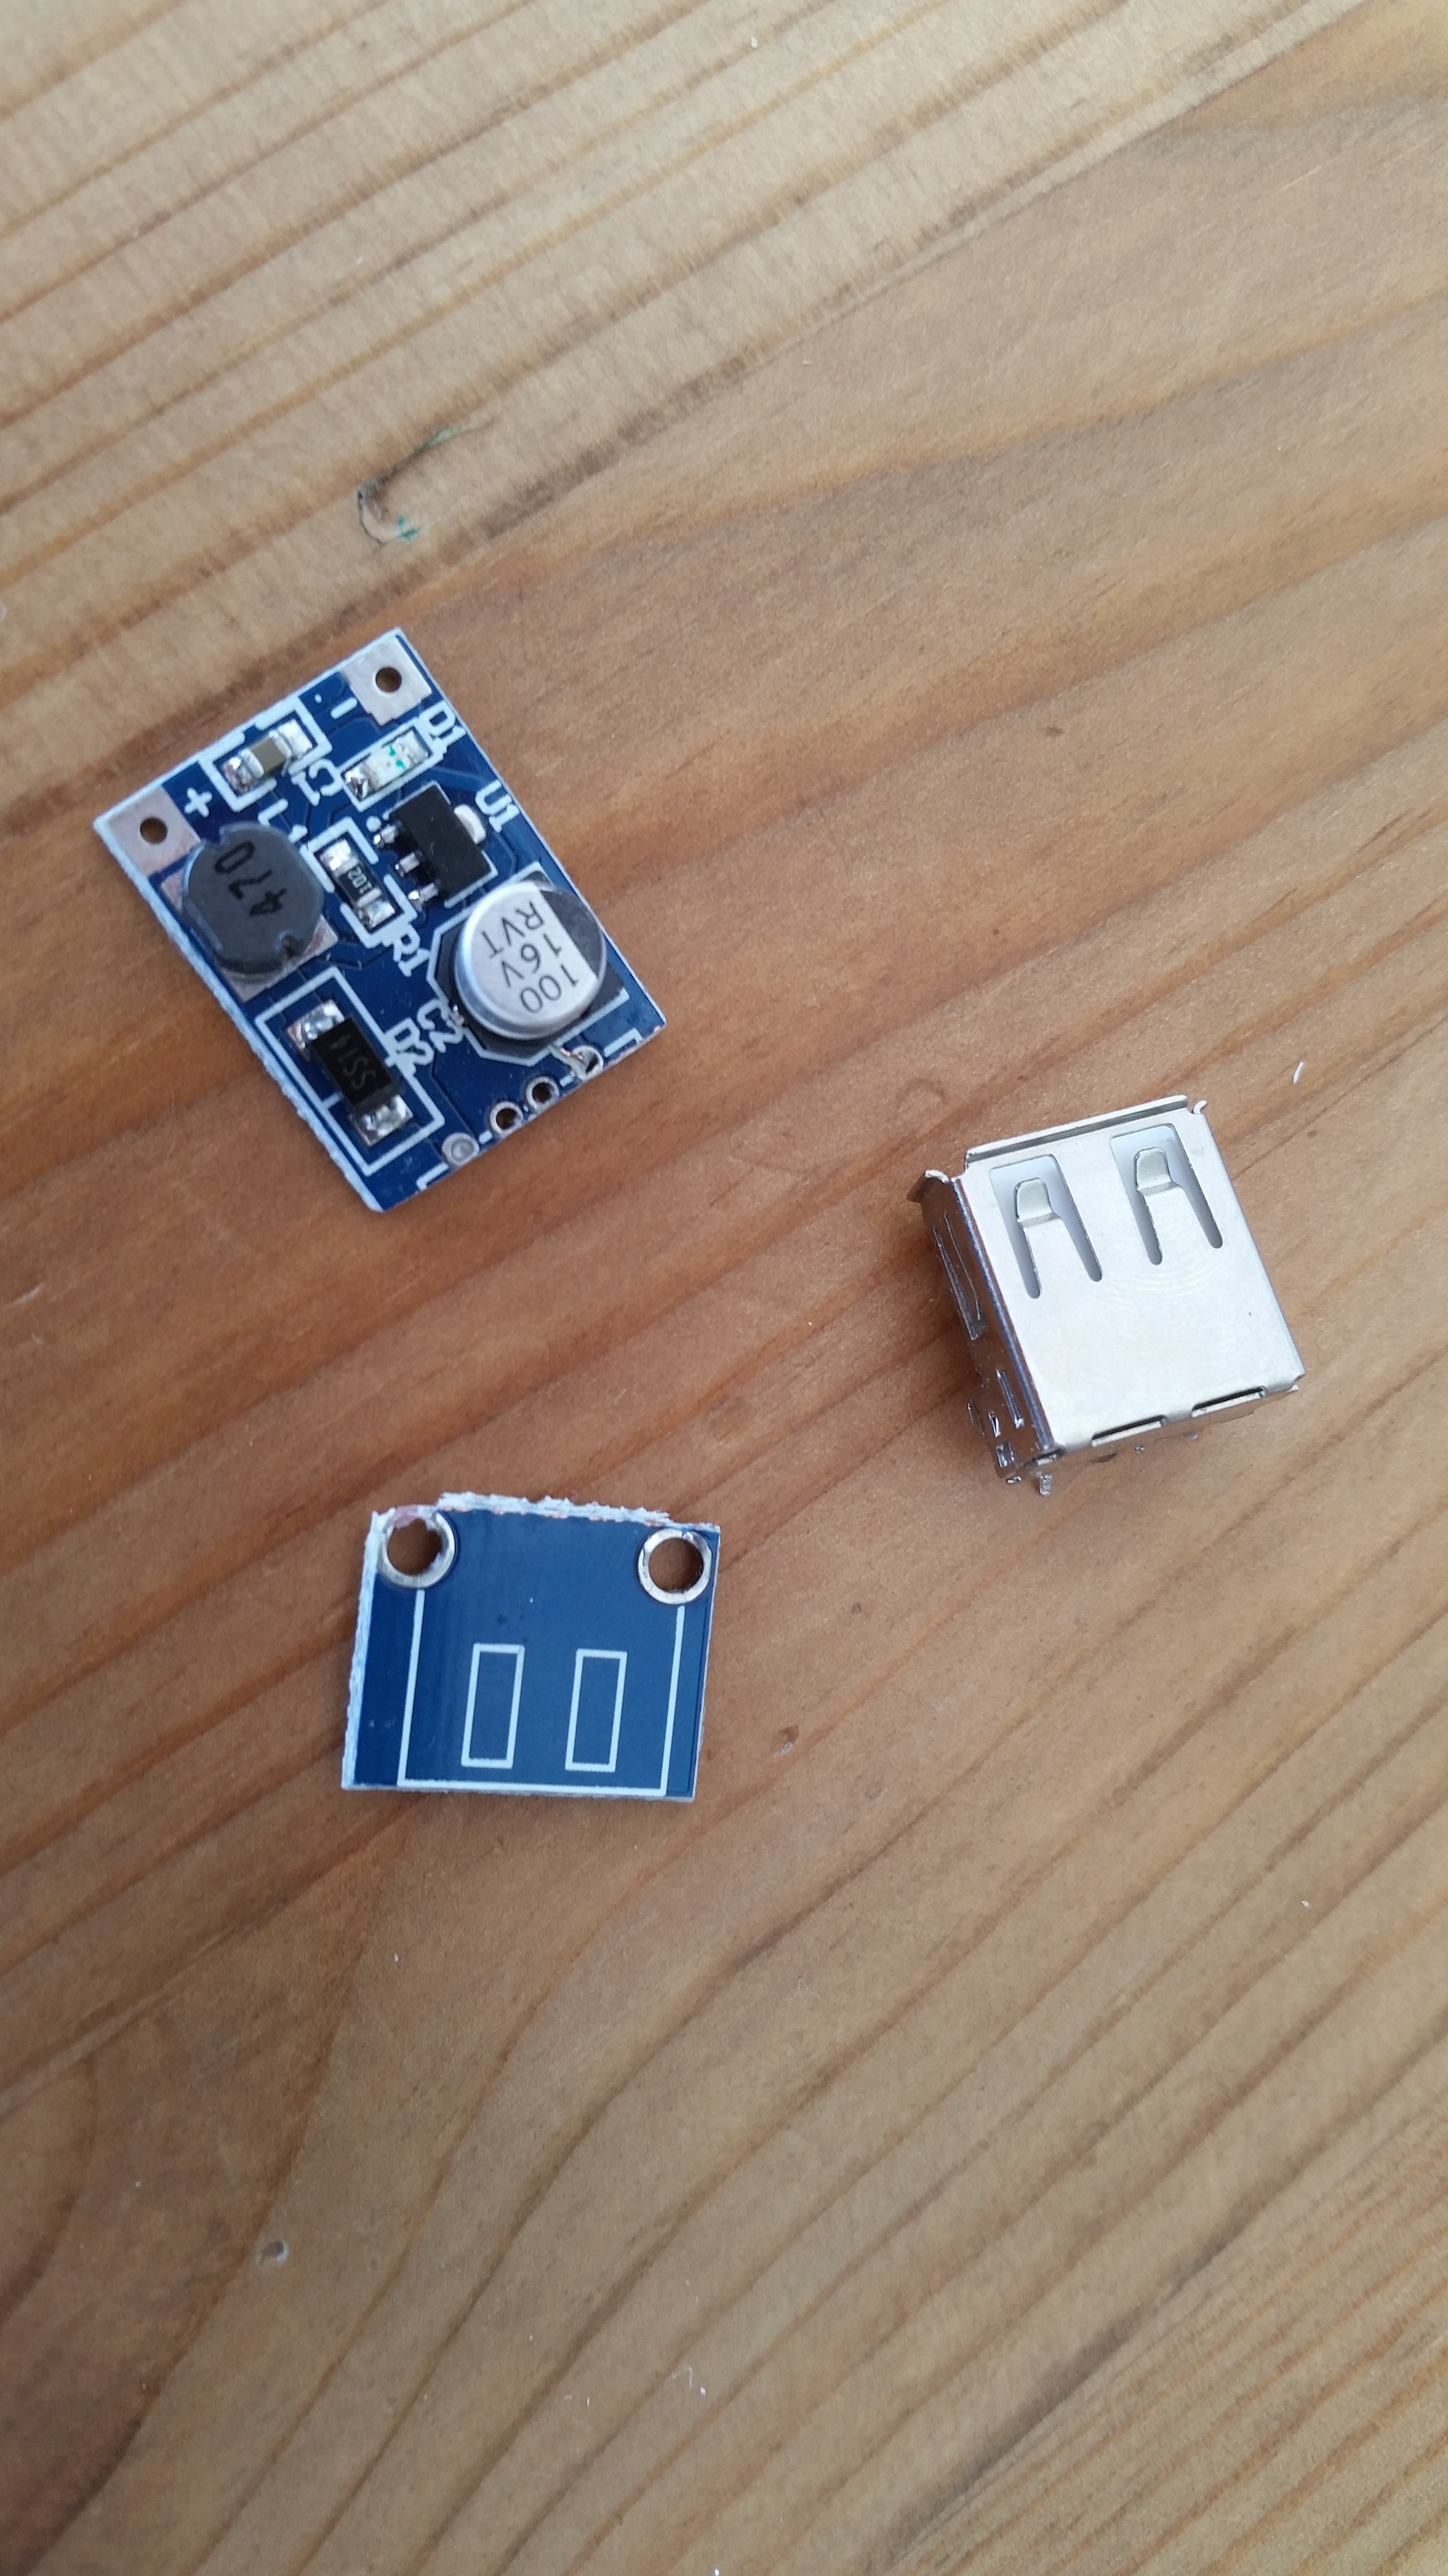
I need a boost converter to take the 3V from the two AAA batteries up to 5V for the Arduino Micro and the light bulb. The one I had lying around was a little too small, so I removed the USB connector and cut off the unused part of the PCB:

Before:

After:

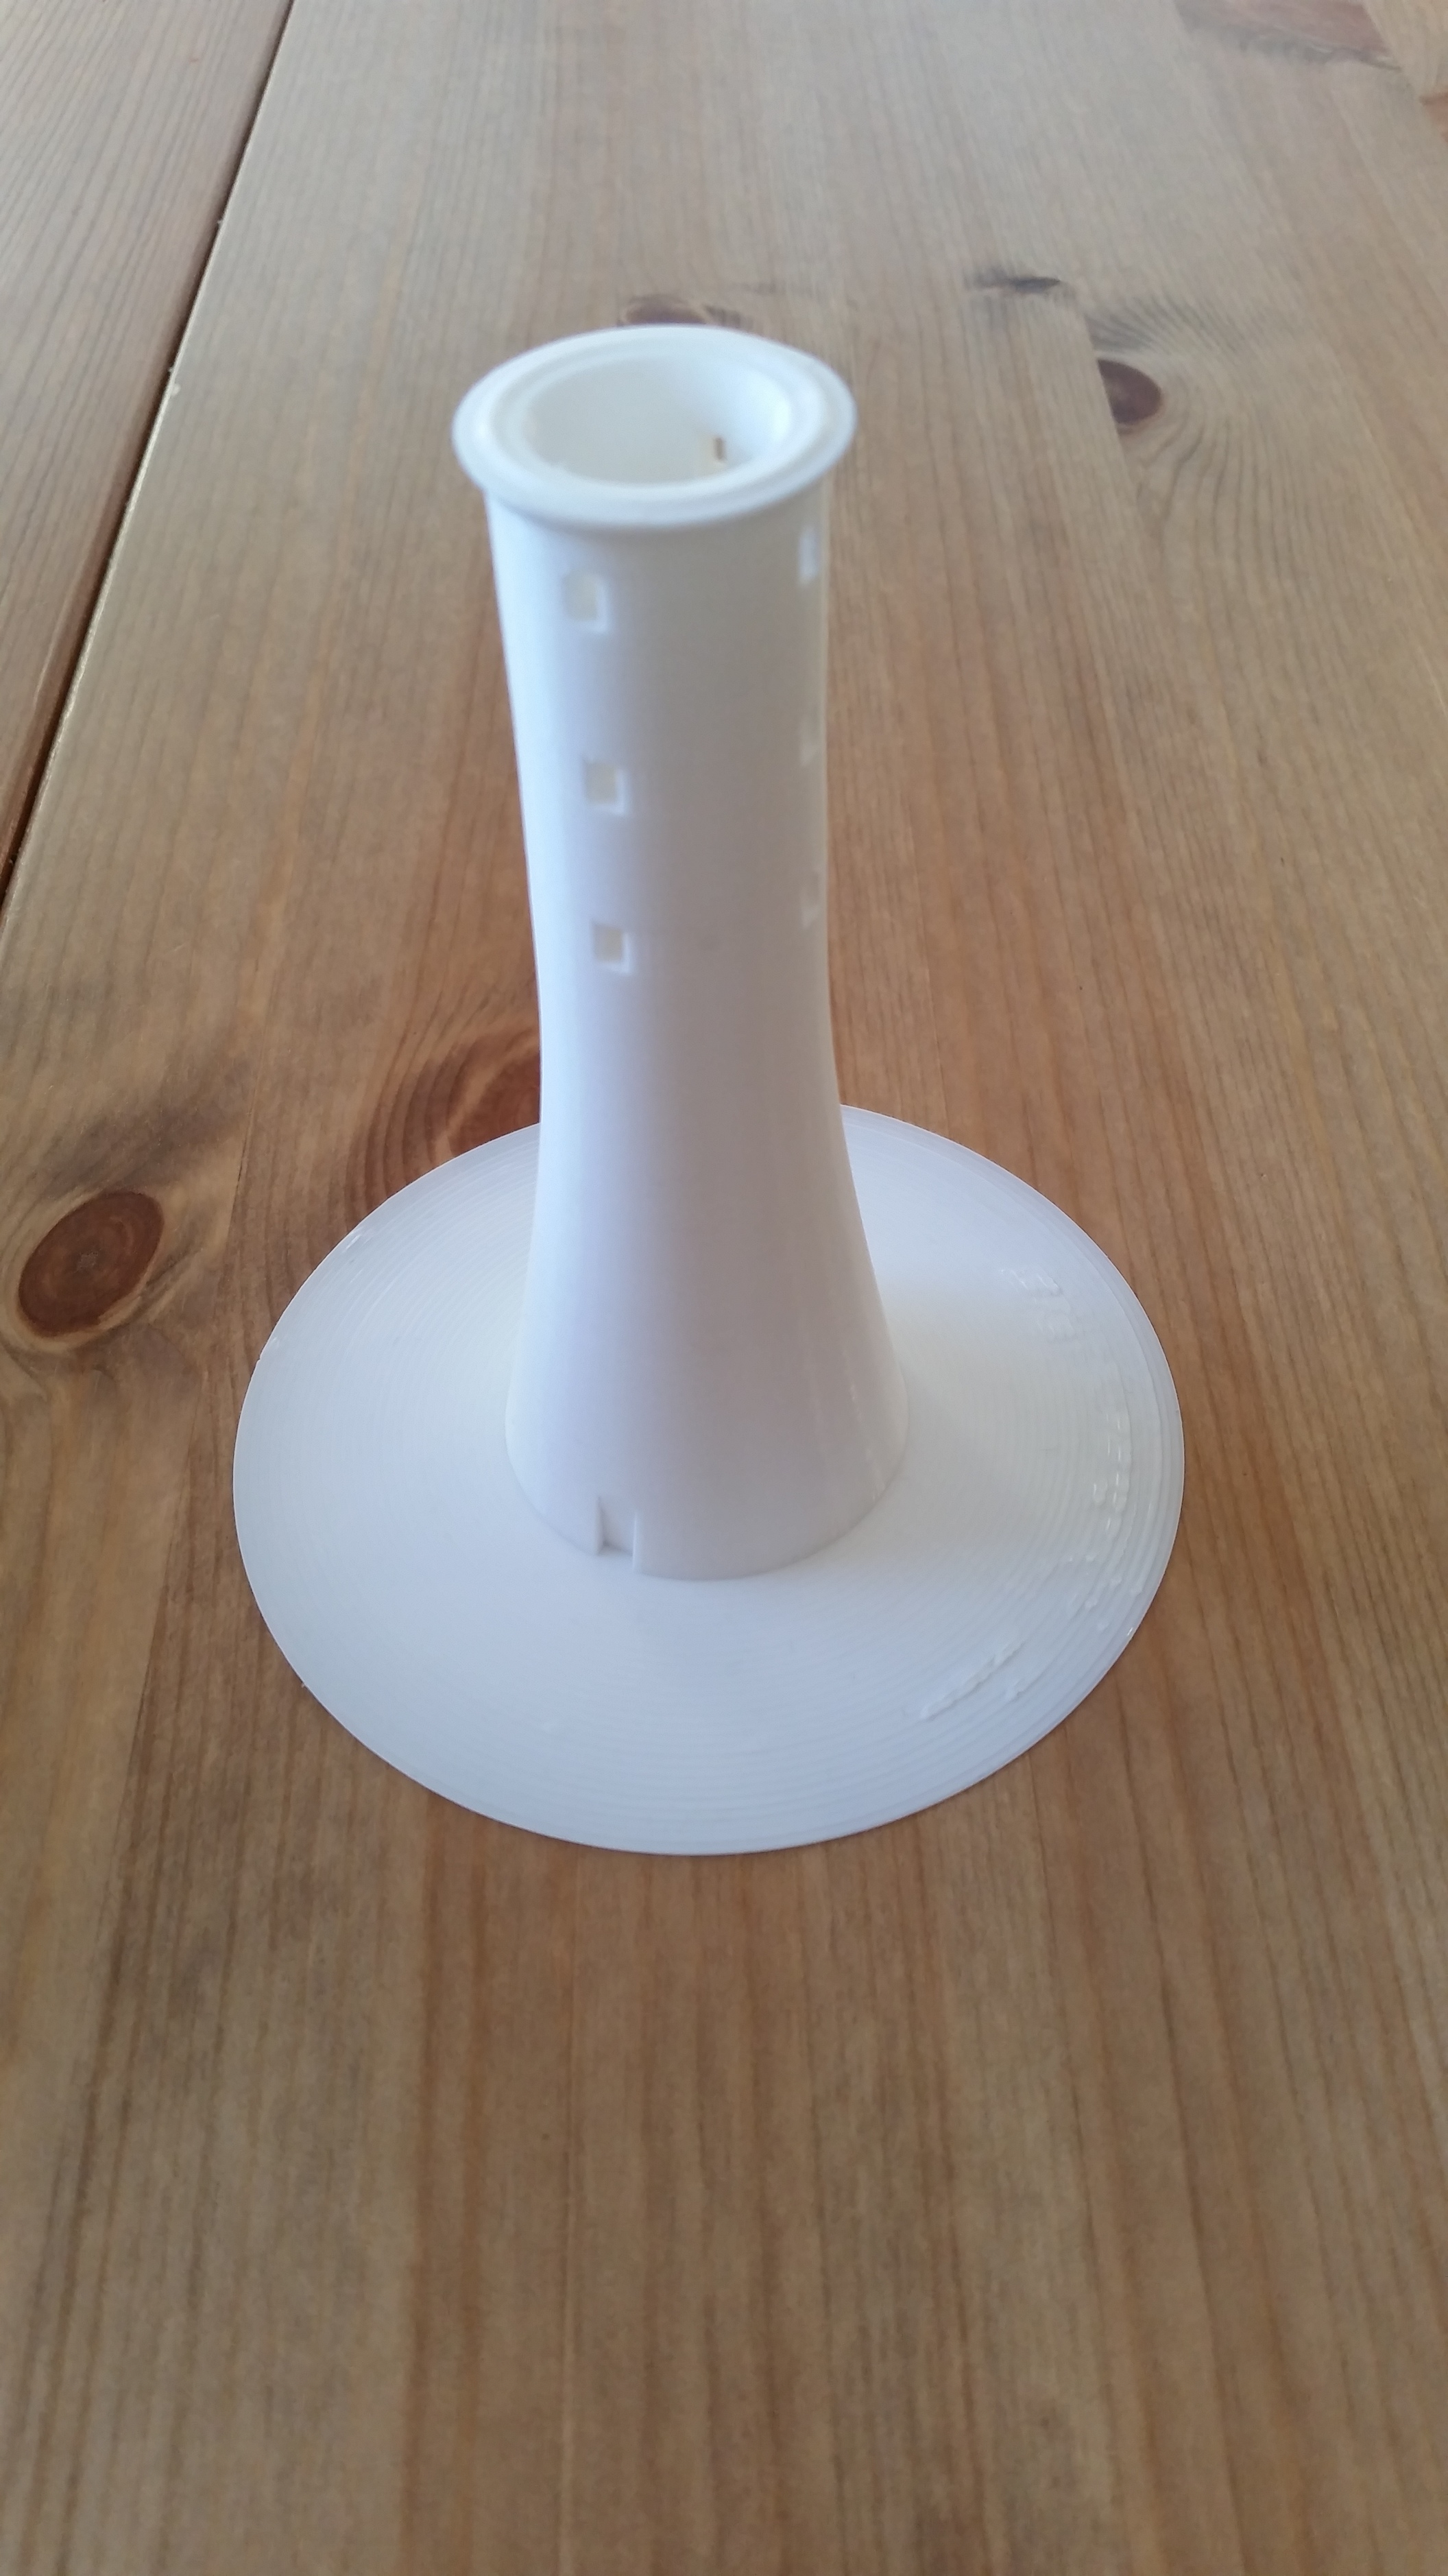
I also printed the battery holder which doubles as lightbulb socket and the platform on top of the tower. And I ended up laser cutting the hand rail from card stock. It’s so tiny!

So, all the parts are ready. Next up is painting.

12 Likes

good to see FDM prints worked out for you!

So in the end the school didn’t have a crazy hair day at all last year. This year they do, so we are picking this project back up.

After painting with acrylic paint. We used electrical tape as masking tape. It makes really crisp edges.

3 Likes

This topic was automatically closed 365 days after the last reply. New replies are no longer allowed.