Ukulele Build Log

On the member project shelf area there is a device that is labelled “IoT Temperature Logger” Not sure who owns it.

You can buy a TI sensortag for $30usd and have it report the temperature to your cell phone over bluetooth for data logging.

Or you could get an TI MSP-EXP430FR5969 board that has 64KB of FRAM (long term memory storage for logging the temperature data. It costs around $15usd. You would need a temperature sensor ( around $2 from ebay ).

It got quite hot without insulation; though it might still be a good idea. The top was right around 94-98 degrees where the bottom was 60 degrees.

I steamed the wood for 32 minutes, right now I’m waiting on my results as it is clamped up, but here’s the process:

I’ve got to take the outer form and figure out how to attach it to a larger base (luckly I have those nice mounting holes for threaded rod.

Also I need to place my work space further from the hot box, turns out I nearly touched it a few times. Good to know for the future.

Overall, I think it worked well; my jig could be better now that I’ve seen it in action, but now I know.

3 Likes

After waiting a bit and unclamping, I got quite a bit of bend-back, but not horrible. No pics but its certainly not as bent as I need.

I’ve re-clamped it and left it to sit for a night. I might try putting it back in the box and bending it, also I think I need to chop the inner jig into a few parts so I can exert pressure in all directions, not just in one axis.

Yay! All the things!

What thickness is the wood you’re bending? Are those the 5/6mm measurements
you posted?

I’m getting ideas in my head. Bent-wood ideas.

The piece in the video is 2.3mm thick (started at 5mm). From videos I suspect you could bend quite a bit thicker.

1 Like

After the oak test, I learned a few things, the bendback wasn’t as bad as I initially thought, see below:

http://imgur.com/Cu0FYPc

I took my hand at resawing a Walnut blank I purchased at Lee Valley, overall it worked well, but not a perfect edge.

http://imgur.com/hGzXRWK

Rinse and repeat I had two, planed them down, plenty of sanding and here they are (sorry for blurry pic):

http://imgur.com/IraHzJ6

I chopped up the inner jig to allow for clamping force in more than one axis:

http://imgur.com/laqfiE3

After steaming my first Walnut side, this is what it looks like all clamped up:
http://imgur.com/BwL0vFy

Out of 3 attempted resaws, I had problems on the last one; I didn’t do as good of a job clamping down my featherboard, which caused some blade drift and I had to back out. I was trying to do the 3rd resaw because my 2nd one was too thick. I ended up just planing and sanding down after the failed resaw. Changing the blade on the bandsaw to a wood blade was certainly a big change since trying this last time. Night and day.

My walnut side will remain in the form for at least one day before I try bending the 2nd side.

Next I need to design my working form so that I’ll be ready to start work on the body. I’ve also started marking out the rest of the walnut blank for the neck; I’ve chosen to do a fully solid neck rather than a scarf joint neck.

5 Likes

Another (short) night of Ukulele building tonight.

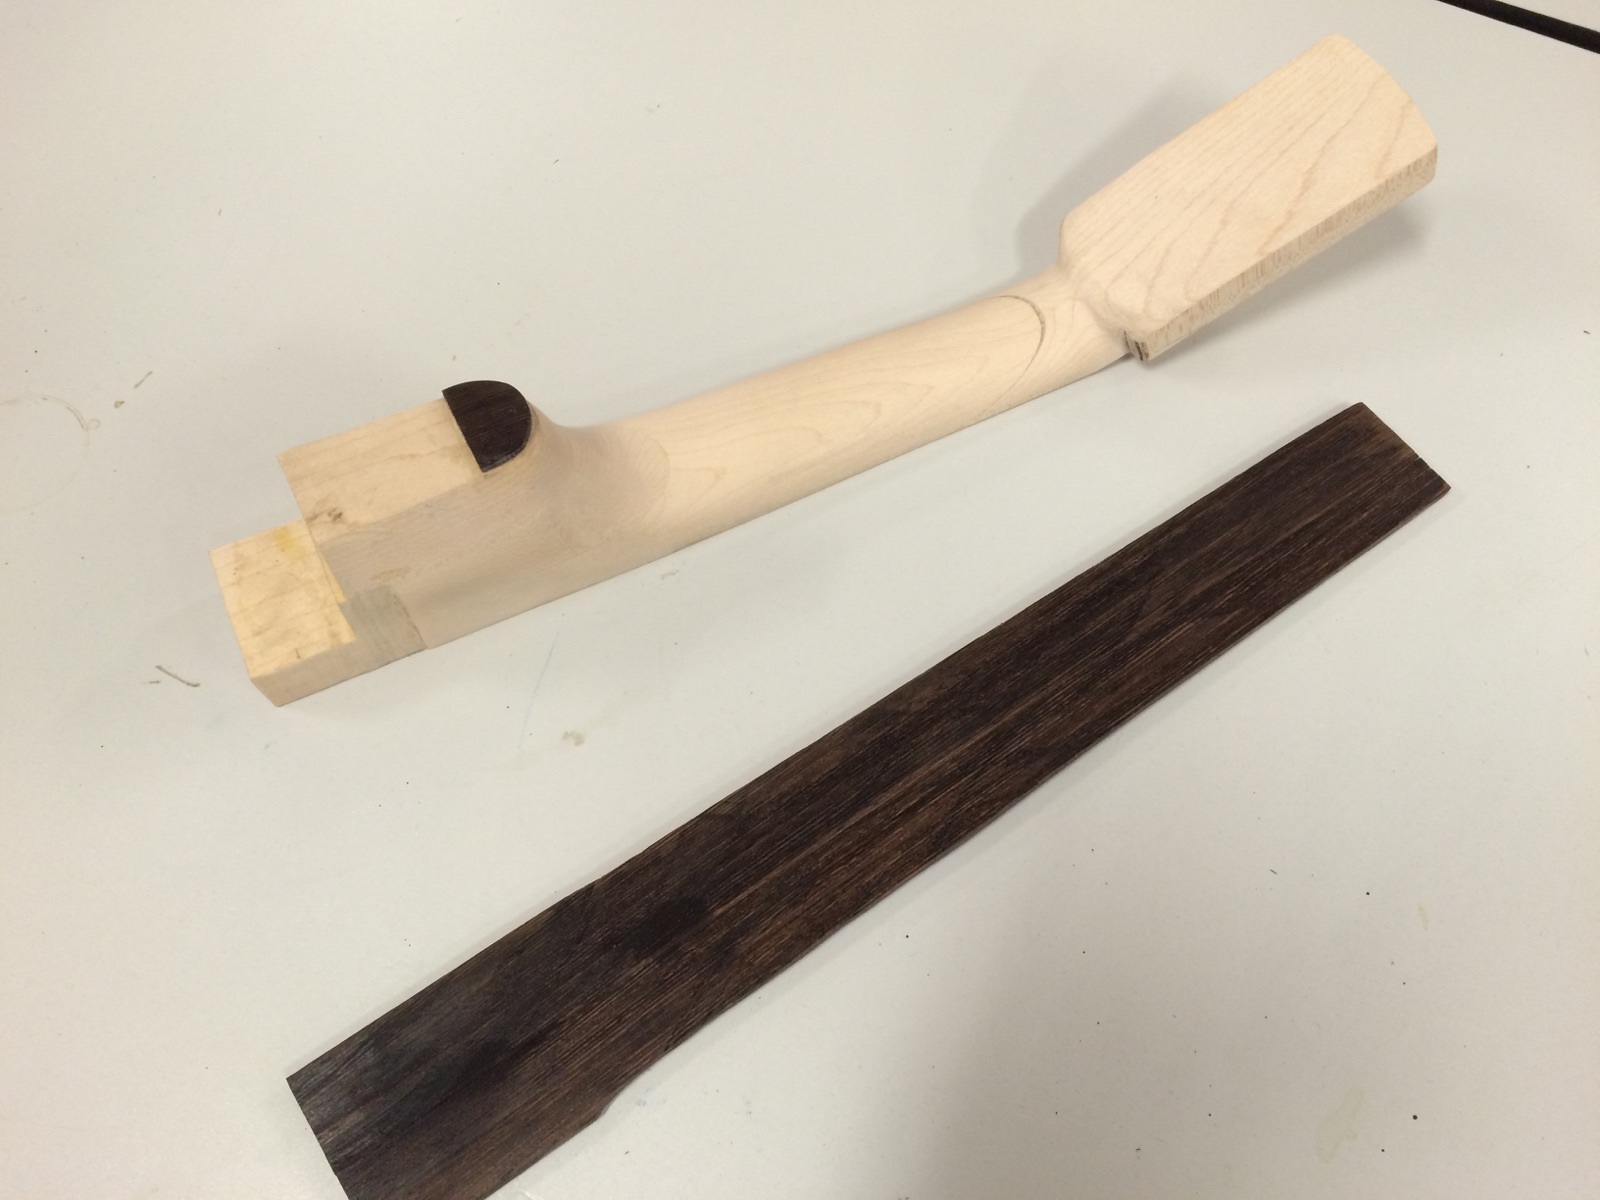
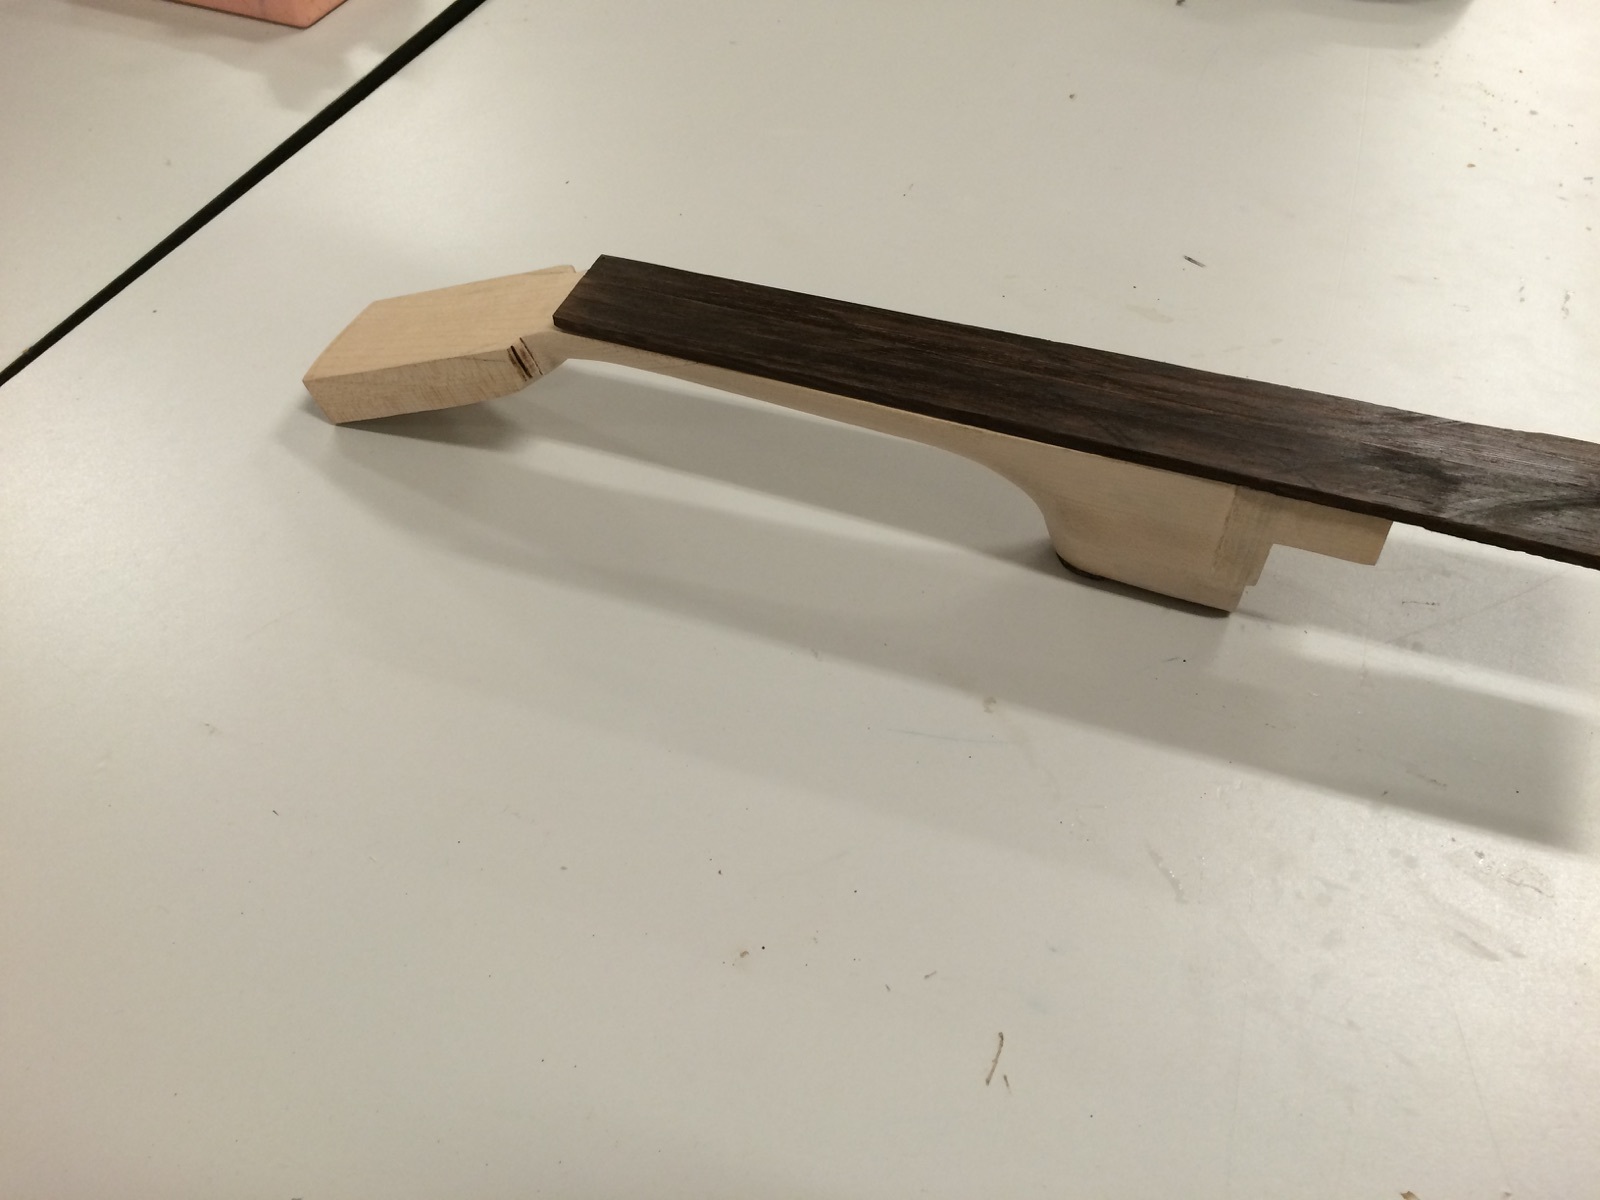
I picked up some woods for building my neck; but I wasn’t able to work on them tonight; I’ll have at that another day.

I also found a wire shelf being thrown away at my apartment; I grabbed one of the smaller ones right as the trash truck was pulling up. @TyIsI helped me bend one side to allow me to fit it into the ammo box, and with some wood spacers, we’ve now got a tray for wood steaming. This helps hold the wood, gives good access when we go to grab it (as it can slide out) and helps keep the wood in the hotter region of the steamer, allowing better efficiency.

I checked out my walnut side, after removing it from the form, and it turns out I put my good side on the inside. I’ll try sanding that one out; but there are some divots I made when trying to plane it down that I’m not proud of. If I can’t sand most of it out then I’ll probably end up having to cut another side.

I put my 2nd side in the steamer box and was about to start it up when one member complained that last time the steam made her ‘sick for days’. As a safety conscious person, I happily yielded to the request and offered not to steam that night. At which point, @TyIsI suggested I do my steaming in the loading dock. I set up everything there and had a successful steam. I don’t think I ever got the other member’s name, but I’m sorry that you feel I caused you harm.

While I disagree that the steam likely caused anyone to be sick, I recognize that I don’t know everything, there are too many unknowns, and that any safety concern should be met with the halting of the offending behavior. Removing my apparatus from the vicinity of the affected party seemed like a reasonable way to proceed.

If the safety committee still operates, I’d be happy to talk offline about how I can mitigate discomfort in the future, and what the ramifications of a steam bending night would be.

Here’s a pic of the new rack in the steamer:
http://imgur.com/9hY5rXG

( I actually ended up flipping the rack around before steaming it so the wood could sit even higher in the box ).

Hopefully I can start building the neck soon; I haven’t yet picked my soundboard (top piece of the body). Windsor plywood had nothing in-stock that would be suitable.

I’m looking forward to having something that at least starts looking like an instrument.

5 Likes

I got a chance to get a lot of work done tonight (and lots of pictures)… yay!

First, I checked on my bend from last night:
http://imgur.com/yOwleFs

I started opening it up piece by piece…
http://imgur.com/D8EautQ

It was my best bend yet! Glad they are getting better rather than the other way around…
http://imgur.com/XQtBW7z
http://imgur.com/knN189T

I measured everything and trued up the edges on the bandsaw. I got the clever idea to use the jig to keep it vertical (I clamped on the table saw surface, since that is the flattest surface we have, then moved to the bandsaw to shave off a little bit).
http://imgur.com/T8zm3jf

After trimming, I ran it across a sanding block to clean up the edge a bit more until when I put two together they had no visible gap:
http://imgur.com/a/pcAhq

I took a block of mahogany for the header block and brought it to shape on the band saw and sanding disc, then glued the three together:
http://imgur.com/EAT0R2z
(Now it is starting to look like an instrument shape…)

Meanwhile, while things dried, I worked on the neck (I lie, this is a bit out of order, since I actually did this part first due to drying times, but it narrates better this way):
I cut an angled cut and glued it backward for the head of the neck:
http://imgur.com/C0FqCov

(the angle I tried to cut was way different than what I cut, but the exact angle is mostly aesthetic, so I’m going to live with it, as long as it has an angle I think I’ll avoid nut buzz).

I glued together blocked for the base of the neck:
http://imgur.com/7d2oeeO

and then glued it all together:
http://imgur.com/yKGbZx2

Everything is pretty rough at this point, but I’ll be taking a lot of material away over the next steps…
http://imgur.com/pBh6ASd

http://imgur.com/PJjGKfD

The biggest problem tonight (that I know of) was my attempt at a 15 degree cut for the neck. It ended up closer to 25 degrees, but it doesn’t look too bad so I’m going to go with it. Also, I’d love to figure out a way to sand at exactly 90 degrees; ideally on a power sander. I think there was a bit too much rounding on the neck joint, so there’s a bit of filled area with glue/sawdust. Luckily, I think most of that will be covered by the fretboard.

Things are starting to get exciting!!!

8 Likes

Just 20 min or so of work today. Got on the bandsaw and roughed out the shape of my maple neck.

I left the bottom joint alone as that is measurement-sensitive and my drawing for the tenon is approximate.

http://imgur.com/42WRqpk

Time for wood rasps to rough out the 3d shape and the head. I haven’t committed to a head shape yet, even considering doing a horizontally laminated head, but that might be overdoing it.

3 Likes

When I got home, I was able to put more into the neck.

Here’s a roughing out of the shape, still plenty to do, and the heel is still under heavy shaping right now; had to stop half-way through one process so one side of the heel looks bigger than the other.

Here’s a progression through the night; wish I had done a timelapse.

http://imgur.com/3x3u7ru

http://imgur.com/ttWDP3O

http://imgur.com/kHp97Cm

edit Humm, looks like the images are getting cropped, click to view.

edit2 That “crack” is just the scarf joint when I glued the head back on diagonally. I’ll need to fill the opening with glue and sawdust.

7 Likes

Sanding:

The 90% of project time that youtube videos don’t show you.

3 Likes

More sanding, shaping, filling, sanding shaping… the photo progression isn’t exciting but the feel of it is.

I cut my wenge wood heel cap and fretboard, and glued my heel cap. More sanding truing, etc to go. (Fretboard is not attached in 2nd photo, just placed for rough look).

Gotta love that grain though.

4 Likes

I know it doesn’t seem like I’ve done much; but I did a lot of with a handfile, and various grit sandpaper.

I think I’ve finally come up with a neck shape I’m happy with. Now to work on the head shape; I think the heel cap is turning out great (yes, the back of it is angled a bit due to gluing slip, but that’ll but cut off before final assembly).

In retrospect, I would have made far more angled cuts before beginning with the file and moved the scarf joint further toward the head of the neck.

6 Likes

So I continue to shape and sand, the neck is just about the feel that I want. No use in posting a pic because its basically the same visually as the last state.

More interestingly; I’ve decided that I need to build yet another tool to complete this project ( I really didn’t but it will certainly make it easier, especially if I make more than one ).

A thickness sander is similar thickness planer, but instead of spinning blades, you have a spinning sanding spindle. This will be useful for getting various pieces down to very small thicknesses, such as the top and bottom, and my fretboard.

So this post details the work I’ve done so far on the thickness sander.

I bought a sheet of MDF, the thickest I could find, which was 3/4"
I lasercut some scrap baltic birch for some templates and then cut out a bunch of circles, first roughing them out with a jig saw then cleaning them up on the bandsaw, though they were intentionally left pretty rough.

Then I took a forstner bit and marked the center from the center punchout of the template (forstner bits have a little peak in the center to guide them). I used that mark to drill a pilot hole in each then used the same forstner bit to drill out a circle that matched the thickness of a metal shaft I’m using.

(Those are actually some of the nicer ones)

I glued sections of 5 together around the shaft. Being sure to move the shaft during drying in case leakage toward the center. I had a few close calls where I was only able to get it out with a mallet, but the dried came off easily with some high grit sandpaper.

After I had a group of 5, 5, and 6, I put them on the shaft and glued them together. They kinda remind me of shawarma…

While that dried, I cut some oak blocks and screwed two together. I took the 3/4" forstner bit (yes, that one bit is getting a lot of play on this project) and drilled sideways so that the hole was half on each block. I did that twice for two wooden bearings. I mounted them on a couple blocks of wood screwed to a board.

I took the whole thing at a 45 degree angle onto the belt sander and sanded down most of the irregularities.

After finding some pillow blocks and mounting them temporarily, I called it a night.

Next I’ll need to build the table for this to mount to and figure out the drive mechanics.

5 Likes

Last night I bought a bunch of wood for the thickness sander structure and started chopping it up to workable dimensions. I decided to do sunken butt joints so I had slightly more stability, but those take longer to make.

I only got one corner done last night, but mostlly figured out my tool chain for the remaining work on Saturday.

I also did a quick mockup in Fusion360 of my plans so far; i haven’t gotten all the plans into Fusion yet (they are written on paper old-fashioned) but here’s my Fusion render:

3 Likes

Yesterday I had a large amount of time to spend at the hack space, I feel like I got a lot done.

I finished each side and began attaching each side together. I placed the motor on the motor shelf for a dry fit.

Here it is with the sanding drum on top; final location not 100% worked out. I put oak rails at the top for mounting and for impact resistance.

I scored a couple circles and then cut them out of MDF for the upper belt pulley.

I glued the two pulley discs together and cut out an adjustment knob out of maple. The knob only has two wings; when really I’d like a 3 or 4 wing adjustment knob. Not a super big deal so I’ll replace later if it bothers me. I sanded the knob on the belt sander to shape it a bit, chiseled out the hole in the center to fit a nut and pressed a nut using the vice. No glue needed; all pressure-fit.

Here it is all together at the end of the night, you can see the knob with the threaded rod on the stationary table.

What is left to make this minimally functional is to attach the hinged table and adjustment mechanism., wire up the motor, lathe out the upper pulley, attach the upper pulley, final-sand the drum (using the hinged table) lacquer the drum, and then attach the velcro+sandpaper.

Once those are done, it should be functional, but the final touches will include:

  • Adding dust collection hood and potentially including a top-sander cut-out for added benefit.
  • Adding a belt cover (for added safety)
  • Adding side lockdowns (for added stability)
  • Adding “On” indicator light (I don’t expect this thing to be super quiet when on, but its always nice to have more than just sound and vibration as an indication that something is on.
  • Add rubber feet for reduced vibration transfer and better stick.
  • (Longer goal) add feed belt for automatic feeding.

Any suggestions as I’m getting close to minimally functional?
Also, what power switch should I use for the motor? The motor is a 1/2hp motor. (Do we have a power-tool style switch somewhere unused?)

Anything I’ve done wrong and should fix?

2 Likes

Forgot the last pic:

1 Like

…and just when I thought my order was lost in Canada Post, my velcro conversion kit and my sandpaper roll arrived!

Yay!

1 Like

I had a couple short nights where I did some various work, got hinges installed, bored a hole in the future pulley, cleaned up some edges, etc.

The bigger items are, I cut and glued the top table, seen here:

And then I mounted the table on hinges, as seen here:

That photo is actually from the back of the table and the table has been risen to almost meet the drum. There is a screw knob for adjustment, but after playing with it I’ll need to devise a better system for holding the end of the threaded rod on the under-side of the table. Currently I glued a piece of metal, I think I’ll need to make a hinged assembly.

To get this minimally functional, the motor needs to be mounted and wired, the pulley needs to be keyed, set, and lathed, the drum needs to be smoothed, sealed, and wrapped with velcro.

At that point, I’ll design a dust hood add various nice items and paint it. I’d like to use some of the volume under the table to store the sandpaper roll so that they are never separated.

This is getting exciting!!!

4 Likes

Just wanted to give a shout-out to @lukecyca or help wiring up the motor. No pics for today but Luke wired up the motor to the E-Stop/Start switch; this week I’ll mount the switch, motor, and start working on drivetrain.

Thanks Luke!

3 Likes