Hi Everyone,
I recently jumped into laser cutting and had some success with etching images onto a board by making multiple passes to progressively darken the surface in areas where the image should be darker.
This is different take than @miststlkr 's tutorial (Laser etching a full color image) which dithers the image. Here, we’re just flattening the picture down into three colors: white, grey and black.
The Result:
Preparing The Image Steps:
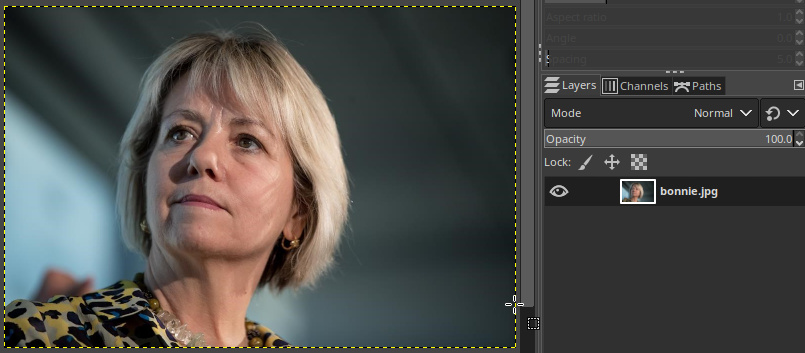
- Get the picture that you want and open it up in GIMP.
- Clean up the picture.
- Background should be very light/white.
- The subject should be outlined with a dark edge. If the image doesn’t offer this naturally, you can add one in.
- Flatten the image when you’re done.
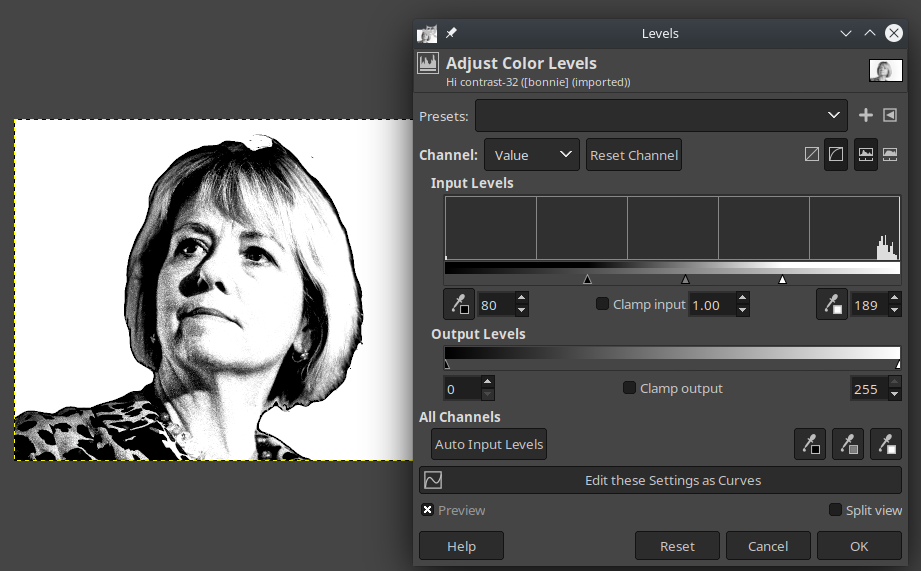
- Desaturate the image using the “Color to Grey” feature. With the layer you have prepared, select “Colors > Desaturate > Color to Gray…”. Accept the default options.
- Now, play around with the Levels to optimise the dynamic range of the image. Basically, all the dark colors should be assumed to just be black, all lighter colors are assumed to be white, and all the various grey shades get more room in the 0-255 range to show off the nuanced differences.
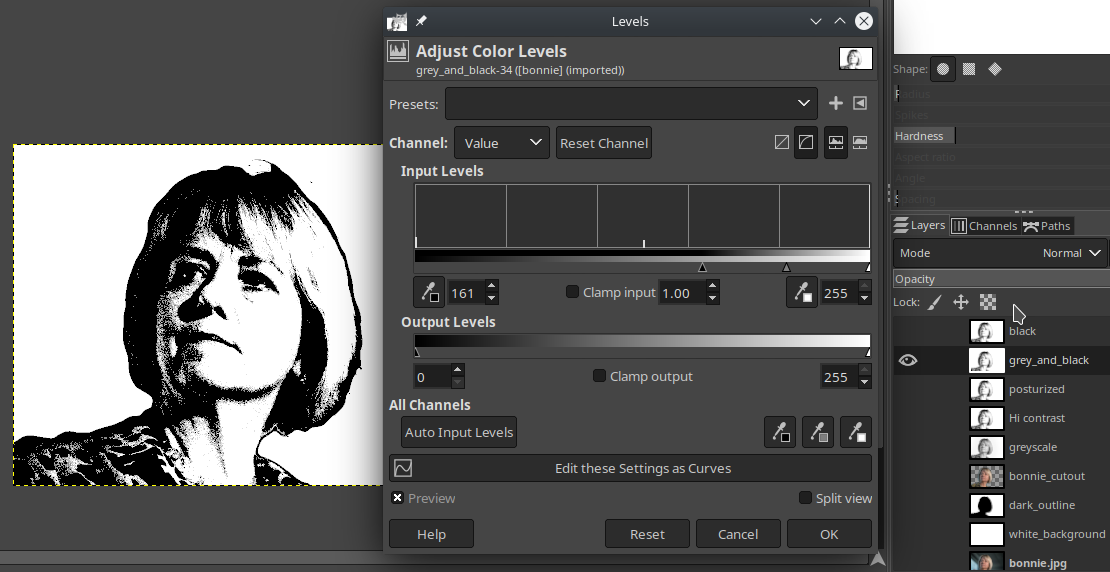
- Click “Colors > Levels…”
- Move the ‘input level’ sliders toward the centre, and pick a setting that makes the image look good while keeping the black and white sliders as close together as possible.
- Click ‘OK’ to apply the changes.
- Posturize the Image. Click “Colors > Posturize” and reduce the image down to three shades.
- If you did the levels step correctly, this step will not change how the image looks much. But now there’s exactly three colors in the image.
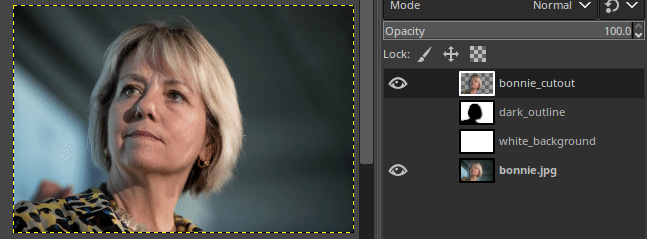
- Duplicate the posturized layer. Call one copy “grey_and_black”. Call the other “black”.
- For the “grey_and_black” layer, open the Levels editor again and move the sliders so that both the grey and black colors get mapped to black.
- For the “black” layer, open the Levels editor and move the sliders so that grey gets mapped to white instead.
- Export the ‘black’ and ‘grey_and_black’ layers as separate PNG images.

Burning The Image Steps:
TBD, once I get back to the shop and take screenshots, but the steps essentially are:
- Open the ‘black.PNG’ and set it to an engrave layer (let’s say… red).
- Open the ‘grey_and_black.PNG’ and set it to an engrave layer (blue).
- For burning, I’m using my cheap 5mm birch plywood that burns really easily and requires really low power settings.
- The Grey + Black layer is engraved at a power setting of 8.5%, with a speed of 300mm/s.
- The Black layer is engraved at 10% @ 300mm/s.
- Remember - The black layer will continue to darken the surface that was pre-darkened in the previous layer.
- Any non-image etching (e.g. text) is engraved at 12% power.
- Cut out the board at 50%/53% power @ 25 mm/s. Required 3 passes.
- Sand off the board to remove excess soot and wipe down with a damp cloth + dry.

I’m going to keep fiddling with the settings but I’ve gotten a couple good results so far. Let me know if this is helpful!