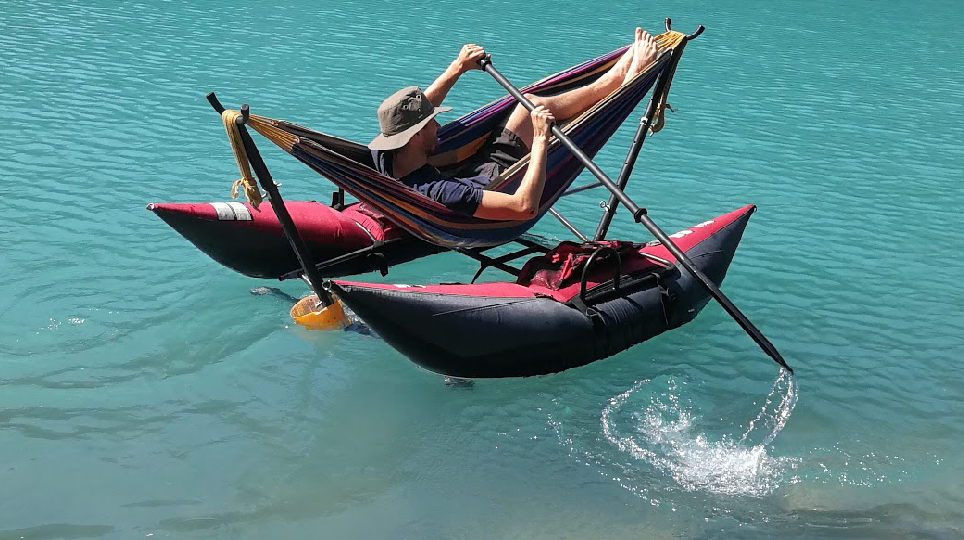
Moneyshot:
When we last looked at this project, I had taken out my hammockboat on literally the last decent day of the year, with a laundry list of changes to turn this into a slightly more reasonable project. Okay, not reasonable, but less liable to murder me.
Since then, some stuff came up. Nothing major, just the usual - fire, deadlines, global disasters - but this year is now the year. One advantage of the long delay has been that I had time to put a lot of thought into the next moves before I actually moved.

For this leg of the journey, I had two goals:
- Replace the long boat-hammock connecting tubes (the old ones went missing - don’t ask)
- Lower the mounting point of the hammock components to increase stability
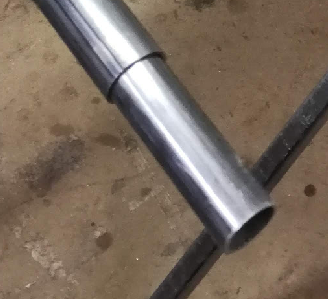
A quick trip to Metal Supermarkets for about 12 feet of 0.875x0.065 inch steel tube and 4 feet of 1x0.065 inch tube, and we’re off to the races. And also then about ten feet of extremely expensive half inch boxtube from Home Depot because I planned that out poorly.
For the long section, I think aluminum would have worked fine. The lightness would have been nice, but it was way more expensive. Same reason for steel instead of stainless steel. That is definitely going to bite me down the line.
First steps:
Cut the larger tube into four equal pieces. Attach some sandpaper to a stick, shove it into a drill, and then sand the inner diameter of the large tubes until they snugly fit over the small tube. Once again, throwing money at this problem could have solved it, as you can buy tube without a massive seam line on the inside.


Next:
1” holesaw the square tube so that it matches the 1 inch tube diameter.
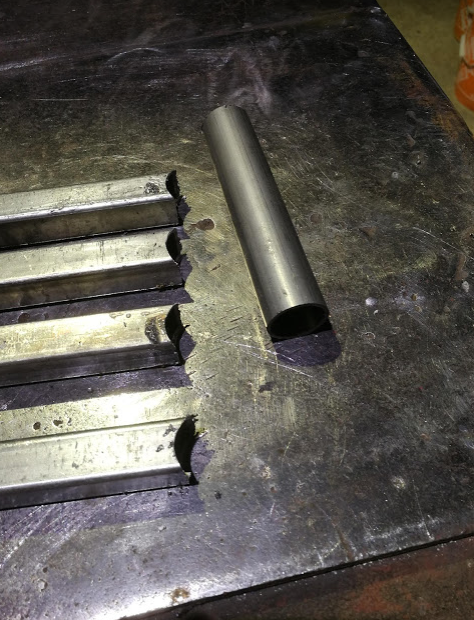
Hot glue them together
Perfect.
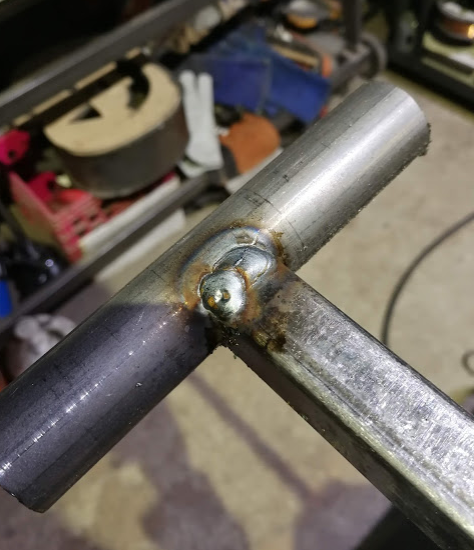
That was actually way less fuss than I expected.
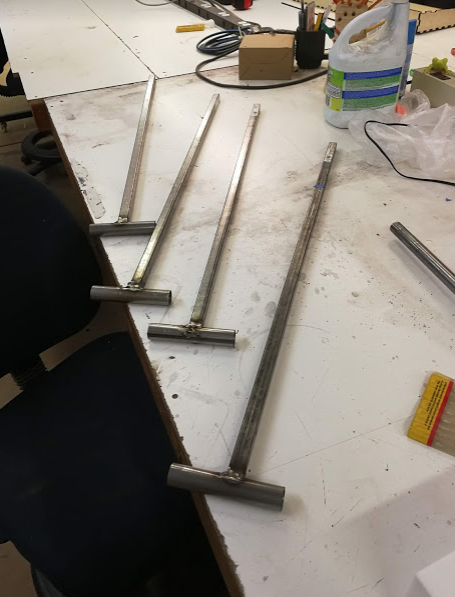
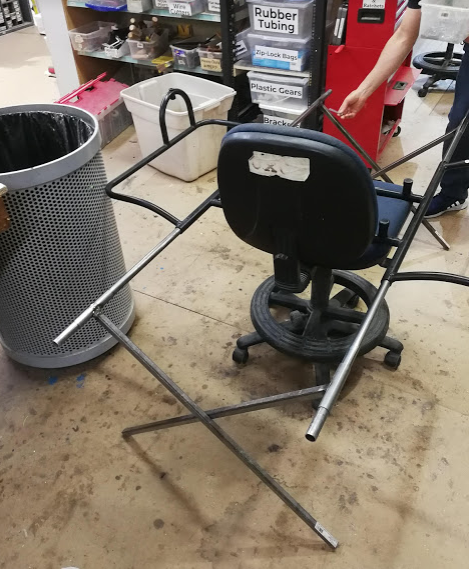
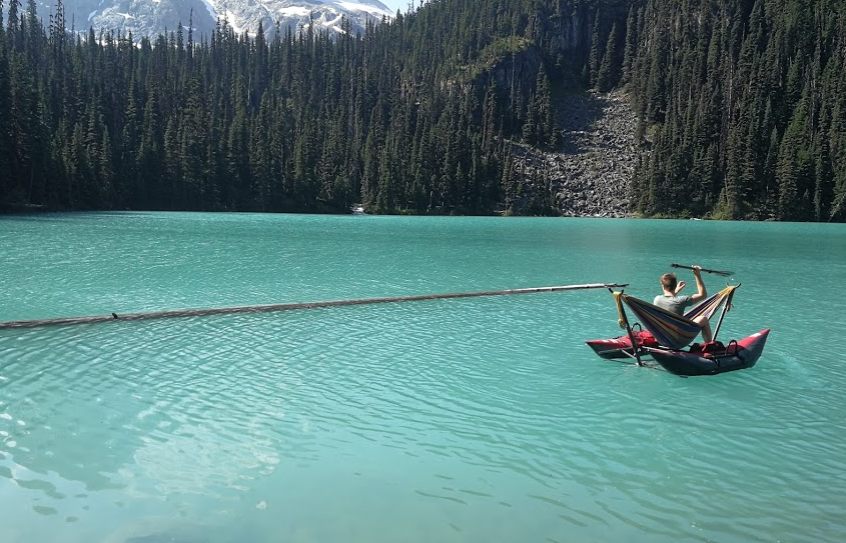
Okay, the structure of the system is:
Boat frame (black, on the chair) gets the long tubes going through them, which then connect to the large diameter tube and boxtube.
The two boxtube pieces per side will be connected together in the middle to form a hinge.
The bottom of the boxtube gets attached to the side supports of the hammock frame, the black bits right at the bottom of the above image.
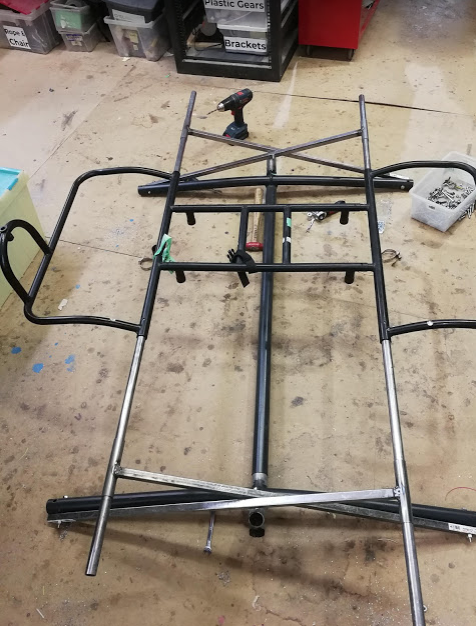
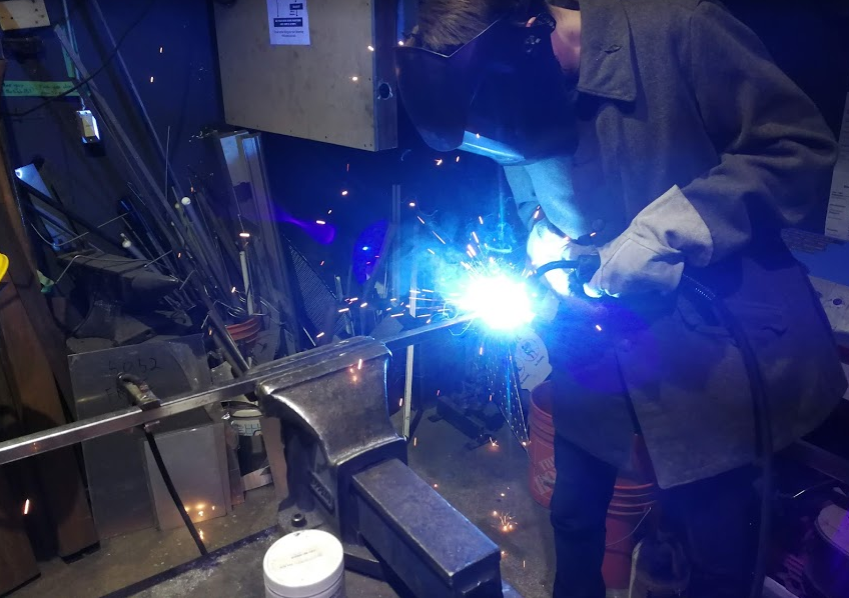
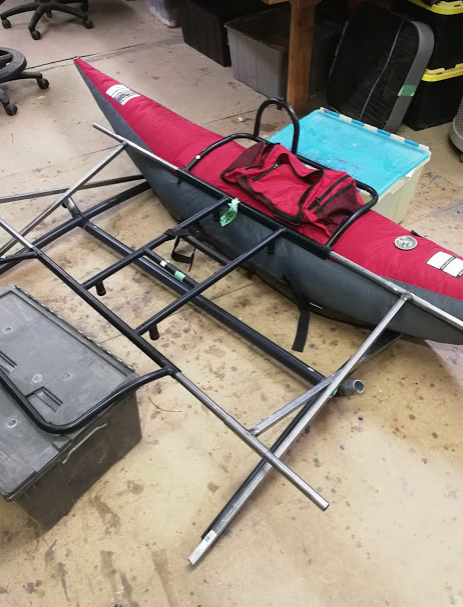
And all done. It is incredibly sturdy, and came together in only two afternoons, I was very surprised.
So we took it on the water.
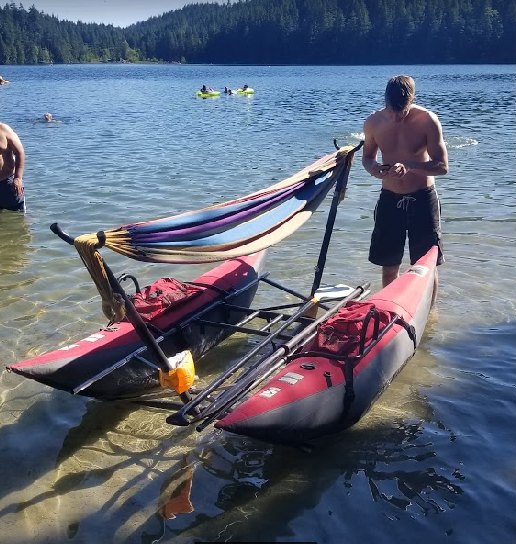
This was just a shakedown run to figure out how well the system worked.
Result:
It was okay! Still a little tippy, but it didn’t dump us. Credit to @Lukeo for helping out. It is very much a two person job. Both the transportation/assembly and making sure I don’t die in the water.
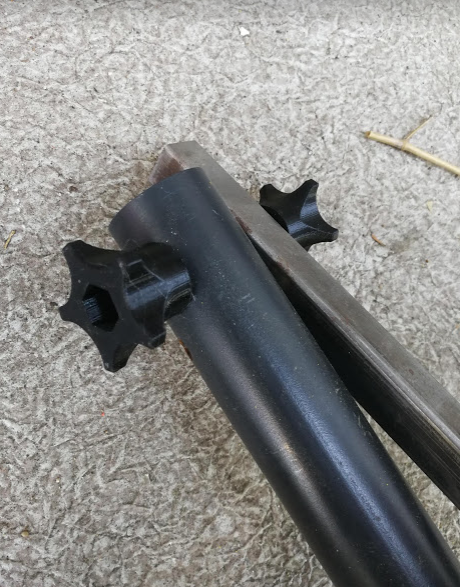
The one quick/easy fix I did afterwards was to 3D print some grips for the bolts so that they can be assembled in the field without tools.
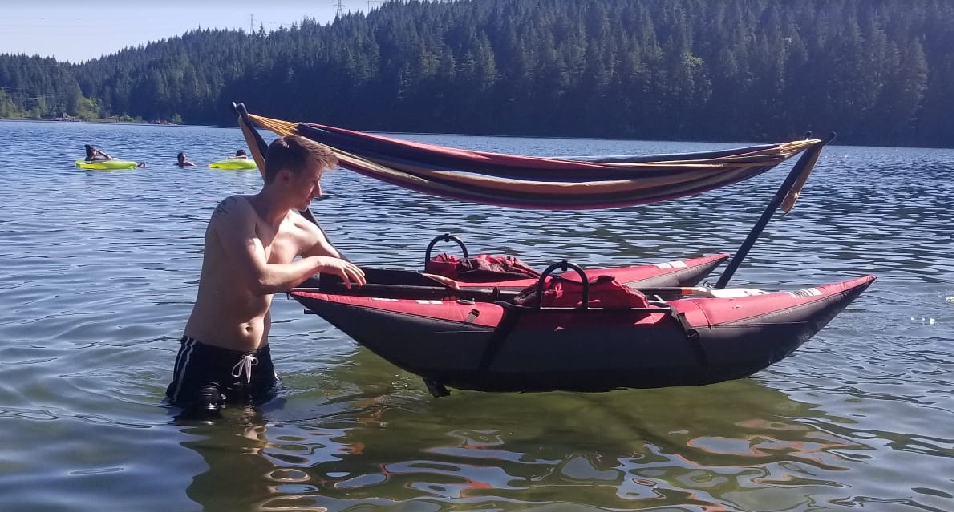
Now for the real fun.
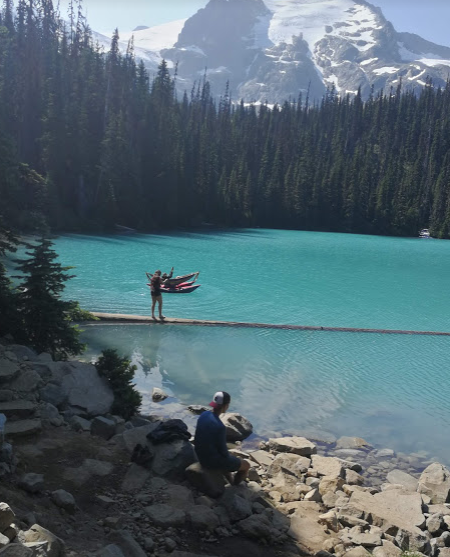
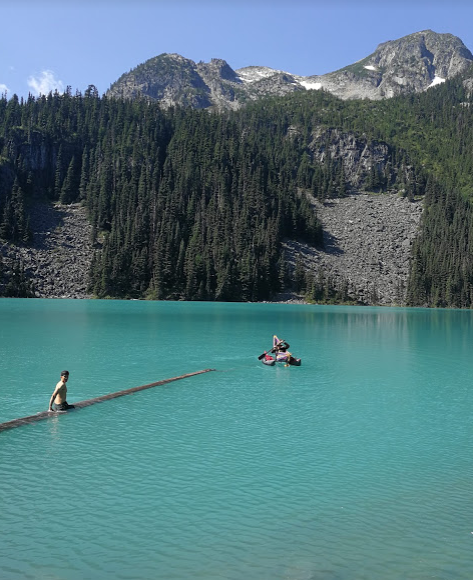
There’s a park out by Pemberton called Joffre Lakes. On one of the three lakes, there’s a log that goes out into the glacial lake. It’s very picturesque, you’ve probably seen it on social media.

It’s a little bit cliche!
So of course I had to do yoga there as well.
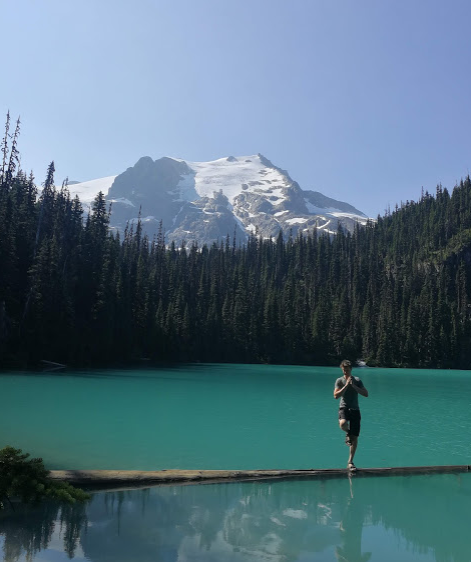
@Rob_MacKenzie and I hiked up there. It was very heavy and it took about an hour. And then we got to work.
People literally line up to get that social media picture.
But for some reason…
That day…
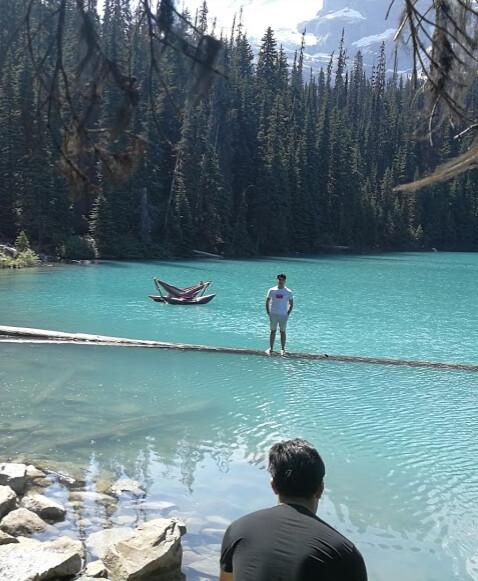
No one could get their shot…
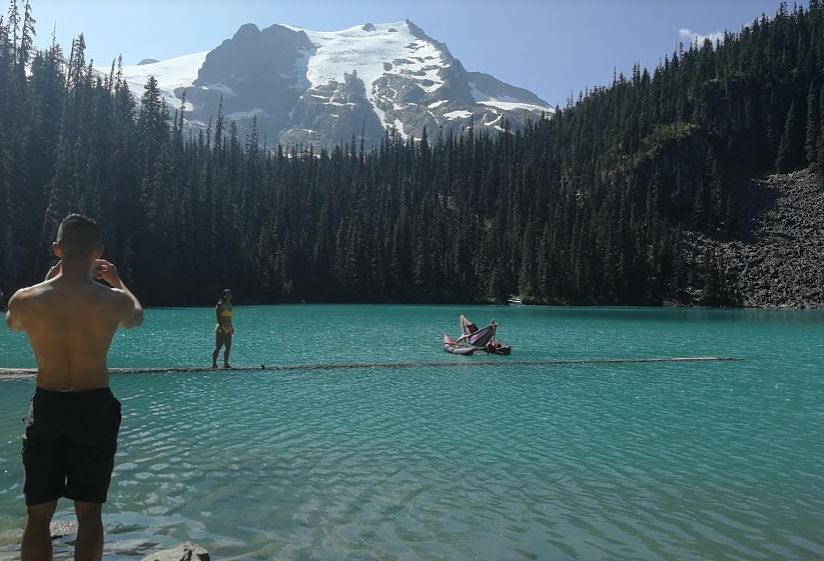
For the better part of the day.
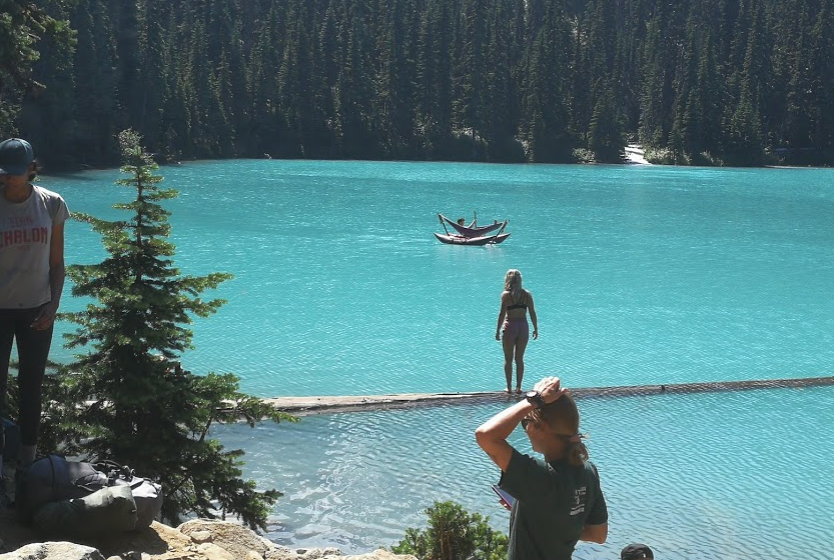
Somehow, it was pretty relaxing.
Cool.
Second test done.
Next steps:
- Add lightness. The long tubes are longer than necessary. Shave ‘em down.
- Remove the friction fit between the large and small tube. Split the large tubes and add a clamping mechanism. This allows them to be assembled faster and removes the brute force assembly strategy, as well as increasing safety with the above step.
- Lock the bolts into the 3D printed thumbscrew heads better. Easy.
- Better packing and pumping strategy.
- Fins to improve paddling forward. Less side-to-side. Method still very much TBD.
- Covers for the tube ends to be less stabby.
Learn to swim better?