I have a decent power supply but it is only capable of 0 to 30V and 0 to 3A… The range of voltage is fine but I find as I do larger projects with LEDs the 3A limit is not enough… I wanted something larger…
Problem is that I am cheap… And larger power supplies are pricey…
Found this on AliExpress:
(Was a bit cheaper during the 11.11 non-sale)
Also sprung for a 36V 10A power from here (pretty much the cheapest I could find:
Both items showed up recently so I quickly cobbled it together and found that the module seems pretty decent and the LCD display is quite nice to use.
But I wondered if it could really handle the 32V 12A output it advertised…
So I tried to find some sort of load that would run it to the max. I remembered that I had some old hot water tank elements kicking around and went looking for them in the garage. No luck…
Had a small space heater so I took it apart to see what the heater elements weer like. Once I measured the resistance I determined they would not present enough of a load.
Actually did some math and figured I needed around a 3 Ohm resistor that could handle 384 Watts. Not something I had kicking around…
Was at the Space tonight so went searching for power resistors and to my amazement actually found a 3 Ohm 100 Watt power resistor. Could not contain myself so I rushed home and set it all up. Discovered that the resistor started heating up to much to even touch at 20 watts…
So that wasn’t gonna work…
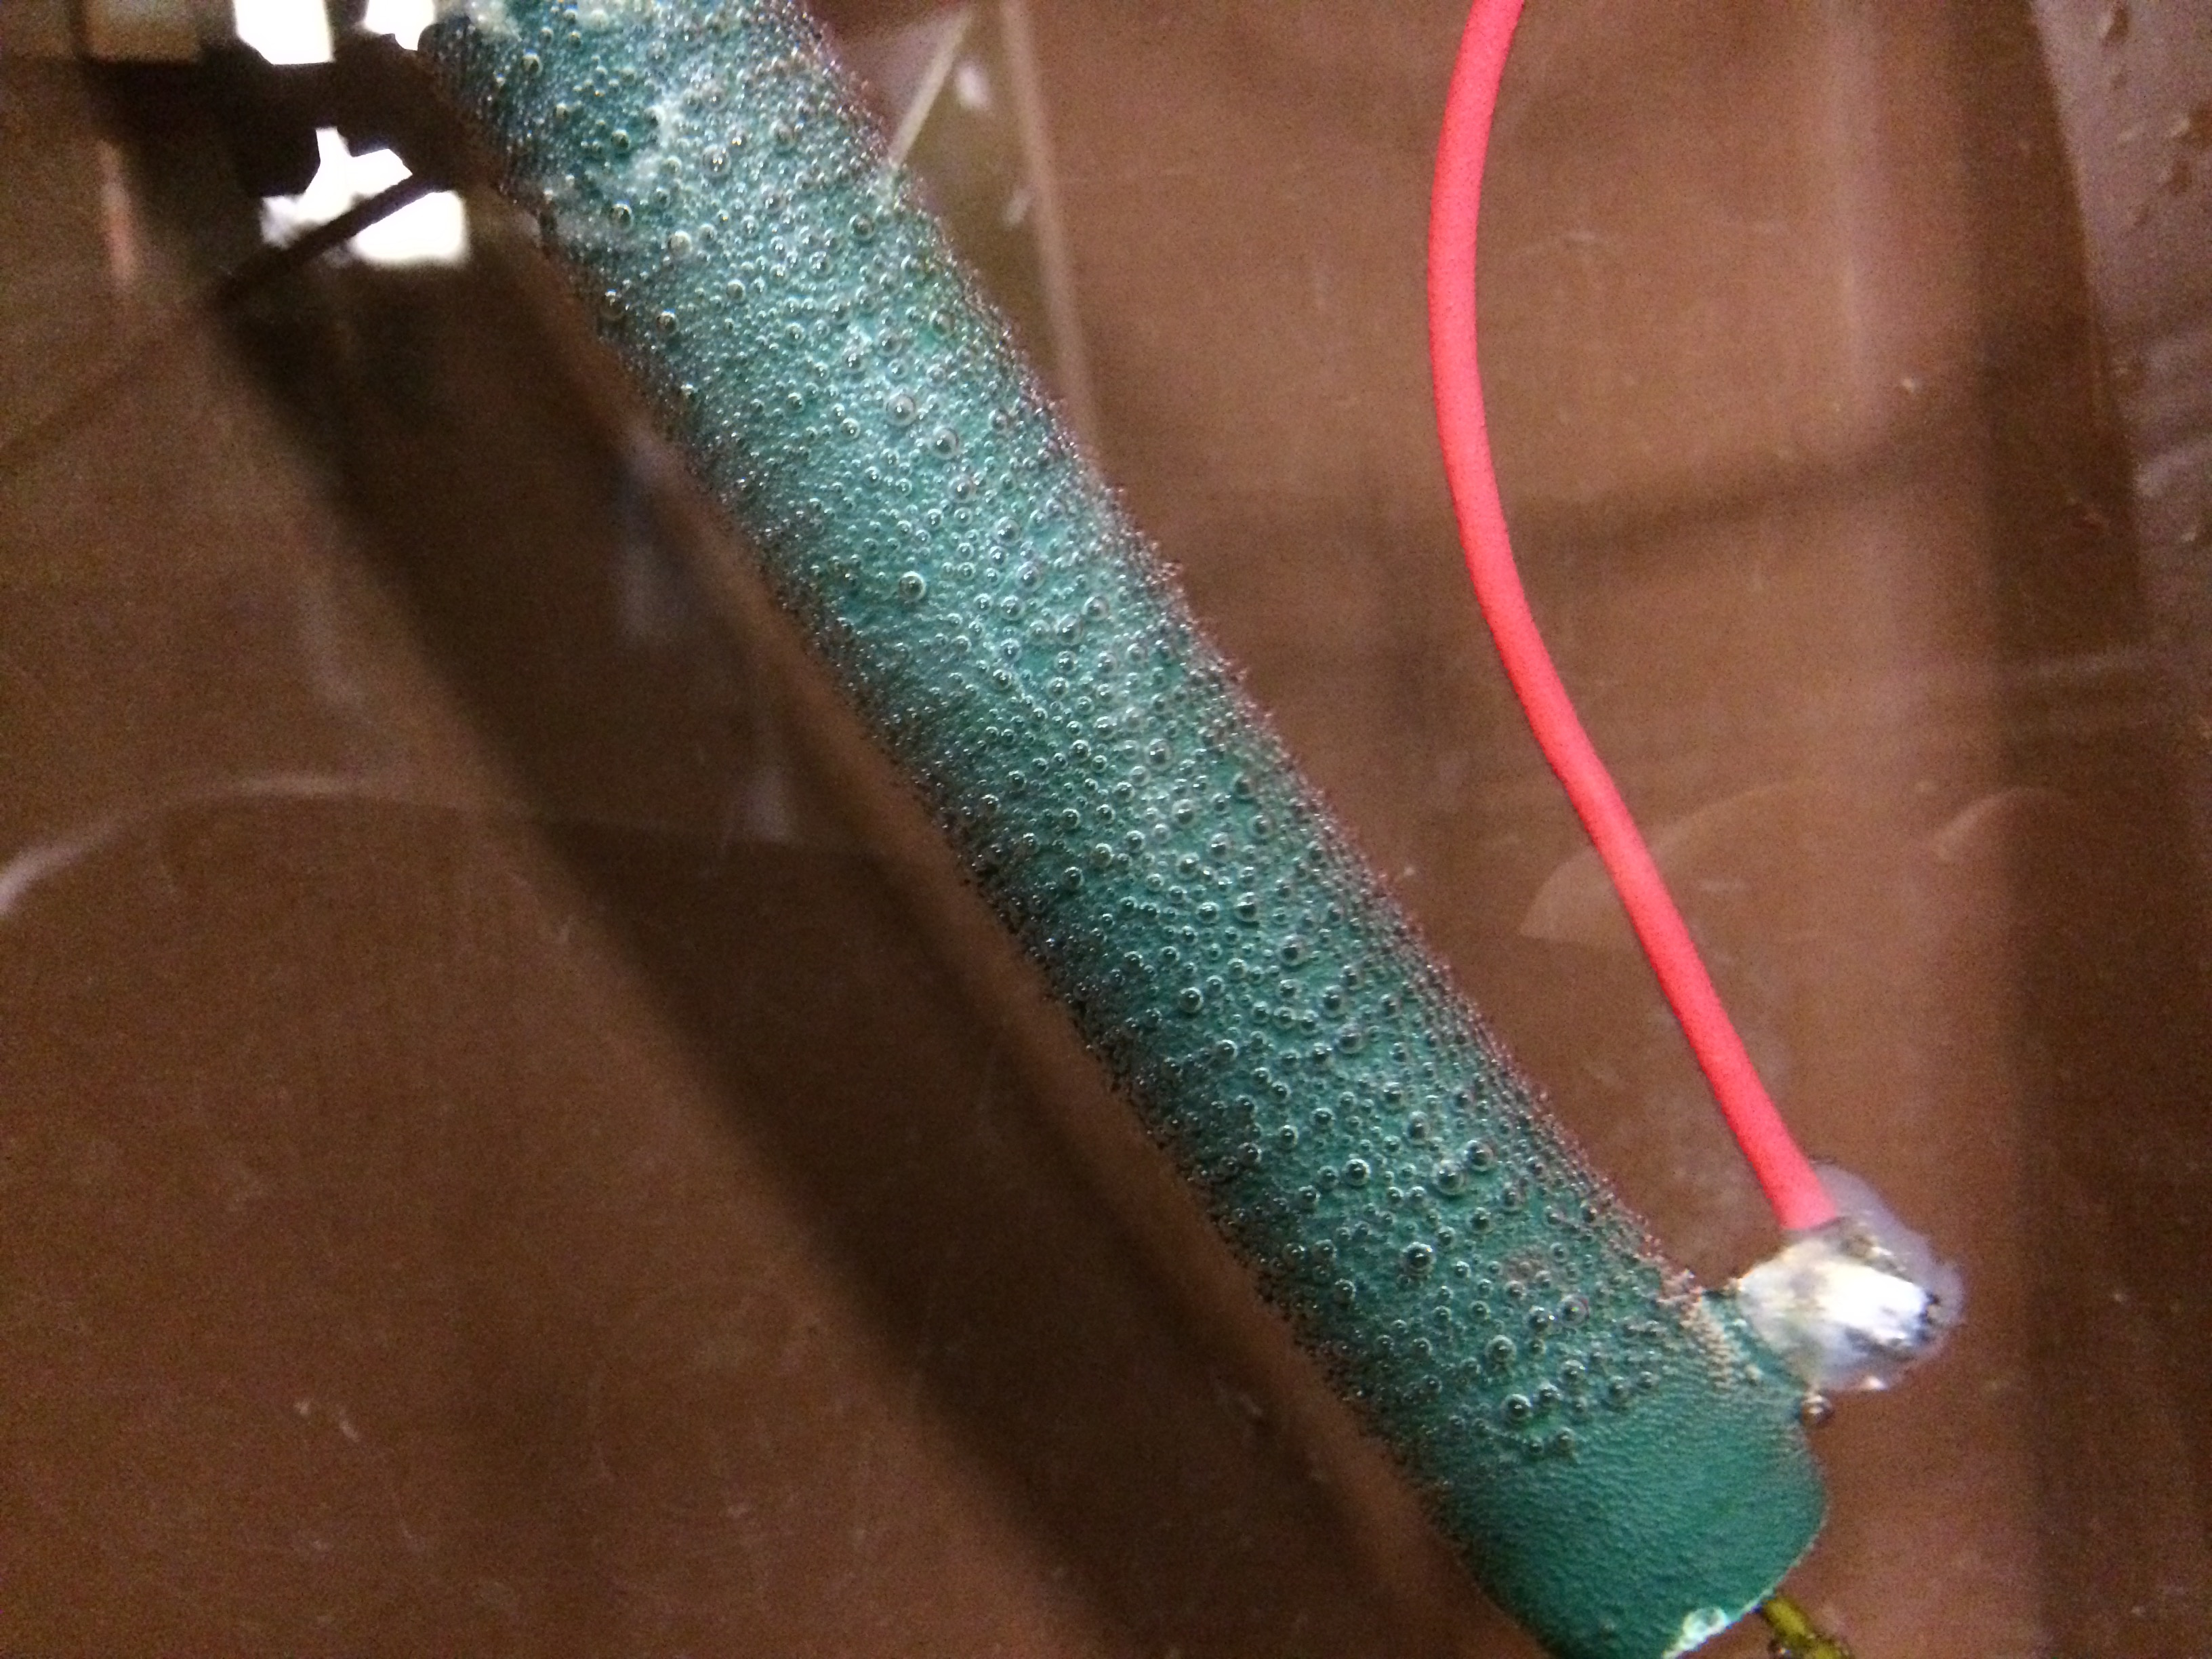
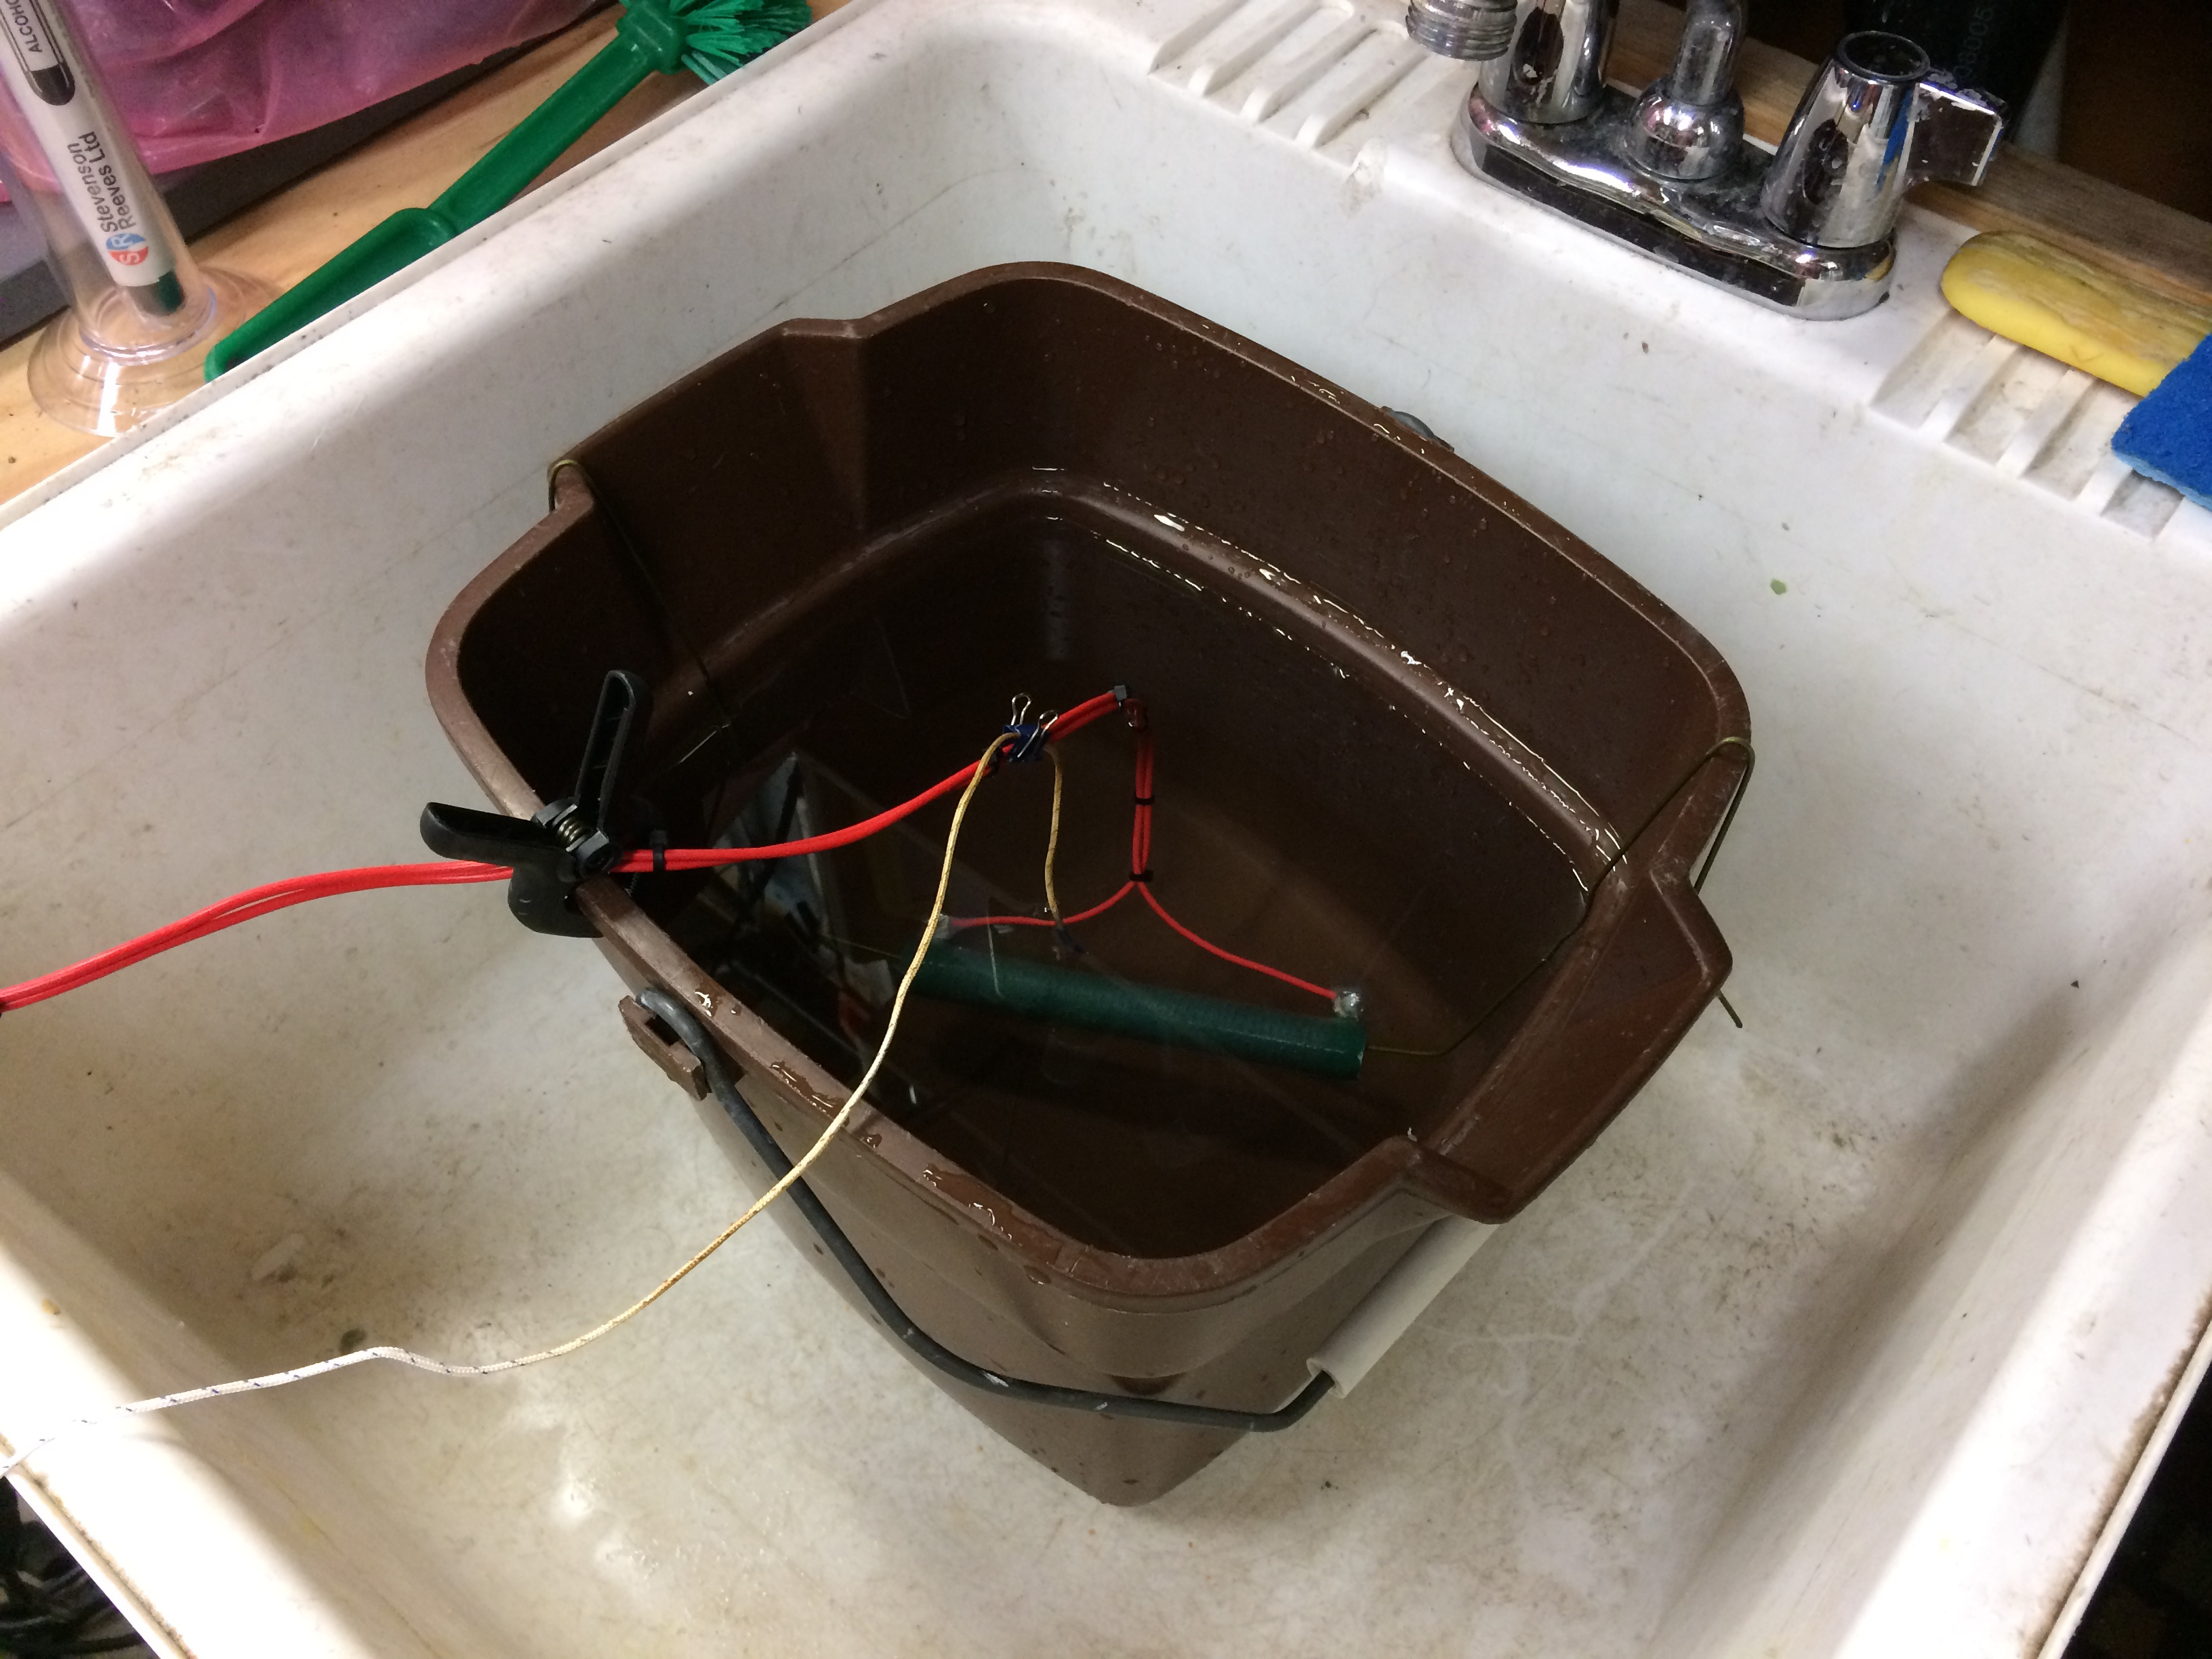
So I decided to try water cooling it. I soldered on some longish wires the the resistor terminals and gave the terminals a coat of silicone sealant (to prevent exposed wired causing potential electrolysis of the water. I used a bent length of coat hanger wire to suspend the resister near the bottom of a plastic bucket. I filled the bucket with about 2 gallons of room temperature water. Didn’t want to make the water too cold as I was worried about thermal shock cracking the enamel power resistor…
Also stuck in a temp sensor so I could watch the water temp…
Anyways i fired it up and used the constant current function of the power supply module to slowing bring up the load to the max current…
I was really able to bring it up to about 328 Watts (32V @ 10.25A) and ran that for a good 30 minutes. Both the power supply and the control module got warm but each has a fan and they seemed to keep them cool enough.
The bucket of water went from 20C to over 40C in the 30 minutes I spent testing…
Test Setup:

Load Setup:
AC Power Being Used:

So far it looks pretty decent so I will figure a way to mount it into a box for my bench…
Notes:
I can’t comment on the quality of the power but plan to test again using a scope to see what the ripple is like. You would probably be better of with a appropriate big ass transformer/rectifier/filter cap than the cheap switching power supply I used… But the switcher is cheap and smallish…
The switcher power supply I used has a very noisy fan that seemed to be rubbing on something on occasion so I will try to replace with better fan…
The fan on the control module seems fine but it may be wise to find a better one for that also.
Water cooling the power resistor allowed me to run it nearly 4X it’s rated capacity so that was handy. You could see the bubbles forming around it so I know it was hot… When I test again I’ll attach a thermocouple to the resistor to see how hot it actually gets…
Anyways this seems like a cheap way to get a high capacity power supply…
YMMV…