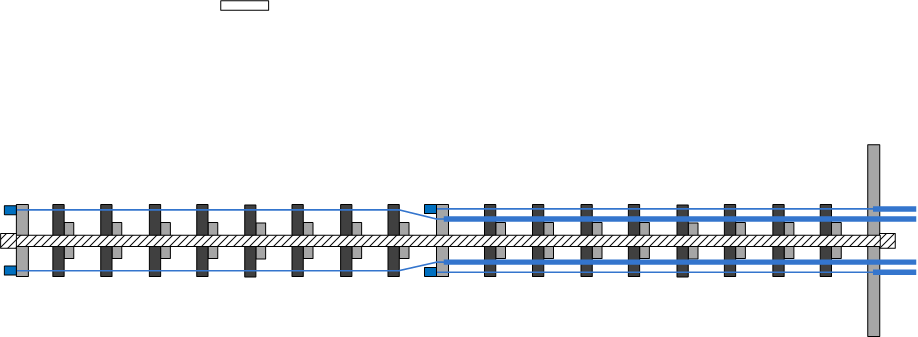
So here is my initial plan for the tentacle…
The black parts are Delrin disks
The grey parts are aluminum
The blue bits are the control cables and housings (only showing half)…
The larger aluminum plate on the right end will be for mounting it to something…
The eye housing will mount on the left end…
The tentacle will be two stage, each sections has four control cables…
But the opposing cables work as push/pull so I just need 4 mechanisms to control all 8 cables…
I think…
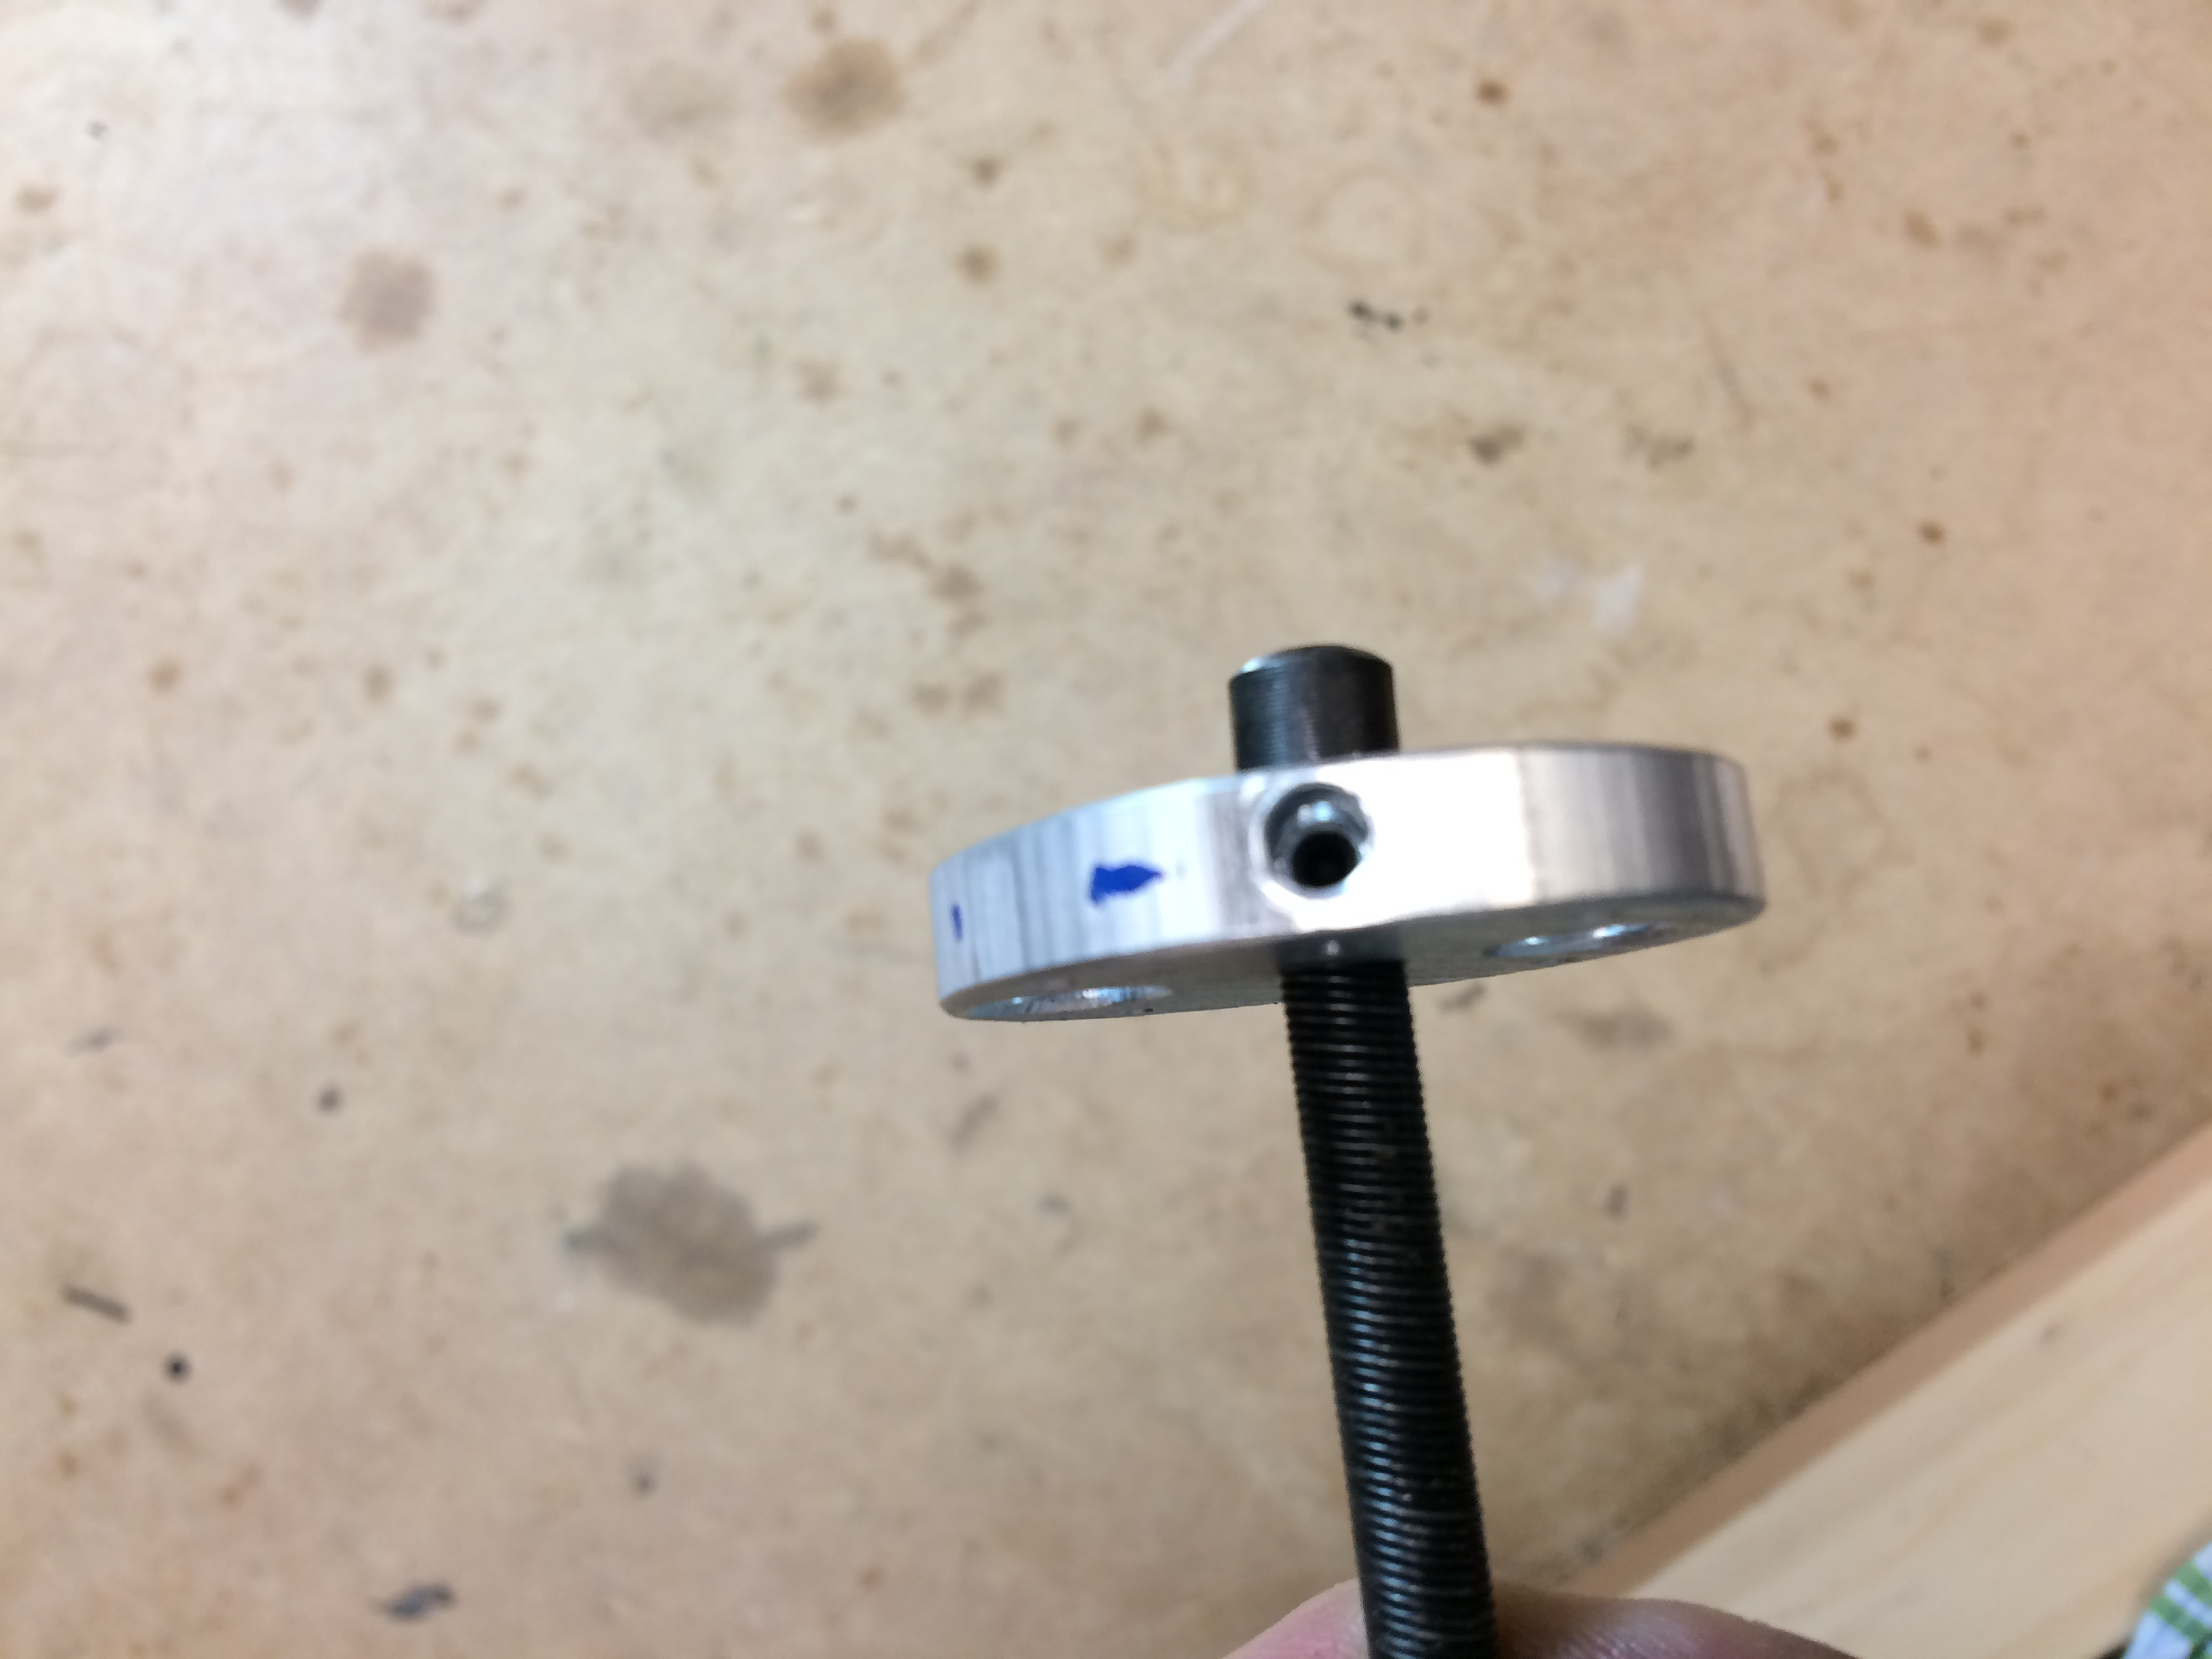
I found some scrap aluminum 1.5" rod stock but I needed to cut it down to 1/4" thick disks…
Was planning to use the power hack saw at the space…
However somehow I ended up at Metal Supermarkets out in Burnaby
Figured I’d see if they could cut me some…
They have a nice automatic saw that moves the stock and cuts the exact length repeatably…
They only charged me for the cuts and gave me the aluminum for free.
I have spent some time trying to figure out a way to power the tentacles. Any of the larger size ones (from movie special effects) that I have found are all manually powered. All the other examples I have found seem to be smaller in size and are driven by rc servos. Mine will be too large for this (and will have the weight of the eye pod). I know you can get quite large servos but they are too pricey…
I was originally thinking about using a stepper with various timing belts and pulleys to gear it down. But couldn’t find anything that was both cheapish and easily available.
After many hours of tireless research (ok… in reality just a few Google searches) I have decide to use a 4" robot wheel (looks like a large pulley when you pull the rubber off) driven by a nema 17 stepper that has a planetary stepdown gear. The stepper will directly drive the pulley saving me the work to make a gear train.
This should give me the torque I need. I hope it will give me the speed I need though I don’t expect to be making any fast moves… I will have to come up with some way to counteract the lateral pressure on the pulley (the planetary gear can’t take too much pressure)…
The best place I found for this stuff was www.robotshop.ca. They ship from Montreal so no customs brokerage fees…
I have also decided to only use a single stage for the tenacle. This means it will be able to bend 90 degrees but not in a full circle. With the eye pod at the end I don’t think I’ll need to bend more than that. It may save the tentacle from possibly getting tangled and will certainly save me $$, time and complexity…
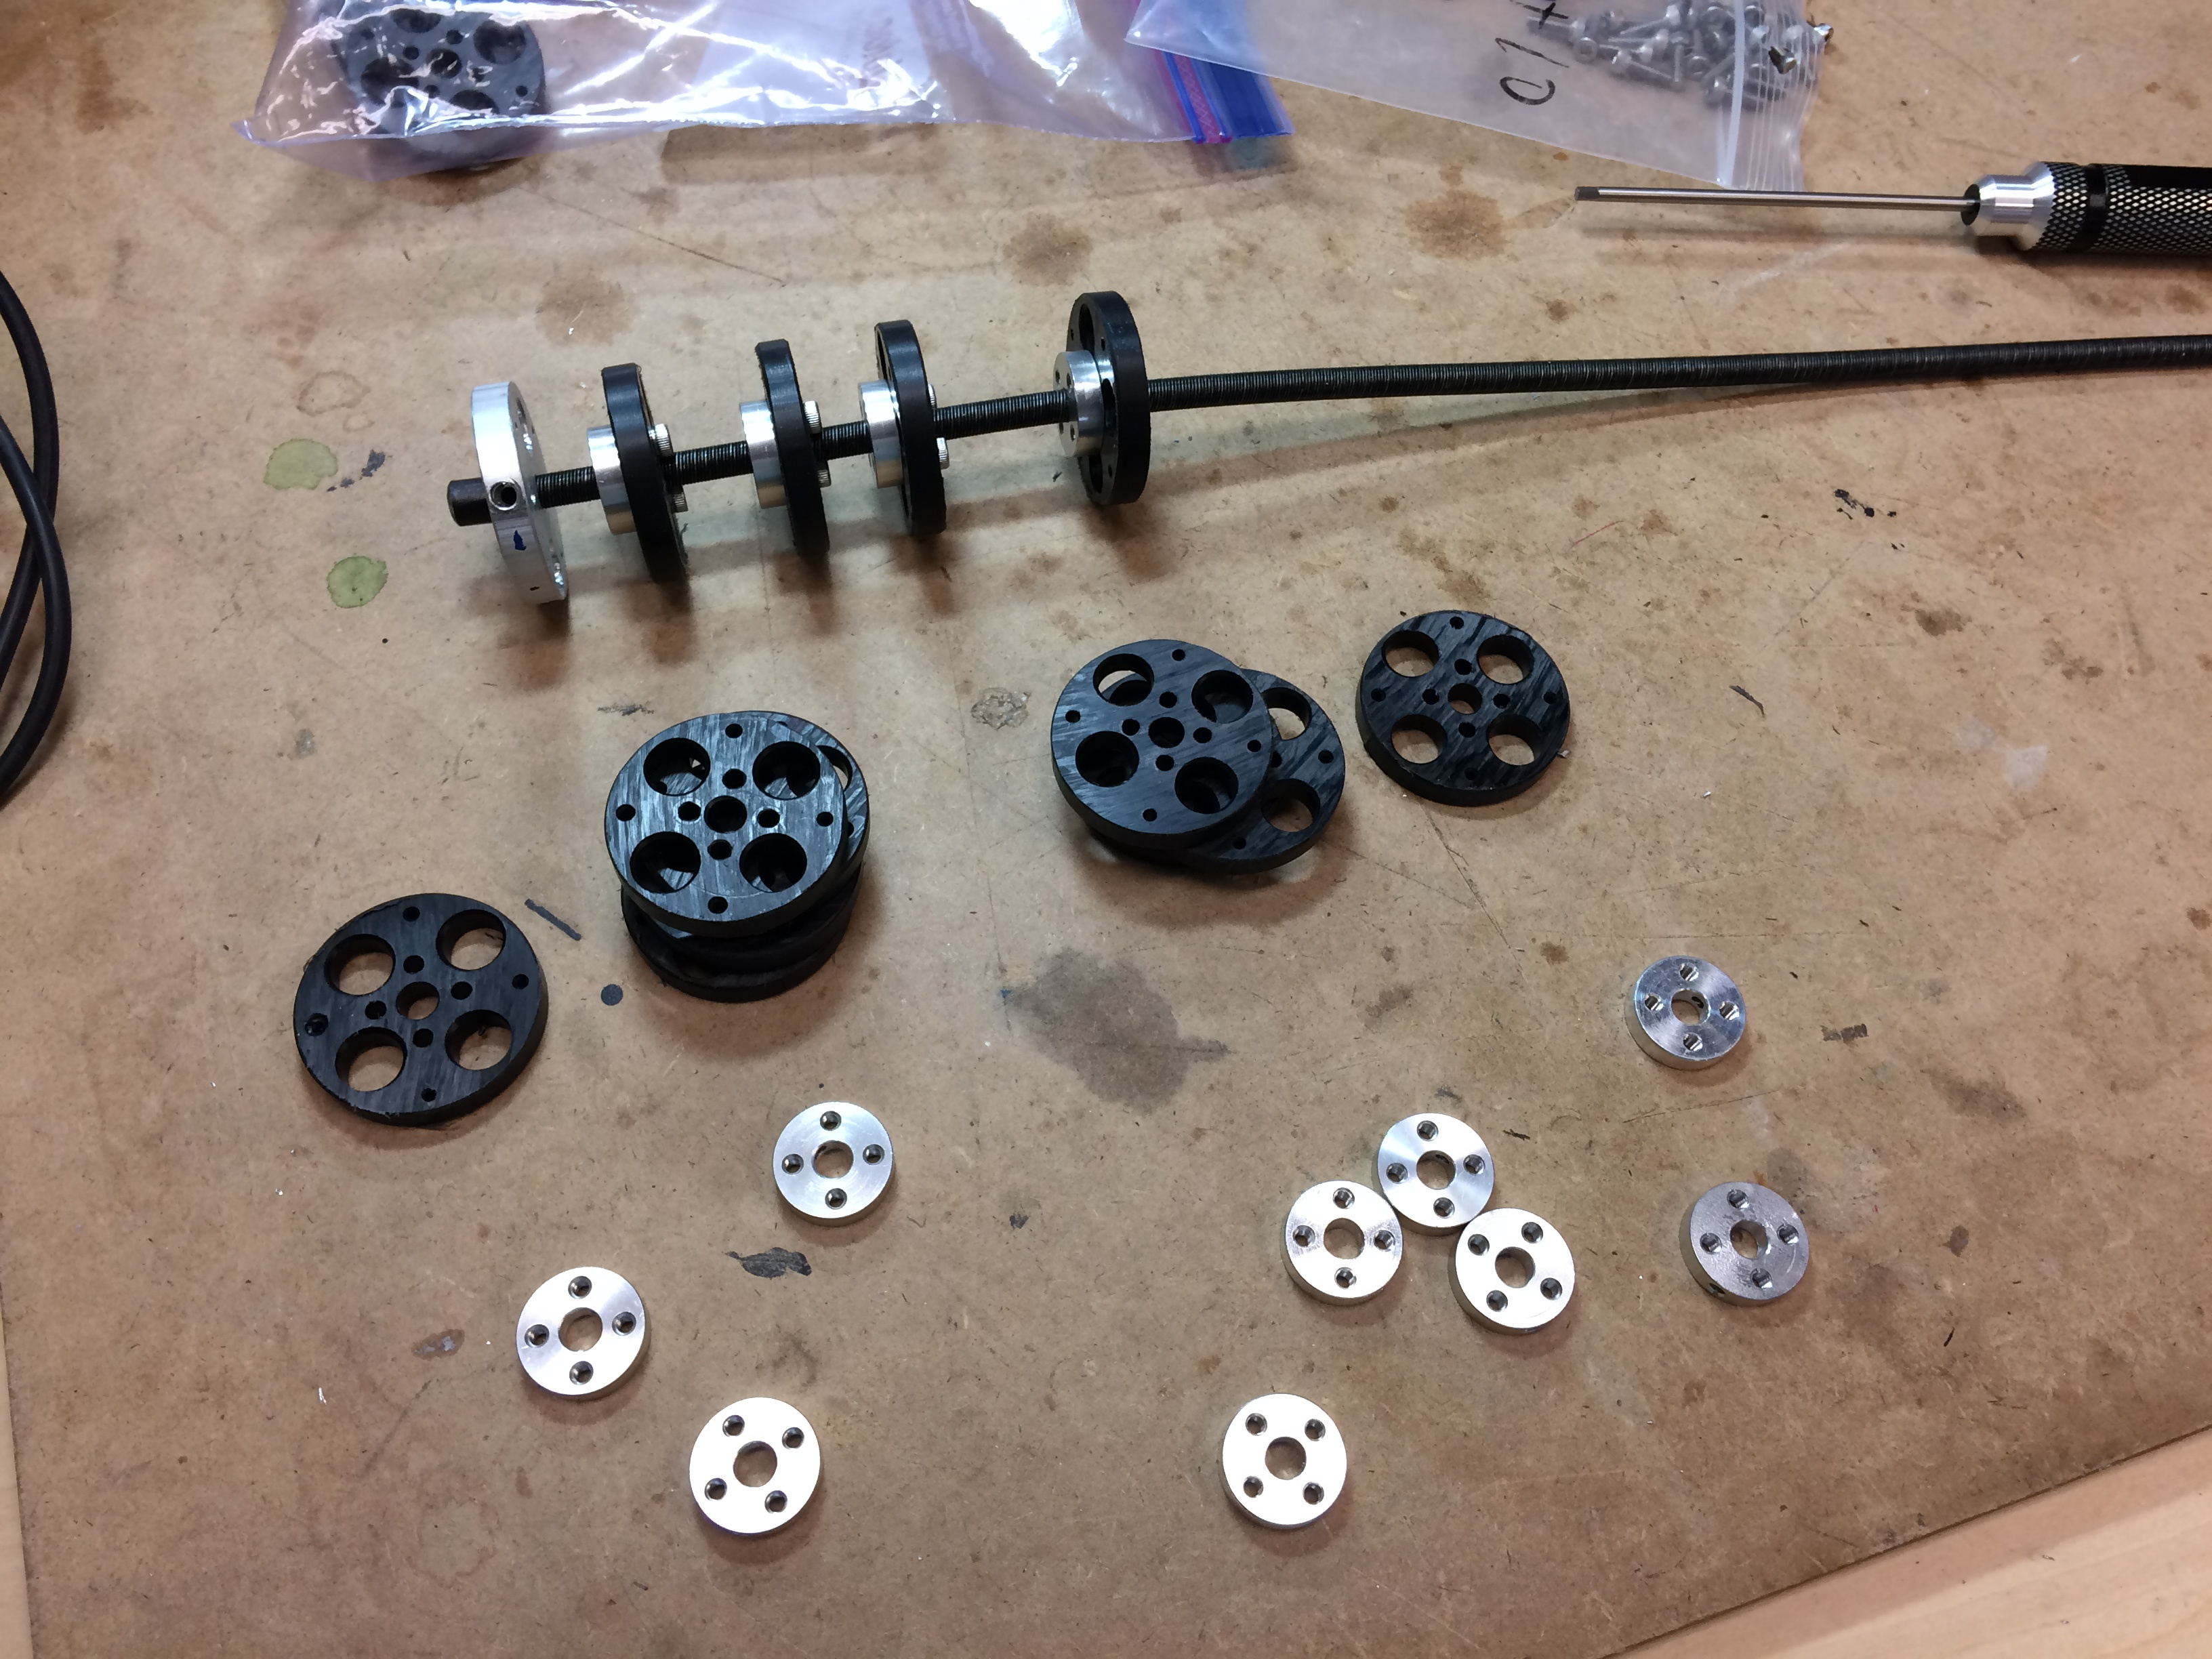
I have 20 of the Delrin disks and each one took 21 seperate drilling steps plus another 26 passes with a chamfer bit…
Found that a step bit worked much better that a twist bit for the larger holes…
Also found it was much more accurate to use a lathe to do the center drilling…
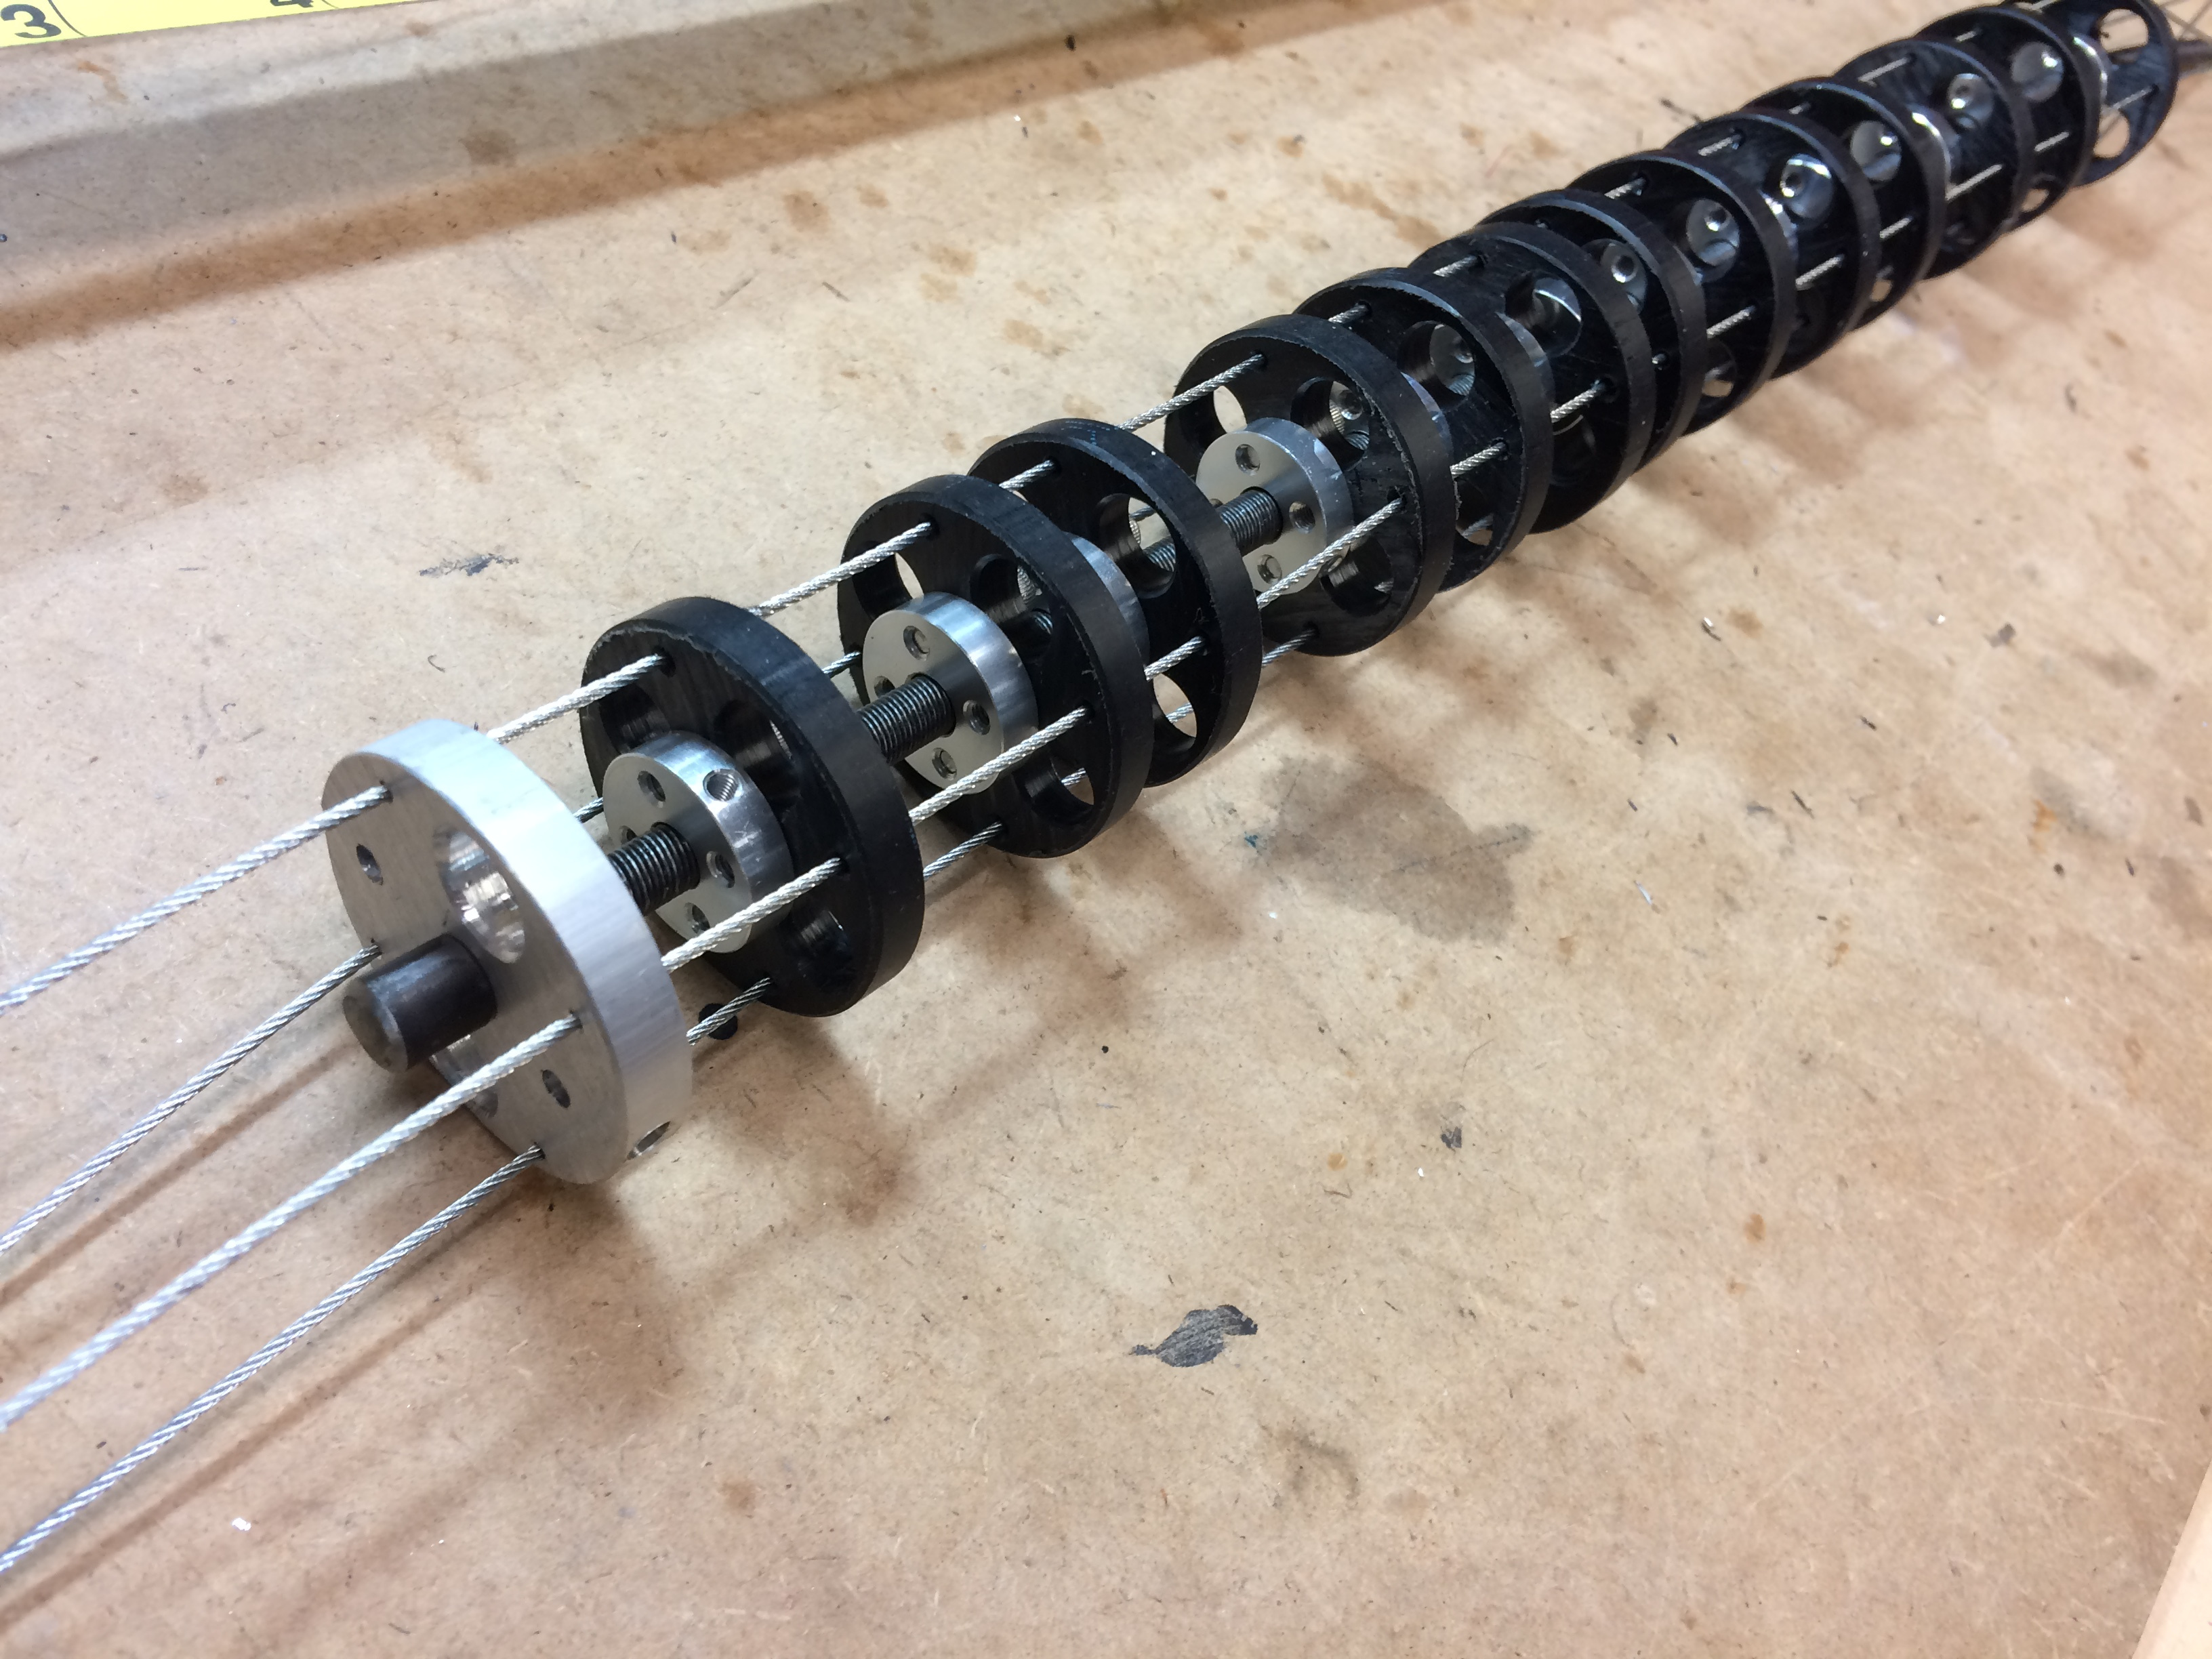
Next it’s time to assemble it all and see what kind of tentacle action I get…
And now I’m attaching the Pololu aluminum hub pieces to the Delrin disks. Luckily
I had some M3 screws left over from a previous project. The I slide them onto the spine…
This project has been on the back burner for a while as I need to make a reasonably heavy duty gear box as the cables require a fair bit of torque…
But I did stick the eye assembly on the back of my front door window for Halloween and that got some attention… However what would have worked better would have been the two eyes that the original call for:
However this requires two screens. You can use either OLED of TFT screens. I used the Adafruit OLED for the single eye and it works great but the display is $50 CA which is pricey. And I only had one of them…
The TFT screens are much cheaper ($20 each from Adafruit) but I also found some similar displays on Aliexpress for $5 each. I tried rigging these up for halloween but found that the viewing angle was very limited and as soon as you were viewing off center the image was pretty crappy… If your viewing angle doesn’t change then you may be alright…
“eyes with tft screens on Vimeo”
Not sure if the Adafruit $20 TFT displays are any better than these $5 AliExpress ones…
Haven’t had any luck finding similar OLED versions…