What are these wiggly wooden toys I speak of? Well, I was inspired by those classic wooden snake toys and wanted to design some toy critters that had several kinds of joints and motions built into them. So without further ado… BAM! Here are my first prototypes!


I made these prototypes at Makerlabs, before I knew about and joined VHS last month - so from now on, I’ll be continuing this project here! My plan is to continue refining my workflow, construction, and the materials, and hopefully by the end of it, try to start selling em! (If anyone has advice on the selling front - where, how, for how much - all of it is appreciated, I’m completely new to this sort of thing)
Design Breakdown:
-
Inspiration + Analysis
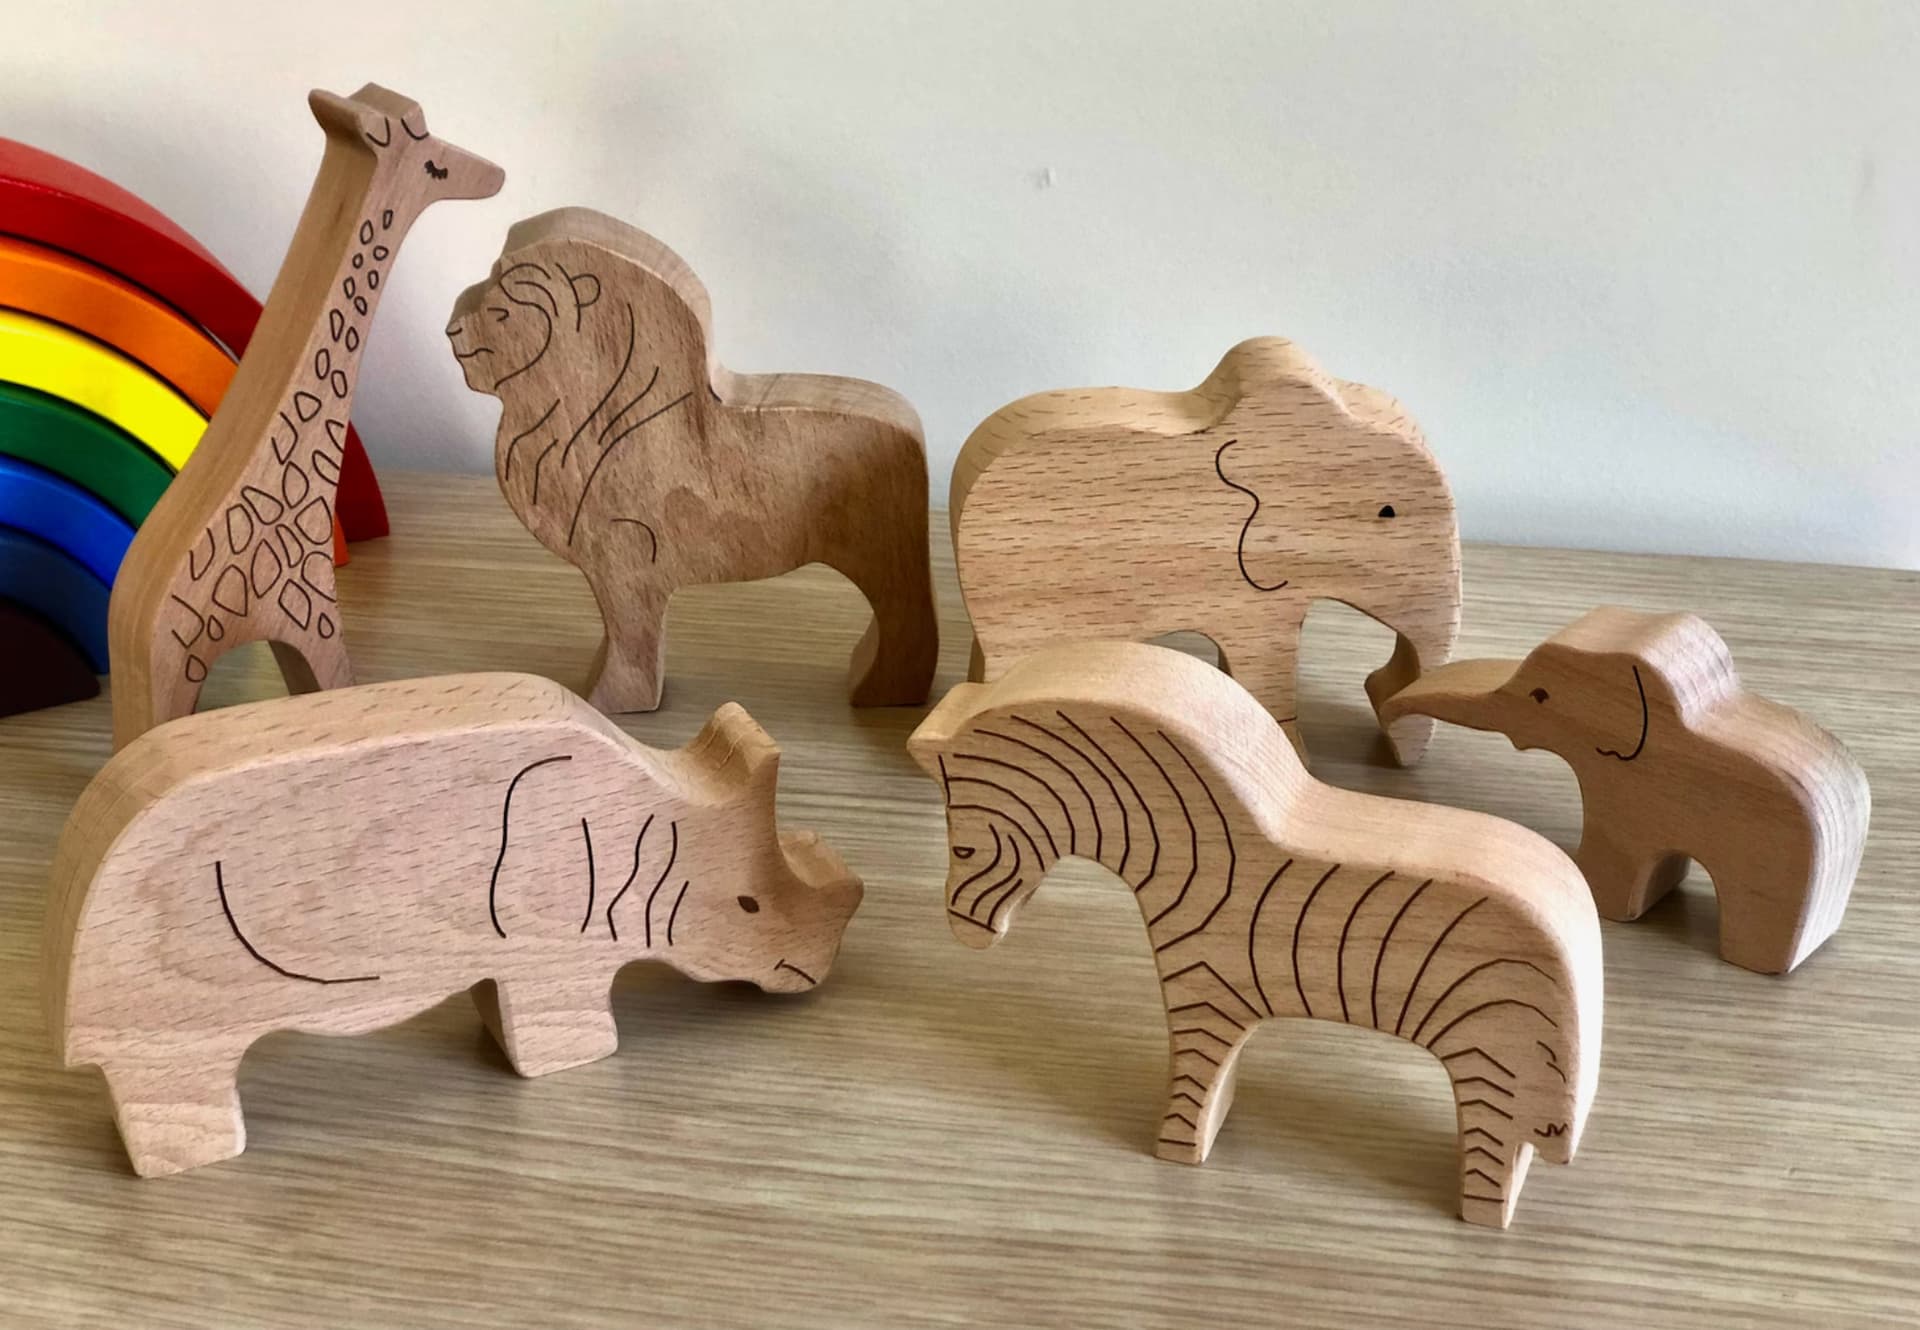
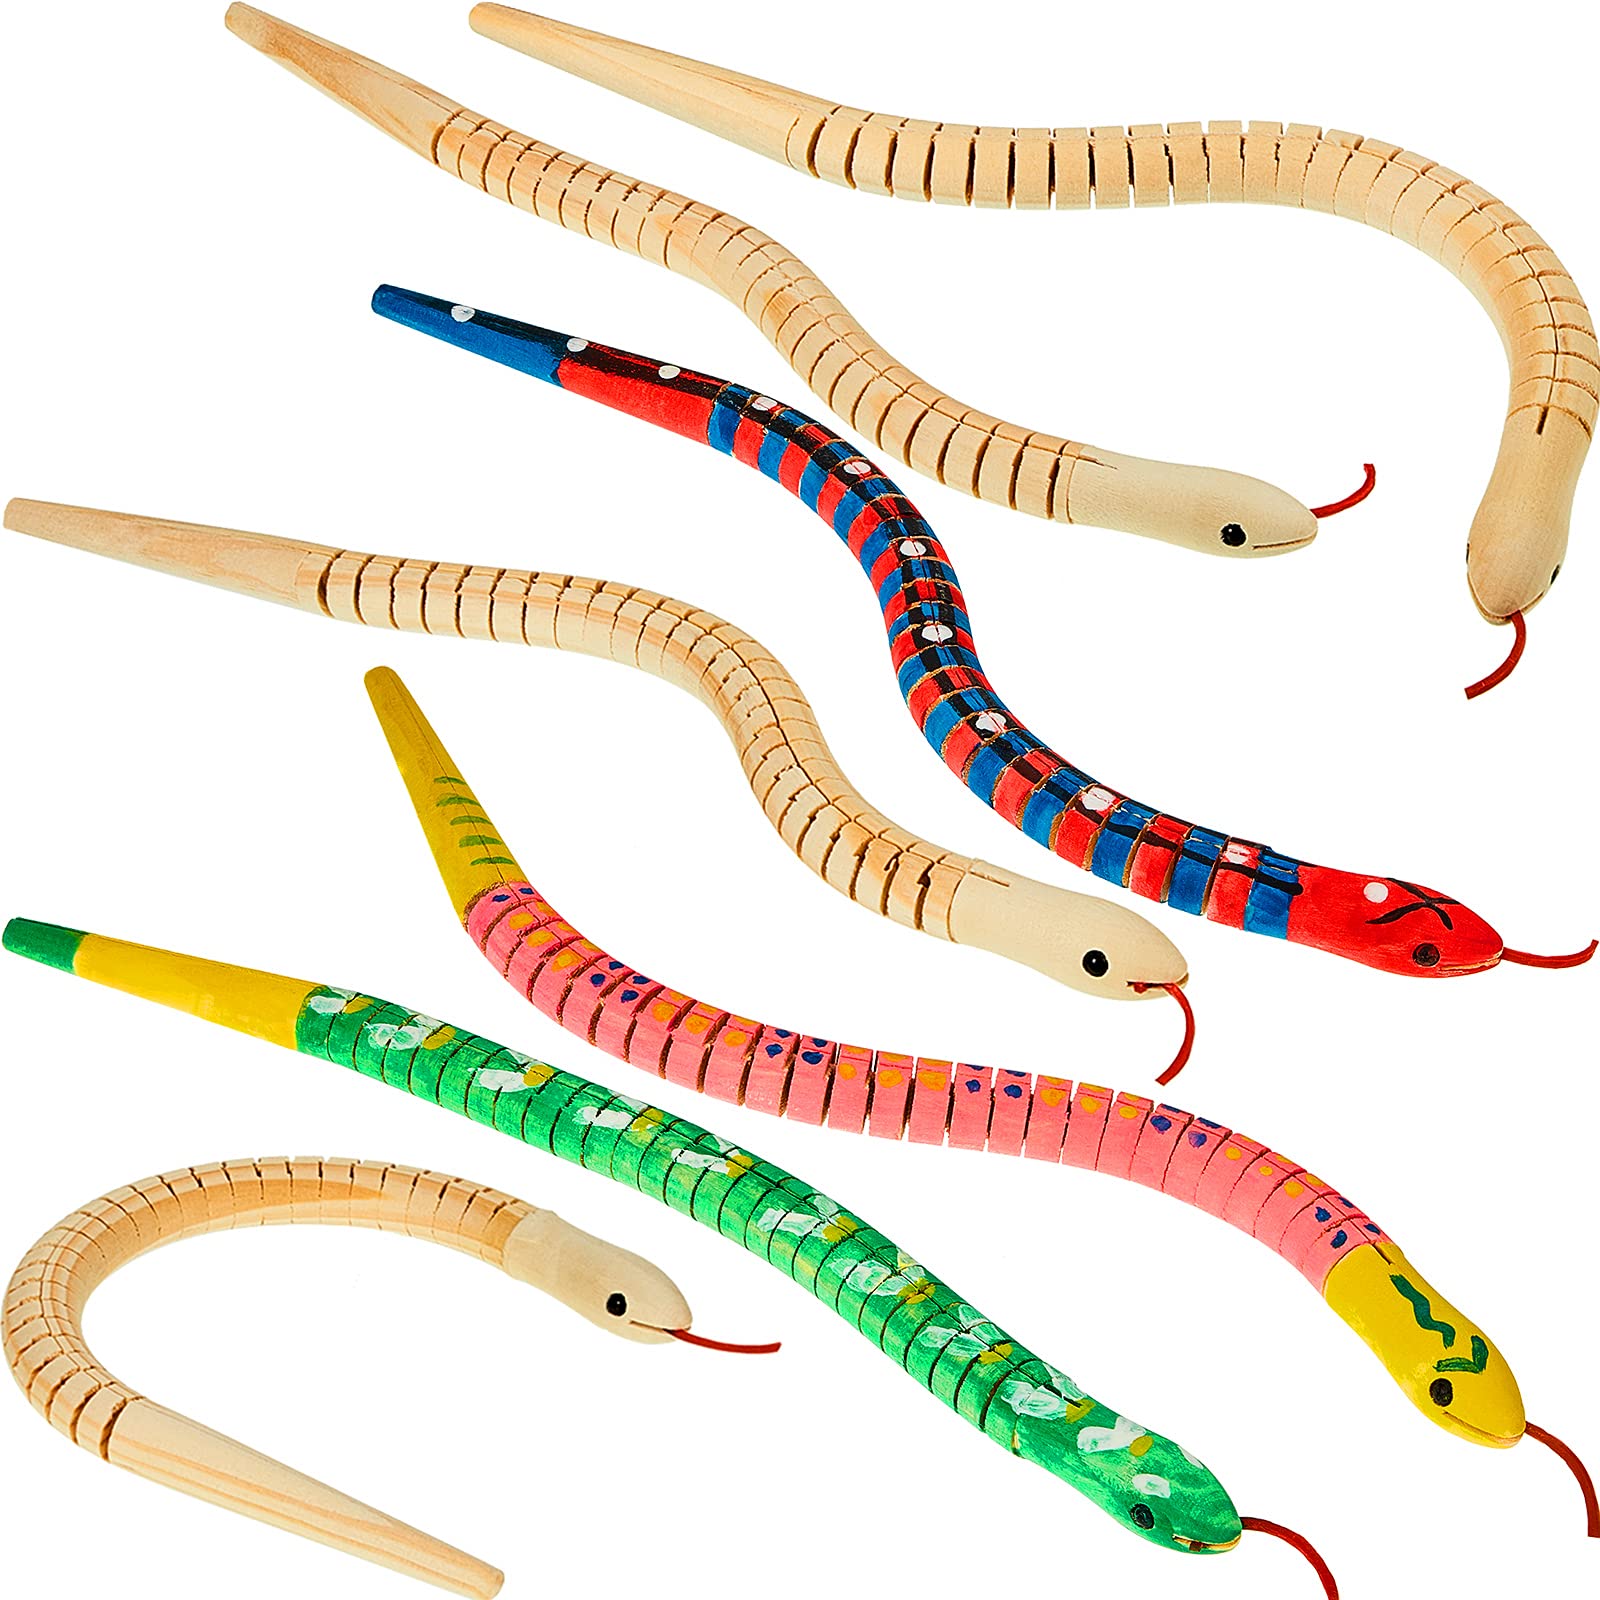
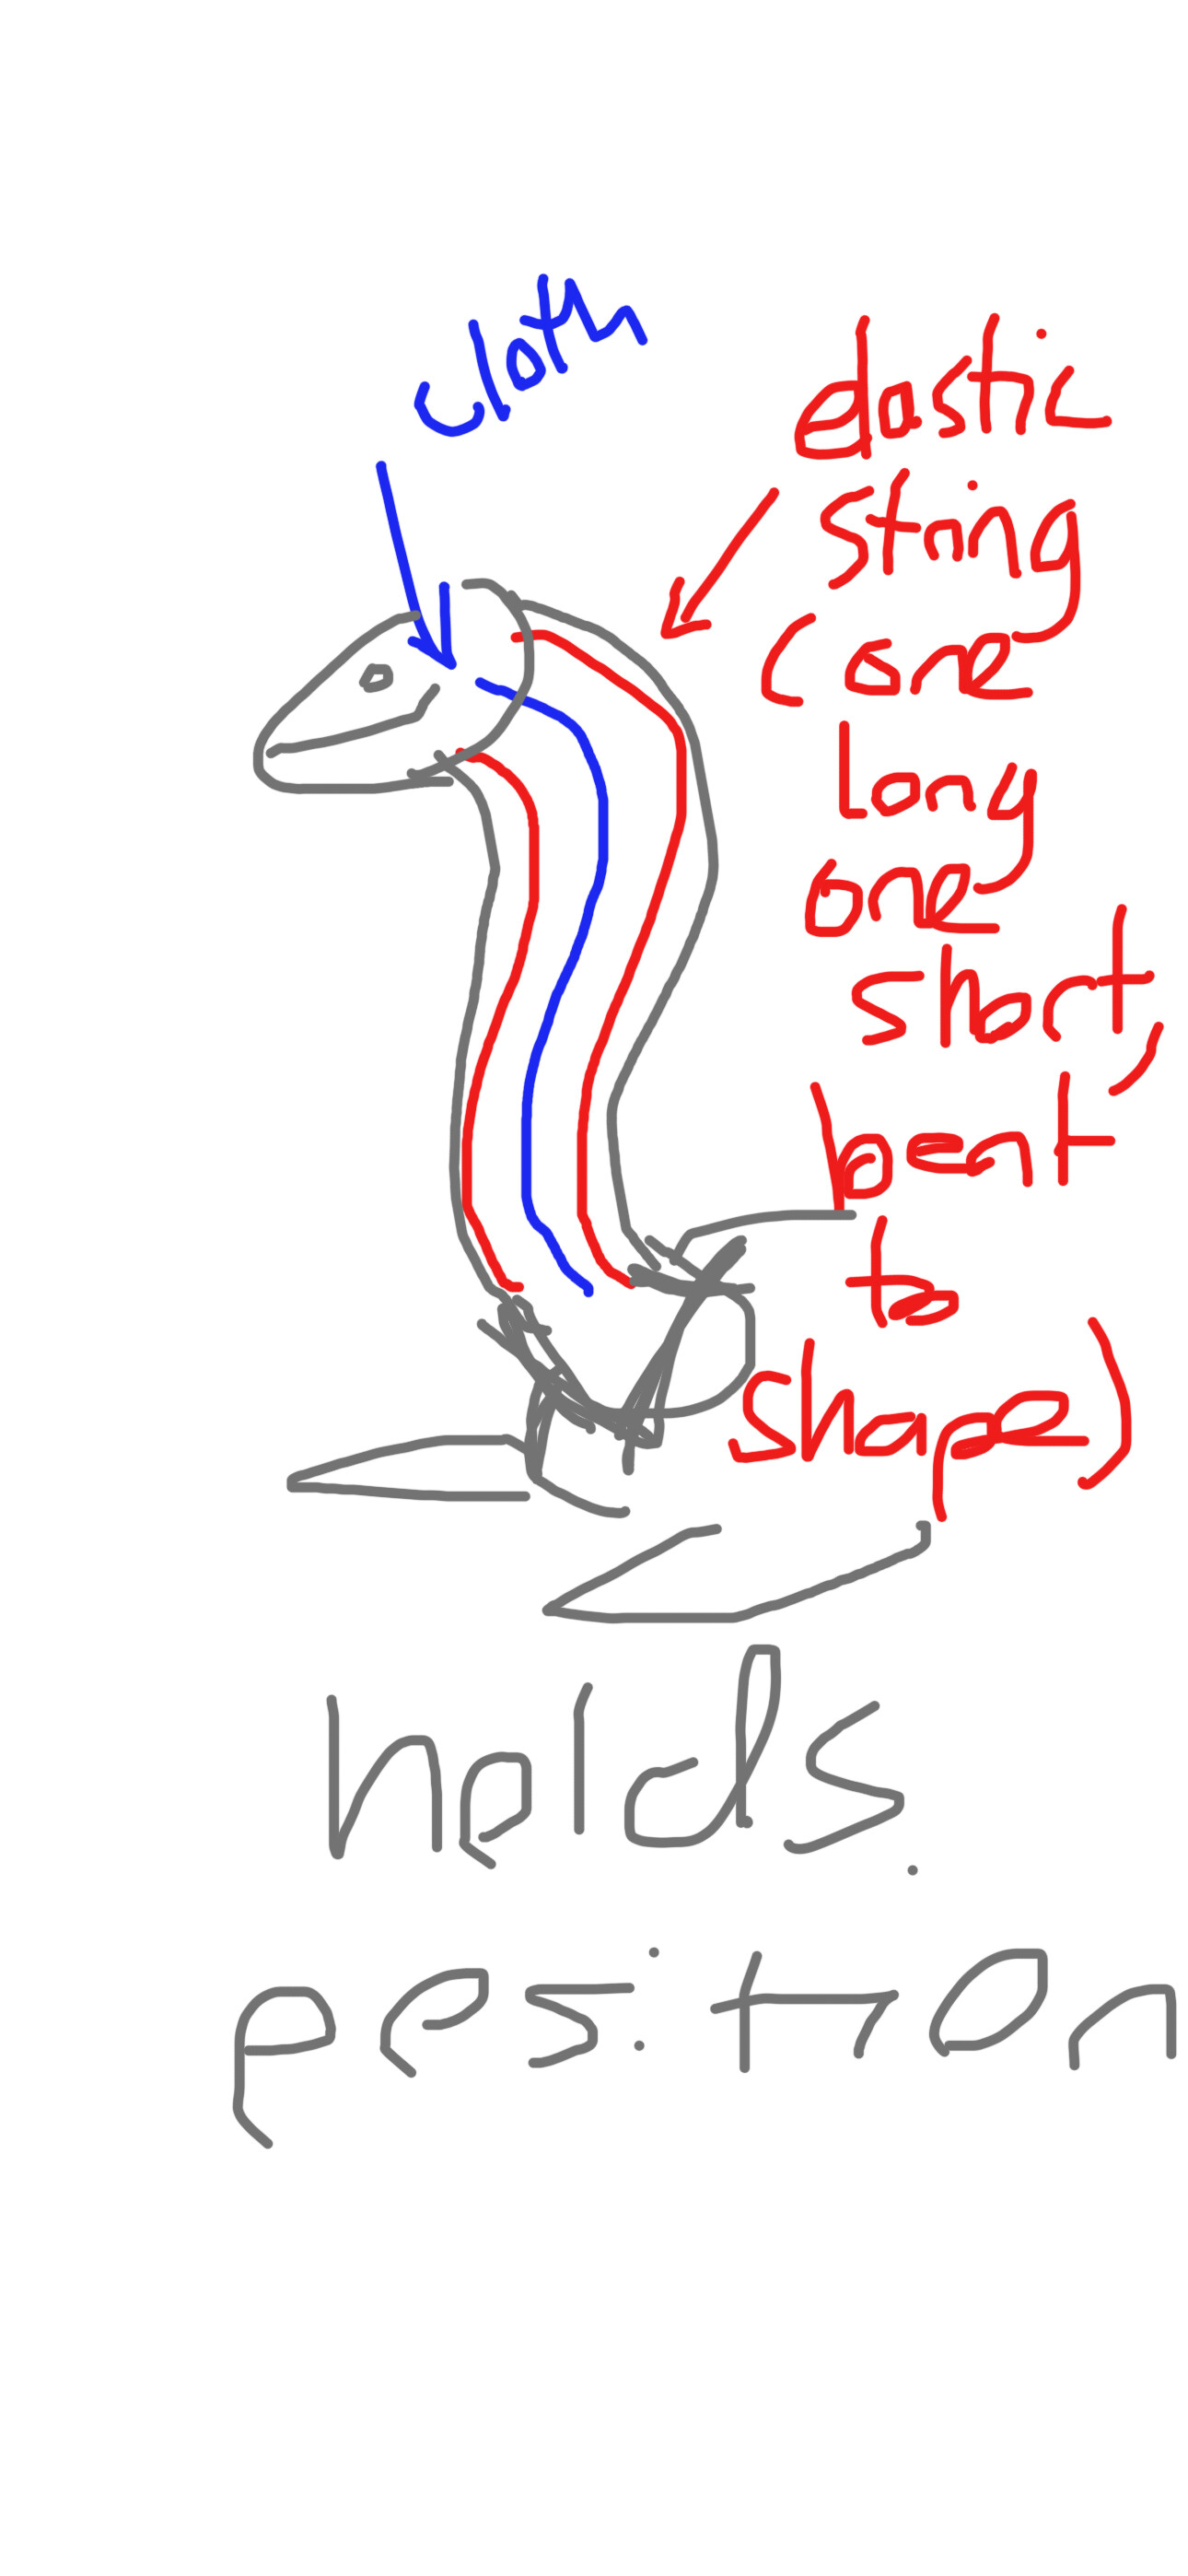
I looked at wooden toys, especially the wiggly snakes. I wanted to try and integrate motion and joints into my toys, as I really enjoy action figures and tactile interactive designs. I saw that the motion of the snake functioned because of a cloth spine down the middle, with segmented body parts flanking each side. -
Designing the Fox
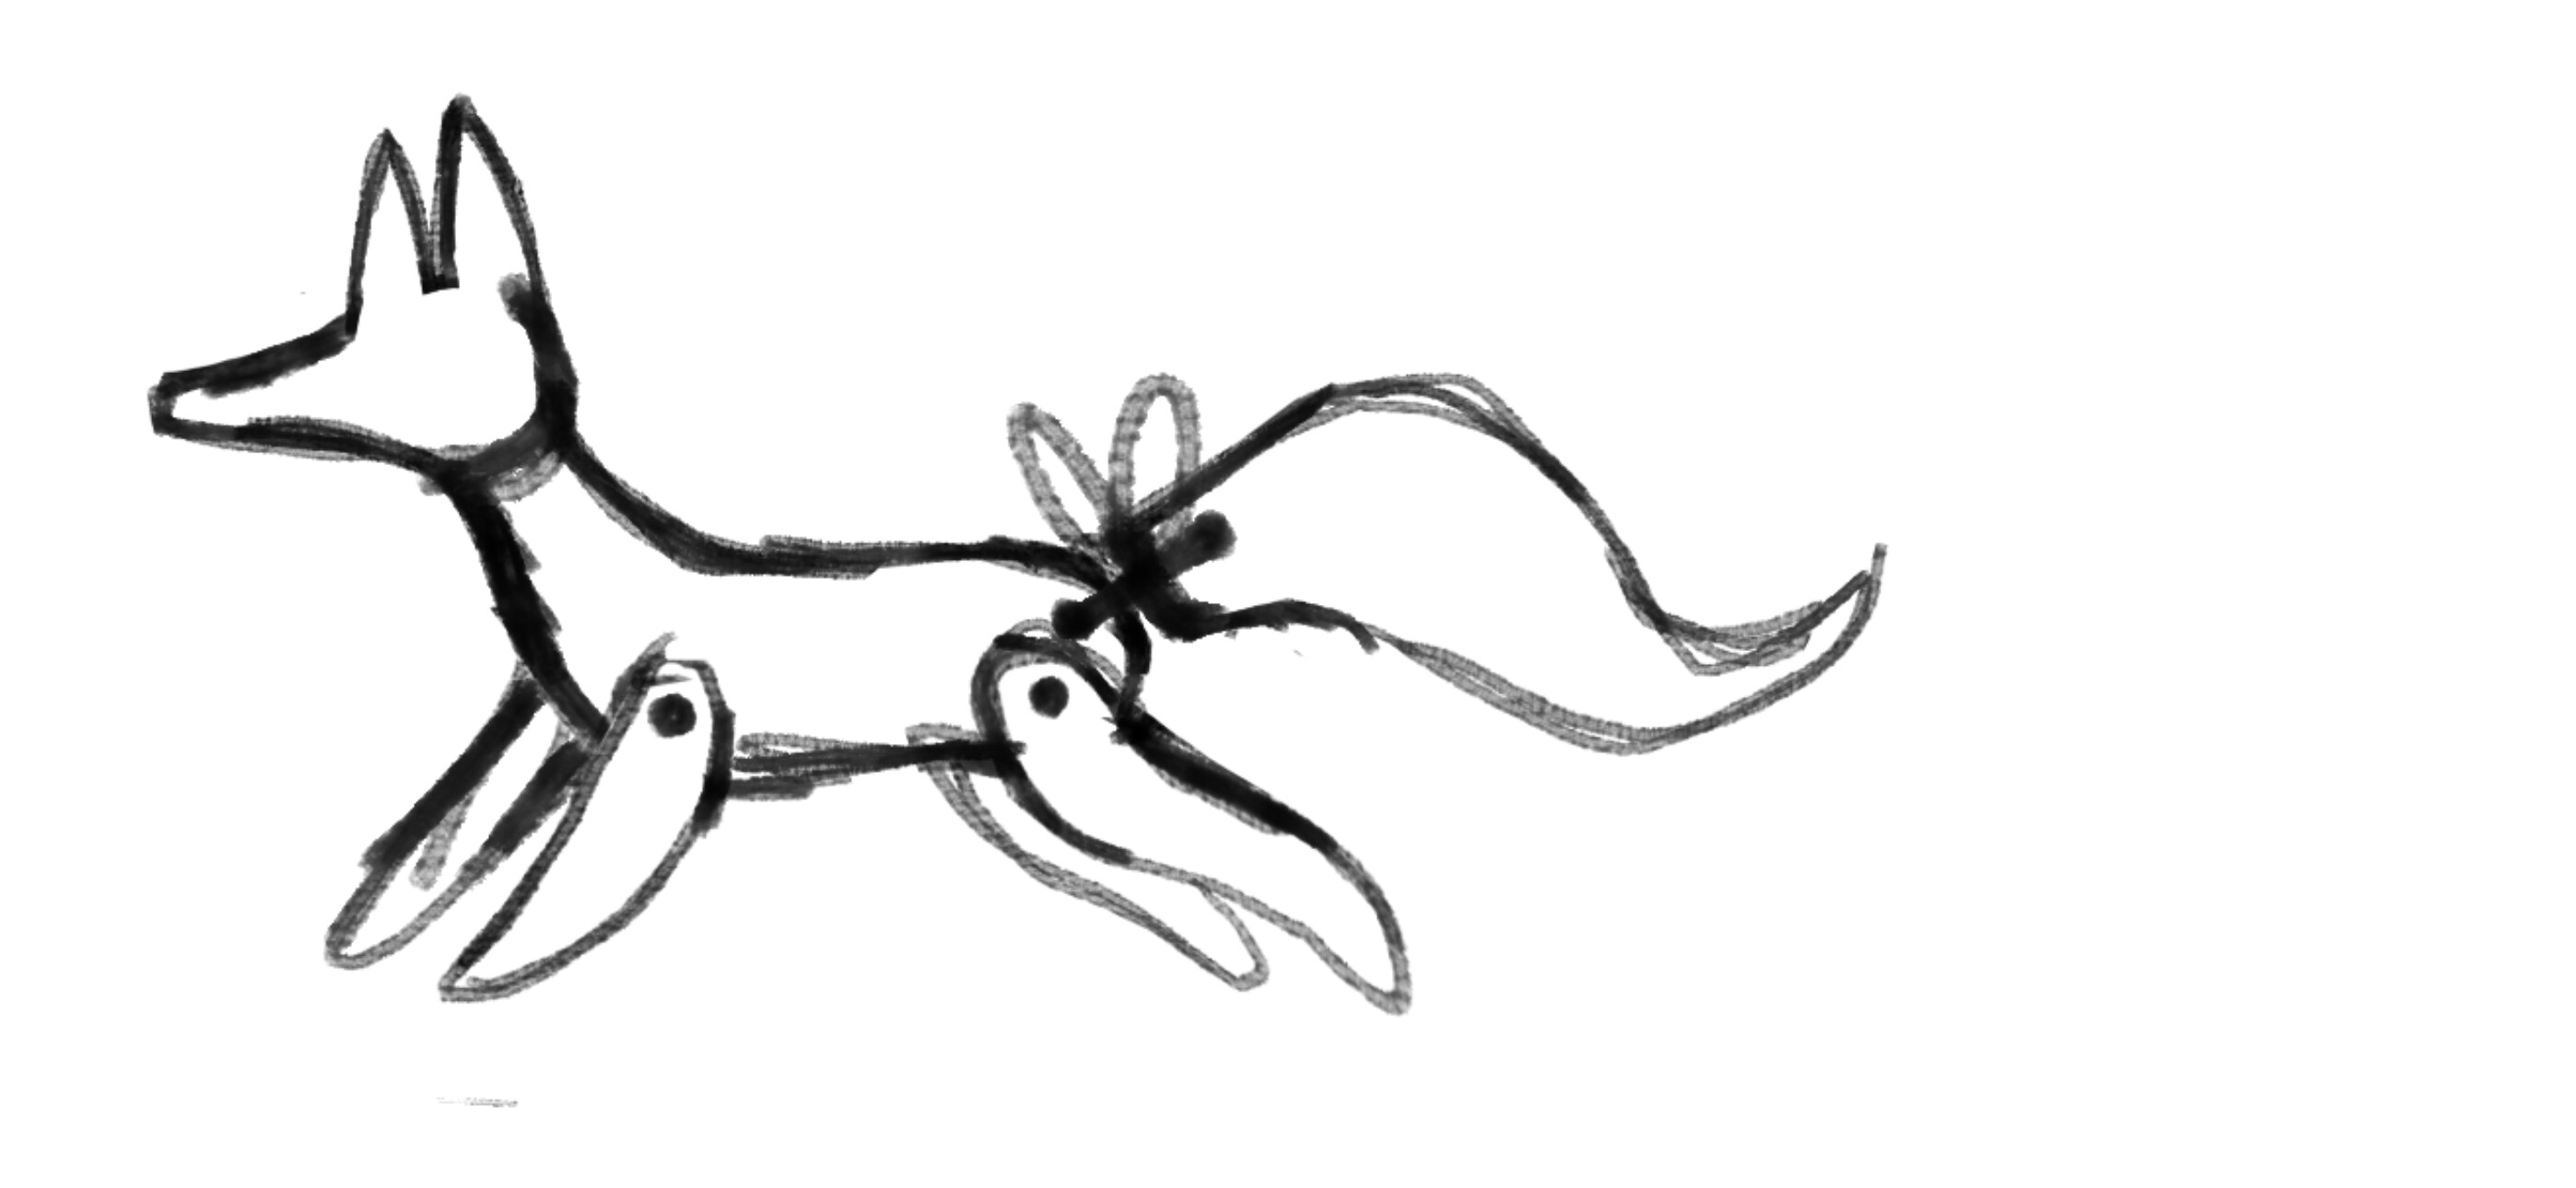
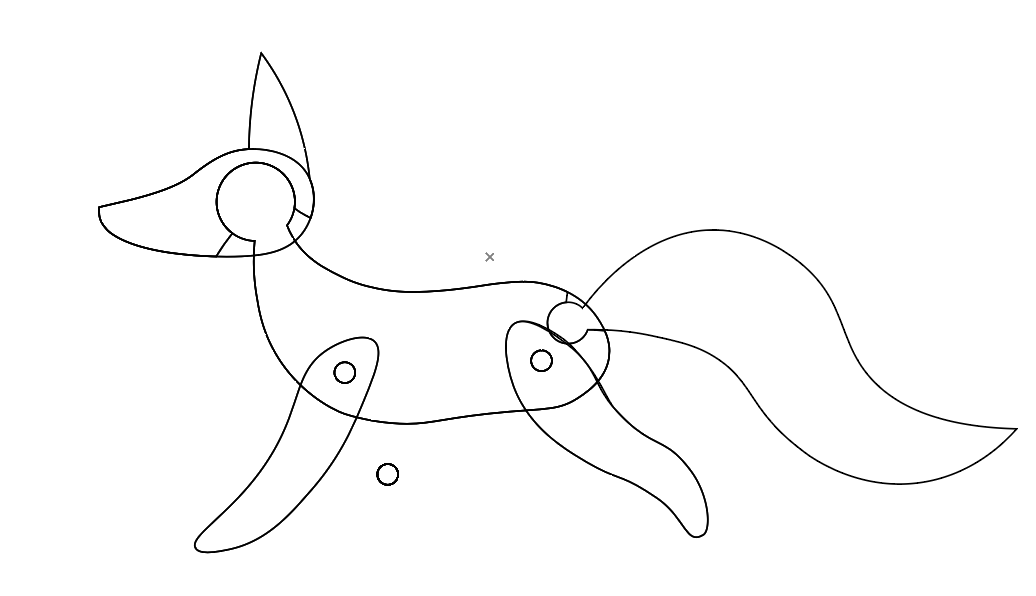
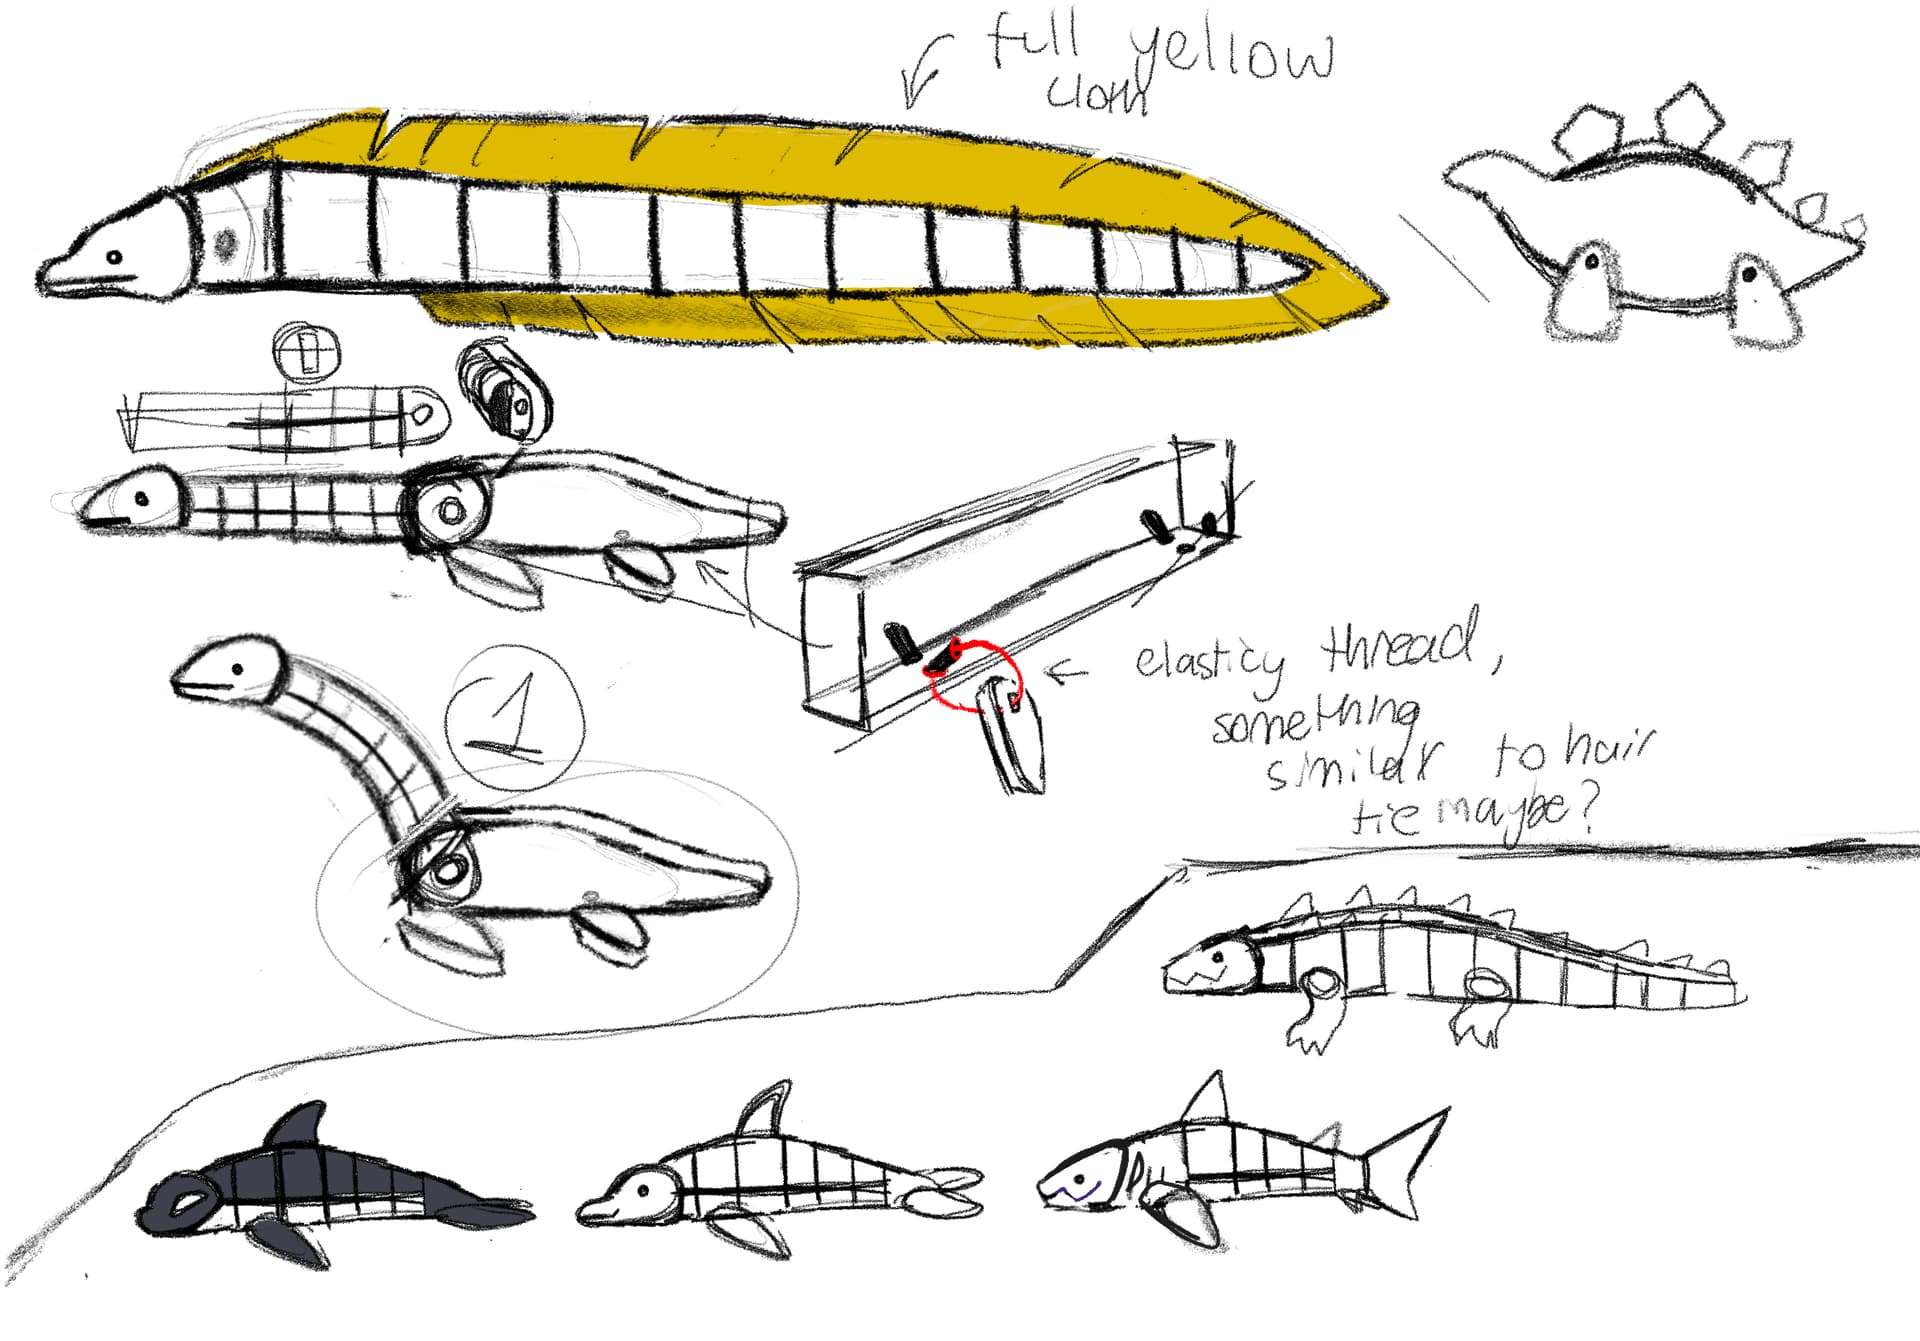
I made this incredibly quick sketch on my phone before popping into illustrator to vector it out. I focused on the idea of tied together pieces of wood threaded through a hole, using string as the axle to my joints.
I started with a fox because my partner is very fond of them - and I wanted to keep the project a little more simple before delving into other joint types. -
Vectoring the Fox
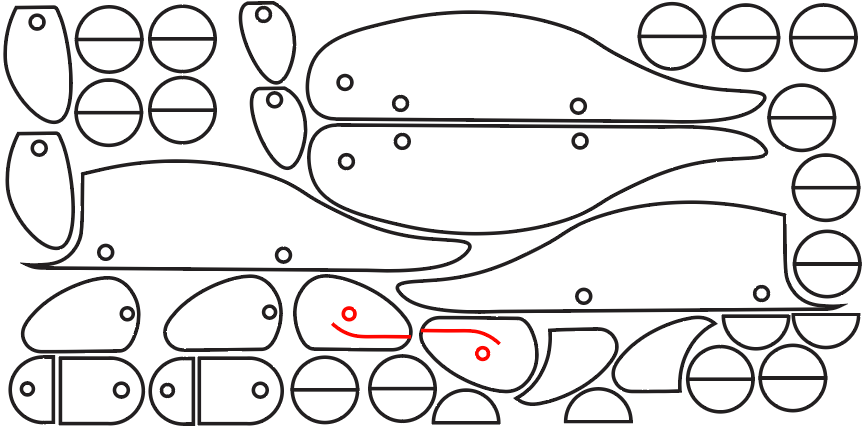
As I vectored the fox, I decided to incorporate another type of joint into the design, seen in the neck and the tail joint. Using a circle, I would fuse it with the vector of the joint I wanted to move. Then I would take the joint I wanted to move and duplicate it twice - I would rotate it, then ‘cut out’ the shape of that joint at both extremes I would want it to move. Finally, I would need to double check that the joint in the circle was bigger than the remaining opening left. The result was this:
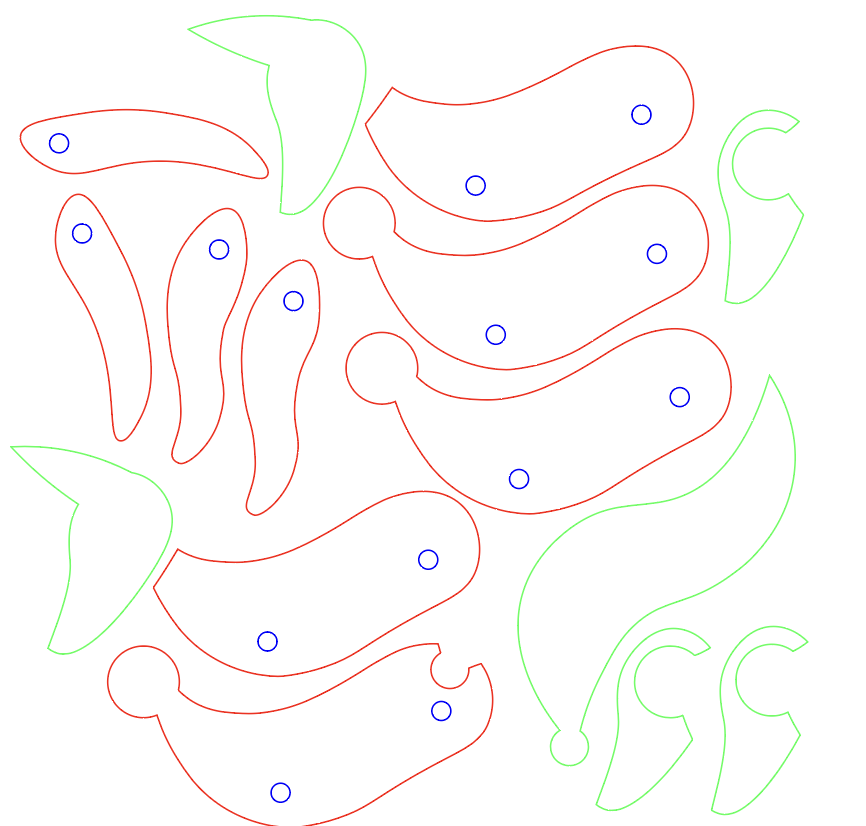
While designing it, I used lots of layers to hold the different layers of the limbs, to help me visualize the result and make sure all the joints would fit where I wanted. After I finished, I laid out the design for the test MDF cut. *NOTE! These prototypes were created at Makerlabs, where we were encouraged to use mdf with the laser. I haven’t used the VHS laser yet, but after I take the training class on it, I will be using alderwood planks I purchased as my material
-
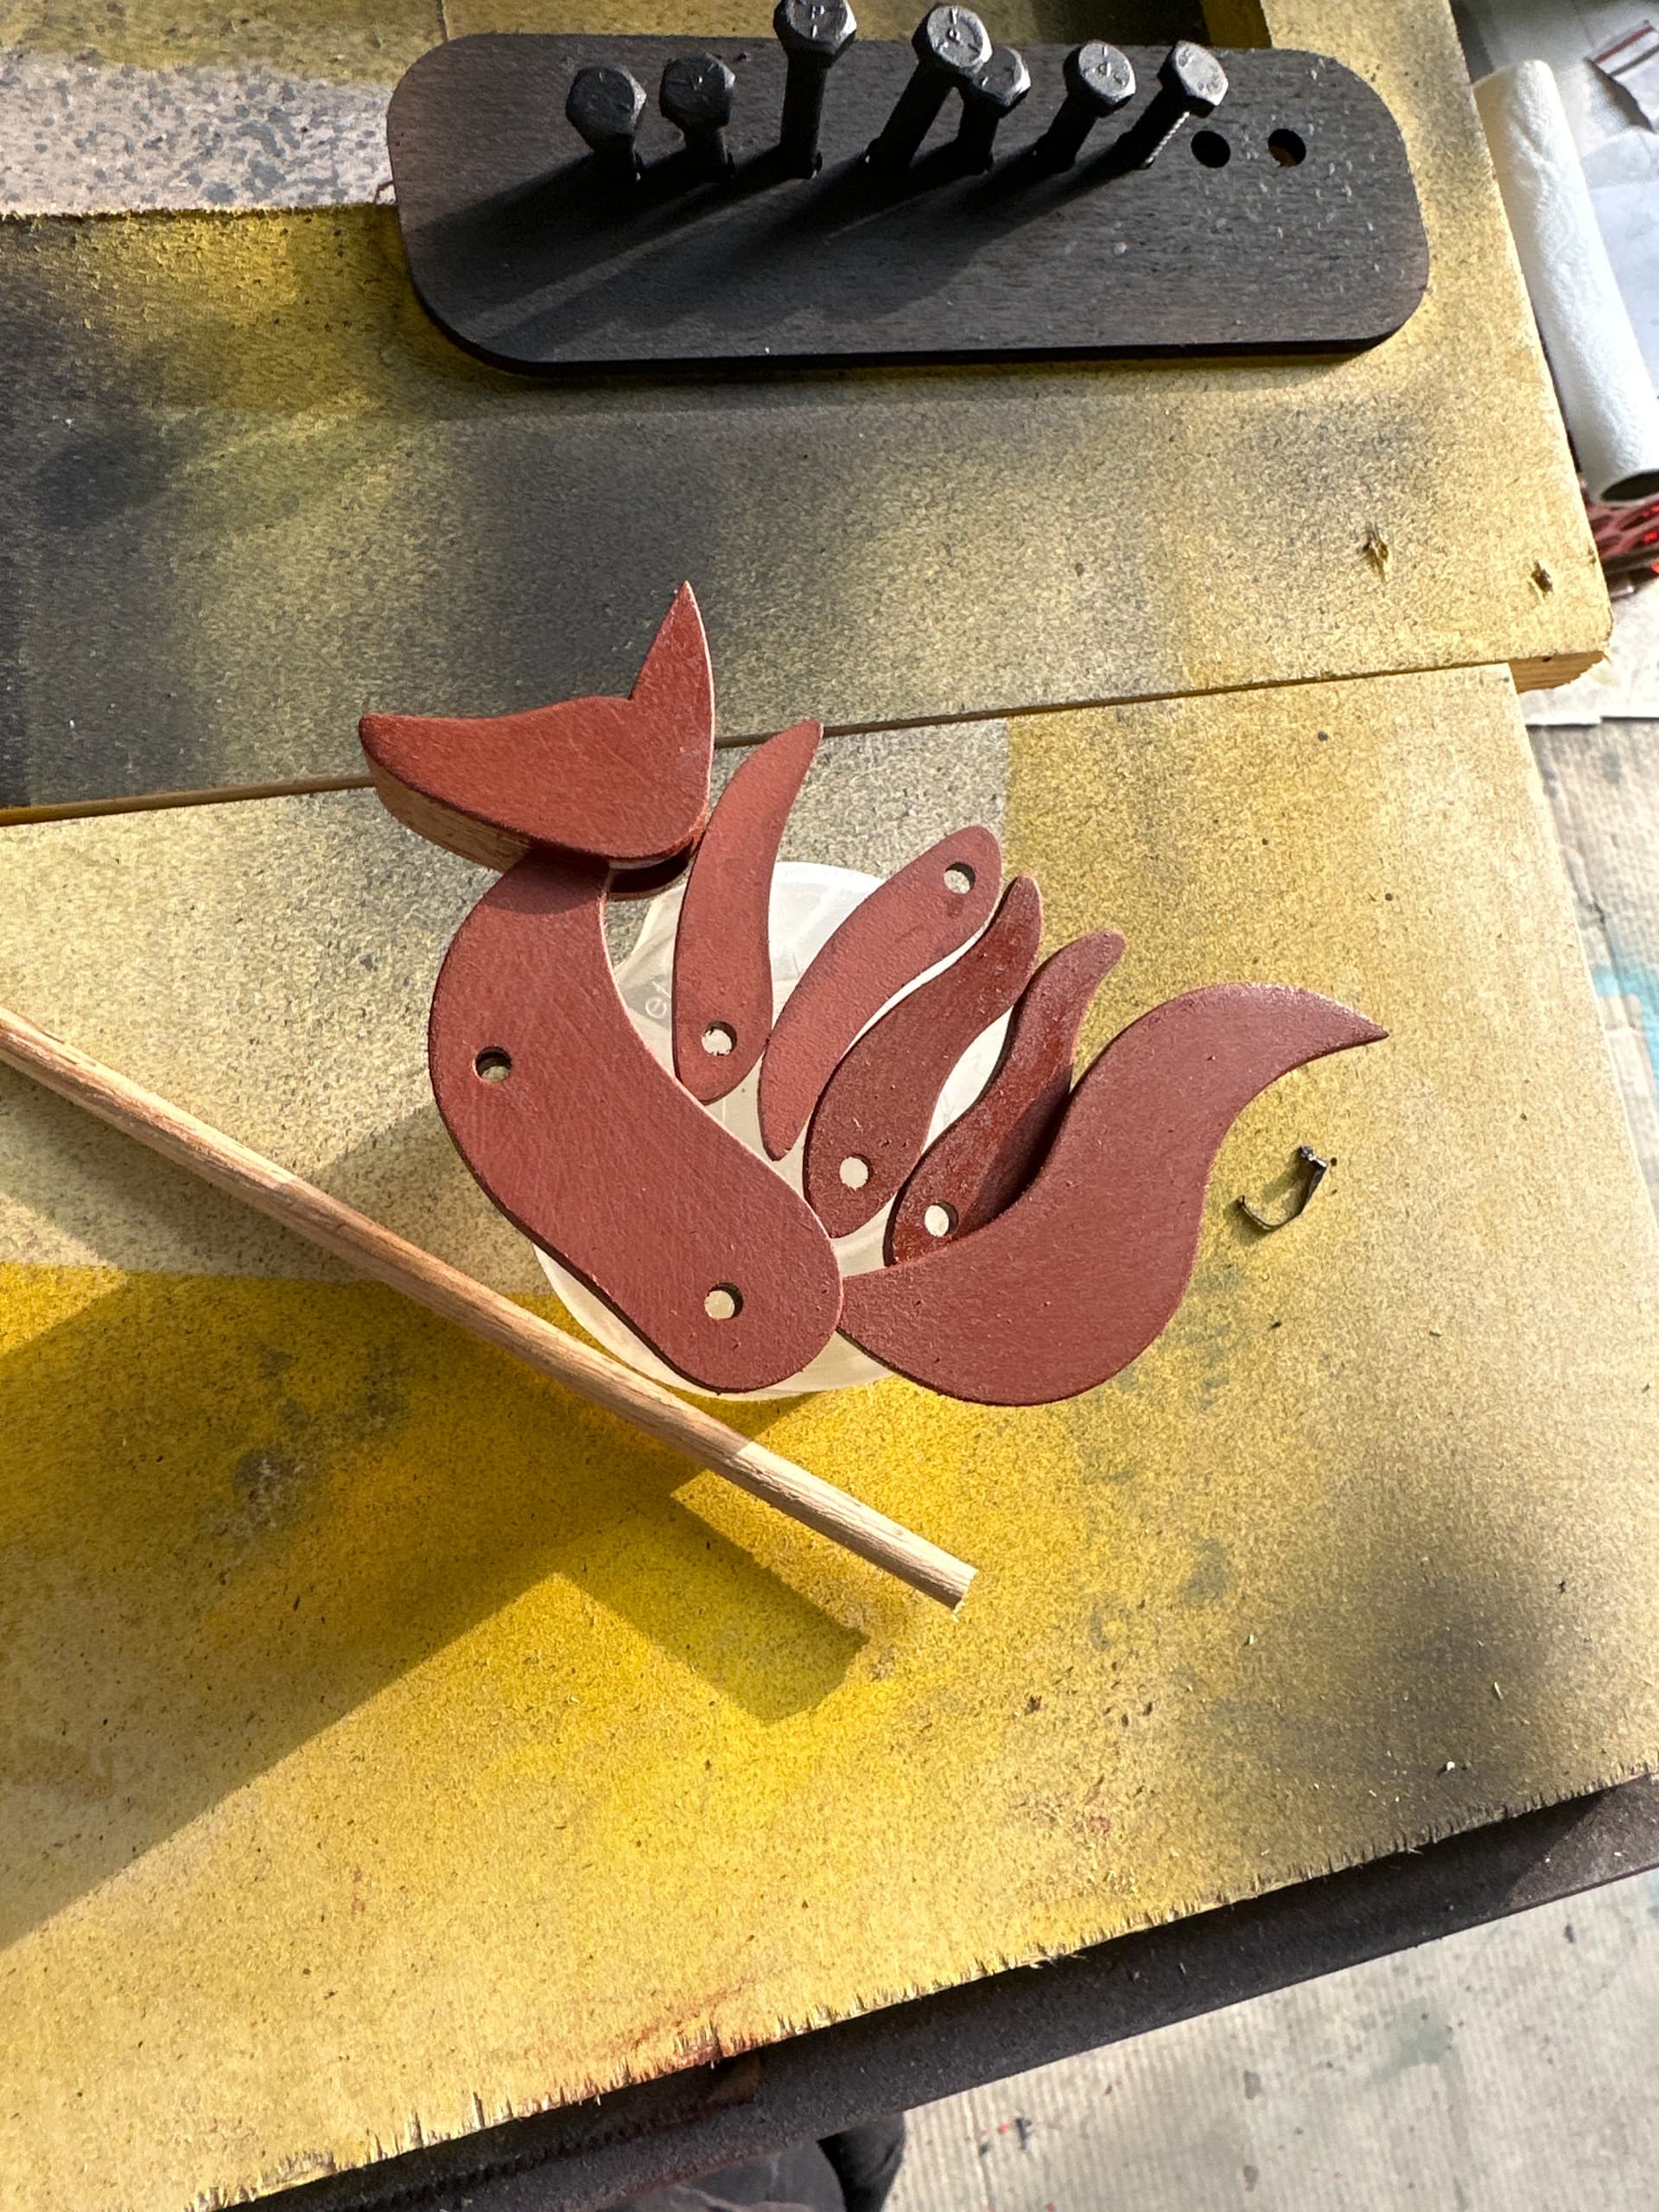
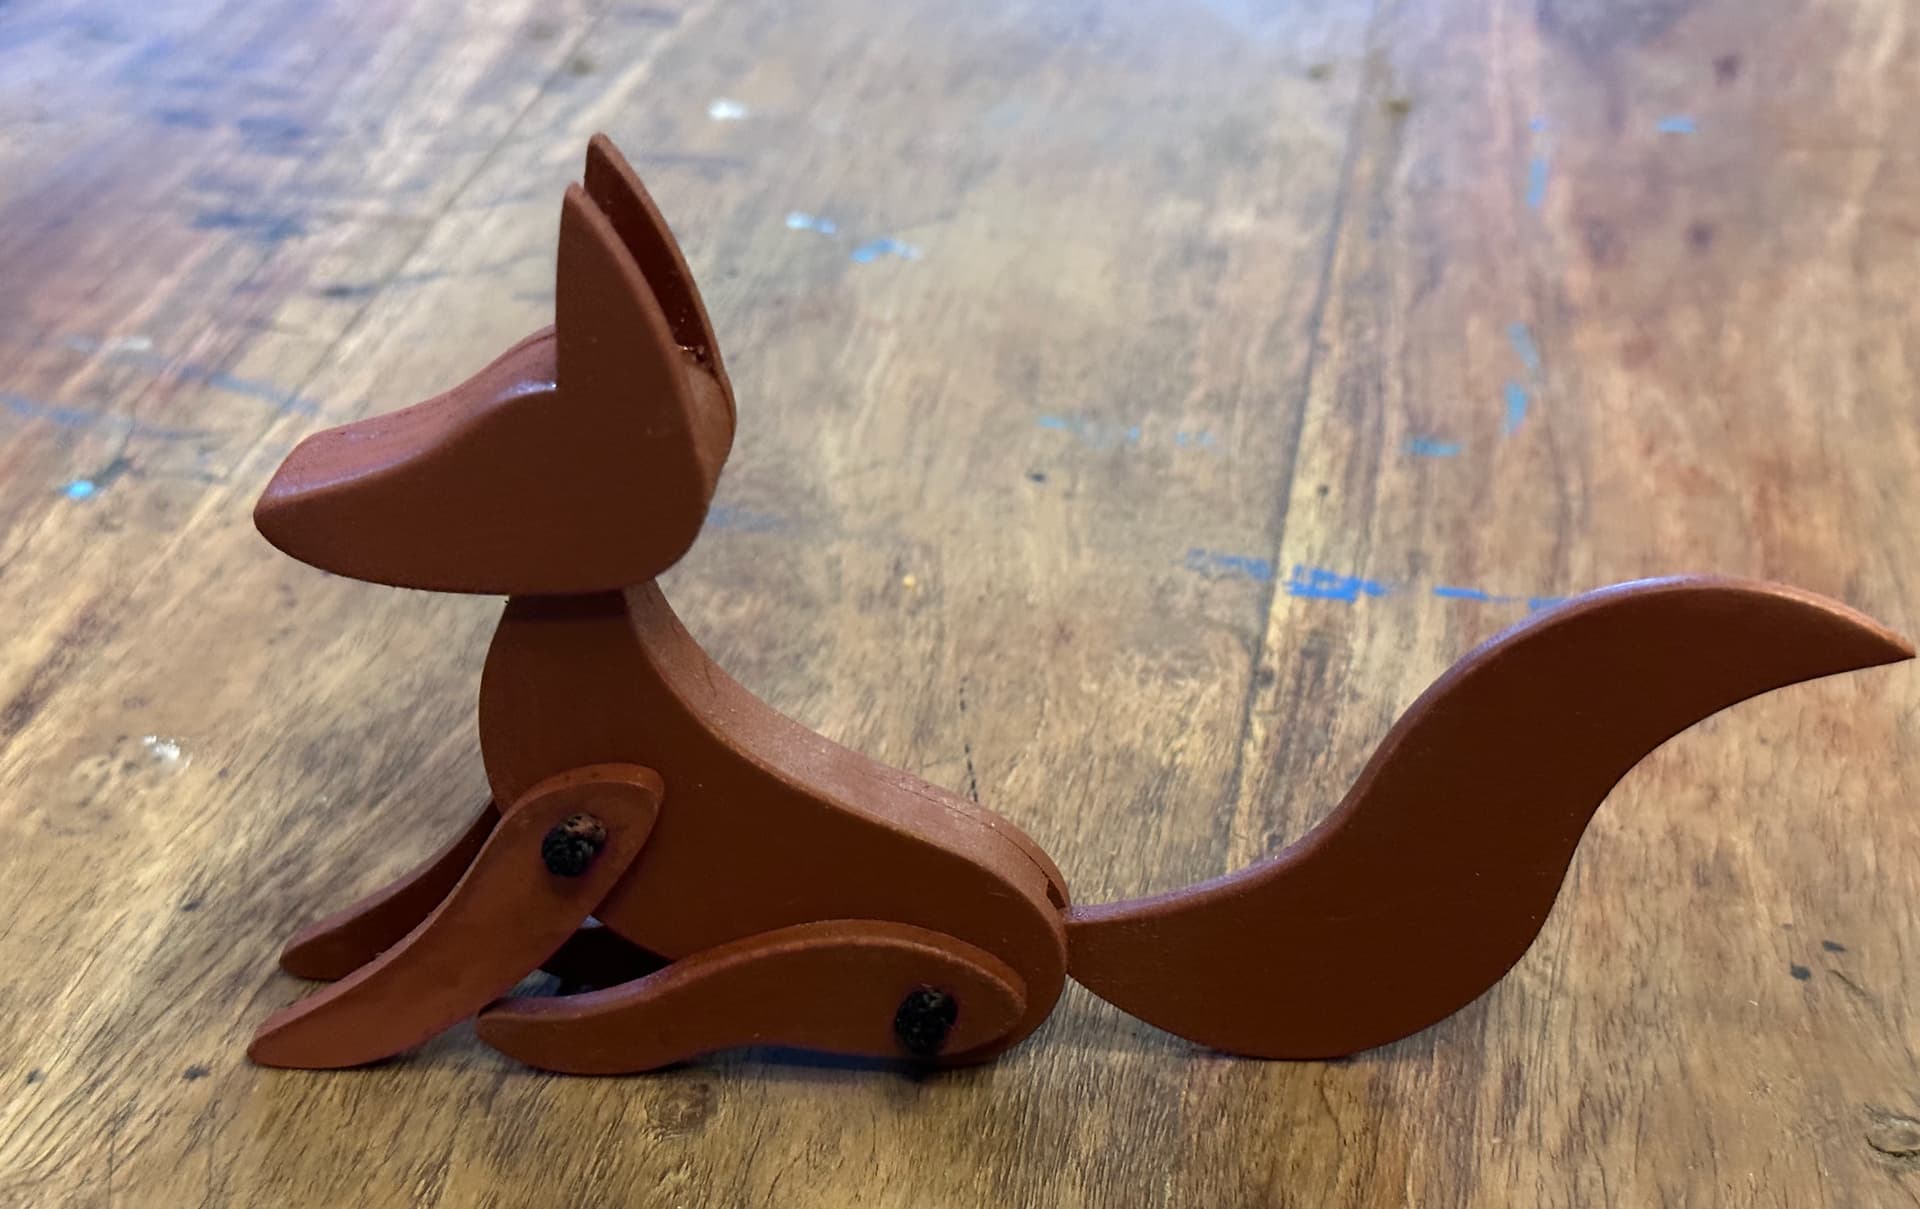
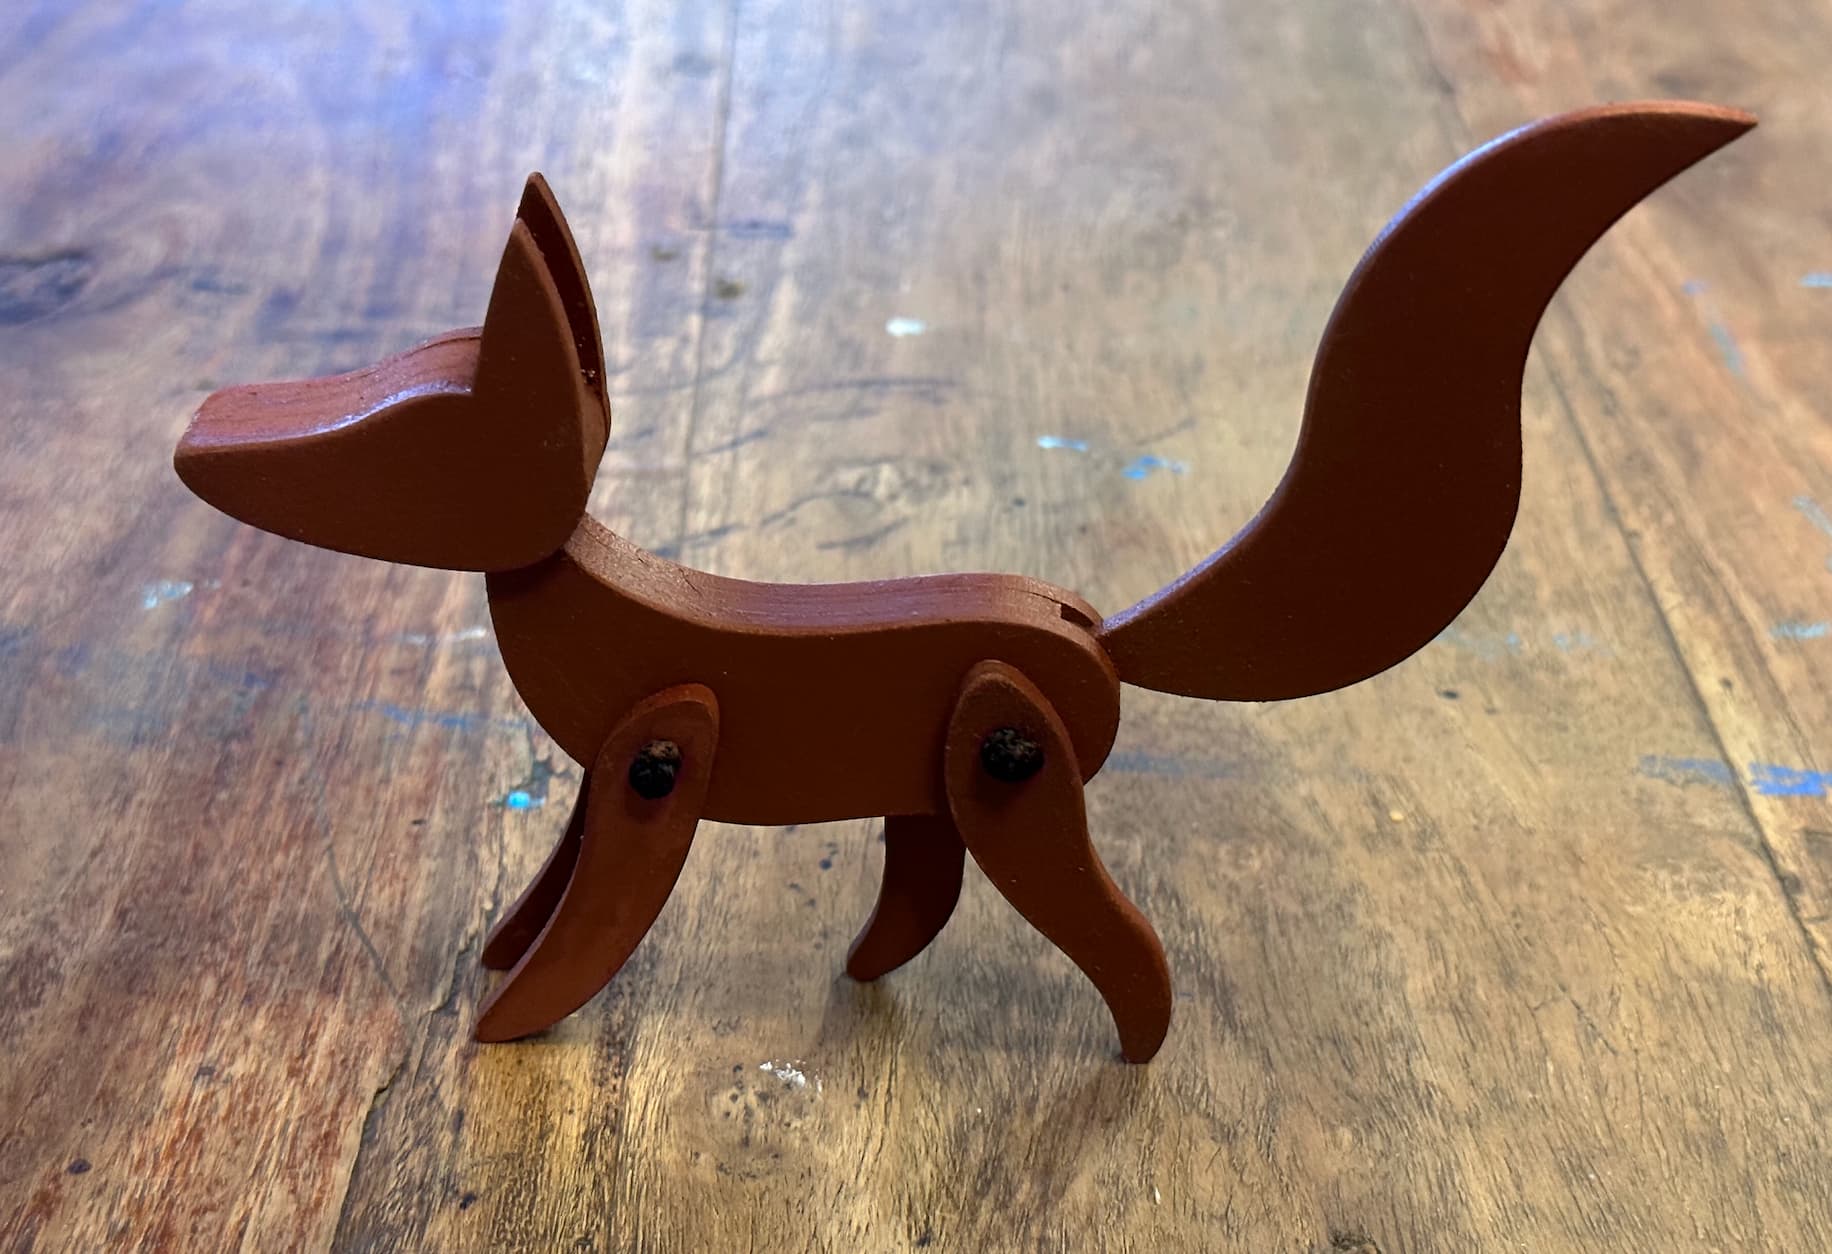
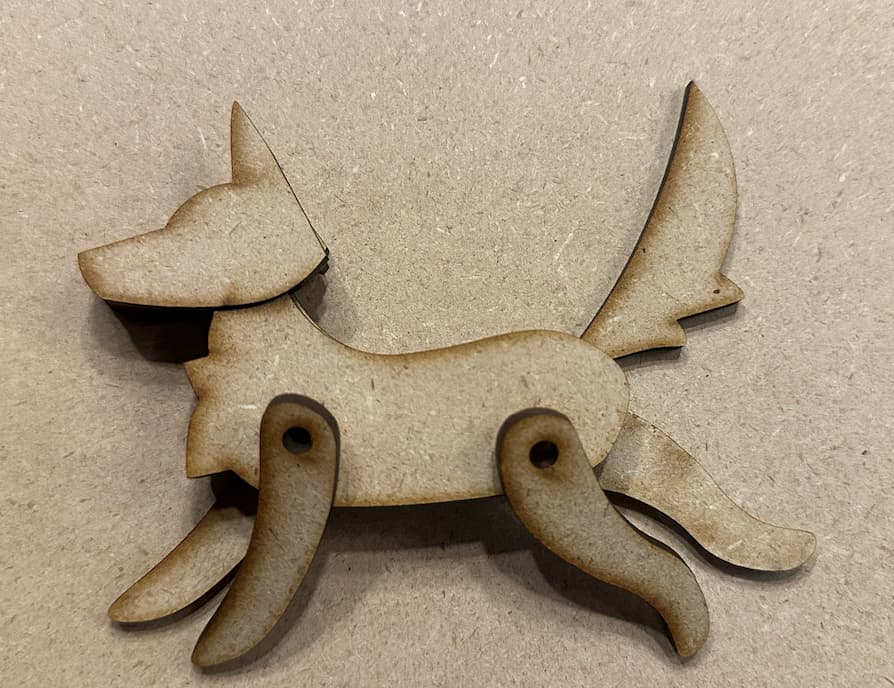
The First Fox
To my surprise, all the joints worked perfectly with this first cut! (I would not be so lucky for all of them). The tail and neck fit snuggly into their joints, holding them in. After gluing the pieces together, I spray painted it, then tied the limbs up with a string!
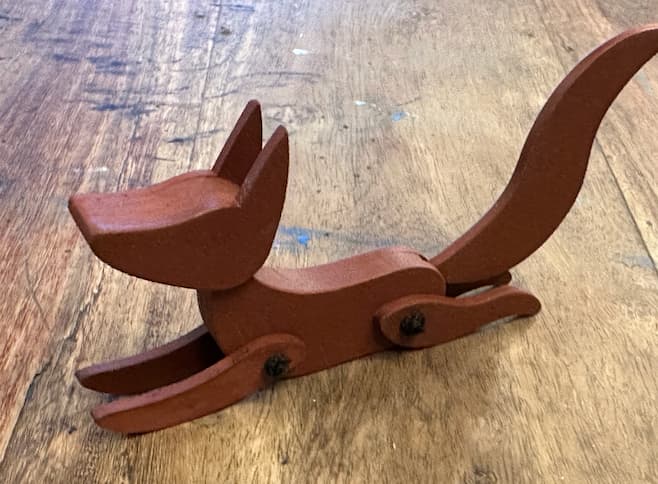
At the time, the ties were tight enough that the fox could hold its pose to stand, sit, and more! The downsides: the knot can come undone, and if the string gains some slack over time it becomes difficult to hold poses.
(Future designs will be made using an elastic string + a bead joint to hold the knot hidden inside the toy, which is makes it harder to come undone, helps hold the joints tight enough to pose, while also allowing some flex to stretch the limbs sideways and make the whole toy even more interactive) -
More Critters
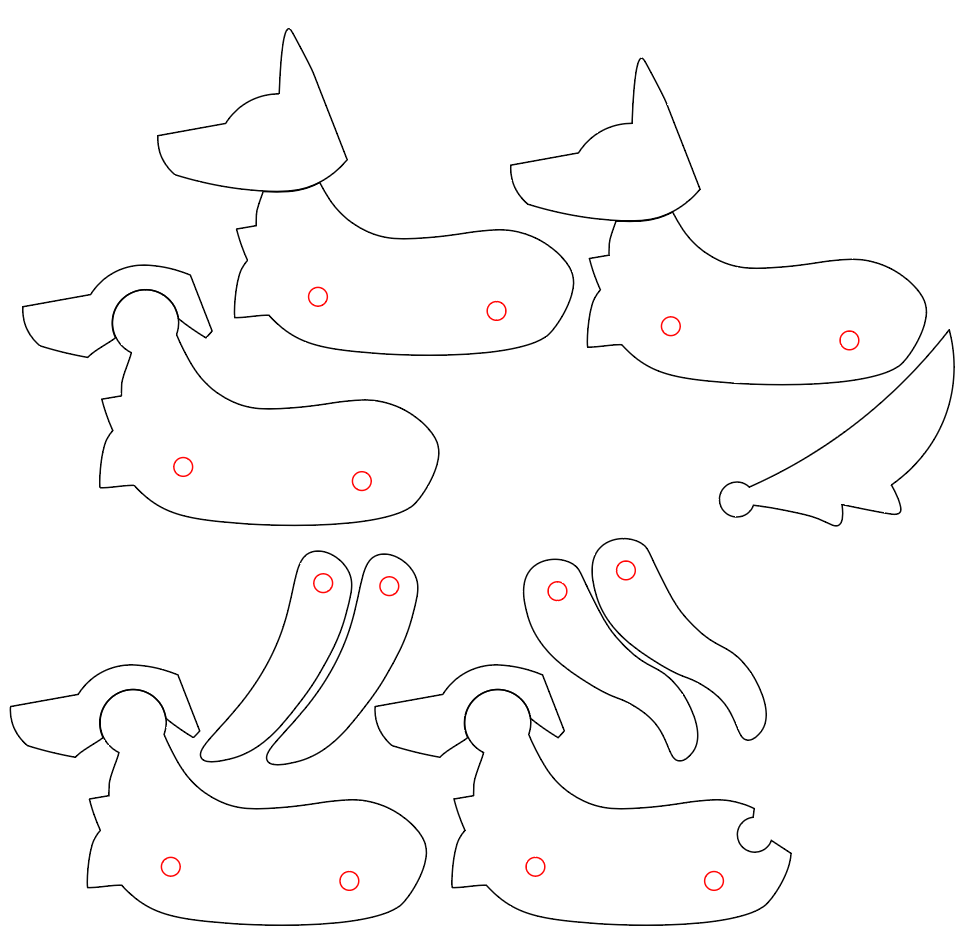
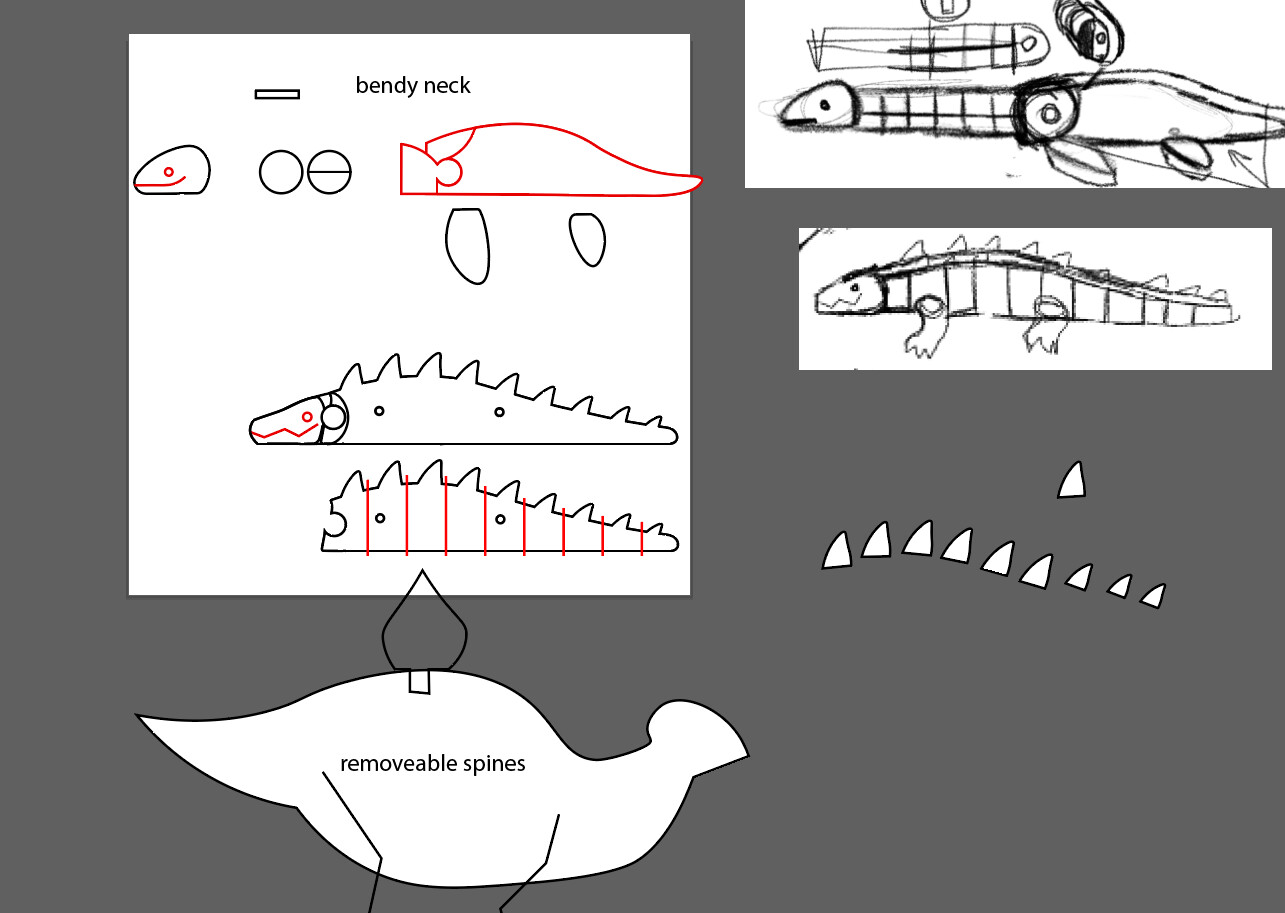
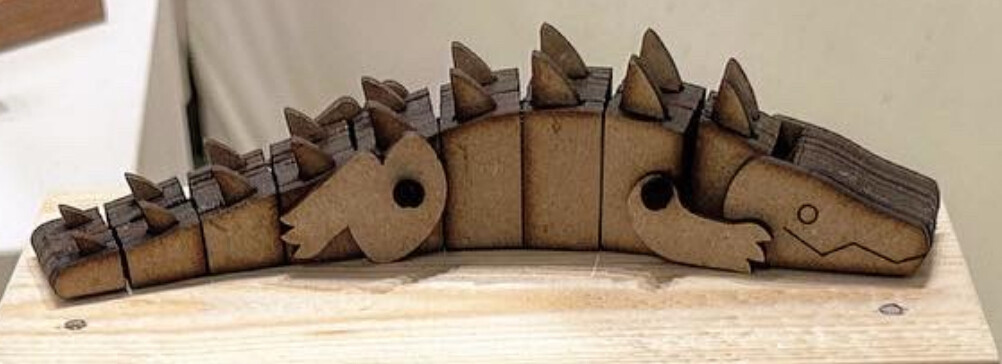
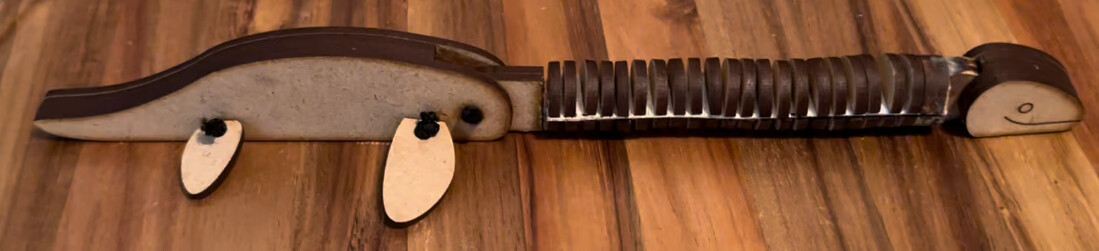
After the success of the fox, I decided to design and create a few more creatures: a wolf, based on a slightly modified fox design, a wiggly crocodile/gator, and a wiggly-necked plesiosaur/nessie.
I then vectored these designs and laid them out:
-
First prototypes results - Mixed success, post mortem!
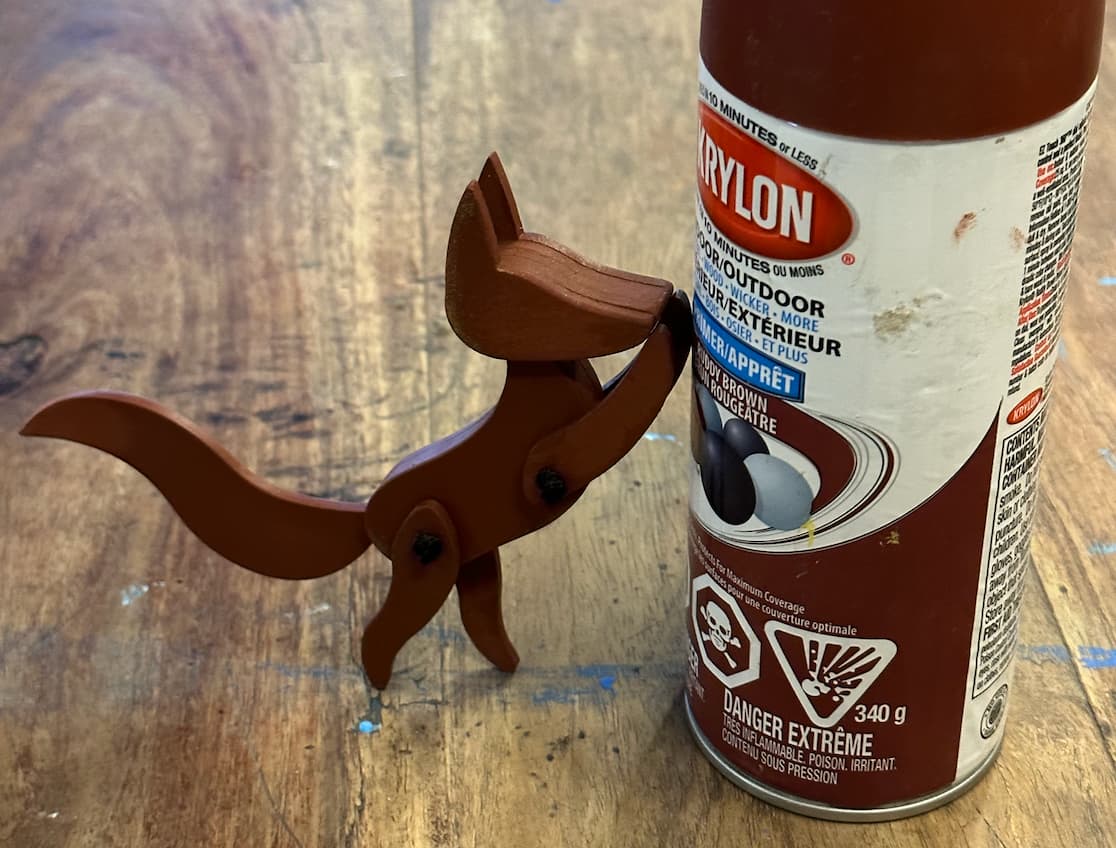
FOX- Incredibly lucky first try! I was happy with the locomotion and resulting design. The painting had some failures along the way with the coating I sprayed resulting in beading, so I sanded it down for a smoother finish.
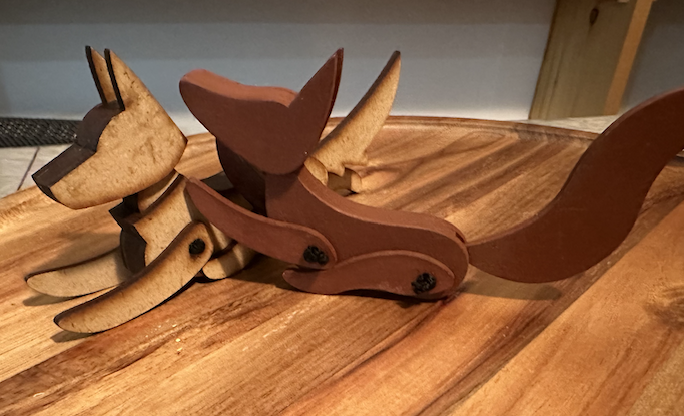
WOLF- I had slightly scaled the design of the fox while making the wolf, and with that slight change to increase tail flexibility, the tail would no longer sit snuggly inside of the body, and could pop out with a little pressure.
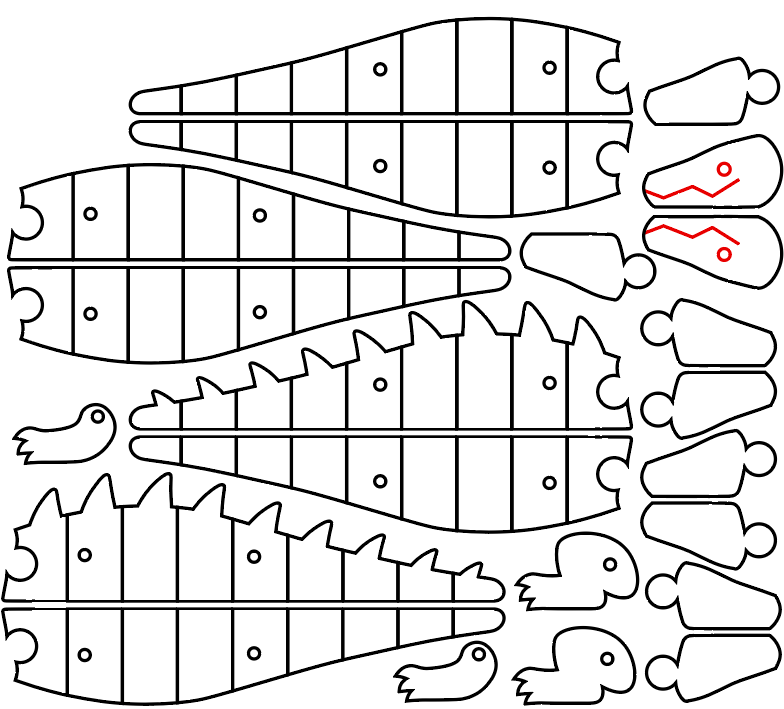
CROC- The crocodile joints all moved perfectly, but the cloth that I used for the spine was a little too flimsy - the last segment of the tail would rotate and tie itself up. Overall though, the croc ended up being my favorite design of the bunch, and needed the least design edits! I loved the silly face on it so much that I decided all my future designs should include a face in a similar style.
NESSIE- I tried a different approach for the wiggly joint type in contrast to the croc, and while it technically worked, it took FOREVER to glue it together and was flimsy. I tried a mix of axle joints for the neck, which did work (in seperation). The loop string for the flippers instead of an ‘axle’ string also worked quite well. However, as a whole, it was flimsy, the neck was too heavy, took too long to put together, and needed lots of design work and even more body bulk to make it more stable. While the other 3 designs I’m tweaking to make more of, Nessie is getting totally scrapped.
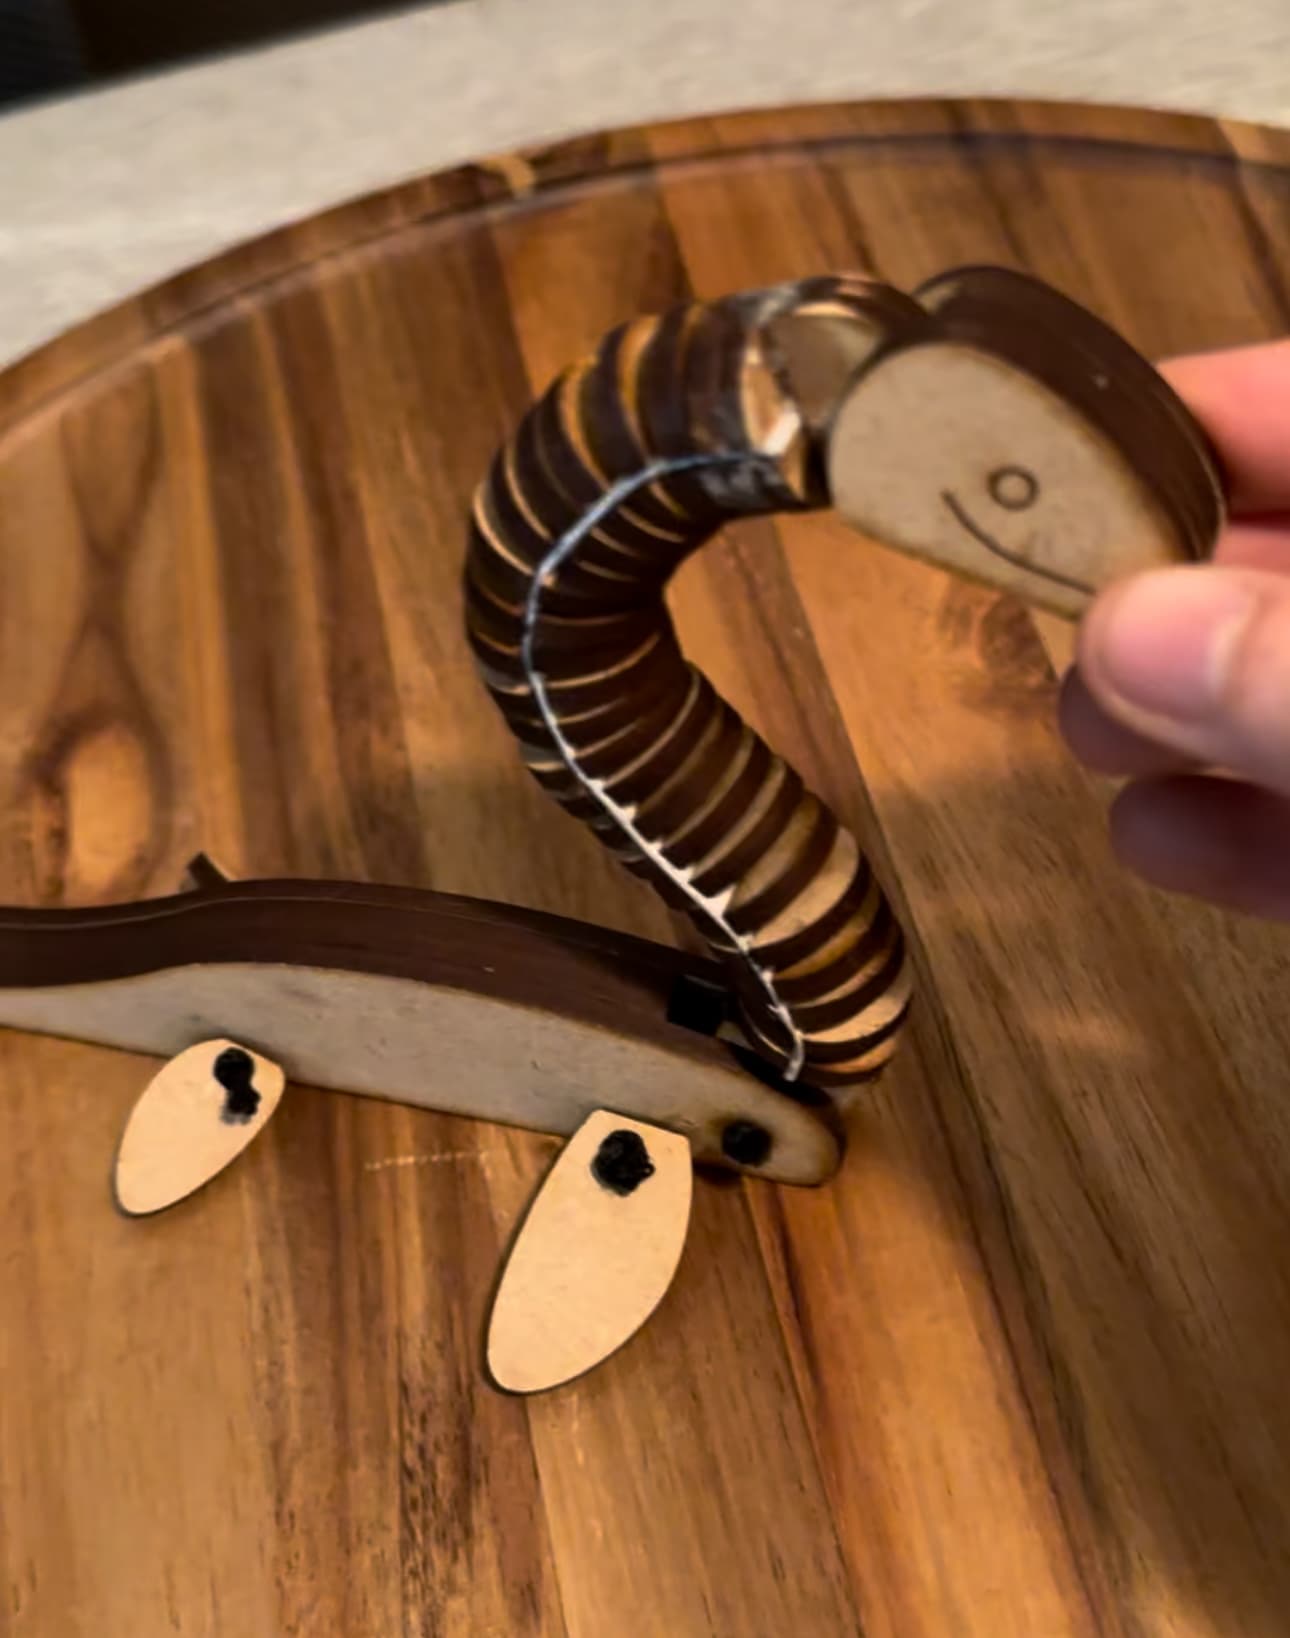
Design notes, post prototype: I enjoyed the contrast of the dark lasercut side compared to the light coloration of the faces. I believe with pure wood with a slight visible grain, it would gain even more charm! For the series of toys, I’ll be adding silly faces to the fox and wolf to give all of them a unified identity. While the knot at the end of the string worked well enough for the prototype, for future designs I’ll be using elastic string with a bead ‘cap’, to make it more sturdy, easier to repair, and overall elevate the functionality of the toy. Additionally, when I lasercut the wood in the future, I’ll bring along painters tape so that I can tape down the segments to avoid dropping them, and to make the toys easier to construct in the future - having a bag of mystery pieces, especially for the crocodile, has made most of the construction time go towards searching for the corresponding pieces - not to mention, the grain of the wood is broken up! I also will be optimizing the lasercut files to reduce re-tracing any paths, and making sure all joints have a mirrored side, so the side with the singing can face outwards.
Progressing to Production
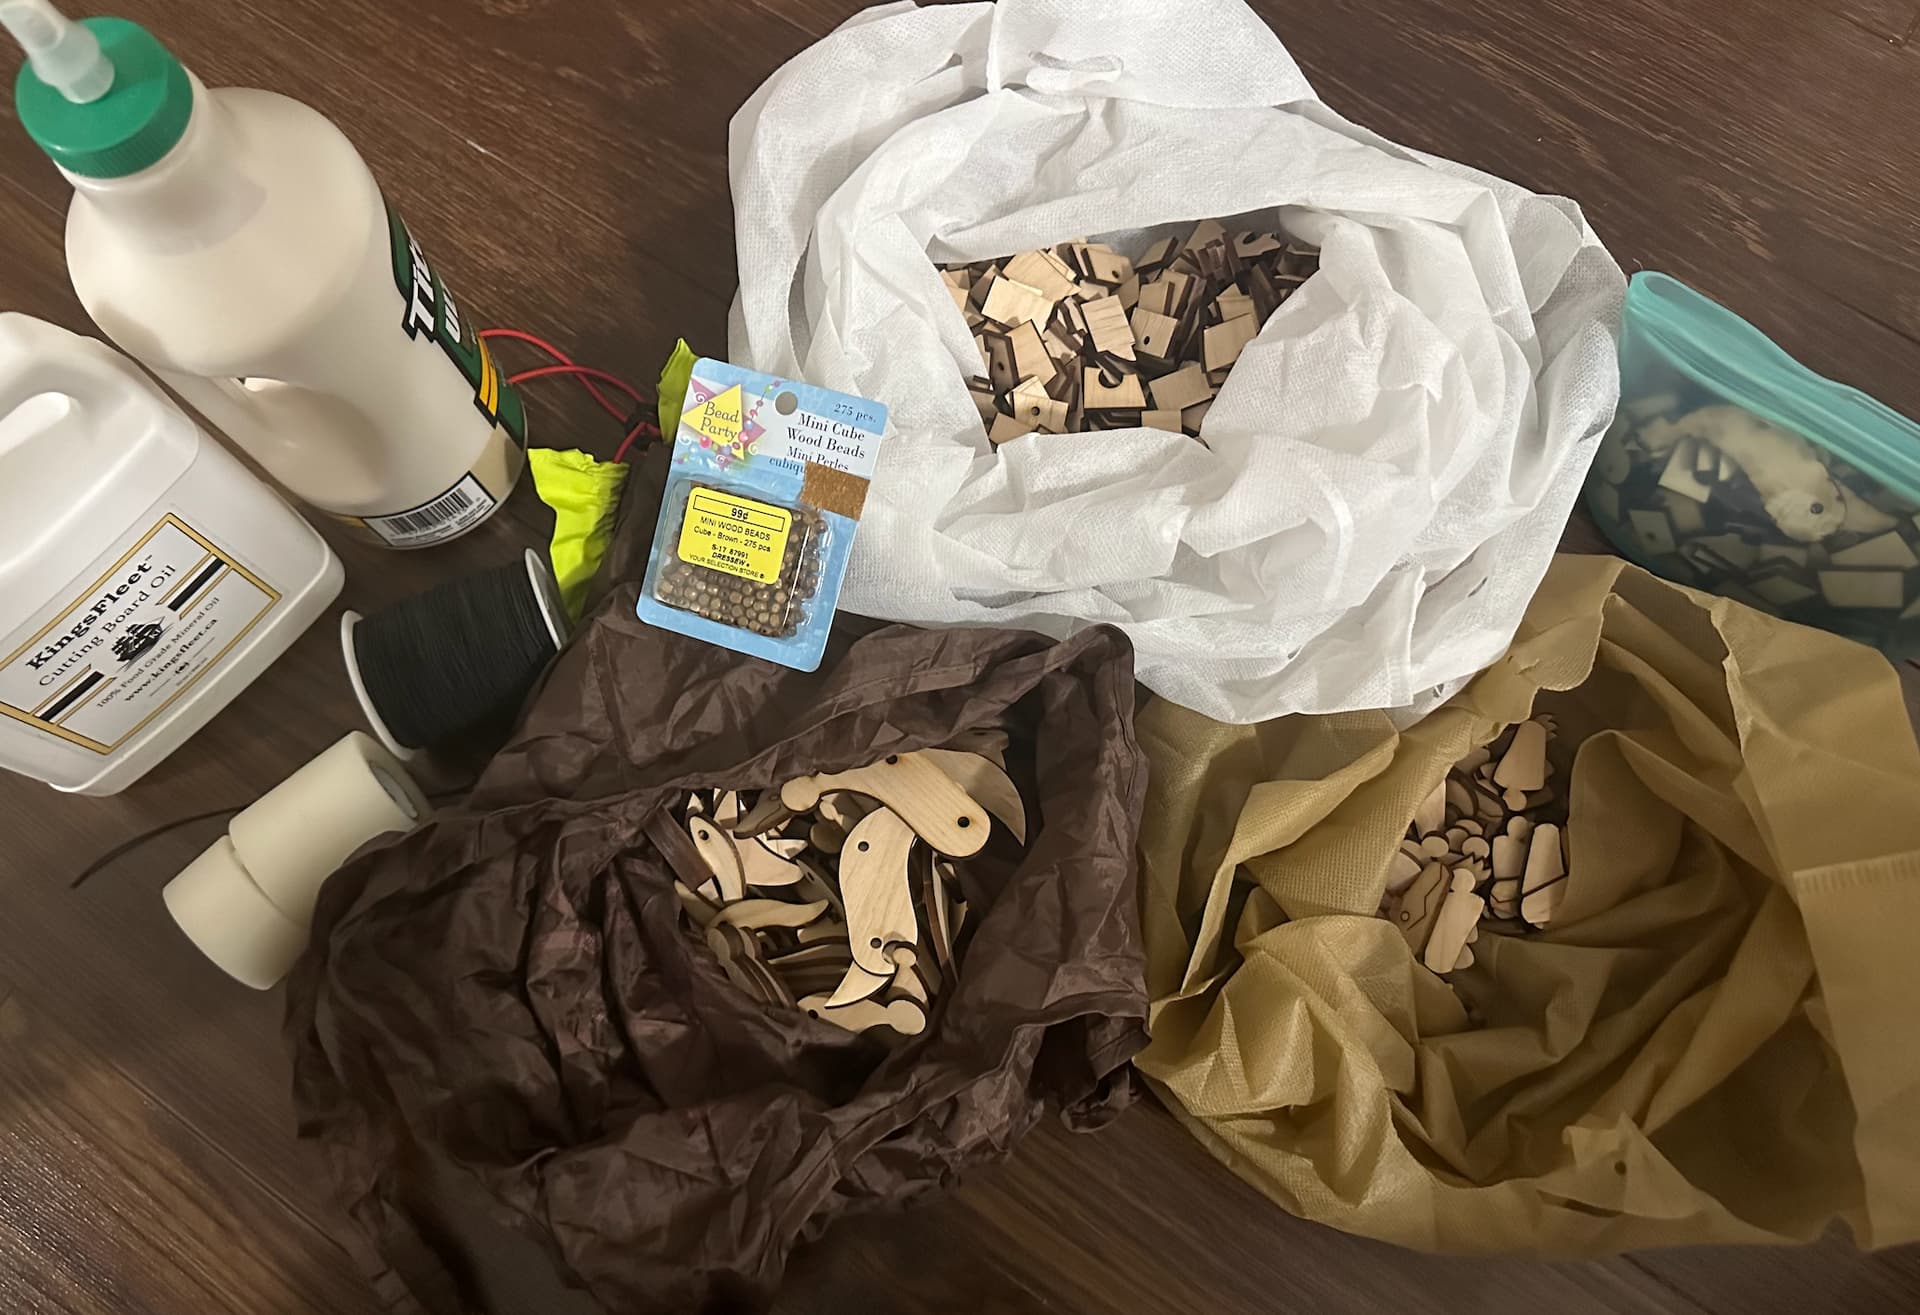
- After the prototypes, I began implementing changes. I purchased better materials - alderwood planks - and optimized my laser paths and layout. I made sure that all the pieces facing the outside would be oriented in the same direction so they’d have similar wood grain patterns throughout the body. I also completely redesigned how the crocodile would be cut, preventing any parts from being cut more than once and unevenly singing the wood. With this specific design and layout, I was also able to make sure all cuts and engravings would be performed on wood that was still secured to the plank.
I tested a few planks on the makerlabs lasers, and while it took me a few tries to get the settings right for my new material, I was able to get it cutting nicely after a few attempts! This one below was a failed plank (I engraved the bodies instead of cutting), but I kept it as a keepsake because it showcased the layout quite nicely.
- I cut the remaining planks that I could with my last minutes at Makerlabs, and that leads me to where I am now! I have a few bagfulls of lasercut pieces I’ll be constructing at VHS while I wait to get my training on the laser here. In the future, I’m making sure to bring painter’s tape so that I can keep the pieces on their corresponding blanks, for easier construction in the future - and so that the wood grain fluidly connects from one end to the other! Unfortunately, when I cut these that wasn’t the case… so you’ll probably see me at VHS puzzling over which pieces go where, and starting to glue some of them together!


So that’s where I am as of now!
I’ll be editing this post with updates as I move forward with the project. If any of you have thoughts about creatures you would like to see in the future, comments about my workflow, or advice on how I could approach selling these, I’d love to hear it!