VHS Reflow Oven
VHS now has it’s own SMD Reflow Oven
It’s sitting in the soldering section (looking like a mild mannered toaster oven)…
Thanks to @majic and all that supported the TILT campaign that financed the purchase of the controller kit.
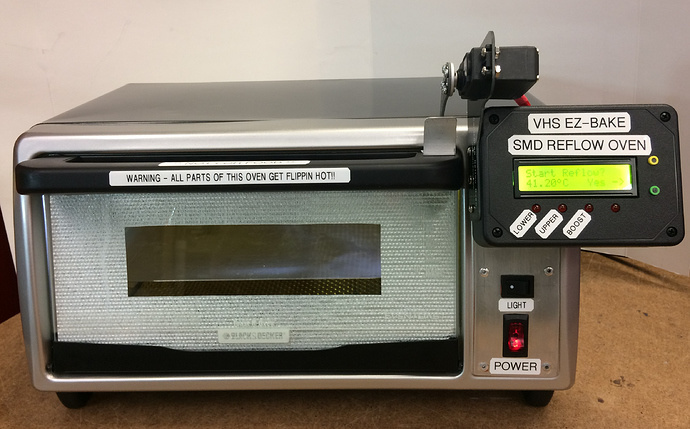
The oven is based the design and controller found here:
http://www.whizoo.com/reflowovenhttp://www.whizoo.com/reflowoven
It is running v2.0 of the software that you can find here:
https://github.com/engineertype/ControLeo2https://github.com/engineertype/ControLeo2
The only thing I added was a VHS splash screen when the controller starts up.
While I didn’t document the build of this oven, it is very similar to the one I built for myself and you can find the Instructable for it right here:
http://www.instructables.com/id/Making-A-SMD-Reflow-Oven/http://www.instructables.com/id/Making-A-SMD-Reflow-Oven/
The one feature I added to this oven was the addition of an interior light so you can see your board while it bakes. I found, that with my oven, I was often using a flashlight to watch the process. This is much more convenient.
Hell… While you are at it you should check out my Instructable on setting up and using a solder paste dispenser. We don’t have one at the Space (yet) but it has some basic info on SMD soldering using the oven:
http://www.instructables.com/id/How-to-set-up-repair-adjust-and-use-a-solder-paste/http://www.instructables.com/id/How-to-set-up-repair-adjust-and-use-a-solder-paste/
Basic Instructions:
- Turn on power using red POWER switch located on lower right side of oven.
- Turn on the light (if so desired) using the LIGHT switch which is located above the POWER switch.
- Place your ready to bake boards on the tray (hopefully located inside or near the oven)
- Slide the try into the oven, try to center tray in the depth of the oven
- Close the oven door.
- The LCD panel should show “Start Reflow” on the top line and the current oven temperature on the bottom line.
- Gently press the GREEN button located to the right of the LCD.
- The oven will start the bake cycle.
- It starts with a PRESOAK phase
- Then it goes through a SOAK cycle
- Next it run through the REFLOW cycle.
- Once it hits the required REFLOW temperature it holds it for 40 seconds (this is when the solder melts and the various SMD parts settle into place)
- Once the REFLOW cycle is complete the controller shuts off the heat and opens the door.
- Once the oven has cooled to 100C it is safe to remove your board (avoid touching it before this so the solder has time to harden) Note that you need to use tweezers as the boards will be hot… Really really hot… Like burn your friggin fingers even though you should know better hot…
- Once the oven has cooled to 50C the oven door now closes. This is a better time to remove your PCB
- Close the door and turn off the oven if you are done.
- If you have another bake to do then you need to wait till the oven temperature drops to 50C before you can start another bake cycle.
- If you want to cancel a running bake cycle then press the YELLOW button (or just shut off the POWER)
Advanced Instructions:
Adjusting Temperature - Unless you are an advanced user I suggest you stick with leaded solder paste as it is much easier to work with. For leaded solder I set the temp at 183 degrees. If you change the temperature for a non-leaded solder run please change it back to 183C when you are done.
Bake Mode - An added feature of this controller is the ability to bake at a set temperature for a set period of time. Handy if you need to heat stress test something or dry out components (please do not try to bake cookies unless you feel you need extra heavy metal in your diet… which you don’t…)
Caveats/Stuff:
The controller is auto calibrating in that it monitors the heating and adjusts itself if it doesn’t match the reflow temperature profile. Typically once it is set for a temperature it will be good and not do any further adjustments. However if it detects the profile is not correct it will stop the bake and show an error message. I recommend you do a test bake with the oven empty before baking your boards to ensure all is good.
If you change the temperature setting it will go through a recalibration. This can take several cycles till it dials things in so be aware that you must go through this process.
The unit will not let you do another bake till the oven cools to below 50C. Once the oven cools to 100C you can remove your board (with tweezers or something cuz it will burn you) and then aim a fan into the oven to aid in cooling it down.
Do not use this oven for heating food. It is full of lead and other heavy metal residue.
Do not lick the inside of this oven (see above). In general I recommend copious hand washing when dealing with solder paste.
If the LCD panel does not show “START REFLOW” then use the YELLOW button (Located to the right of the LCD) to cycle through the options till you get to the STARt REFLOW screen. Do not enter the TEST OUTPUTS or SETUP menus as you risk making the device inoperable or worse.
Do not leave the oven running unattended. While I did install a high temperature cutout (to shut off power should the oven get too hot) this will not stop a fire should your board decide to shoot out flames.
If you need to cancel a bake cycle just press the YELLOW button.
The oven requires the aluminum tray to sit your PCBs on. If the tray is missing you cannot use the oven. The tray is 1/32" aluminum cut to approx. 6-1/4" x 10-5/8". I have scribbed “VHS Reflow Oven Tray” on it to hopefully avoid it getting used for something else. Make sure you put the tray back in the oven when you are done.
If you find the tray getting sticky (with flux) then use some Isopropyl Alcohol and a cloth to clean it. Make sure the alcohol has dried before using the oven.
More Stuff:
Unfortunately the current software version does not let you store several temperature settings (and associated calibration data). It is open source (Arduino Leonardo based) should anyone feel like getting involved. This would avoid the re-calibration the oven will go through when you change the temperature.
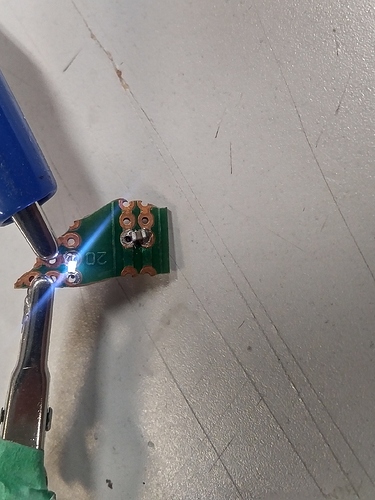
I rigged up the oven light using an old glass fuse and a bright LED. I’m not 100% sure it will be able to take the heat so let me know if you have noticed it no longer working.
There are various thoughts on thermocouple placement. While having it contacting the board may be ideal this doesn’t work very well in practice. Having it in free air near the board seems to work fine. Try not to muck with it.
Feel free to contact me if you have any questions/comments/complaints/whatever.
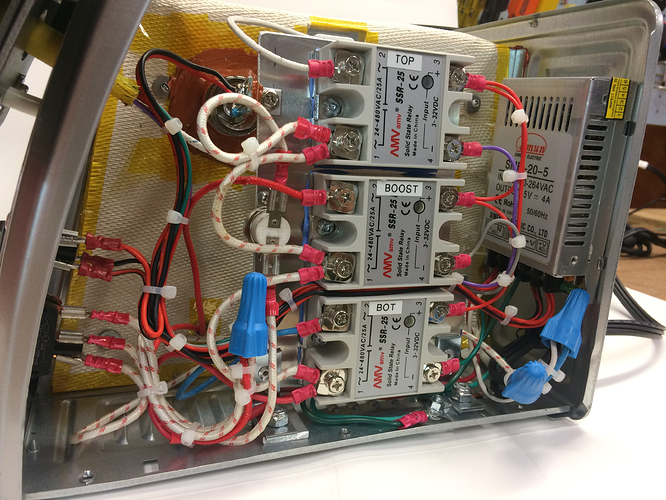
Here are some tech pictures should you have your geek on (and really, why would you be reading a thread on a reflow oven if you didn’t)
Inside Wiring:
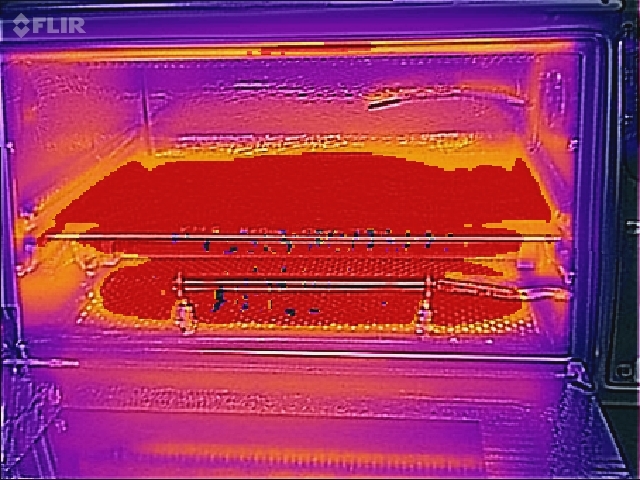
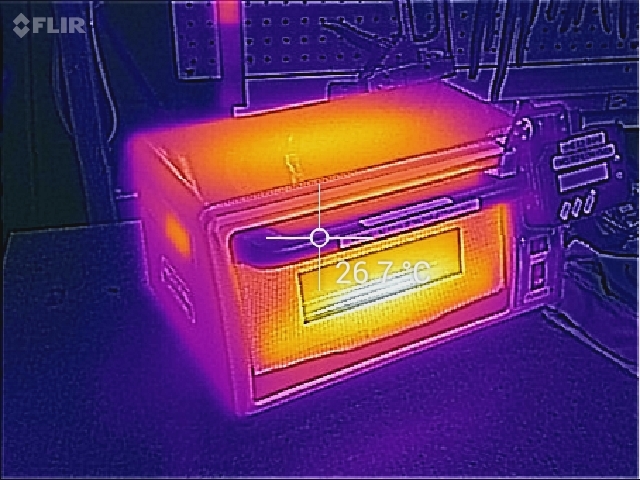
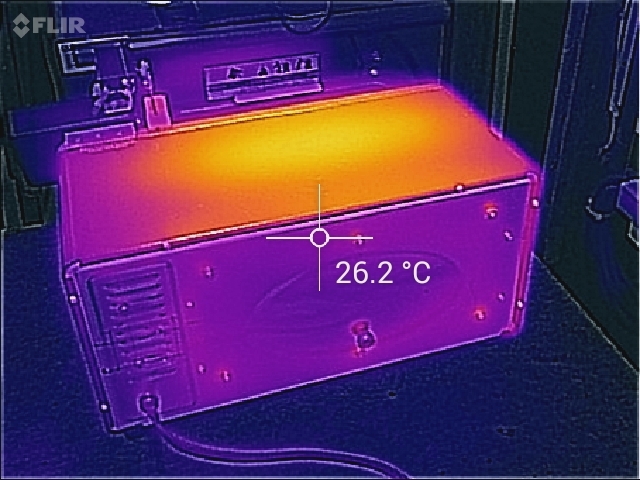
Some IR Views Showing Heat Dissipation (cuz I had access to a FLIR camera)
Front:
Back:
Tray (door was opened after a bake cycle showing pretty even heating):
