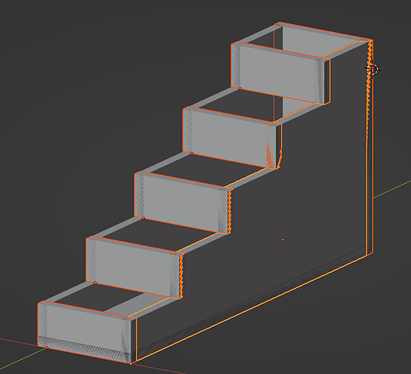
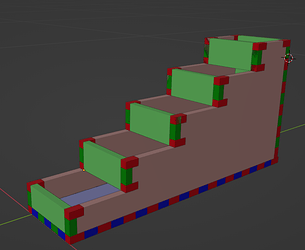
I’m working on a kind of terrace’d potted planter so that I can experiment with putting water at the bottom and seeing how it wicks up in different kinds of soil/see how seedlings react to different moistures. And it’s an excuse to create a custom laser-cut object. I thought I’d note down my steps in case anyone else wanted to get started making custom 3D shapes with the cutter.
-
Model your creation in Blender using one object per wood piece.
- The panels should be 6mm thick, or the thickness of your wood.
- Allow the objects to overlap/intersect in areas where you expect there to be a seam.
- Use integer millimeters for all important dimensions to keep the math simple. I ended up typing in “56” a lot because that’s the inner width of the planter plus the thickness of one panel.
- Re-use meshes where possible to avoid unnecessary duplication. You can duplicate objects while keeping the same mesh data with ALT+D, and assign a mesh/material to a bunch of objects by selecting all the target objects, then the source object, pressing CTRL+L and “Link Object Data”.
-
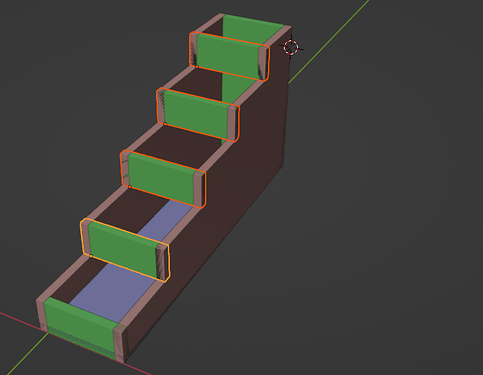
Assign a different colour material to each piece so that no two pieces of the same colour are touching.
- In this example, each of the green “stairs” are instances of the same mesh, as are the red stringers.
- In this example, each of the green “stairs” are instances of the same mesh, as are the red stringers.
-
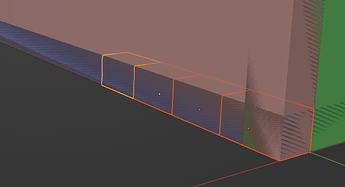
For each intersecting edge, place a series of rectangular prisms along the seam. First, make the prisms 6mm x 6mm x 10mm, and place them along seams every 10mm to show the interlocking pieces. When you copy and paste the prisms, use ALT+D so that the copies have the same mesh and material data. These prisms should NOT intersect or overlap (yet… more on that later)
-
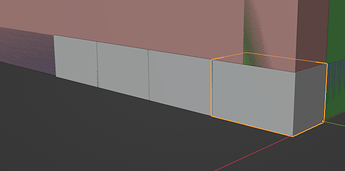
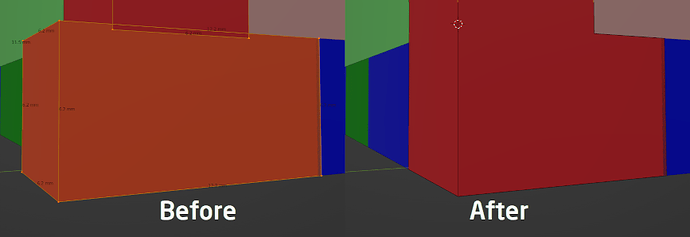
At this point you’ll notice that the nubs are hard to see because Blender doesn’t handle intersecting shapes very well. So now, edit one of the nub’s meshes and grow the dimensions of the shape by like 0.1mm in each direction. All the nubs should follow suit, if the meshes are linked correctly, and then they should be visible. Now we’re working with nubs that nominally 6mm x 6mm x 10mm but in reality are slightly bigger than that.
-
Split the nubs into three separate groups of meshes and give one color to each mesh to associate it with a panel. Place the nubs everywhere so that it becomes obvious which panel “claims” a contested area. This should be easy enough, since all important measurements are integer millimeters.
- Nubs are allowed to overlap by 0.2mm according to that visibility/clearance hack, but should not overlap more than that.
- If you have a gap where the nubs don’t fit, or result in a panel with a weird shape, you can split the nub out into a separate mesh and adjust the length of it by an integer mm amount to make it fit.
-
At this point, it should be easy to visualize how all the pieces will fit together. Check all the corners where 3 panels intersect and make sure you assigned red/green/blue nubs so that there aren’t any weird… consequences from those decisions.
-
When you’re ready, merge the red, green and blue nubs into just 3 objects/meshes. In spots where you have tricky intersections of pieces, manually edit the mesh to clean those up. We’re actually going to leave those 0.1mm offsets in, because they become the clearance margin to make sure the wood pieces fit together. For each mesh, recalculate normals outside.
-
For each panel that you want to laser, apply a boolean modifier that subtracts the nubs of every other color.
- Sometimes Blender freaks out when performing that operation and makes the resulting shape disappear.
- This happens if the faces on the meshes you’re subtracing happen to line up perfectly, and the floating point operation glitches out. If you manually nudge the faces on one of the nubs meshes by like 0.05mm, that usually fixes it (but ideally you perform this operation last).
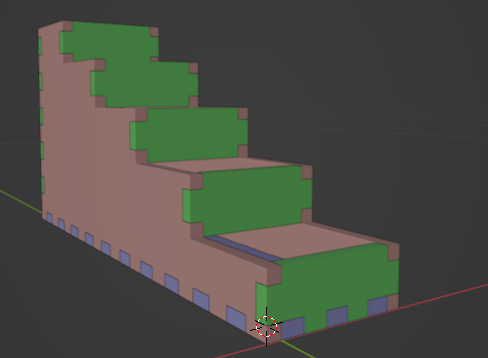
- After you’re done, admire what your final lasered shape will look like.
-
Take a backup of all your geometries.
-
Apply modifiers to all your panels, so that the notches become part of the meshes. Be careful that the apply operation doesn’t corrupt the mesh due to the aforementioned glitch. Join all the resulting objects together into a single object/mesh.
-
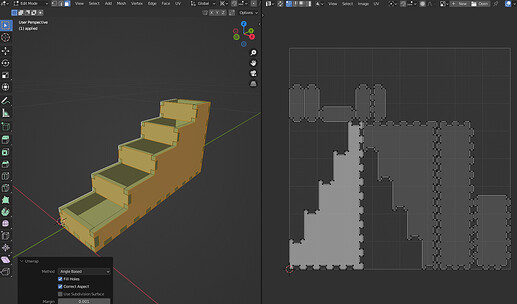
In the mesh editor, select one of each of the important faces, press ‘U’ and Unwrap. The laser design should now appear in the UV/Image Editor. You can export this to SVG, and from there, process the paths and cut.
I hope this helps someone, or at least reduces the activation energy for someone to get started on a new project ![]()
