I just finished my last project, which took me 2 months and raised a lot of questions from observers, some of them thinking it looked cool, others gently stepping back away.
This was, at first, a project to reuse Dan’s carboard leftovers. I thouhgt I’d make a cheap (recycled), quick (cardboard is easy to laser cut), light project. But by the time I went far enough into the designing phase to turn back, the cardboard was gone. So I just ended up using a stash of pine plywood that I had bought for no particular project.
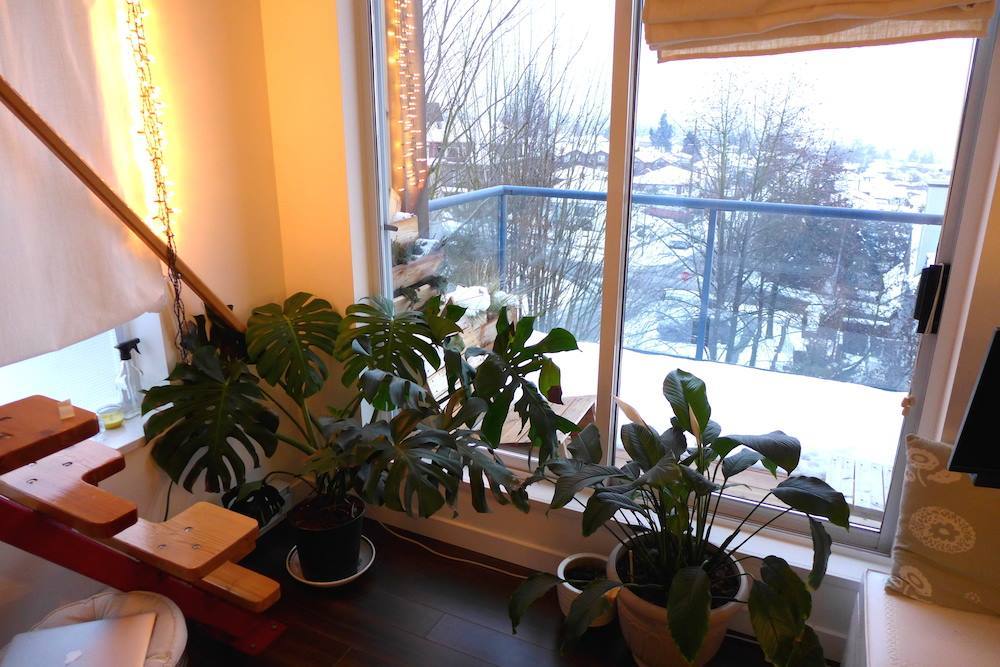
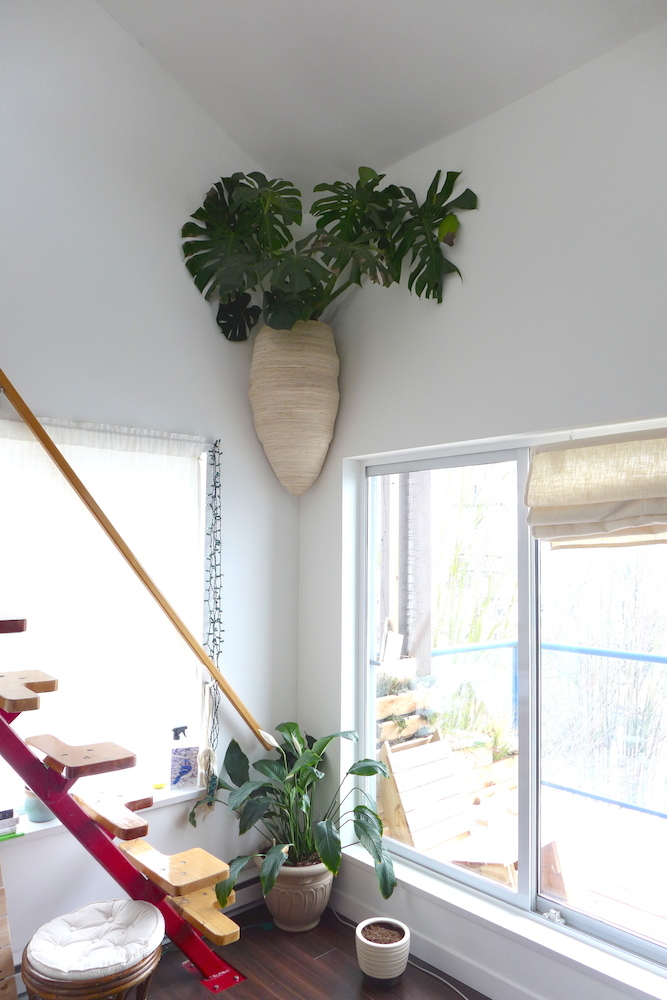
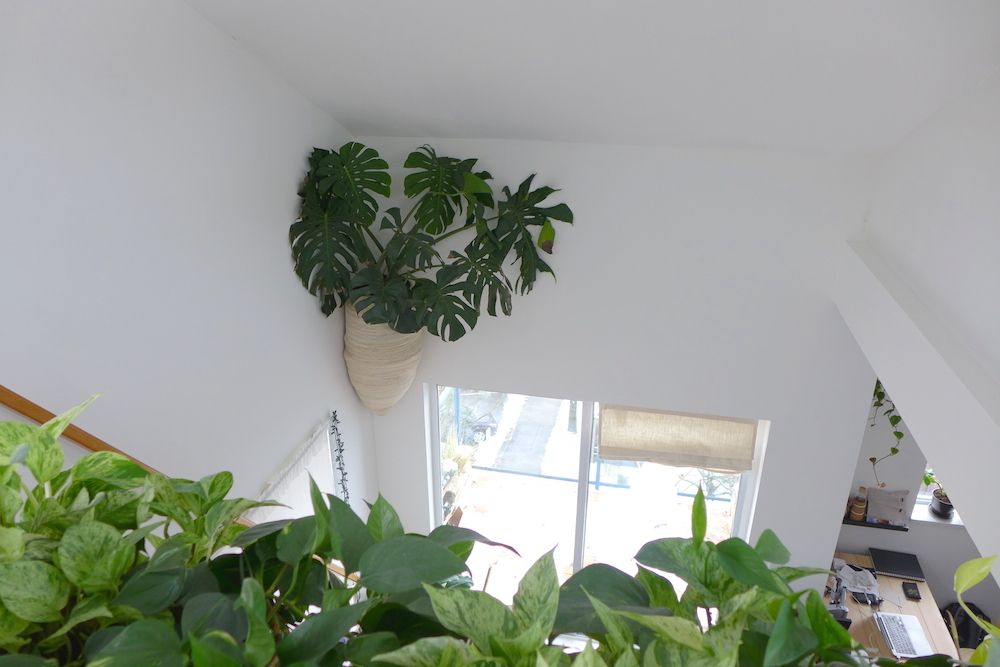
So, we have this monster plant (Monstera deliciosa) that we “saved” from Home Depot, super dicounted because no-one wanted it, as all the leaves were damaged, and they wanted to make space for winter stuff.
It quickly thanked us by growing two fresh new leaves, and we had to admit that this little baby was going to take a lot of space. Our appartment is not huge, but it has vertical space. So why not grow the plant up on a wall? It’s a climber, after all…
I spent Somewhere between 1 and 2 days designing something on SketchUp.
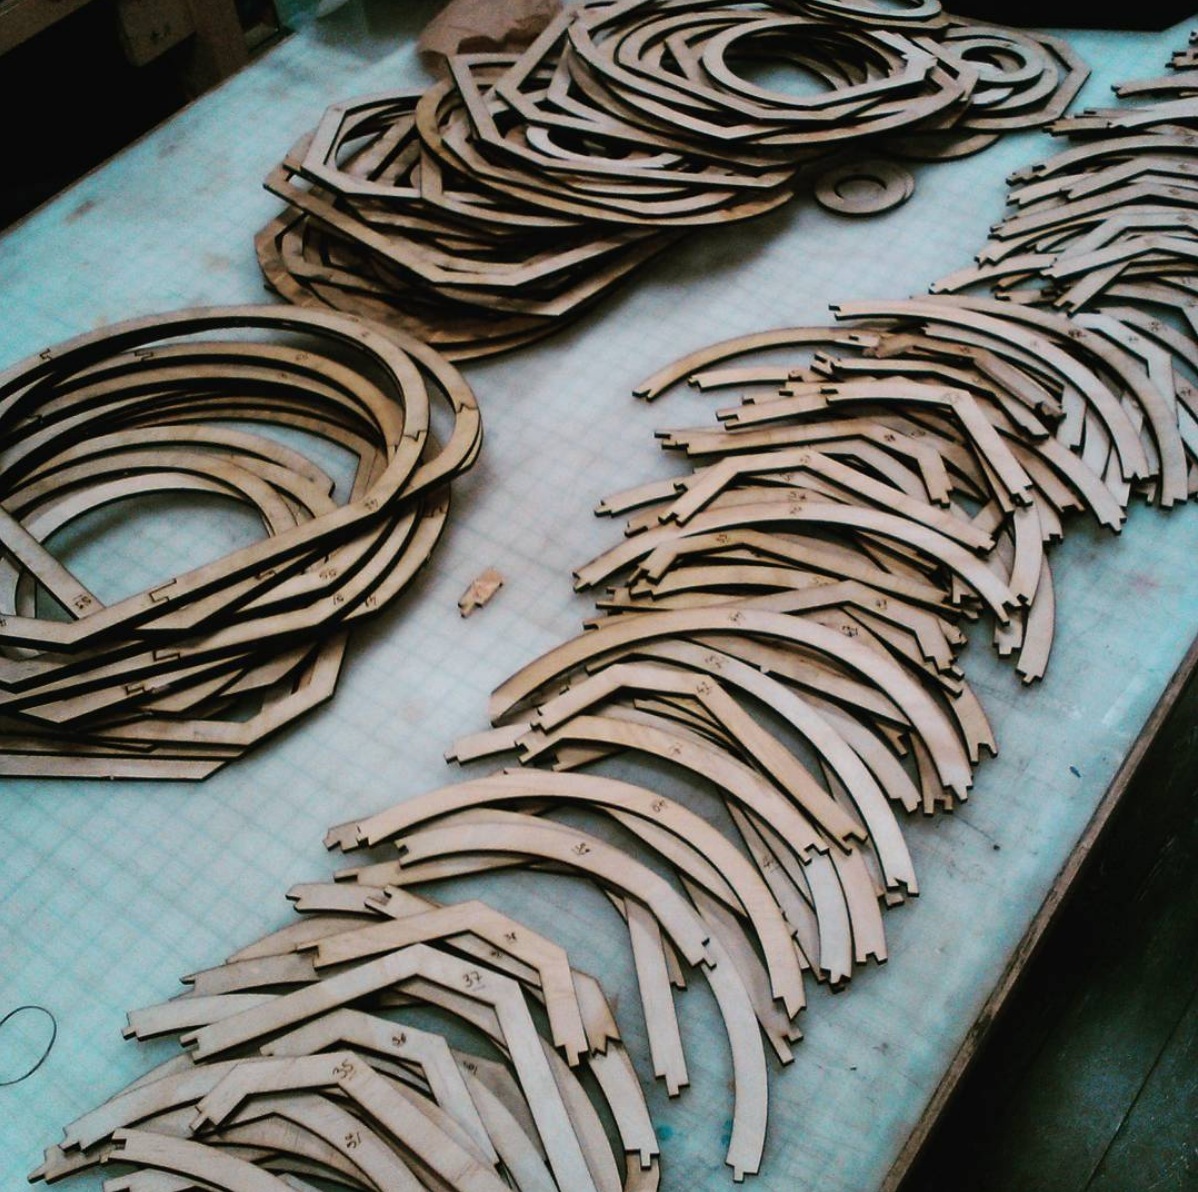
Well, the design part itself wasn’t that long. Laying out all the pieces for an efficient laser cutting was the ordeal.

Nesting is key, but my pieces overlapped to much to be efficient, so I had to divide and number 4 pieces for most layers.
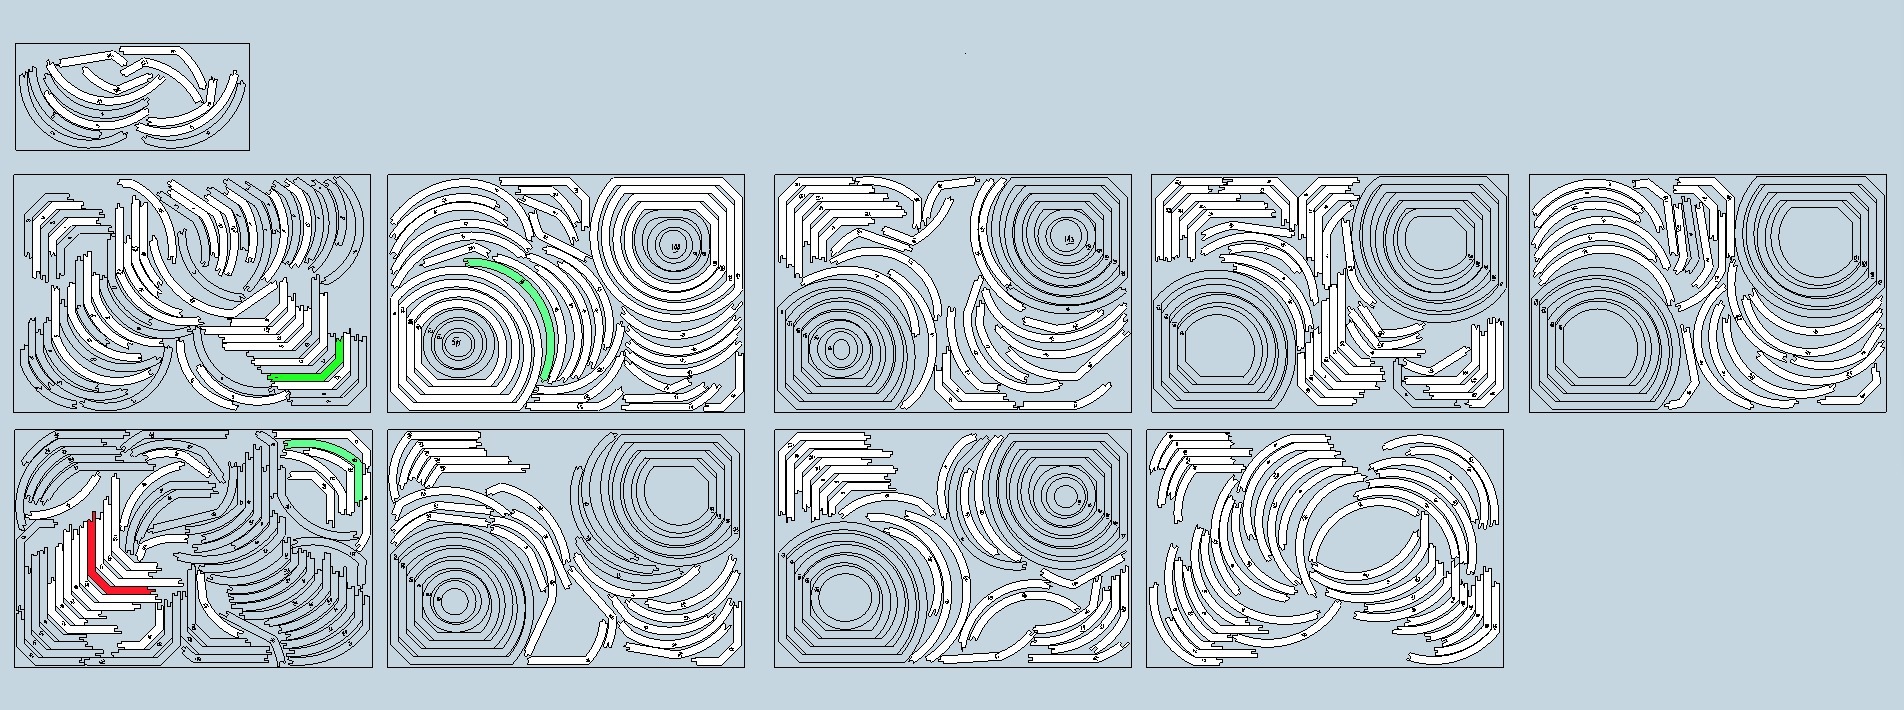
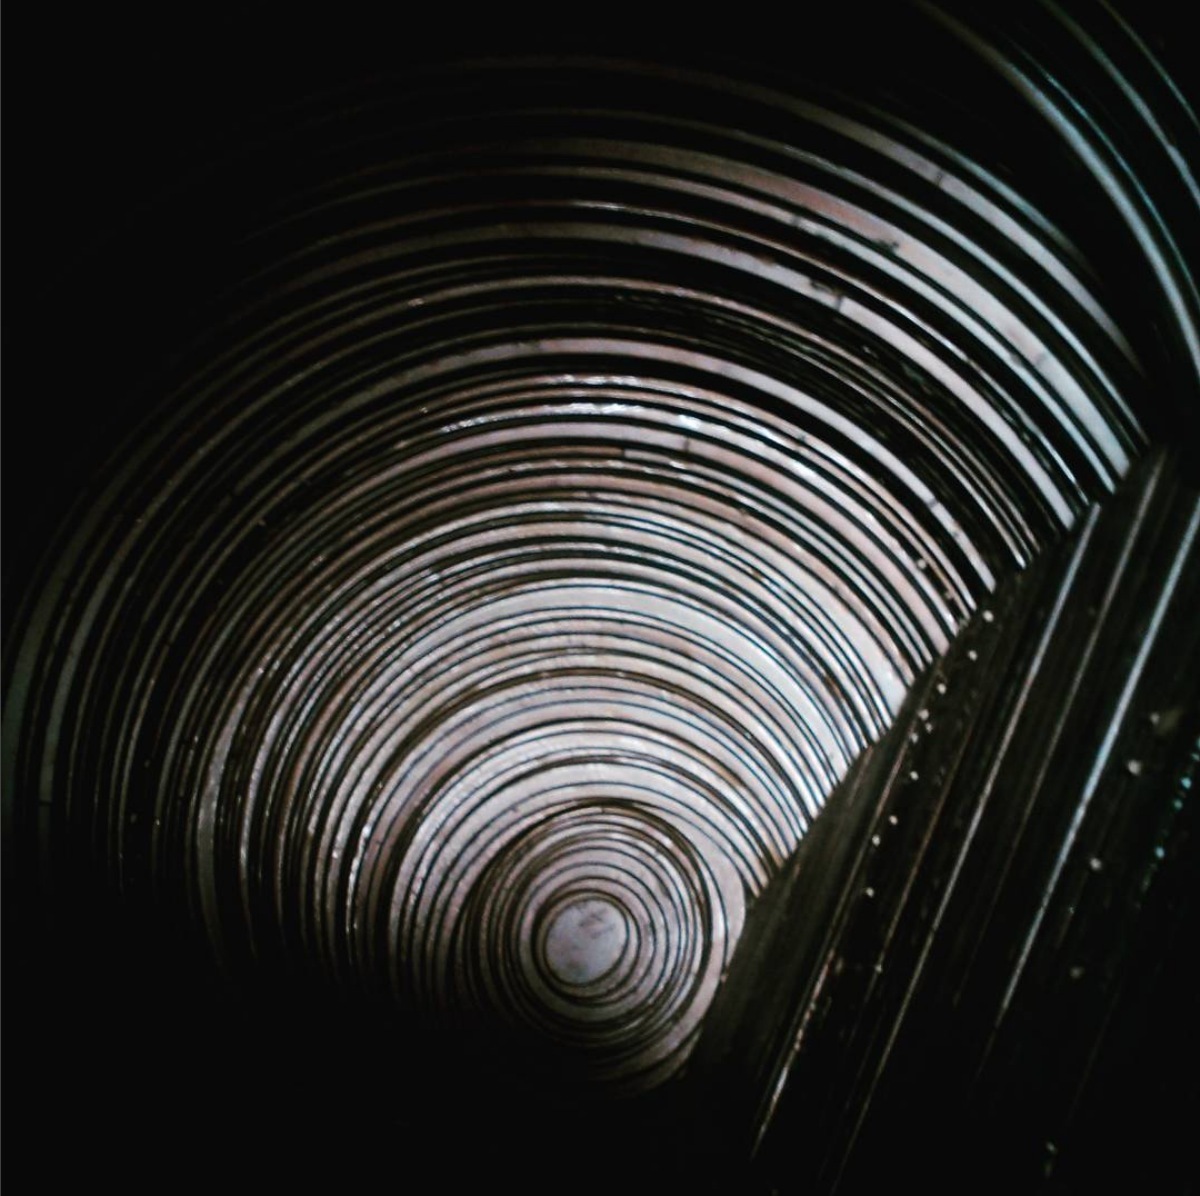
Nesting all these layers represented most of the design work, numbering them also took a while. By pure chance, though, the result was a perfect fit for the exact number of plywood sheets I had in stock, to the very last tiny scrap sheet I had on the side (as long as I didn’t screw up when lasering).
Now lasering took me almost 2 whole days. It wasn’t a great time with the cutter, with focus issues and clogged filters, so it went pretty slowly. I will also never use this type of plywood again. It had a good rating but I think it’s definitely not as clean as birch, and man, there were some weird things inside.
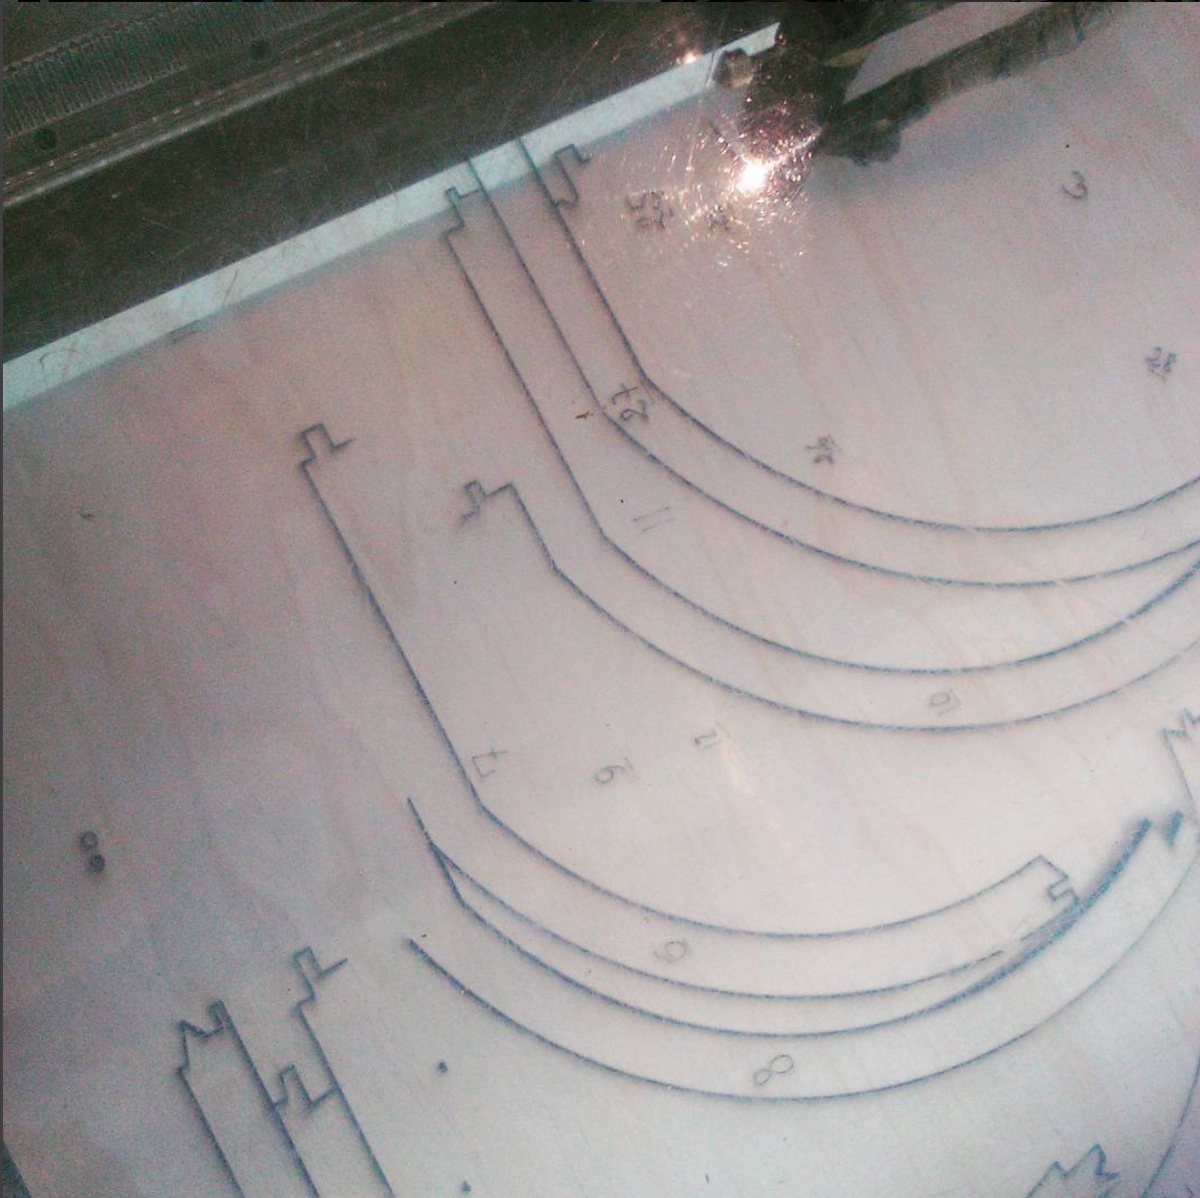
I had 150 layers, most of them divided in 4 pieces. That makes a lot of tiny pieces, which I am
happy I numbered. Also, I made every joint unique, to make assembly easy. Correction : not as hard.
Then I glued for 2 days straight.
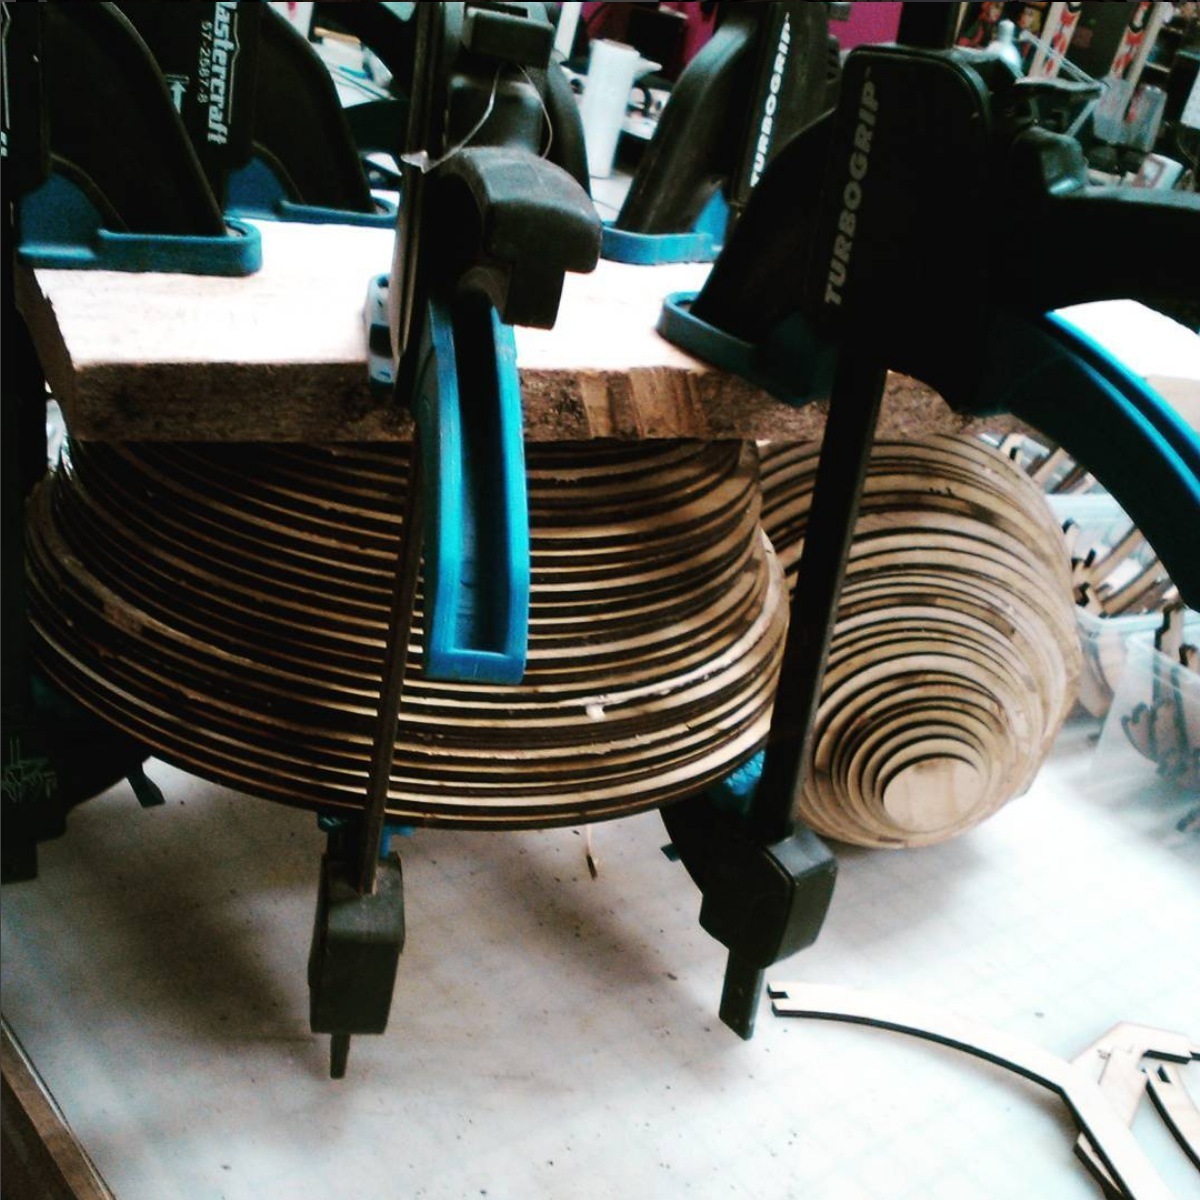
I glued different batches at the same time, to allow them to dry while working on another one. It did save me a lot of time, but I would rather recommend to go layer by layer, as assembling bigger stacks was much harder than just adding 1 or a few layers at a time to a bigger piece.
The last step was messy, my two halves wered slightly warped in a different angle, just by a couple of millimeters, but it was enough to make it impossible to join. After a major fail, I had to disassemble them and sand both sides step by step until they could almost align. I still had to mix some glue and sawdust to fill the gaps. I also used this mix in quite a few tiny spots where layers were not 100% tight.

I bought a 3 pack of 300mL aquarium sealant to waterproof the inside (not seen on picture). It went messy because I had to reach the very bottom, which meant I had my arm in it up to my shoulder, while trying to balance the odd shape with my other arm and legs and keeping my mask on (silicone fumes are very aggressive).
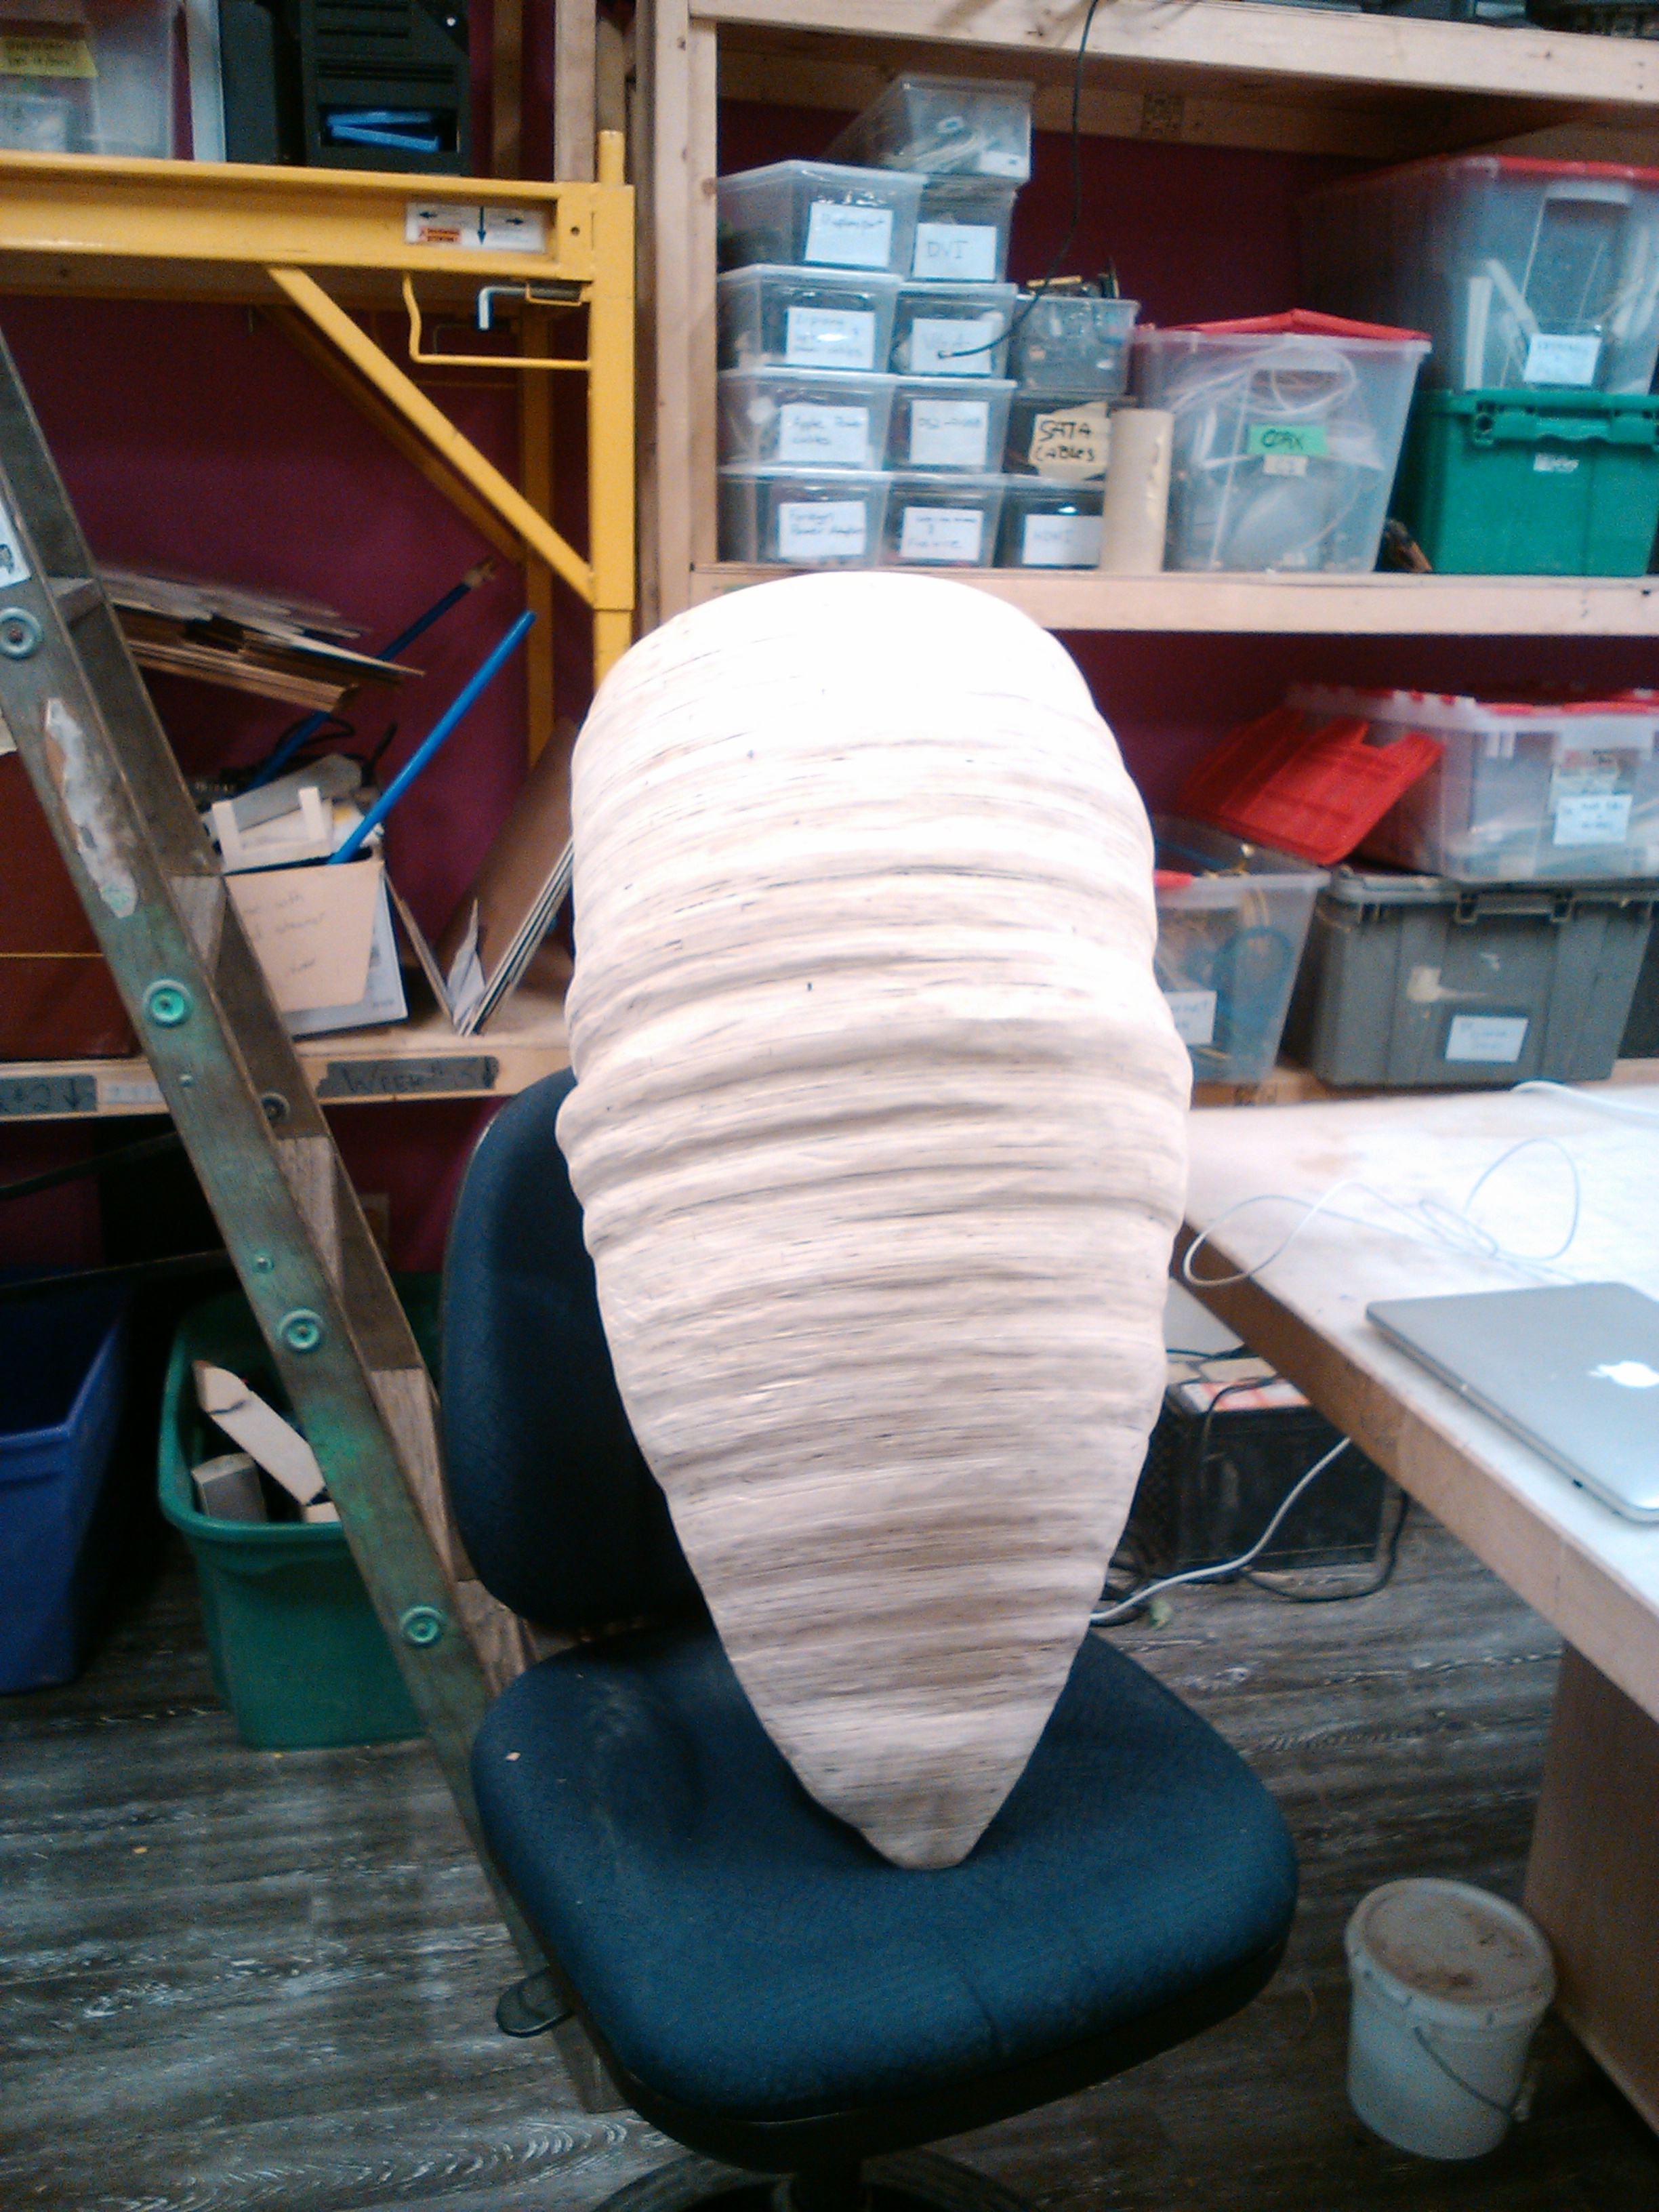
Then I used an angle grinder with a very coarse sanding disc (vendor told me it was usually used on concrete, which I took as good enough), to get rid of all the obvious layering “steps”. Mask was a good ally again.
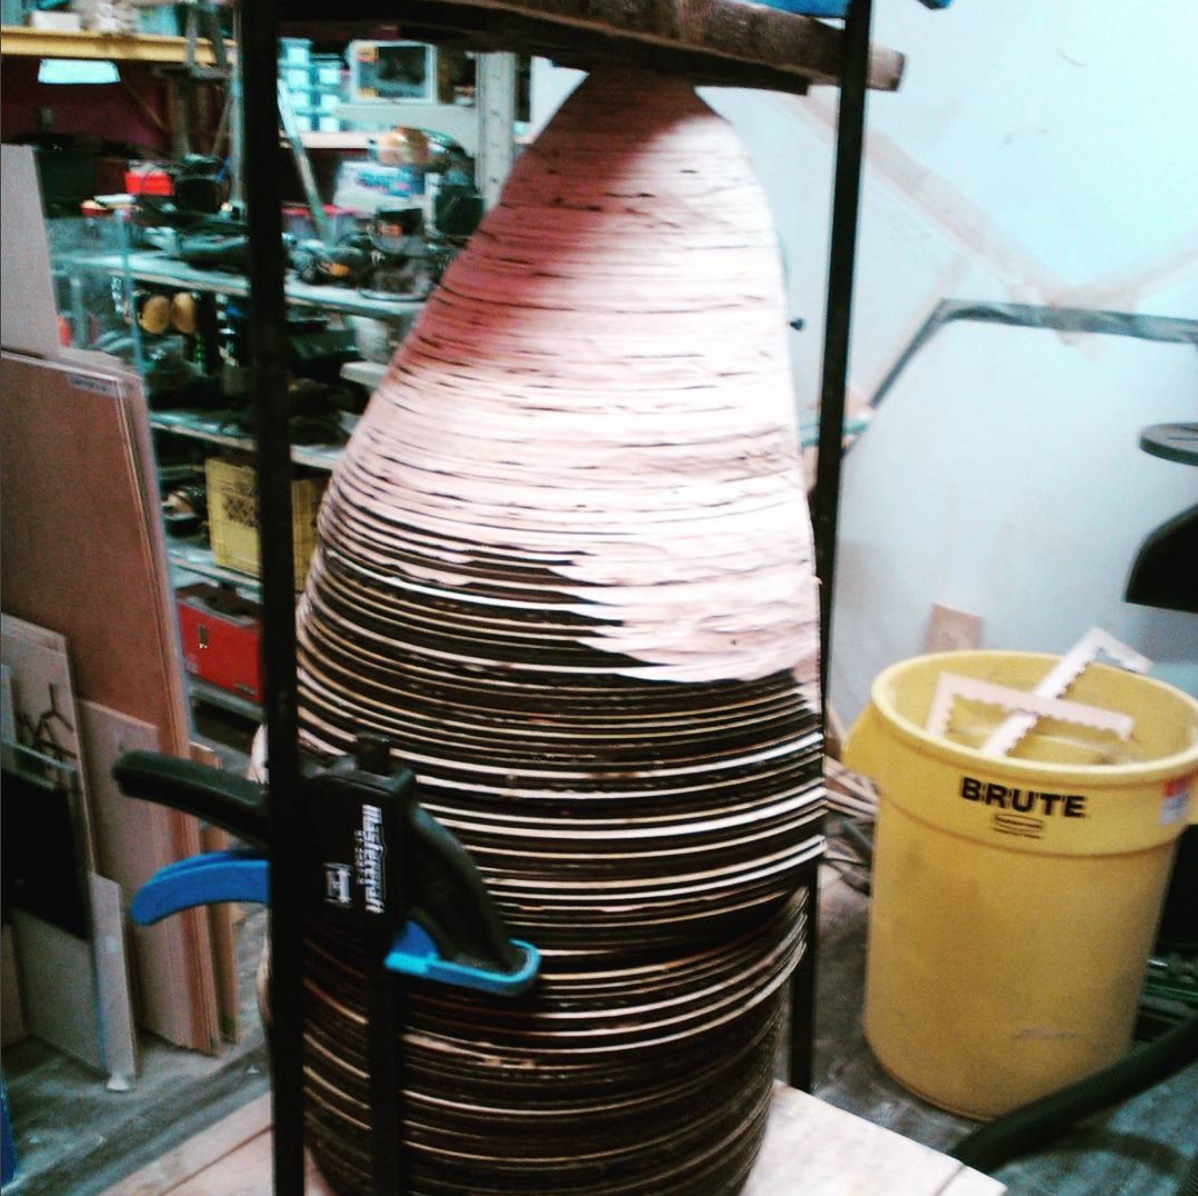
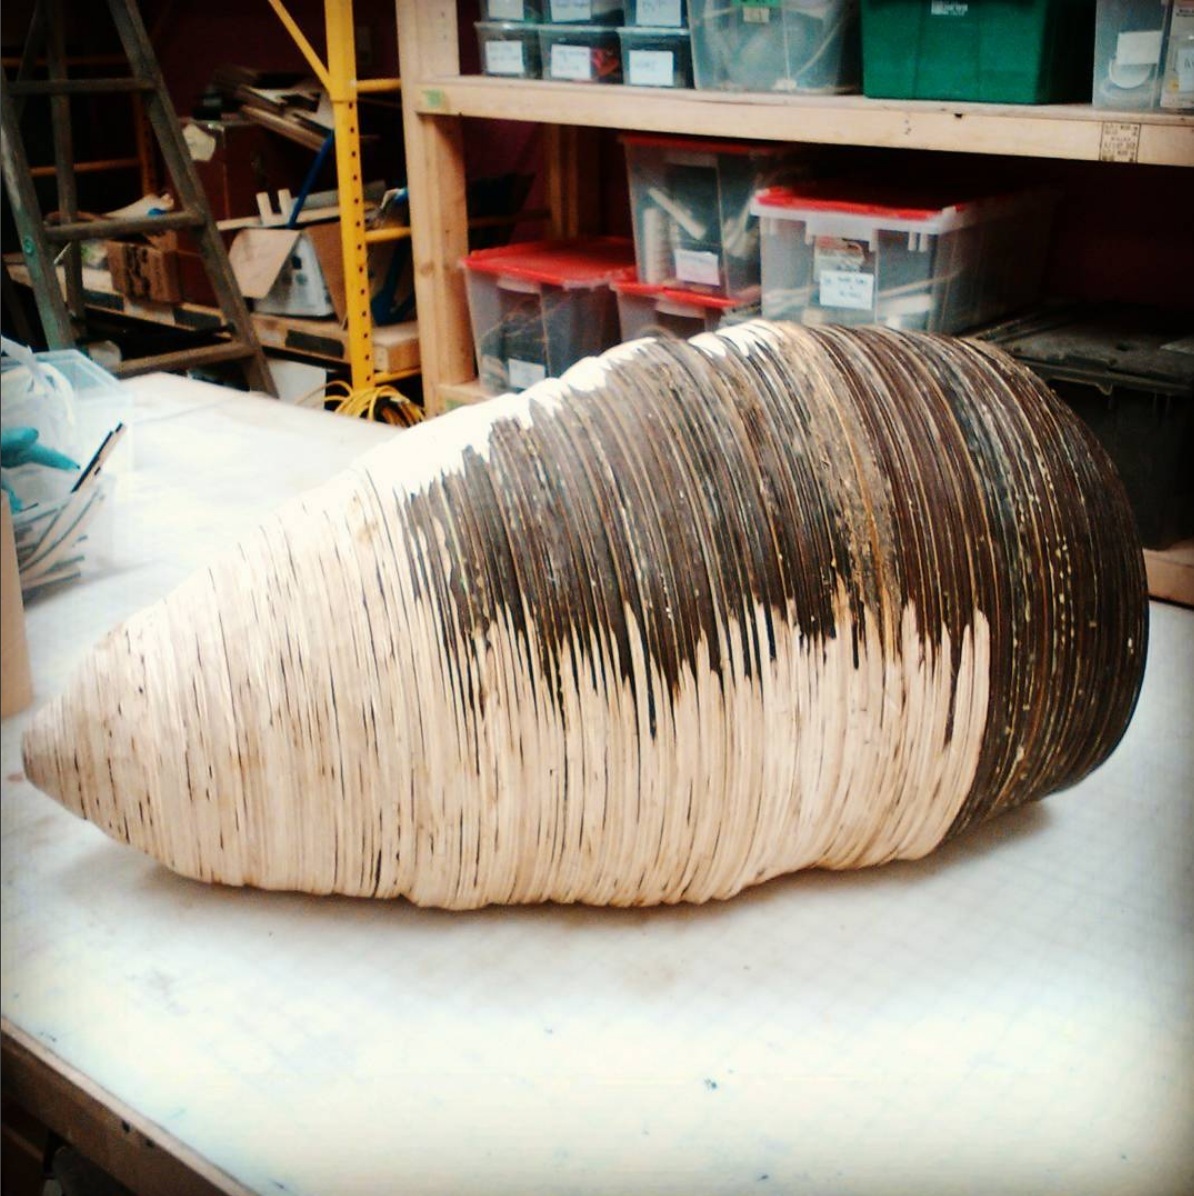
From the beginning, I intended this to look like something quite organic, so I purposedly added some randomeness in the layers. It made sanding a little harder, because I had to refrain from making everything smooth and regular.
I finished the job with a long manual paper sanding, with 3 different grains.
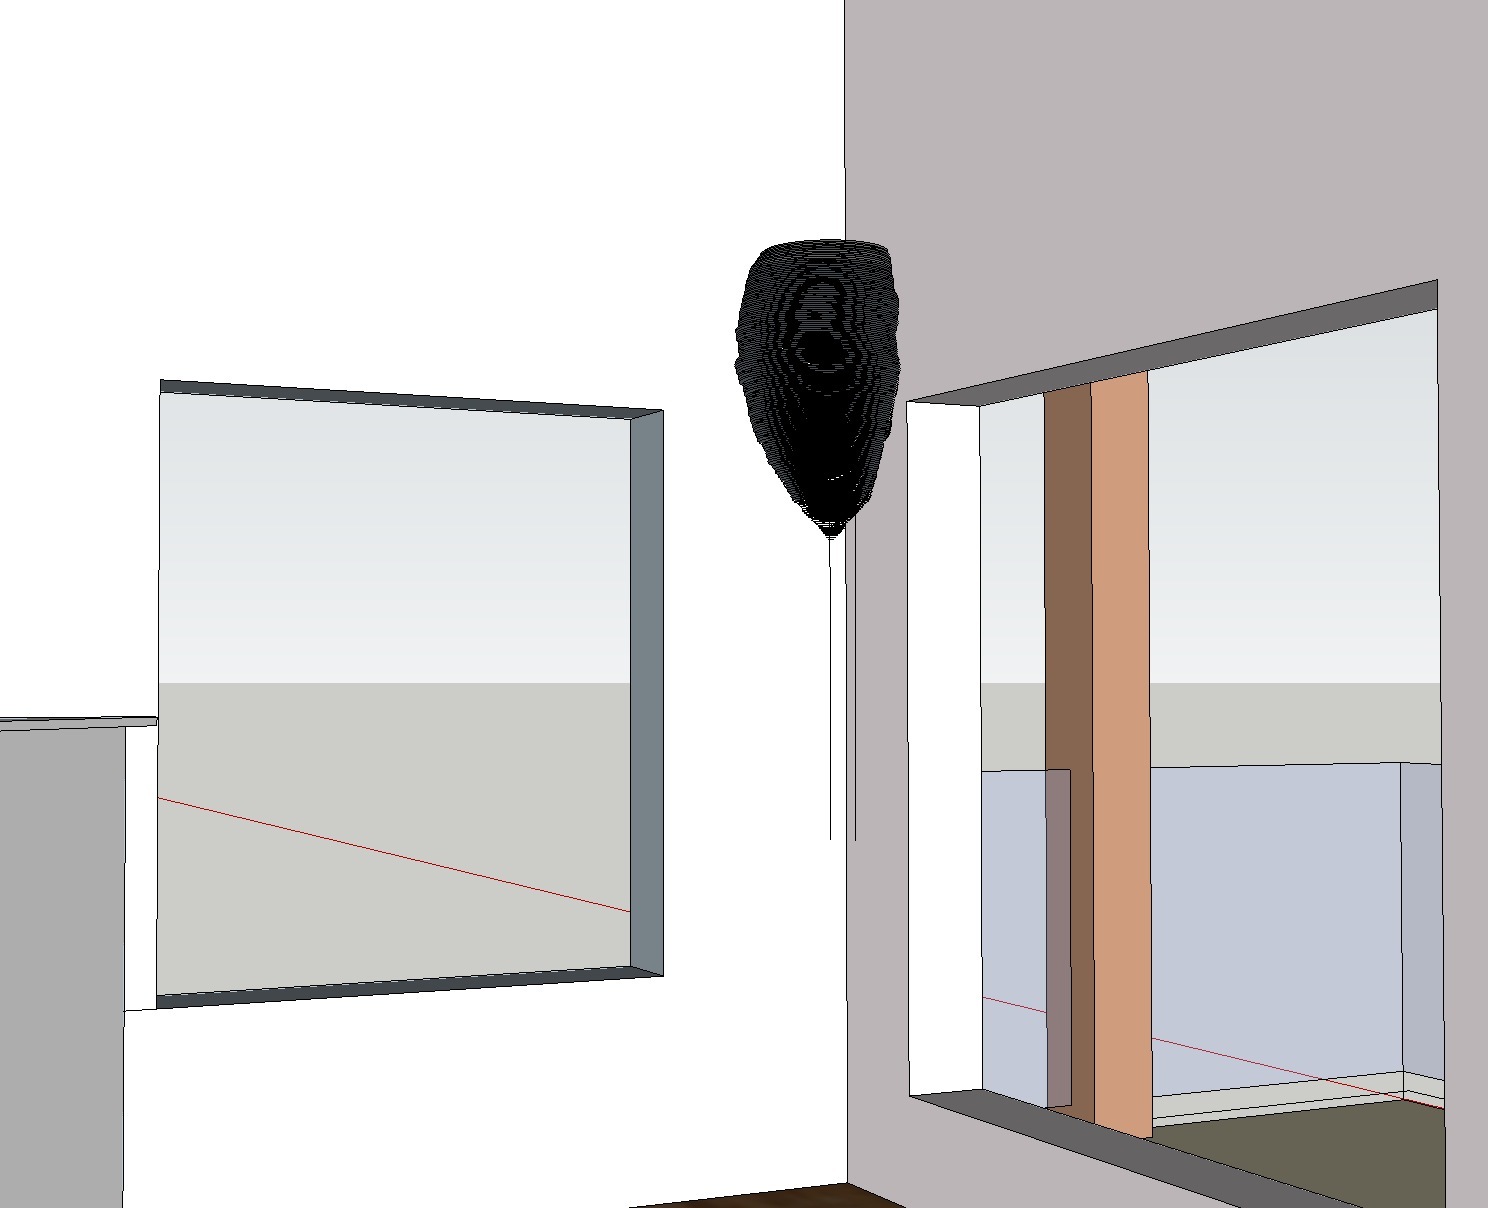
Once the cocoon brought back home, I had to anchor it to the walls. I bought a 36 inch aluminium Z-clip bar that I divided into 12 clips (6 anchors), and started the tedious process of aligning them from the cocoon to the walls. I was lucky to hit 1 stud on each wall (by pure chance), which meant stronger anchors, so I ended up only using 4 anchors instead of 6, which saved me a lot of time.
The main difficulty here came from the fact that the two flat sides of the cocoon were far from flat, due to my not 100% perfect staking process. I had to use mainy extra spacers on the clips to fill up the gaps between design and reality.

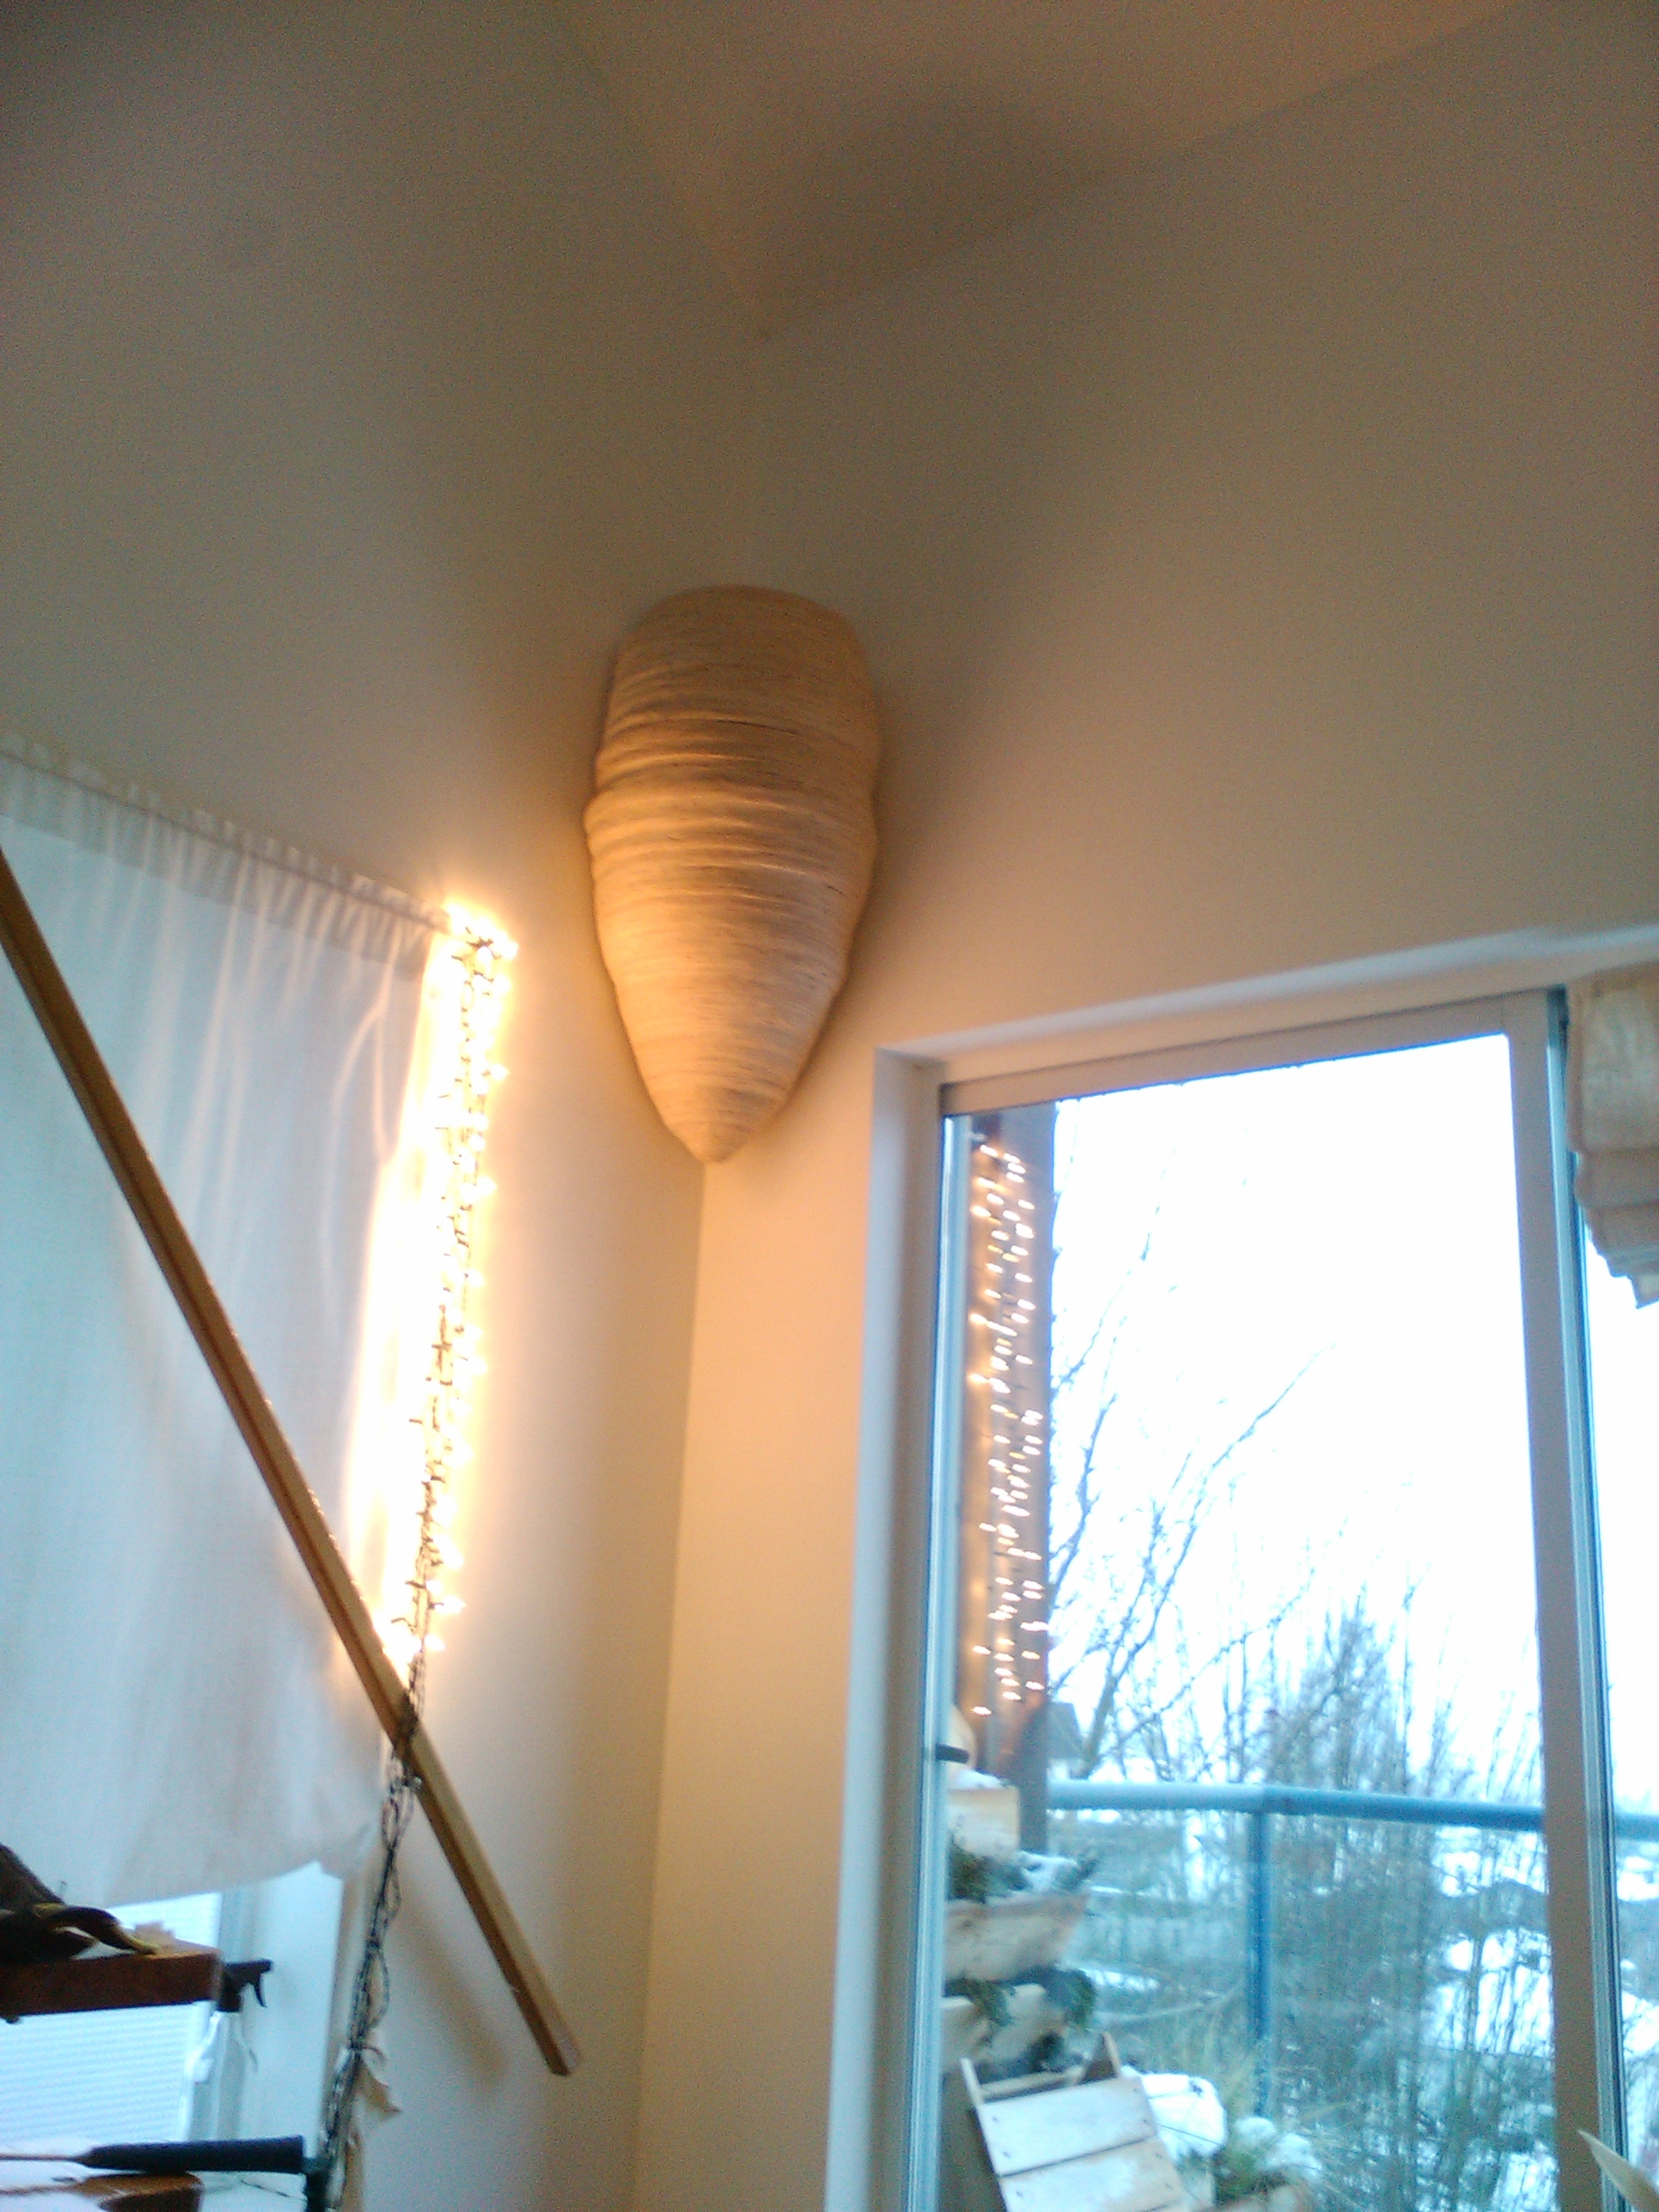
I tested the strength of the system by hanging almost my whole weight to the cocoon, before I transplanted the monster plant and hung the whole thing. I barely made it, to be honest. That thing is probably twice as heavy as I had estimated when designing it, probably around 40 kg.
But it’s now up there and she will probably be very happy with all the new growing space, looking down upon the human tenants.
Some useful observations and conclusions about this project :
This was a “simple” project that allowed me to go through all the steps and many possible mistakes of plywood stacking. I would definitely make something smaller if I was to try more complicated shapes.
It made very clear to me that the design phase has to take in account nesting the pieces nicely to be efficient when cutting. That means altering the project itself to produce smart pieces that wil nest nicely, or pay the price and spend more time working around the issue (dividing the pieces for better nesting). Not having the nesting step in mind when designing will definitely generate a huge amount of waste.
Some of the pieces disappeared in the process, either misplaced on my SketchUp file, or broken when cutting, or lost with the scraps. It didn’t matter much, and I managed to discard 3 or 4 incomplete layers without ruining the shape, as long as they were not consecutive. That is thanks to the design allowing a generous overlap between layers. The downside is, the more overlap, the wider the layers, the more plywood and the heavier the general result. I doubt I could have made it thinner and still safe enough for possible mistakes. A thicker result also reduces consequences and allows more freedom when sanding.
If I had to waterproof such a piece again, I would try to find a thinner type of silicone, because aquarium sealant (as any caulking-gun type of sealant) is too thick and very hard to apply smoothly. A more fluid version would have been much easier to apply, and more efficient. I am not convinced that all the inside surface has been covered, which is ok with a personnal work, but I could not allow this to happen if I had to sell it. The dimensions of this piece also made it tricky : long enough to make it hard to handle and to reach the bottom, and narrow enough that I didn’t have much freedom of movement inside for a paintbrush. I need to add that I choosed aquarium sealant because it is safe to keep in contact with soil and roots.
The sanding part wasn’t too hard, the very coarse disc helping a lot, but it took quite a while. But that’s mostly because I was preserving the irregular shape and had to manipulate the grinder with care, gently following the bumps, and turning around the whole pieces many times to get access to all necessary angles. A simple, smooth design would be much faster to sand, allowing broader and faster moves.
The long an narrow shape also prevented me from sanding the inside, which would have allowed me to be much more efficient when applying the silicone, also reducing the necessary quantity (smaller surface to coat).
All in all, this has been a long, not always easy project, but it was fun, and brought a nice aspect to a purely laser-based workflow, adding a real woodworking part to it, more touching, shaping and feeling the material. It also opened the door to the 3rd dimension, broadening my uses for the laser-cutter. The next step might be to use thicker plywood to reduce the number of layers and the glueing process, which means using the CNC instead of the laser. It has a much smaller bed, though…