So I wanted a small MIDI keyboard (25 key)…
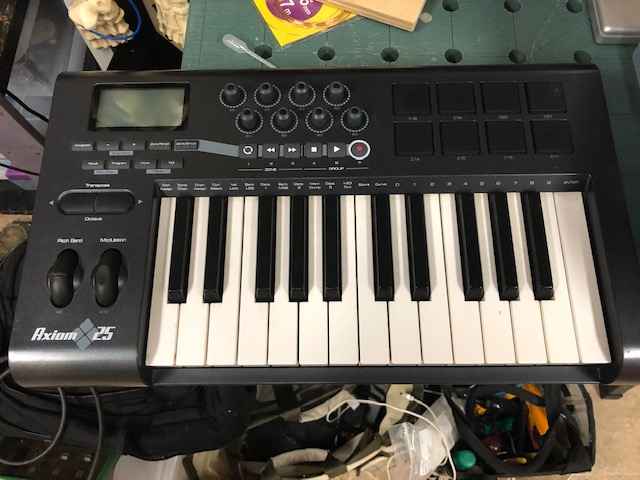
I found a decent Axiom 25 on Craigslist and bought it… (wanted something older with 5 pin DIN MIDI out not just USB)
It was in really great shape and works fine… (can’t say the same about my musical abilities…)
So a few days later I see another Axiom 25 on Craigslist but for really cheap (almost free) cuz the keys don’t work… Figured at worst it would be spare parts…
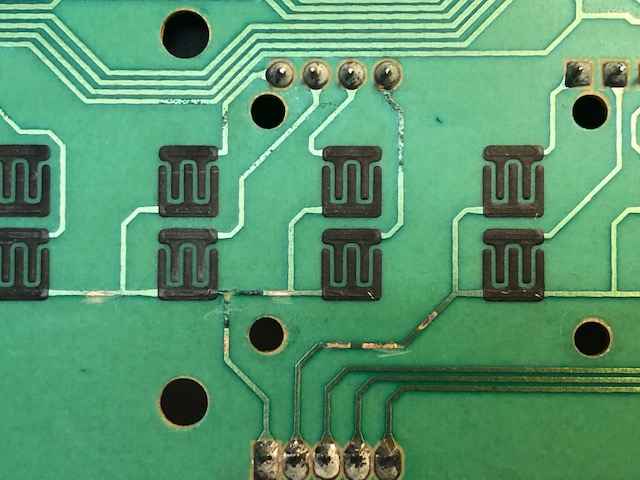
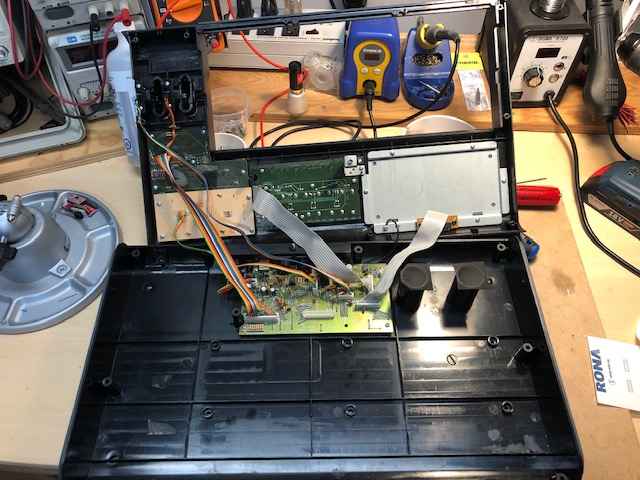
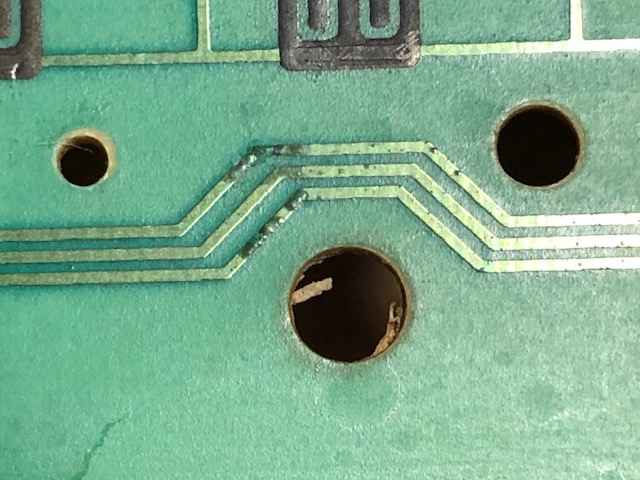
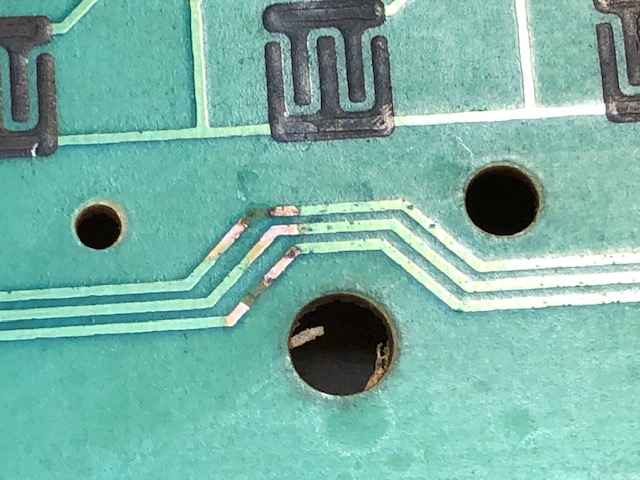
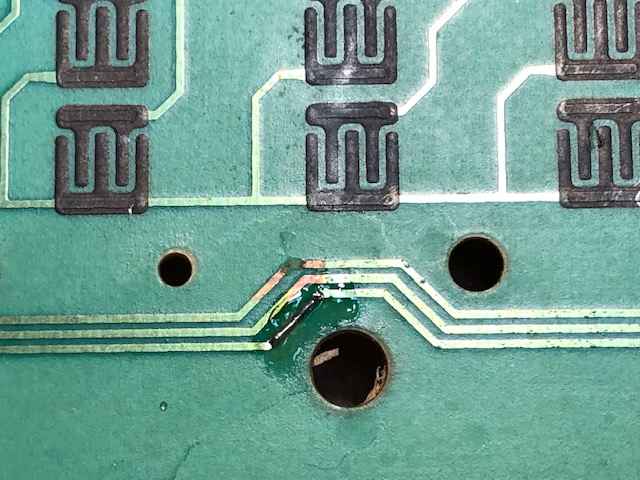
Got it home and yes the keys mostly did not work. Pulled it apart and while it seemed to have been worked on there was evidence of some liquid spill of something mebbe a bit corrosive… Did some troubleshooting and eventually found that the traces in various locations on the keyboard PCB seem to have corroded away. In some cases it is kinda visible while in others not so much…
So I plan to try fixing up the various broken traces and see what happens…
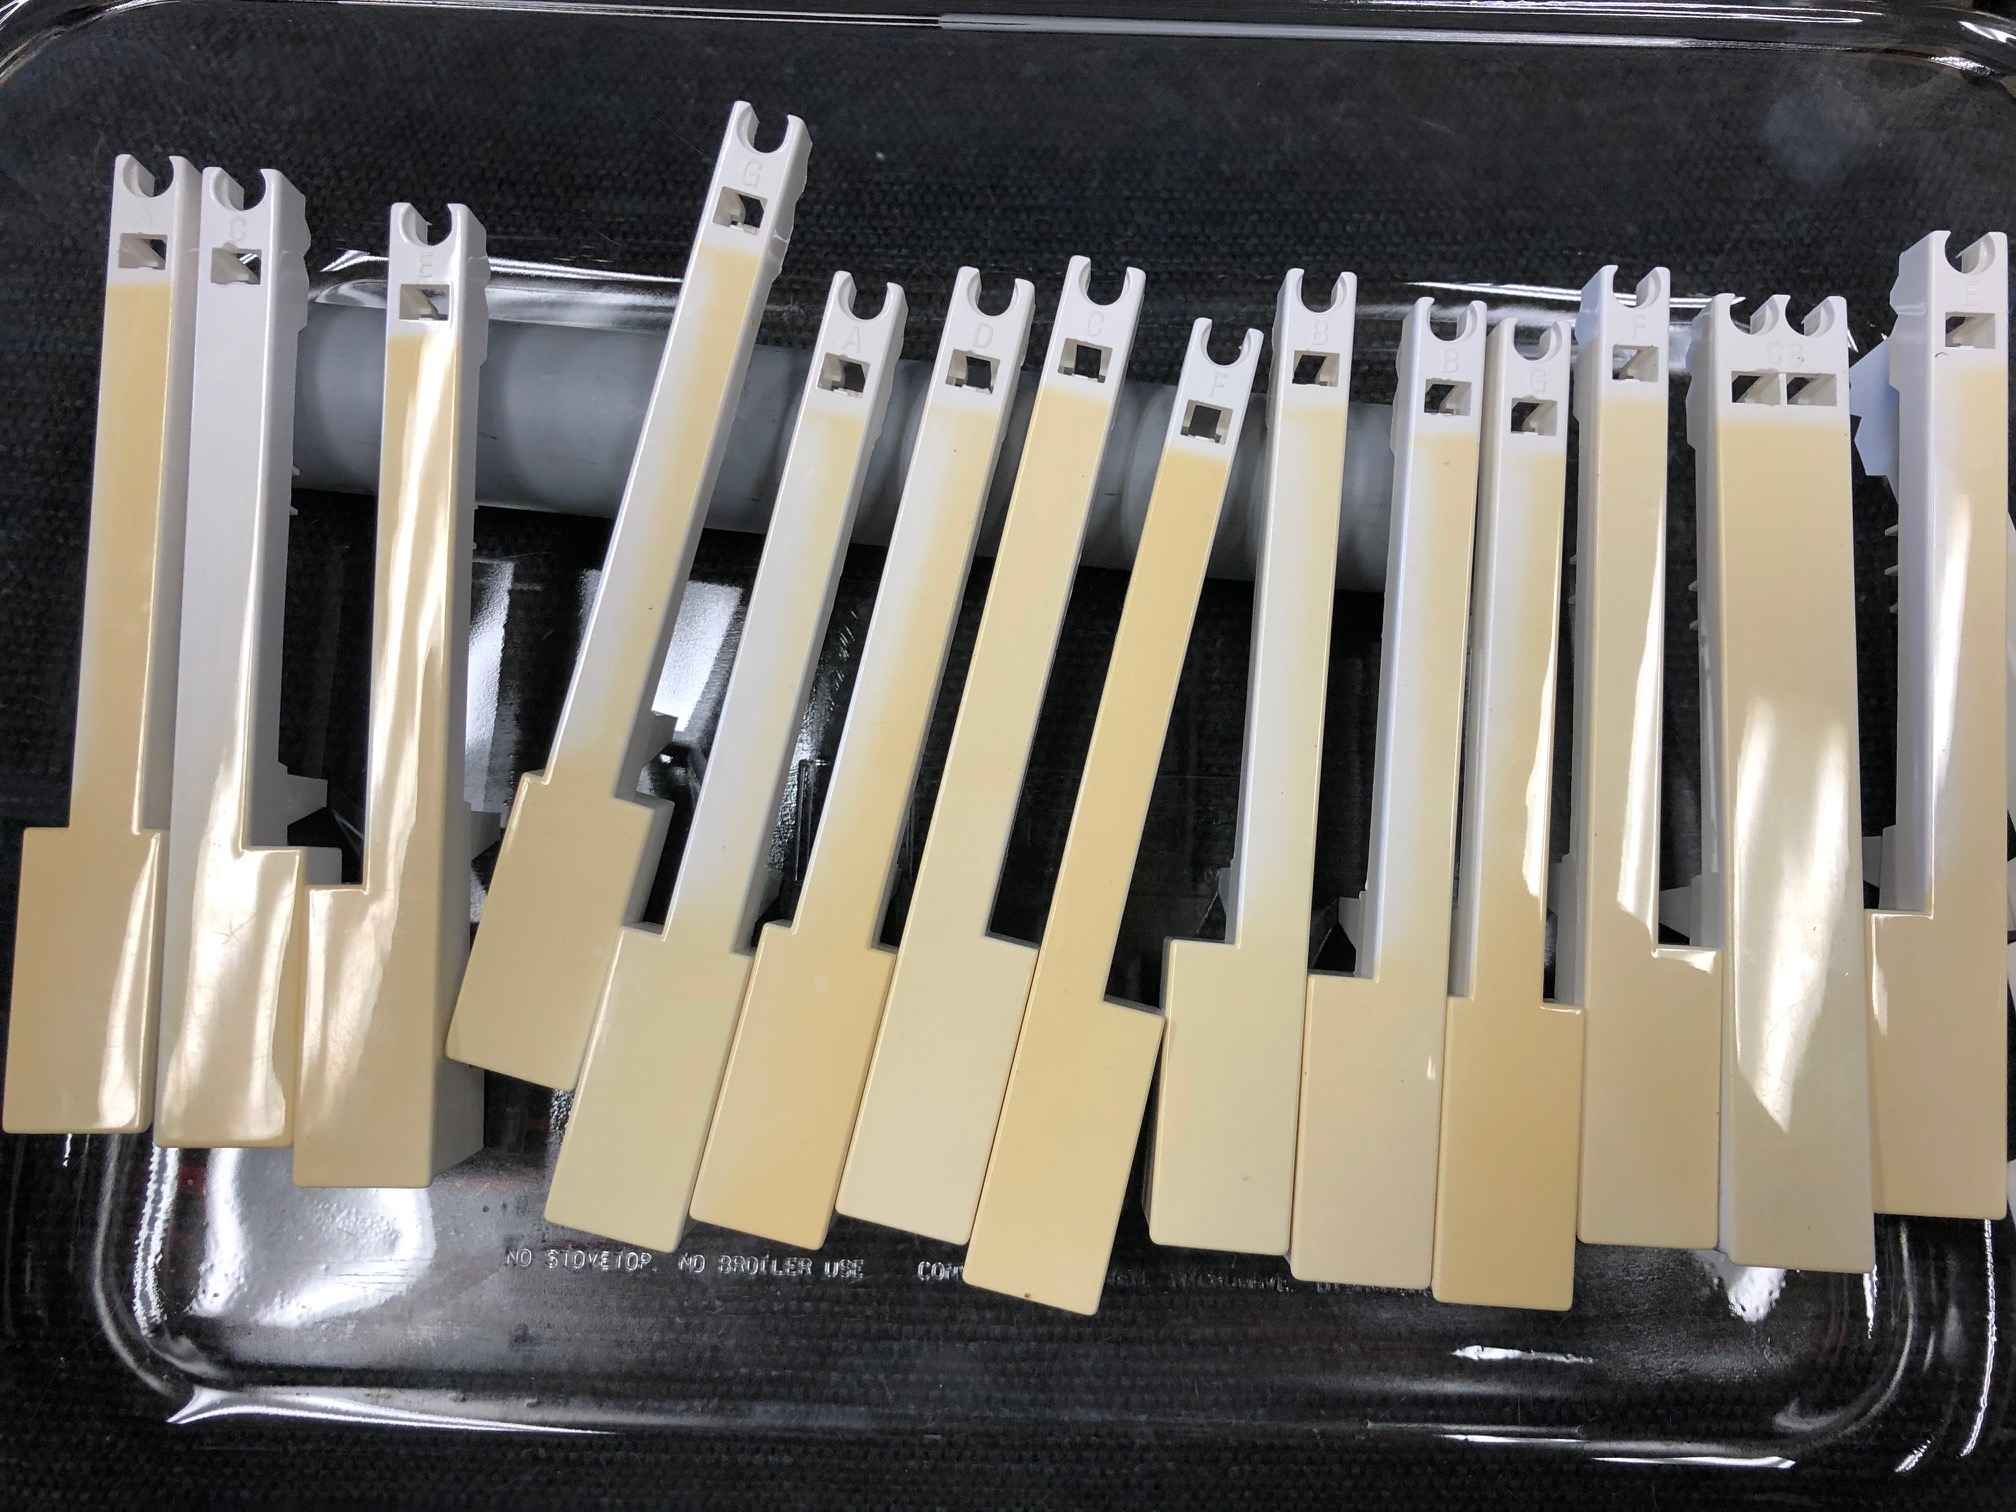
But first I ripped it all apart for a good cleaning. Cleaned the PCBs with Isopropyl Alcohol and cleaned the case and bits with soap and water. Cleaned the keys but they were still really yellowed…
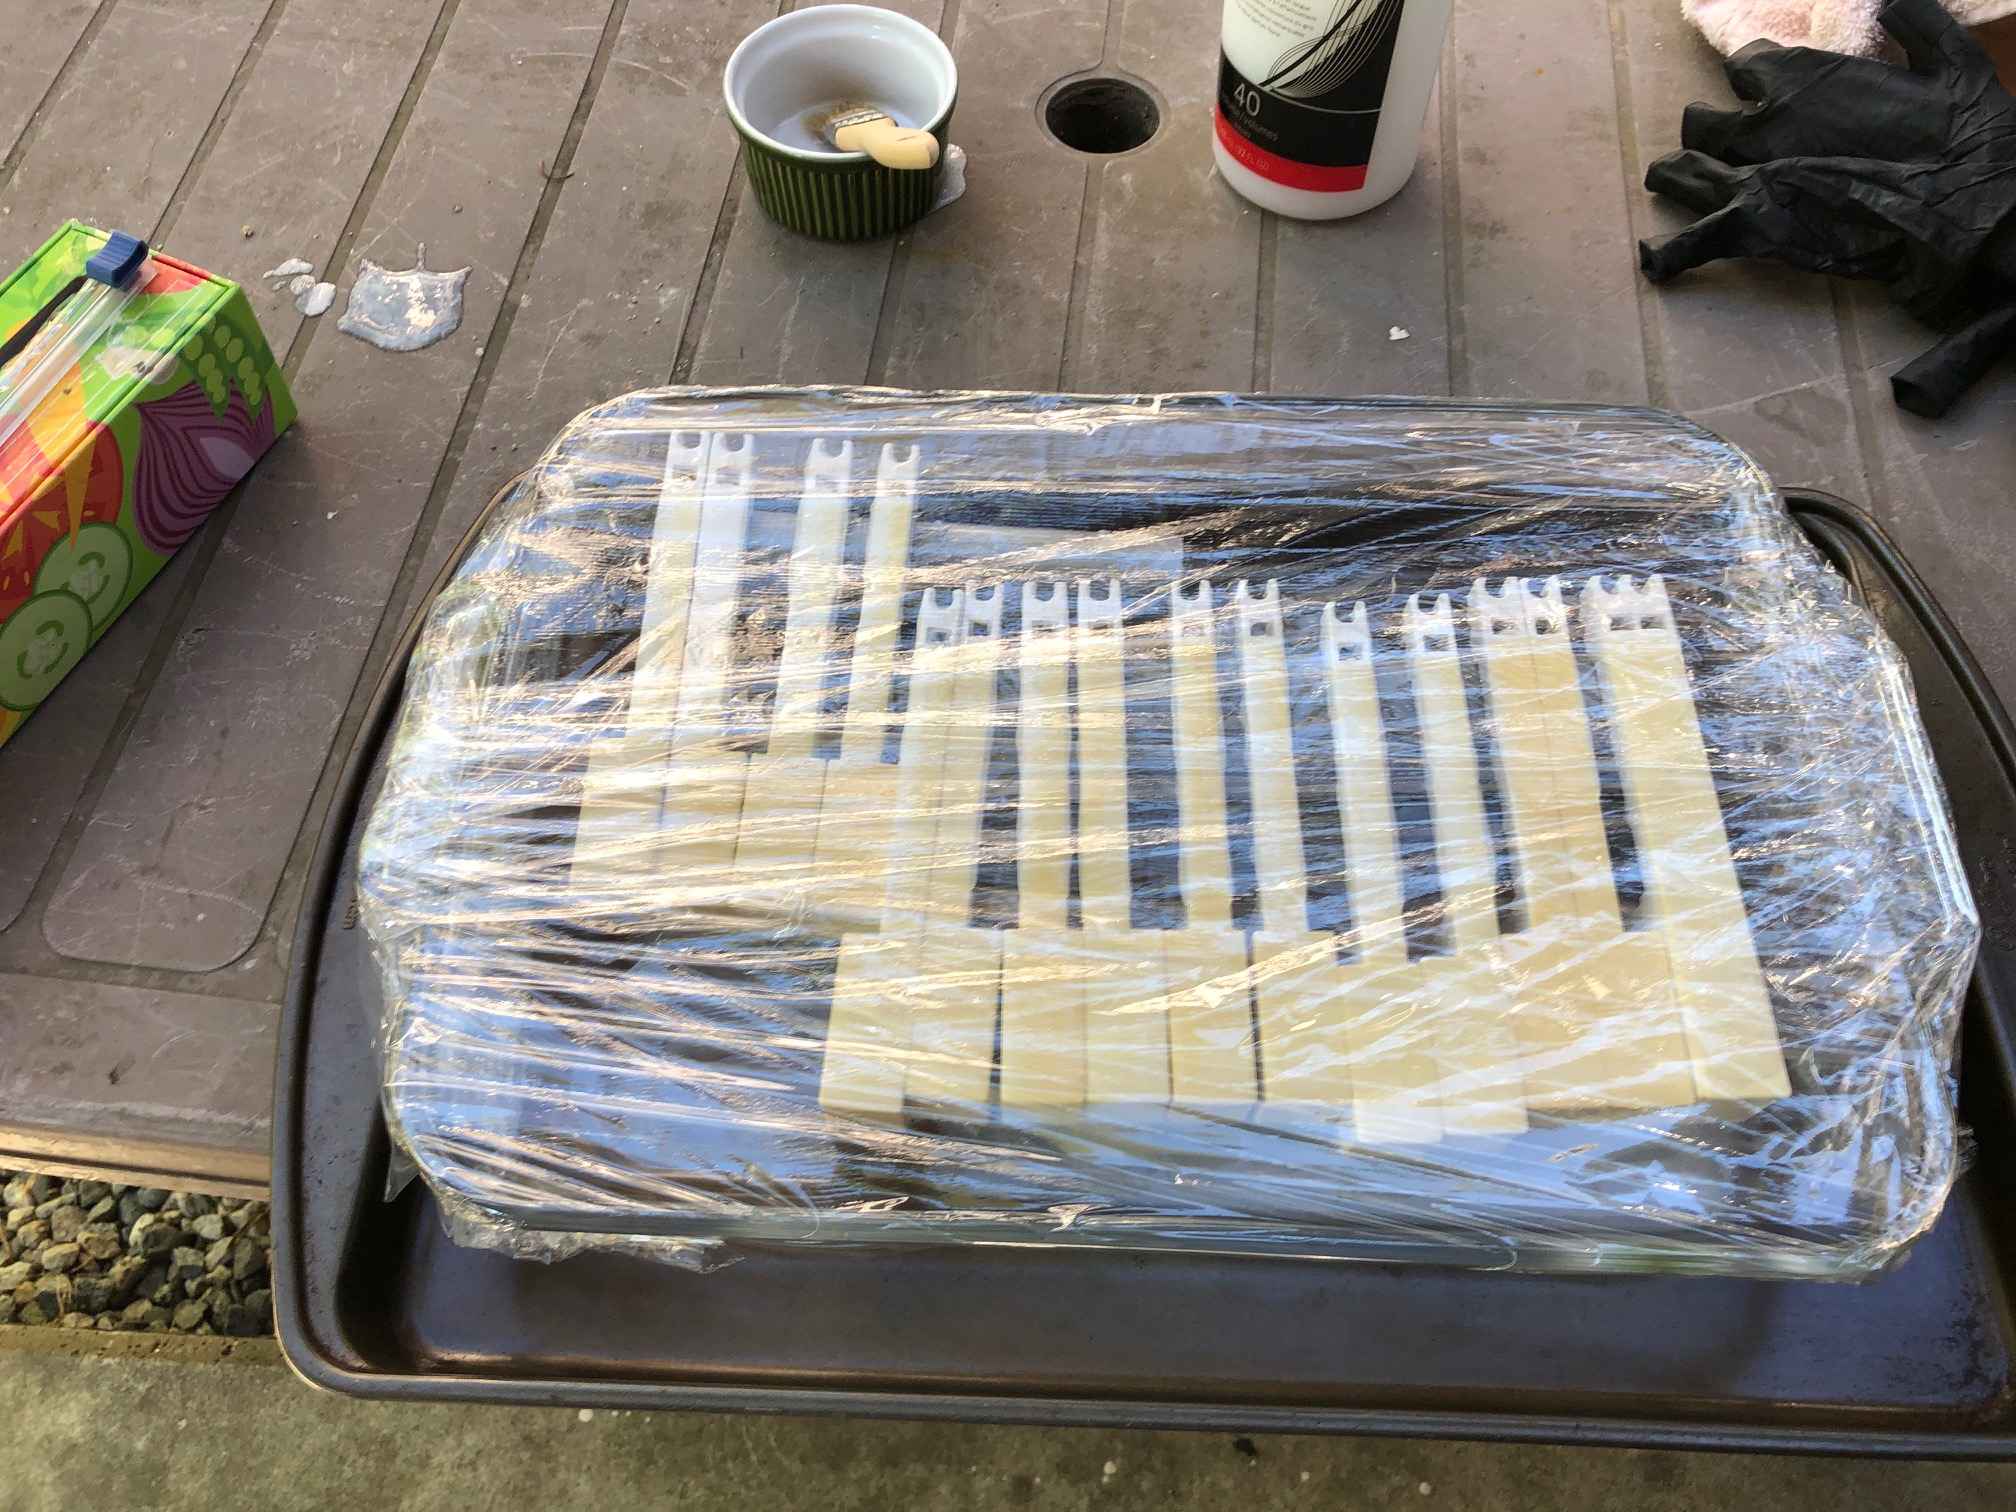
Did a little web searching and found a few mentions of using hydrogen peroxide and sunshine. Seems that you can get it in a gel form from a beauty shop so off I went and got a litre of Wella Cream Developer for $7.
Stuck the keys in a container and covered them with a good coating of the cream developer. Covered the whole thing with saran wrap (to stop it from drying out) and stuck it in the sun for most of the day.
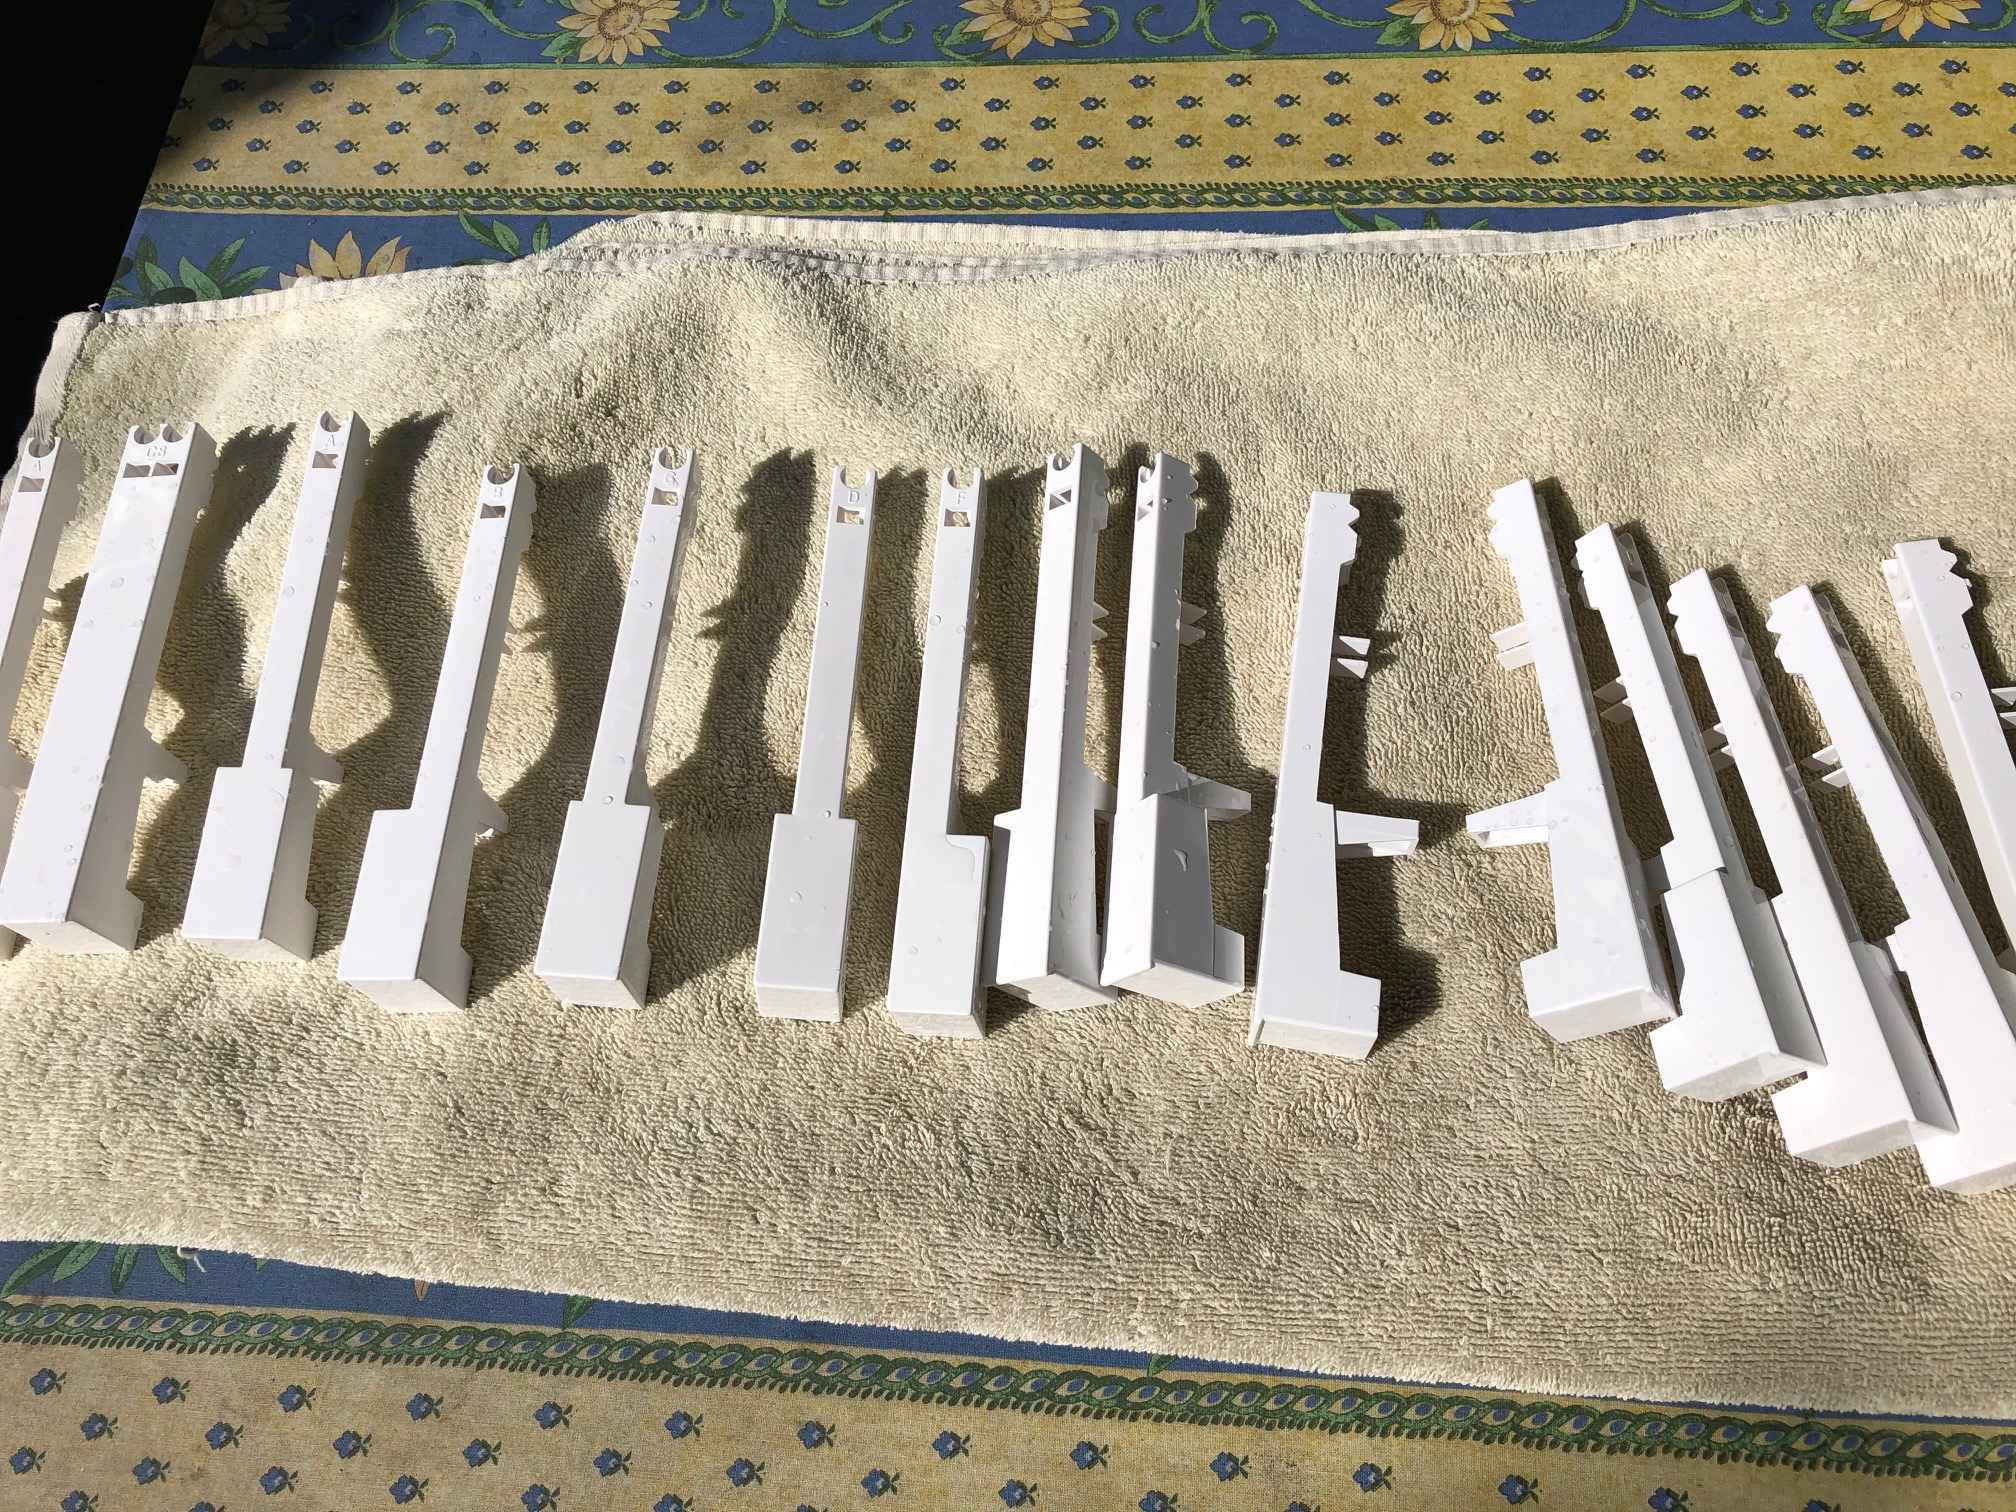
About 6 hours later the keys were completely restored to the original color. Washed them off and they do not seem any worse for wear… All the yellow is gone…
Right now I am putting the key assembly back together and then will deal with the broken traces on the PCB (the left most trace on the connector was completely gone at the T junction. Not sure this was due to whatever got spilled into the keyboard or what…
Another issue is the aftertouch sensor connector seems to have the same fate…
I am hoping I can cut away the bad bit and reconnect somehow…
Anyways if nothing else I will have some clean spare parts…
Or perhaps a working keyboard…
So got the keys back together but the aftertouch sensor connection is toast…
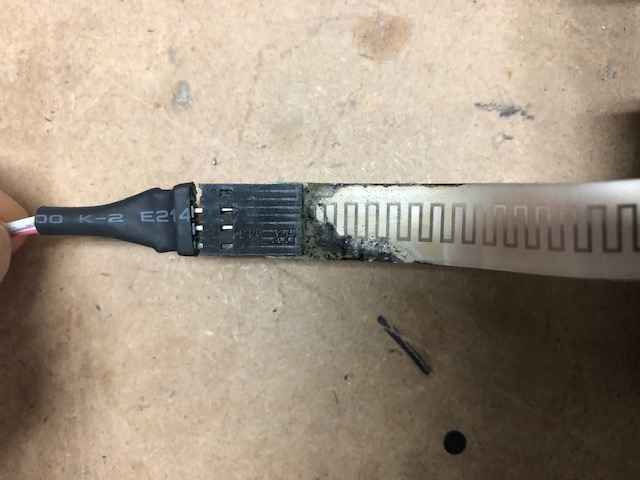
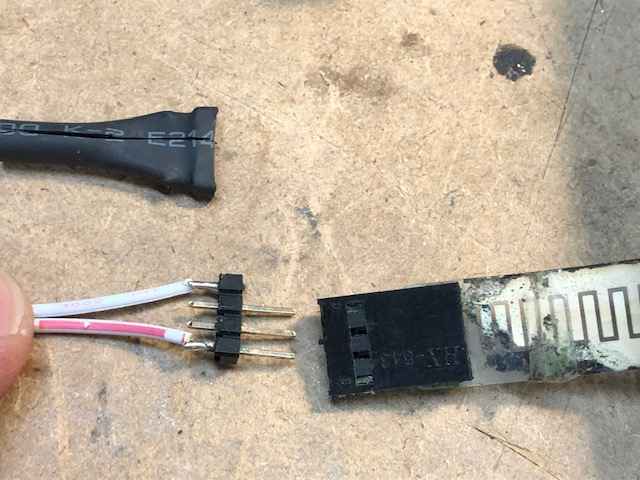
It is supposed to use the two outer pins but one is corroded away…
And even if it wasn’t, the resistive traces on the sensor strip are disintegrated away on it’s connector… I can easily replace the corroded pin connector but not sure what options I have with the sensor. I’ll try gently opening it up and see if I can clean away the corrosion. I may then be able to use some sort of conductive trace paint to restore the connectivity… Mebbe…
While you can’t see it in the pics the corrosion is green in color and the connector is jam packed with it… Wondered if it was alkaline like when a battery leaks or some sort of acid. Stuck some of the corrosion in vinegar and nothing happened (so it’s not alkaline). Stuck some in baking soda and water and got some fizz… So perhaps someone dribbled vinegar or some other acid into the keyboard… It may have even been an acidic pop but nothing seems sticky (though I think someone tried repairing this before and may have cleaned it)
Success with the PCB trace repair… Now all the keys work (rather than just the last two)… Funny how a few drops of whatever managed to dissolve the traces just in the right places to take out most of the keys…
Originally the small metal sockets had one end crimped through the plastic sensor and I suppose that connected them into the resistive tracing. The other end was in the black connector housing (just like a dupont connector). I did manage to pull it all apart and clean up the corrosion but the end of the resistive strip has been eaten away.
However by pulling back some of the plastic cover I have found an un-affected area that I hope to make a connection to. I googled for repair examples but have yet to find anythign other than just replacing the sensor which in this case would be too much $$ even if you could find one.
My plan right now is:
Cut away damaged section
Find a way to remove adhesive residue for newly exposed sensor trace
Attached some copper foil (with conductive adhesive) to exposed sensor trace
Unfortunately both are closed to day so will have to wait till next week…
Since i do have another functional unit I will pull it apart to get a reading of the resistance of the working sensor on it so I can compare with my fix.