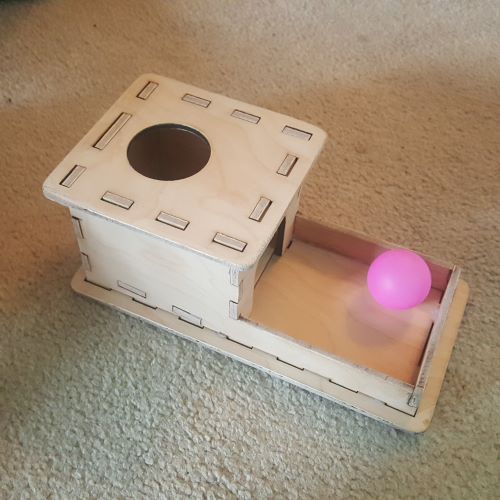
I designed a Montessori Object Permanence Box using Autodesk Fusion 360 then cut it out using the Laser Cutter.
‘Montessori’ is an educational approach and often uses a variety of ‘equipment’ (i.e. toys) to develop particular skills. The permanence box is intended to develop hand-eye coordination and refined hand movement and indirectly allow the child to experience object permanence (i.e. the ball still exists even when it disappears from view.)
Background
I found a few commercial options (e.g. Object Permanence Box with Tray), but they were unavailable or fairly pricey. Plus, it was a good opportunity to try a more involved laser cutter project in Fusion.
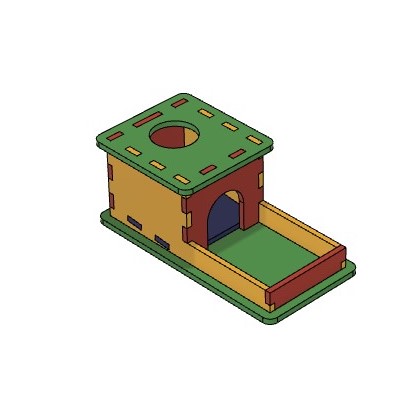
The design is pretty simple - a box with a hole large enough to fit a particular ball, and an opening in the box to return the ball into a tray. A ramp inside the box ‘encourages’ the ball into the tray.
Design
I based the overall shape on the commercial version, but adapted for laser cut joints. I chose to use a 40 mm diameter ping pong ball, since I had several from a different project and they were large enough to pass the rough ‘toilet paper roll’ choke test (i.e. anything small enough to fit through a standard toilet paper roll can be a choking risk)
I started modeling the design with an overall sketch, and then created separate, overlapping bodies for each of the panels. On a given panel, I then sketched the finger joints, extruded a cut, then used Boolean operations to cut the finger joints on adjacent panels. You could then use push or pull operations to change the tolerance of the fit, but based on previous experience, the kerf of the laser yields a reasonable fit for size-on-size fingers, especially those intended to be glued like this one.

Profile Export
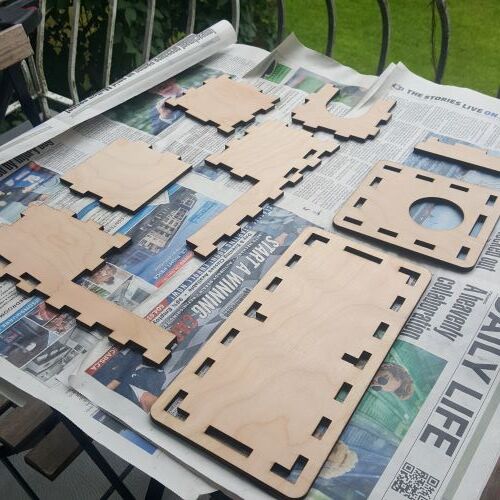
In order to obtain the profiles of each part with the joints cut out, I created a new sketch on each of the panels. If you create a new sketch on a face of an object, then immediately close the sketch, when you export that sketch as a dxf (i.e. by right clicking on the sketch), you’ll get the profile of the face.
Laser Cutter Prep
I loaded each of the .dxf files exported from Fusion 360 into a single file in Inkscape. This enabled me to check that the profiles were exported correctly, create copies of parts that were mirror images, and arrange the parts to minimize material usage. I saved the file to allow for later adjustment / tweaking and also saved a .dxf.

Laser Cutting
The design was cut out of 1/4" baltic birch. I used a single pass at something like 60% @ 18 mm/s. Maybe 7 or 8 minutes of cut time.
Post-processing
I cleaned up the edges using a small brush and some white vinegar to get rid of some of the scorch and smell and then allowed the parts to dry completely. Considered painting, but leaving a natural wood finish is more in spirit with other Montessori equipment.
Assembly
I test fit all of the components together, and that was when I discovered I had forgotten to update my material thickness parameter with the actual thickness of the material rather than the nominal value. This meant some of the slots were loose and the tabs were too long. I continued on and glued the parts together, then sanded the long tabs flat. This had the (unexpected) benefit of getting rid of any remaining char on the edges and leaving fairly clean joints. Also sanded any sharp edges.
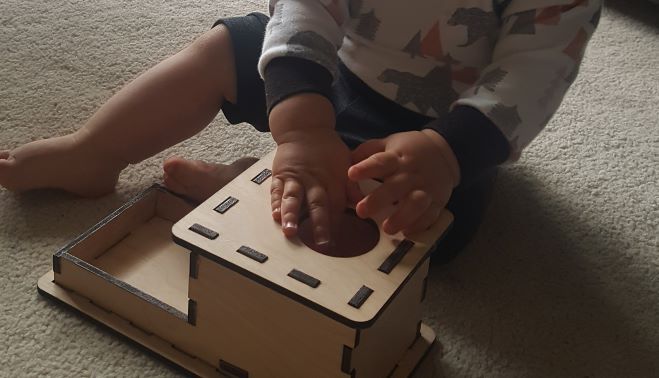
Testing
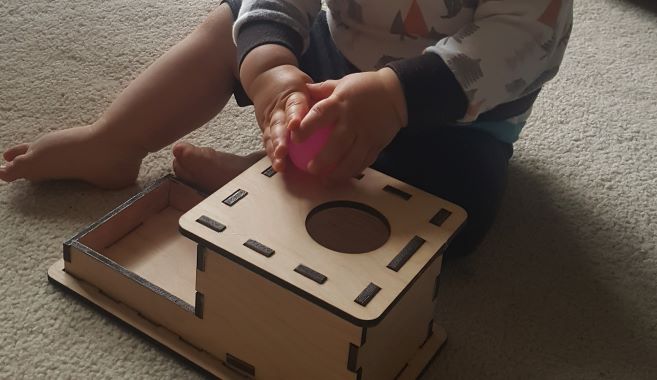
The kiddo figured it out pretty quickly (at about 12 months old) and still uses it now 6 months later. His skill has improved considerably. Occasionally, the ball will get caught up on the inner corner.
Possible Improvements
- Joint fit - I’d adjust the material thickness parameter in the model to more closely fit the actual material so the slots are tighter and less sanding is required. (Though leaving the tabs a little long isn’t bad.)
- Material thickness - 1/4" thick material is overkill:it’s strong enough to stand on. 1/8" / 3 mm would probably suffice.
- Reduce caught balls - A steeper ramp, slightly larger door, or both may reduce the number of balls that get caught.
Conclusion
I’m happy with the how well this turned out, especially given no iterations. Pretty good return on investment based on the time to design and build and the amount of time this has been played with.