Laser Cut Inkle Loom Project

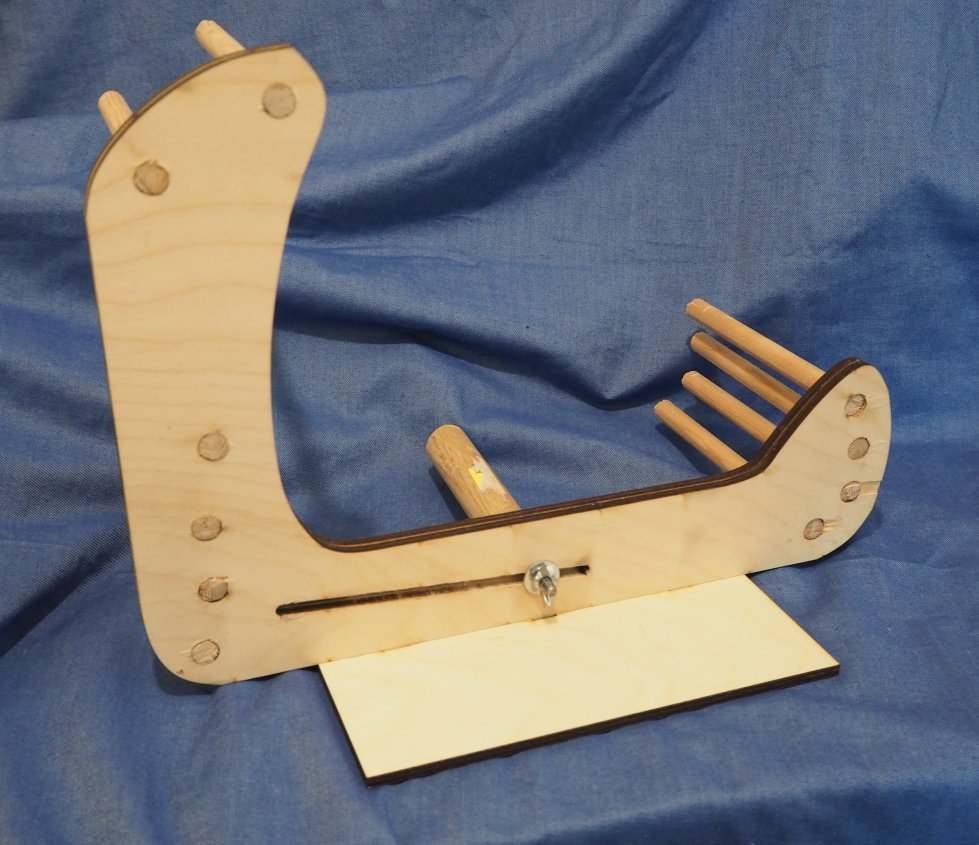
On December 22, 2016, I used the laser cutter to cut out an Inkle Loom.

Cutting Result

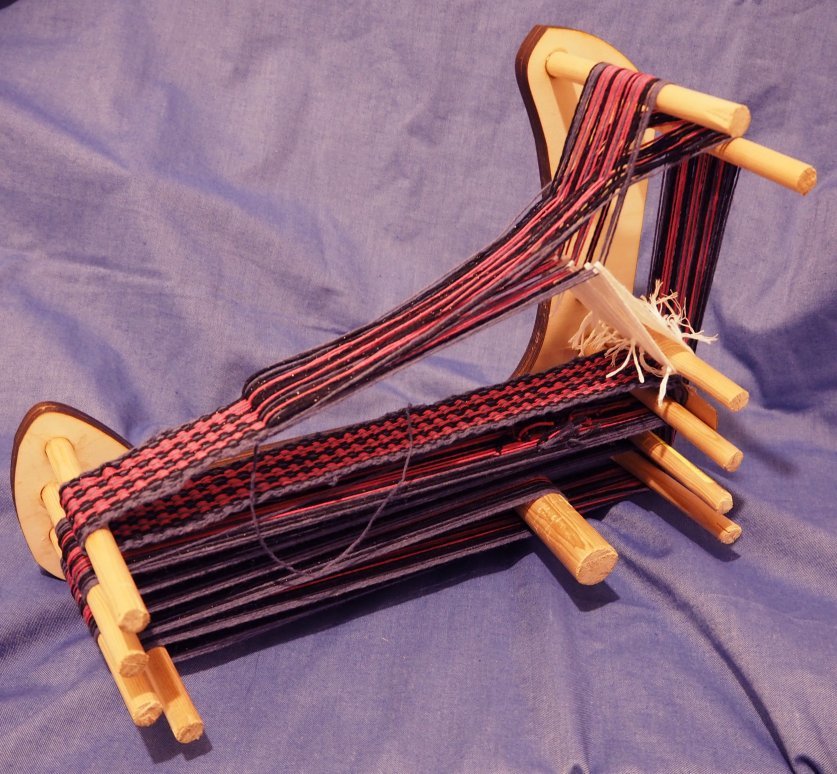
What’s an inkle loom?

For those that have never heard of this, it is a one-sided loom that is used to weave narrow bands. The bands can be used for belts, sashes, bookmarks, lanyards, and even guitar straps.

Here is what one commercial version of the loom looks like:
https://www.ashford.co.nz/media/com_hikashop/upload/inkles_web_1420851095.jpg

Side note: an inkle loom can also be used for tablet or card-weaving, which allows one to make really intricate patterns on narrow bands.

The design I made is based on a “rustic inkle loom” I saw on ebay.

Design stage

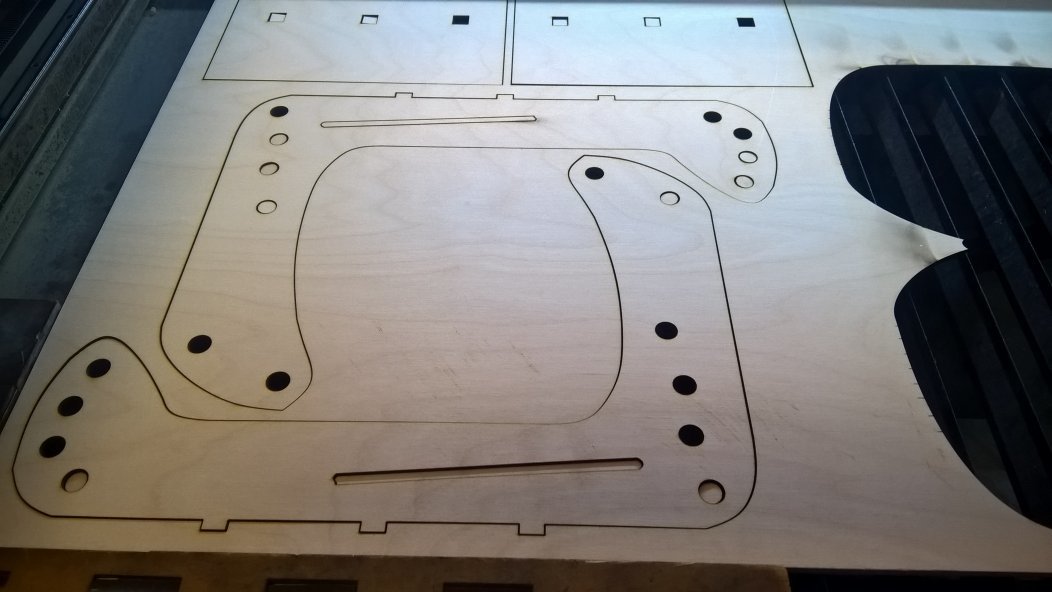
I opened an image in Inkscape and traced around the edges to create the outer edge of the loom. This was a lot of trial and error because I had not used Inkscape very much at this point, and wasn’t quite sure how to draw the lines. Thank goodness for youtube videos!

I saved my new file and then added in the holes for the pegs. I worked in inches, because I’m still more comfortable with Imperial measures. I set up the grid for 1/4-inch squares, and added 1/2-inch diameter holes. (After I finished the design, I switched to Metric, because the laser cutter software uses millimeters.)

I abandoned this design at one point to try something fancier. I spent a lot of time creating a completely different loom, but then came to my senses and decided to start with something simple. In between the starting point and the actual cutting, I acquired a lot of knowledge.

Thanks to discussions on Slack and on the forum, I learned what areas I needed to tweak to get my design in the right format to laser cut. The design and layout workshop by @miststlkr was also very helpful. I think I had already figured out that I needed to remove the fill and to make sure that I had narrow lines for cutting, but the workshop was a great reminder.

Cutting stage

I did my laser cutting training on the 22nd (thank you @Lukeo! ). I had previously converted my design to DXF, but I chose the wrong conversion option in Inkscape. (Tip: Use the spline option, not the other one.) Since I had downloaded my SVG file as well, it was easy to save as DXF again and get cutting.

I’m so glad that the lasercad software had options for cutting inside objects first and the outline last! That definitely minimized my setup time before I could start cutting.

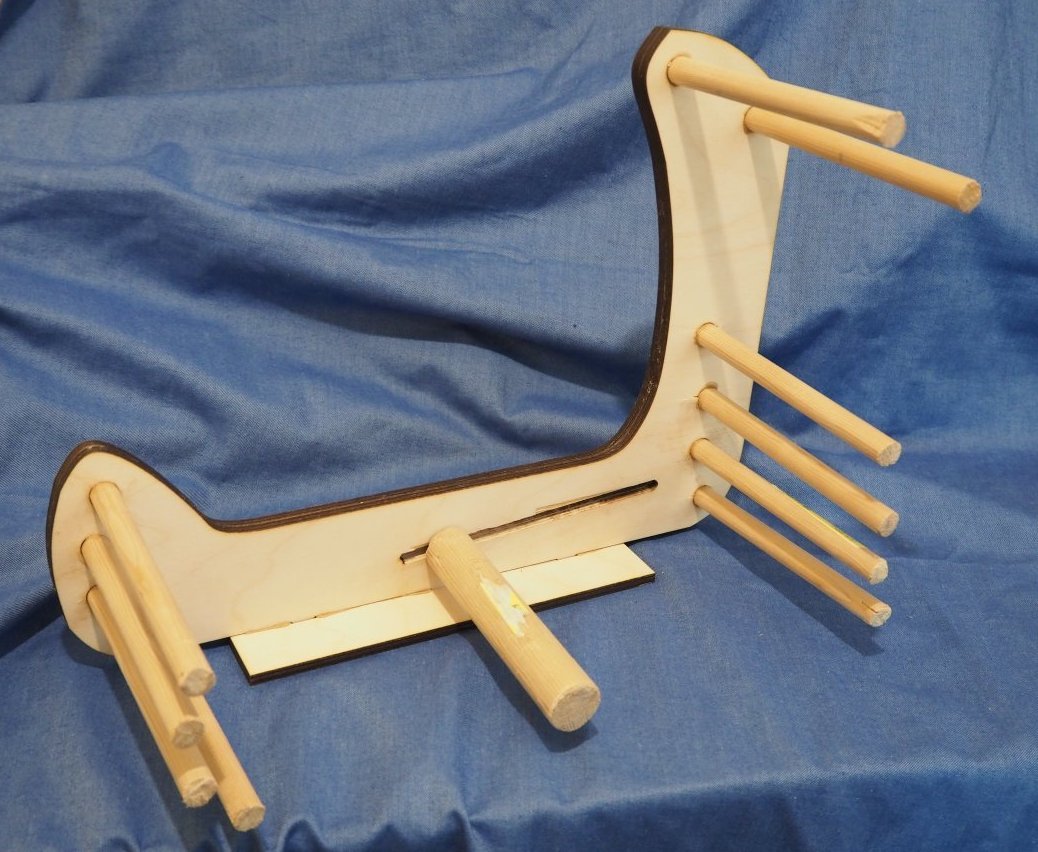
I cut two copies of the loom because it needs to be at least 1/2-inch (12-13mm) thick. I was cutting 6mm birch. I didn’t need to cut two base pieces though. I’ll find some use for the leftover piece. (Maybe recut it into Christmas ornaments or something else!)

Next stage

Now that I have the main part of the loom, I need to get some pegs.

I suppose I could learn how to use the lathe and turn blocks of wood into round pegs. :slight_smile:

Or maybe I could just purchase the appropriate dowels from Home Depot and save some time.

I’ll worry about that after Christmas.

11 Likes

Amazing Inez!! Looks awesome. What kind of yarn can you use? Basically anything?

Janet, you can use whatever you want. The thickness of the yarn determines what your final product would look like.

If you wanted to make thin bookmarks, you would probably use some type of crochet cotton or other fine-weight yarn.

Linen thread, silk, chunky yarn, hemp. All kinds of stuff.

3 Likes

That’s awesome! And also a great write up!

2 Likes

Aw yeah, using technology to keep the crafting systems alive.

1 Like

Looks great, thanks for the trip report! I look forward to pics of the results. :slight_smile:

One thing to keep in mind is that the finished size of a given dowel is rarely anything like its nominal size. Since your holes are already cut, I’d suggest measuring them precisely first before buying dowels, since they’ll probably be a bit bigger than in the original SVG due to laser kerf.

If you can’t find an exact match, I think it’s better to get the dowels slightly too big than slightly too small. I feel like it’s easier to remove excess wood than to add a shim, but what do I know? :slight_smile:

1 Like

Thanks for the tip.

I had forgotten to account for the kerf in the main piece, but Luke reminded me when I was modifying the base piece. I had the measurement wrong and while fixing it, added in a small amount for kerf. I haven’t yet measured the holes to see what size they ended up.

I might measure the holes, or I might just take the piece with me and find the dowels that have the best fit. Or maybe I’ll do both.

It definitely is easier to remove excess, and since the dowels need to be a tight fit, getting them a bit bigger is better.

Loom update

I purchased the dowels that I needed to complete the loom and glued everything in place. I did have to sand/widen the tension slot a bit, but everything else fit fairly well.

Creating the tension dowel was lots of fun! I did my research and knew that I needed to get a hanger bolt for it. I found instructions for how to install a hanger bolt using two nuts, but I didn’t have any nuts in the correct size. I used wing nuts instead, but they kept slipping. After employing several colorful expletives, I finally got the job done. :slight_smile:

To tighten the tension dowel, I wanted to use a star-shaped knob. However, there wasn’t enough clearance between the knob and the base, so I went with a wing nut instead.

And here’s the front of the loom, all ready to be used.

And here it is all warped up and in use.

Not shown is the shuttle that I made. I laser cut a piece of acrylic in the shape of a “net needle”, which has a thin section to wrap the yarn around. Unfortunately, that thin section was too thin and broke, so I switched to a piece of cardboard as a make-shift shuttle. I’ll re-cut the acrylic into a sturdier shape.

I definitely have to work on maintaining even tension on the edges of the strap. The finished length of this strap is approximately 8 feet. I’m not sure what I’ll do with it, but I’ll think of something!

8 Likes

This topic was automatically closed 365 days after the last reply. New replies are no longer allowed.