So. I wanted to learn how to machine stuff. Metal stuff.
I learn best when I have a project, so I figured I would share with everyone my first metal working project. As I am very green, I also wanted to share with everyone my mistakes.
The project is to build floating frames sort of like this or this. The crux of the project is to essentially turn a bolt and a nut. What I am hoping to learn from this project is:
- Turning something to a specific diameter
- Drilling holes
- Using a tap and die
- Grinding my own tools
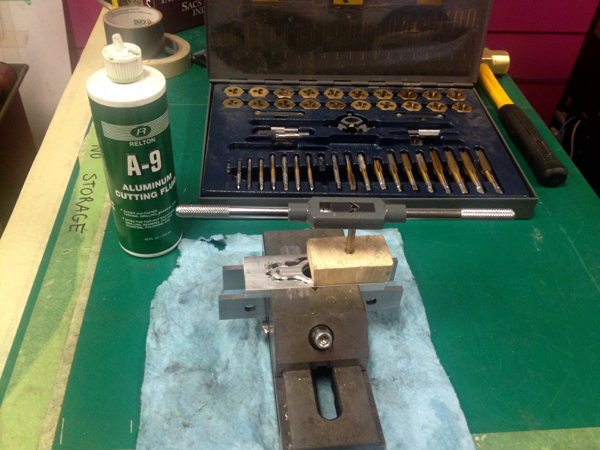
This project started with me buying some cutting fluid and a set of HSS blanks from KMS tools and making a facing tool and turning tool for aluminum. Unfortunately, I don’t have photos of these yet, I will post some when I go back to the space. Grinding is hard, I wasted a lot of steel, but the tools seem to work pretty well.
I then modeled the entire thing in Fusion 360. I wasn’t sure how best to show this, so here is a rendering of what I want to build.

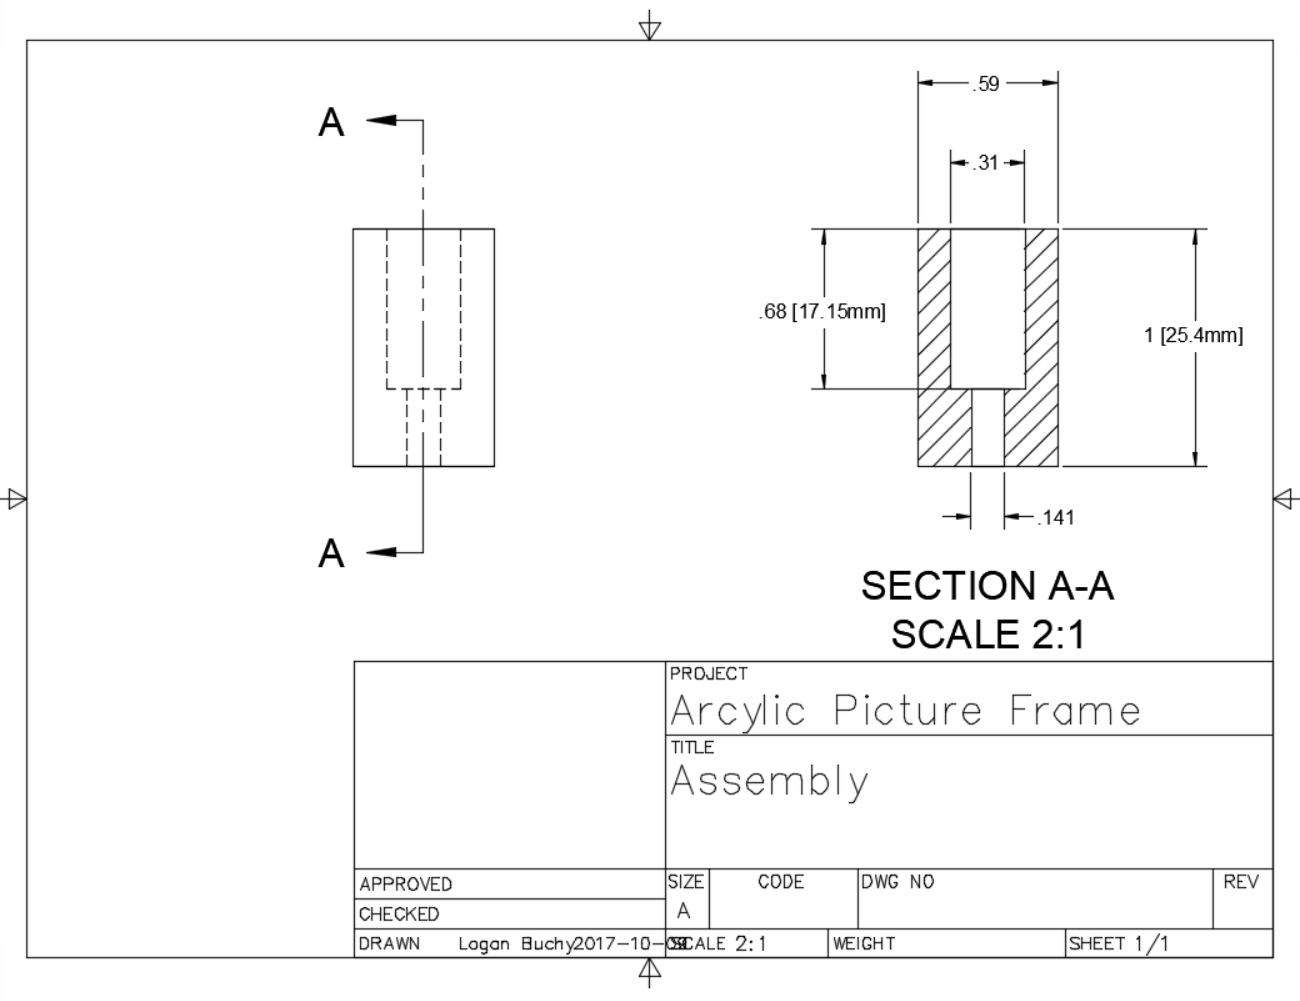
Now, to make the nut and bolt, I created some drawings from my Fusion model to guide me while I am at the lathe. Since this will be a nut and bolt, the easiest way I thought to do the threading was to use the tap and die set we have at VHS. I knew nothing about threads coming into this project, but a little bit of reading on google and the Machinery’s Handbook put me on the right track. I wanted the bolt to be pretty beefy, so I chose to use a 3/8 - 16UNC thread. This is a (just slightly under) 3/8" major diameter (diameter of outer threads) that has 16 threads per inch with a triangular-ish tooth profile. It’s the threads you would kind of expect if you picked up a bolt. There are lots of other (much cooler) threads types (like acme threads) but this one was easy to do.
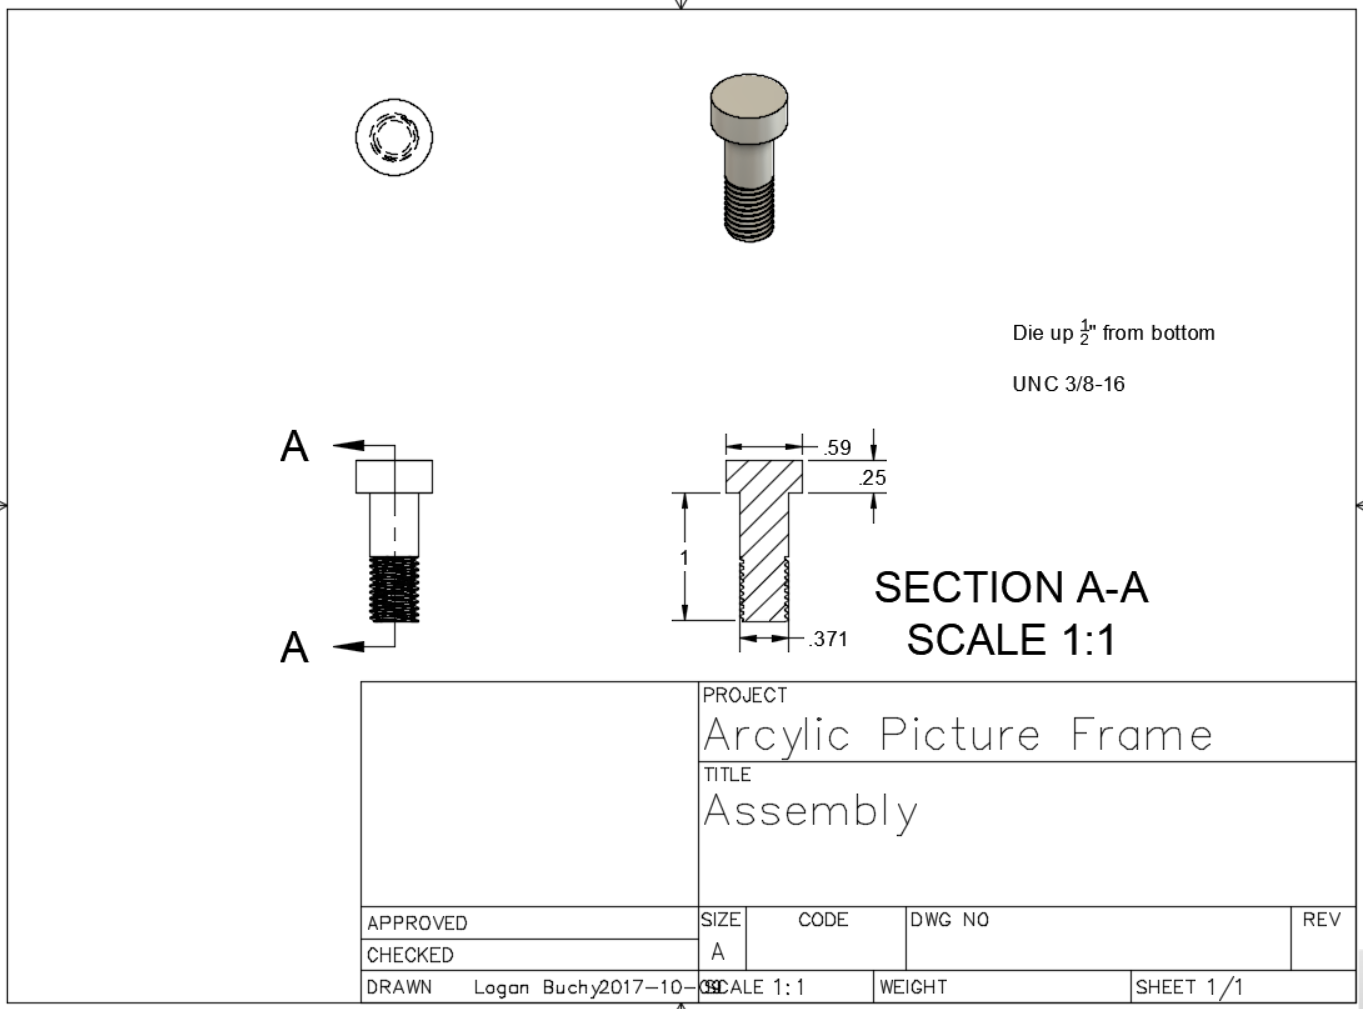
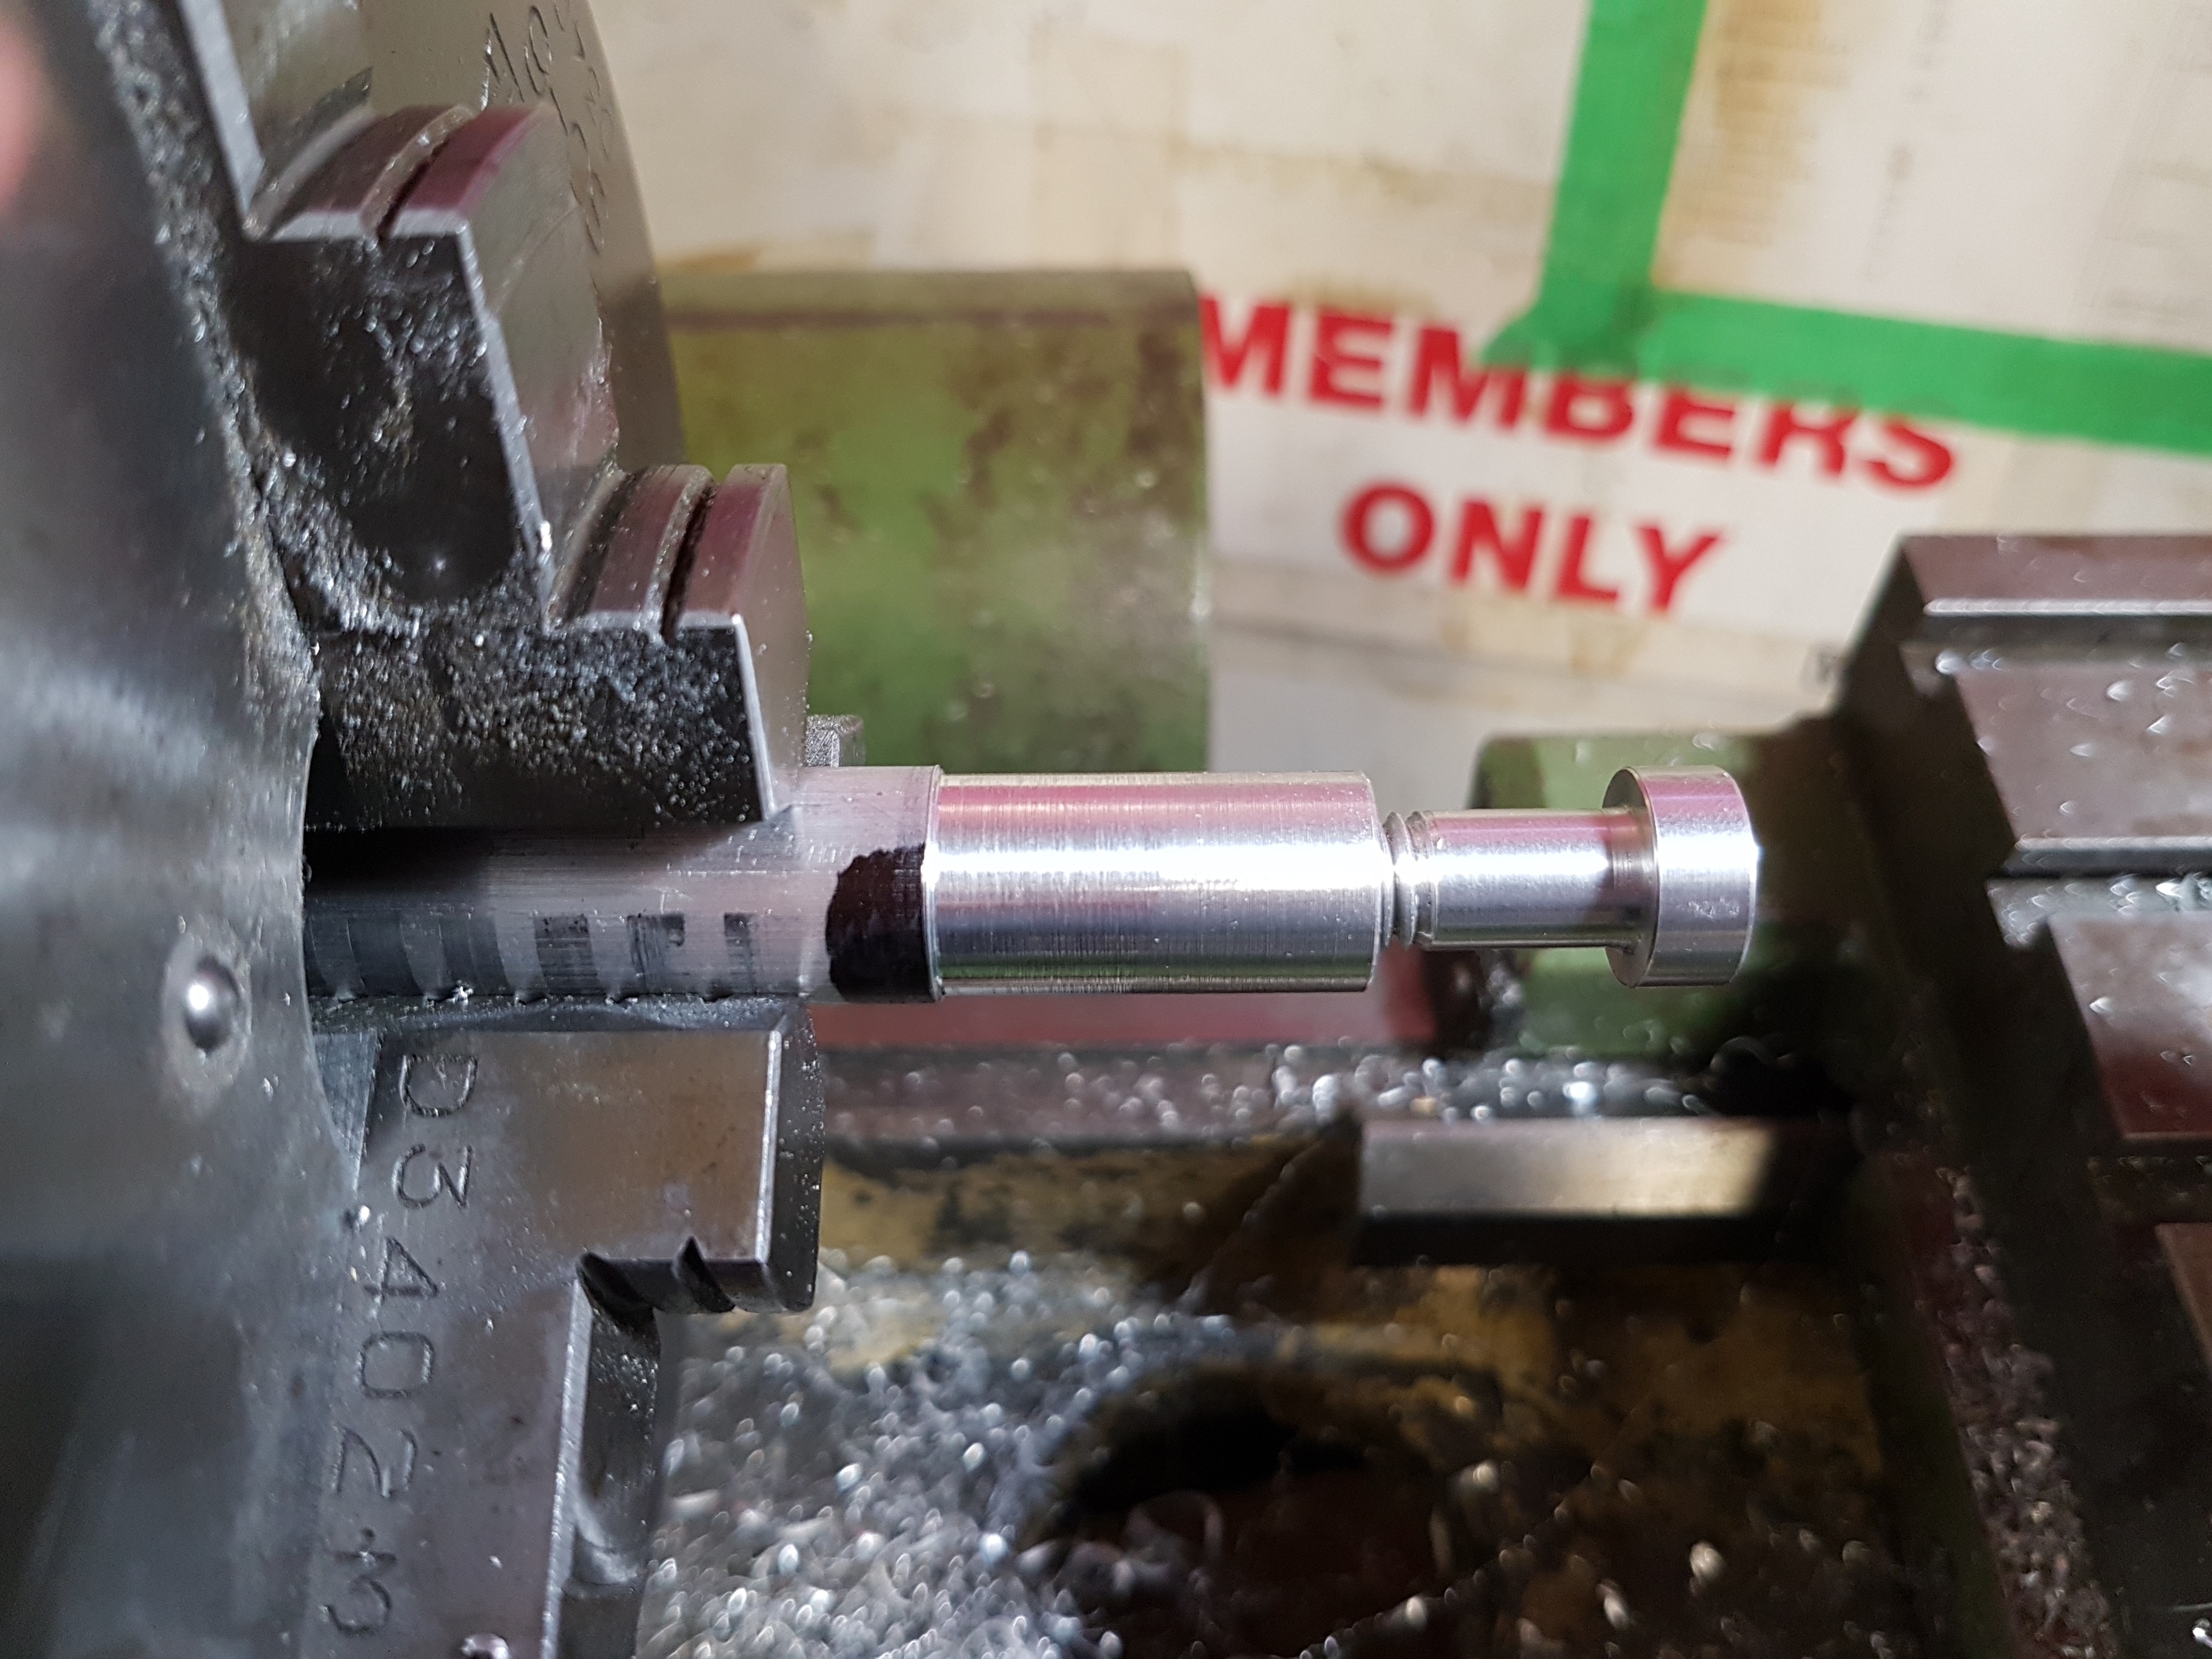
The bolt was completed by first facing one side then dimensioning the outer diameter with the turning tool to the size of the bolt head. Then, again with the turning tool, bringing the shaft down to the 0.371 inches. Finally, I was able to create the shoulder by angling the turning tool to get inside and clean out the 90 degree angle. There is a slight rounding between the head and shaft of the bolt as the turning tool has a rounded edge on it. I will leave it there for now. I parted it off and finally, I used the die to create the threads.
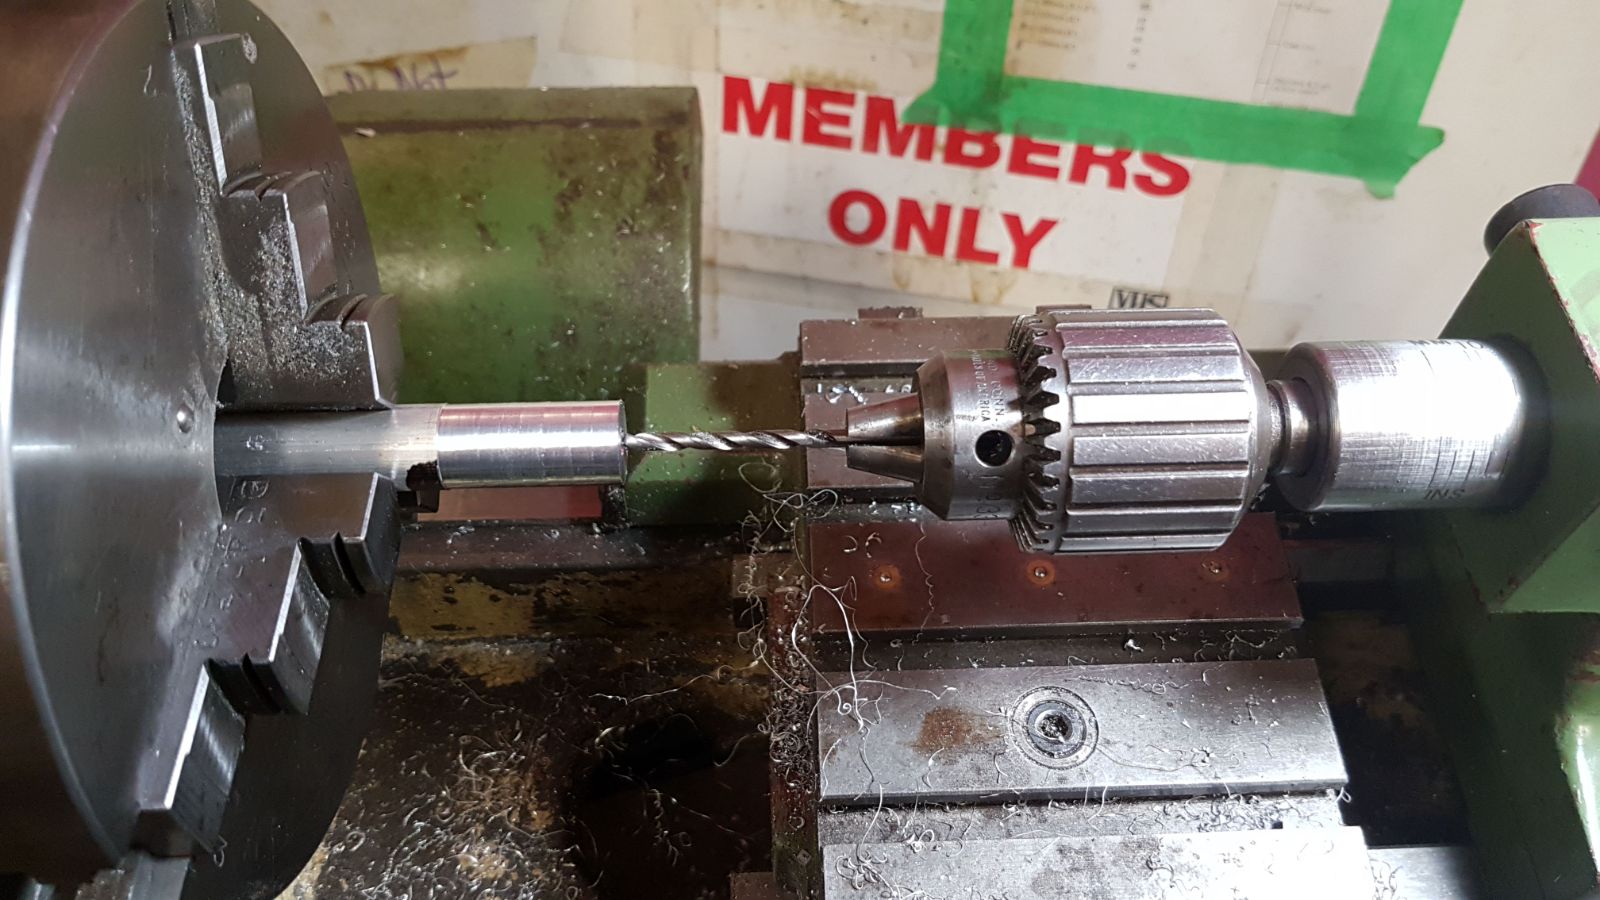
The nut was done by again, facing one side and dimensioning it to the same outer diameter. The nut really only consists of two drill operations. I started by drilling out a small hole to serve as a pilot using a center drill (~5/64") then went in about 1.1" with a 9/64" drill bit. My reasoning is that this would serve to guide the bigger 10/32" (0.313") drill bit. It was pretty quiet when using the smaller diameter bit, I also used some cutting fluid here and backed it out frequently. The larger diameter bit was a lot noisier despite gratuitous cutting fluid. ugh.
I ended up going deeper with the 10/32" hole than I had made out in my drawing because of the types of tap hardware we have. We have plug taps in our most complete set. What this means is that the threads of the tap don’t actually really go to the end of the tap but taper into it. In order to have 1/2" of threads, I would need to drill out just over a 3/4" deep hole. So, more screechy drilling I did.
Tapping the hole was fairly straight forward, however I had to be careful not to go too deep. If the end of the tap hit the base of the hole, then I could risk breaking the threads. I solved this using a piece of masking tape on the tap to determine how deep to go.
Alas, all the pieces were complete. I took a photo of my work:
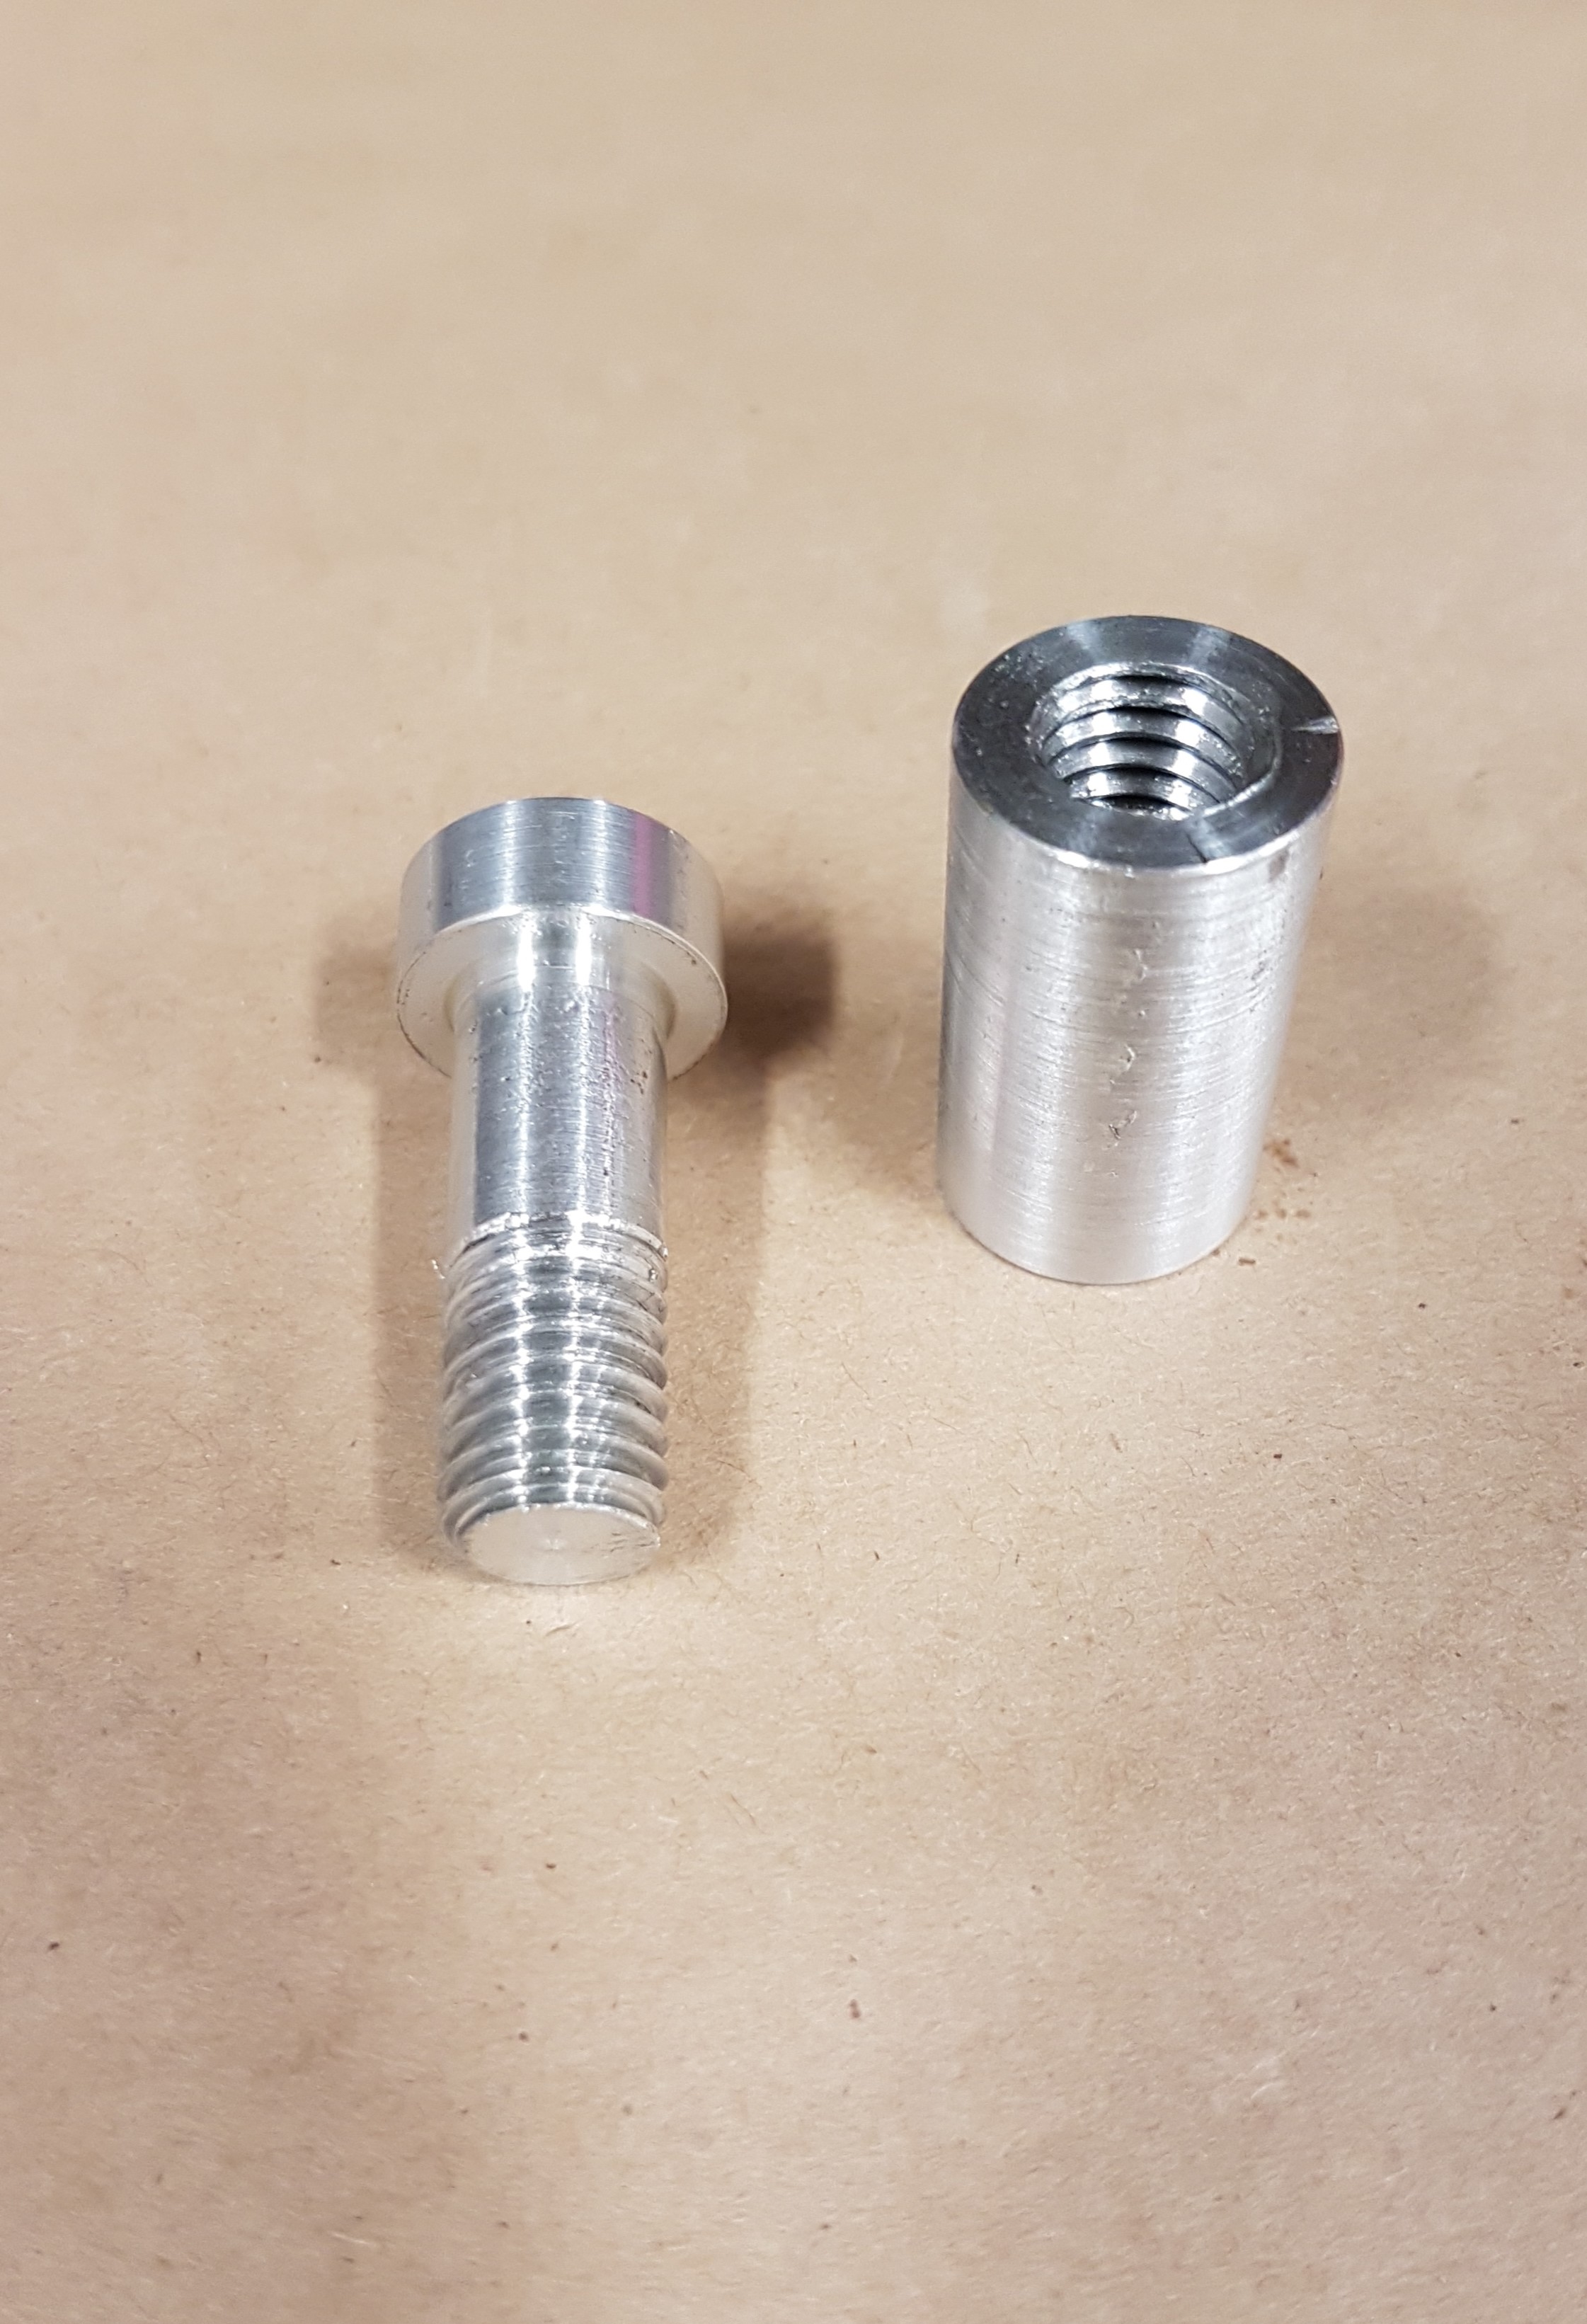
Finally, I screwed them together. They started going in really nicely. SURPRISINGLY nicely. But alas, something was amiss.
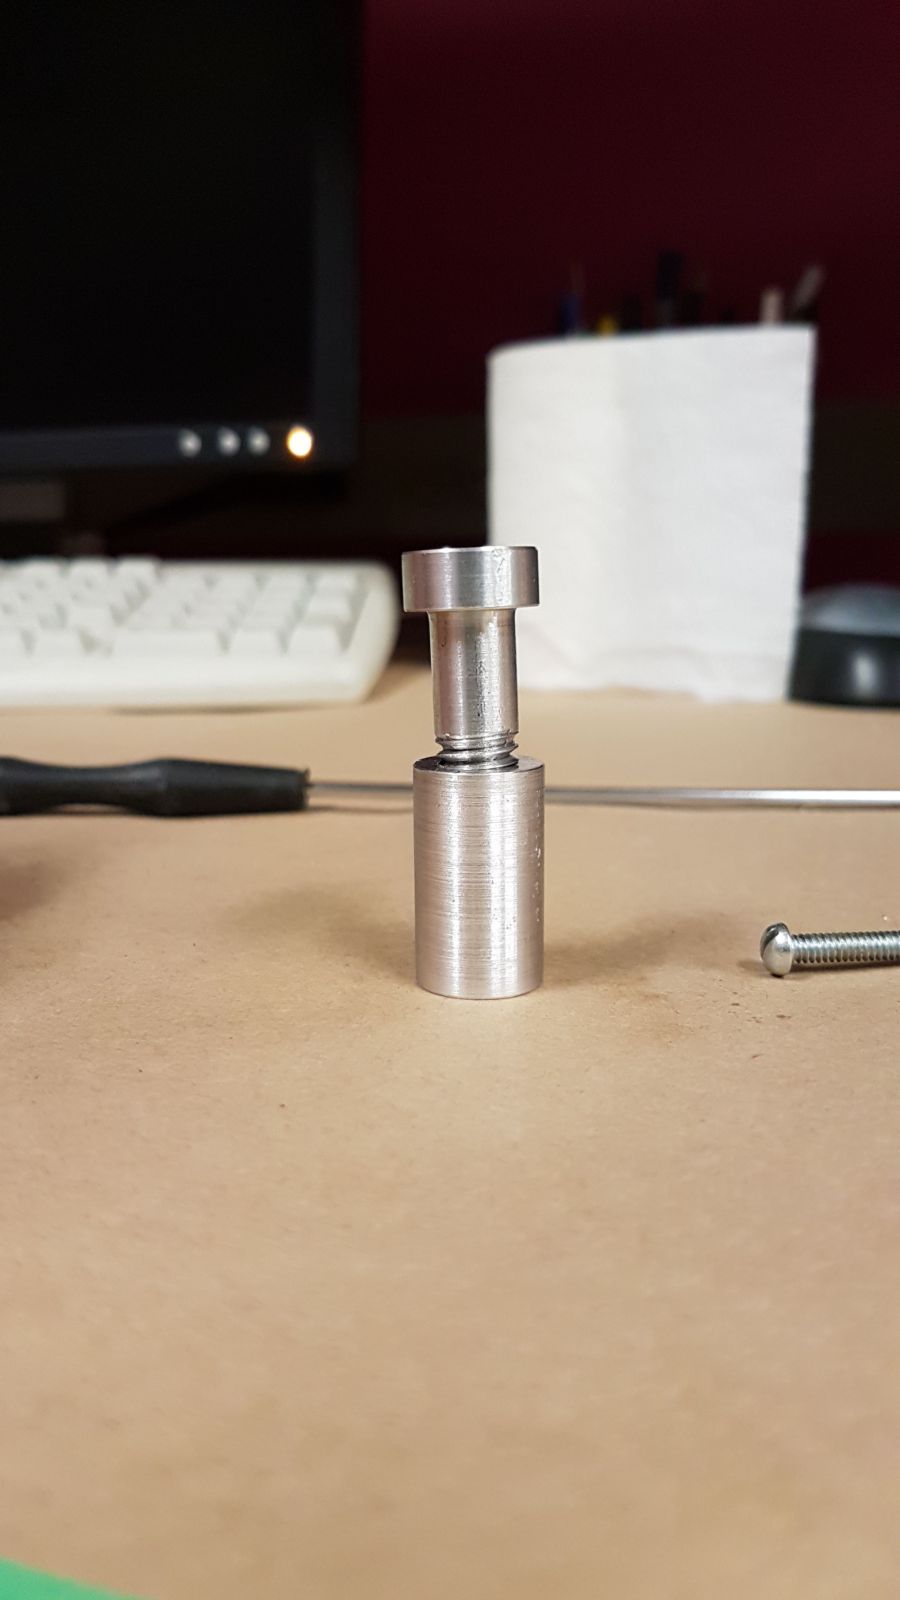
It looked like my drill bit wandered. It also seemed to change angle from the second time I drilled it out which means I wasn’t lined up properly again. So, sadly, it doesn’t fit together. It was SO CLOSE.
Back to the drawing board. If anyone has some recommendations for making these holes in a more accurate way, I’m all ears. I was thinking of going at it with an inside turning tool next time (probably tomorrow…)