IKEA has a series of super cheap AQI / PM25 particulate sensors, at like $12. The sole interface on them is an LED that is green when good, red when bad.
@JohnC picked up a few and ahem encouraged people to get them to send data to the internet.
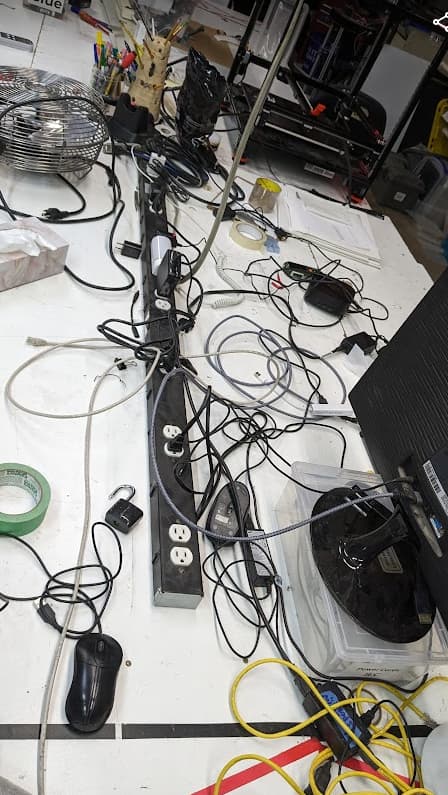
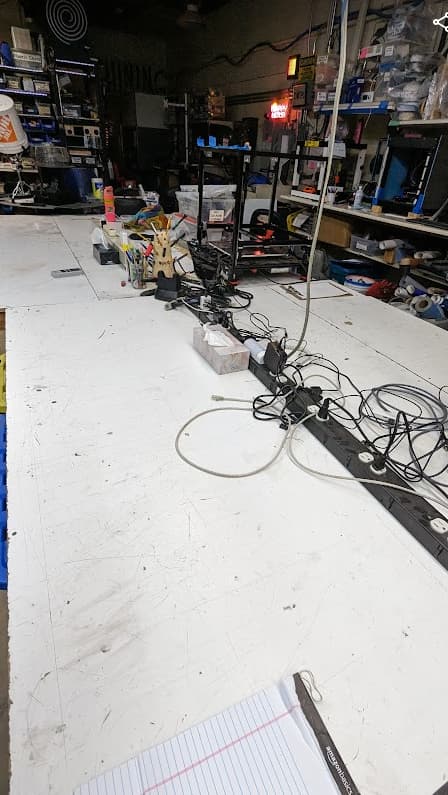
Completion shot first:
At first glance, this seems quite straightforward - Here’s a cool and thorough project that does it using an ESP8266: GitHub - Hypfer/esp8266-vindriktning-particle-sensor: Wifi MQTT Data Logging via an esp8266 for the Ikea VINDRIKTNING PM2.5 air quality sensor
So let’s start with that.
First, I installed the Platformio extension through VSCode.
That ended up taking like half an hour. What do you do when waiting for an install at VHS?
Clean.
The sensors look like this:
This one is above the solder bench. Should be able to see a spike when someone is soldering.
4 screws, and they open up easily:

And a quick solder-job to a NodeMCU, which is just a simple ESP8266 dev board. VHS has a handful. They’re also like, really old tech, so it’s good to use them up. The ESP32 is the new hotness, but it wasn’t necessary in this case.

While initially programming and debugging, I didn’t need to solder the 5V (orange) line, as I had the AQI sensor and ESP8266 boards hooked up separately, and you don’t want the power rails to be fighting each other.
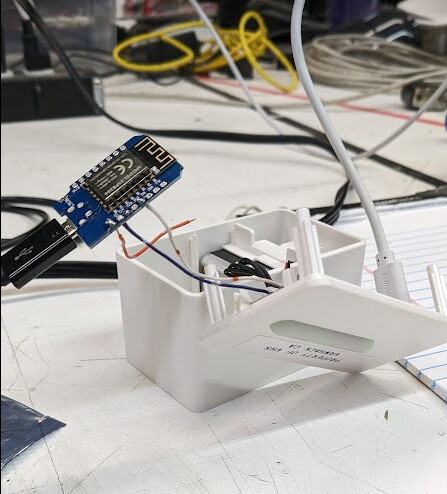
That’s it! The enclosure has tons of free space inside, and the wires are stiff enough to keep everything in tension and not moving around. Close up the case (after testing).
Now onto the software:
The ideal data logging strategy for something like this is MQTT. Don’t worry about all the niche terms when you Google it - Basically you send the server a datapoint, and then the saves it and displays it. There are other features (eg. subscribing to that datapoint for changes) that are beyond the scope of this thread.
Did you know? VHS has it’s own MQTT server!
The documentation is here: infrastructure:smartspace [Vancouver Hack Space]
Unfortunately, I couldn’t get it to work. I’m sure I’d be able to recruit some help to troubleshoot on not-a-long-weekend. It’s a very cool setup.
In the meantime, the scope of this project was merely “get it working”.
I’ve long been a fan of Adafruit’s MQTT server. It is easy enough to set up, free for most reasonable usage, and I don’t have to handle keeping my own servers running and updated.
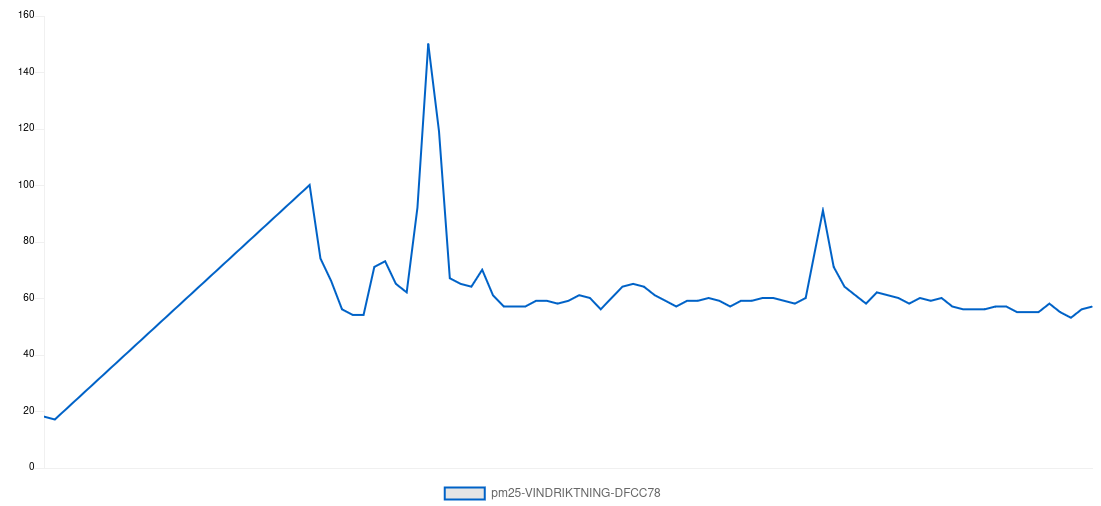
They also graph stuff nicely. That screenshot at the top of the thread is accessible, but live (for now) here: IO - Adafruit
Due to the nature of MQTT, as an open protocol, it will be trivial to point this to the VHS server instead, as soon as the credentials get figured out.
From the linked Github code, I did modify it pretty heavily. Mostly just stripping out all the stuff I reeeallly don’t care about. I think it’s HomeAssistant-related data, which is also out of scope of this project. In the future, this could be added back in fairly easily.
The final code I used is this: esp8266-vindriktning-particle-sensor.ino · GitHub
Cloning the original repo and then replacing the .ino file is the best way to use this, because it has the PlatformIO configuration files that set up the board and download the libraries. The credentials at lines 147 and 148 need to be changed to your account settings, if this code is to be used. Also changing the topic to include your username instead of mine.
It’s worth noting that these include ArduinoOTA, to allow over-the-air updating. I don’t know how this works, but it’s there.
Two more slight additions: the char array at line 10 of Config.h needs to be set to 64 characters instead of 32, for Adafruit’s key.
And PlatformIO’s config makes debugging easier if you add monitor_speed = 115200 to the end of platformio.ini
This should be a good start for anyone else who wants to hack these sensors. I know John wanted three of them done, but I was only able to complete one, because someone had gone around and removed all the others, and taken them out of the space(?) overnight, at least
Once again, the cool result from this thread is this live graph right here: