February 4th
I thought I’d share with folks what I’ve been up to in the hackspace recently…
I use an electric bike for commuting and primary transport purposes, and while it serves me quite well, the only unmet need is the ability to haul large amounts of material. Think Costco trips, another bike? Or a couch?
I’m trying to build a cargo bike, frankensteined out of two different bikes and electrify it. Since this is the biggest project I’ve ever undertaken - I purchased some plans from Phil Vandelay (he builds custom cargo bikes full time). I’ve attached a photo to show how a finished bike would look.
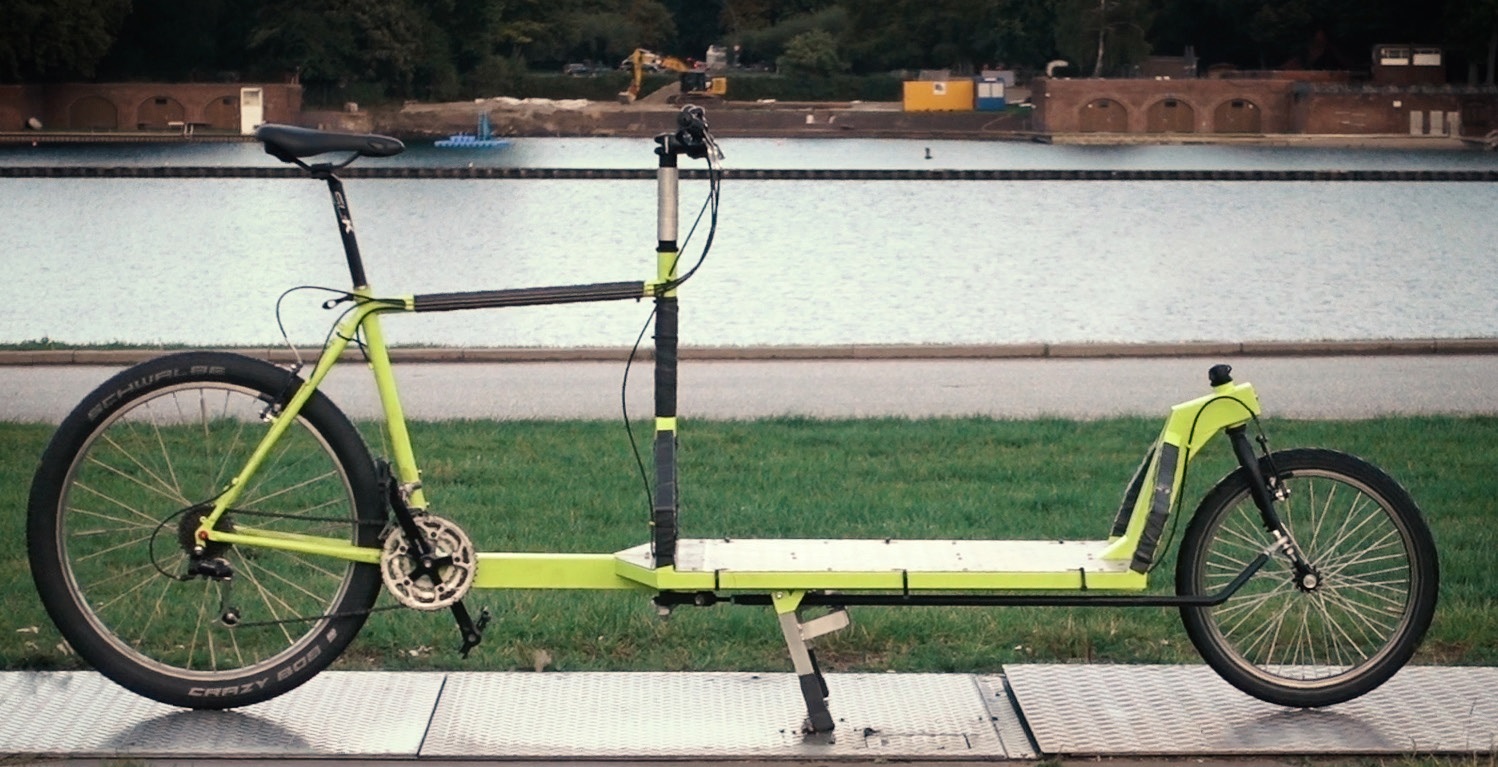
You essentially take a 26" MTB steel/cro-moly frame, cut off the downtube as well as the head tube, attaching it to a 20" (kids or BMX) bike’s head tube through a steel cargo area. This is a well known class of bikes hailing from denmark where they’re called Long John’s. The bullitt by HarryVsLarry is one of the most popular models of this class of bikes.
Some of the more intricate parts of this design involves the steering at the front wheel transmitted from the handlebars through an assembly involving ball joints etc. While I don’t understand all this yet, I’m trying to follow the plans religiously for now.
Jig
Before I can start building the bike, to ensure everything is aligned and true, Phil recommends the use of a Jig. I built a jig out of Aluminum extrusion that was cut to lengths in the new chop saw fit with a 96 tooth aluminum steel blade. If you’re looking to cut aluminum, this saw blade is amazing and is on the pegboard in the woodshop. This was made possibly by a group buy!

I then went on to build this jig by drilling holes into the extrusion and using M10 and M8 threaded rods to create mounting points for axle dropouts of the rear and the front frames…
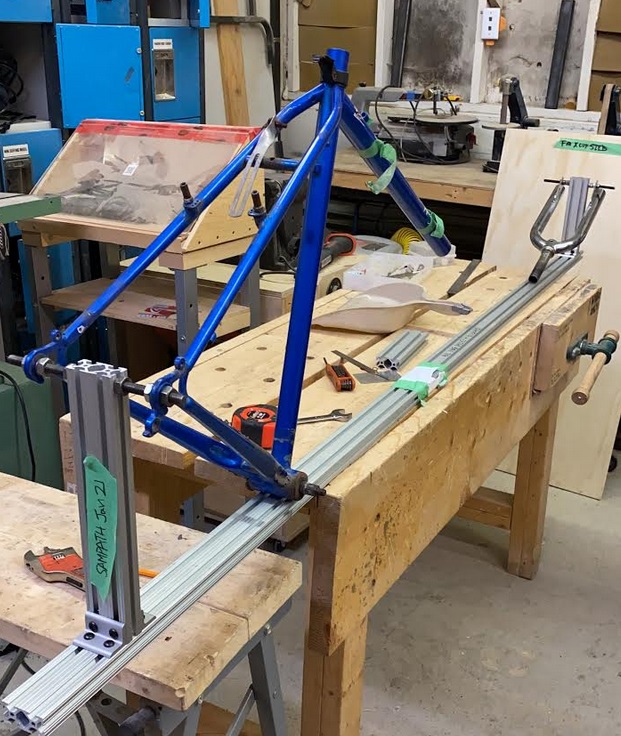
Now I can modify this jig to set the right distance in between the rear and front drop outs, ensure that the fork and frame are always aligned.
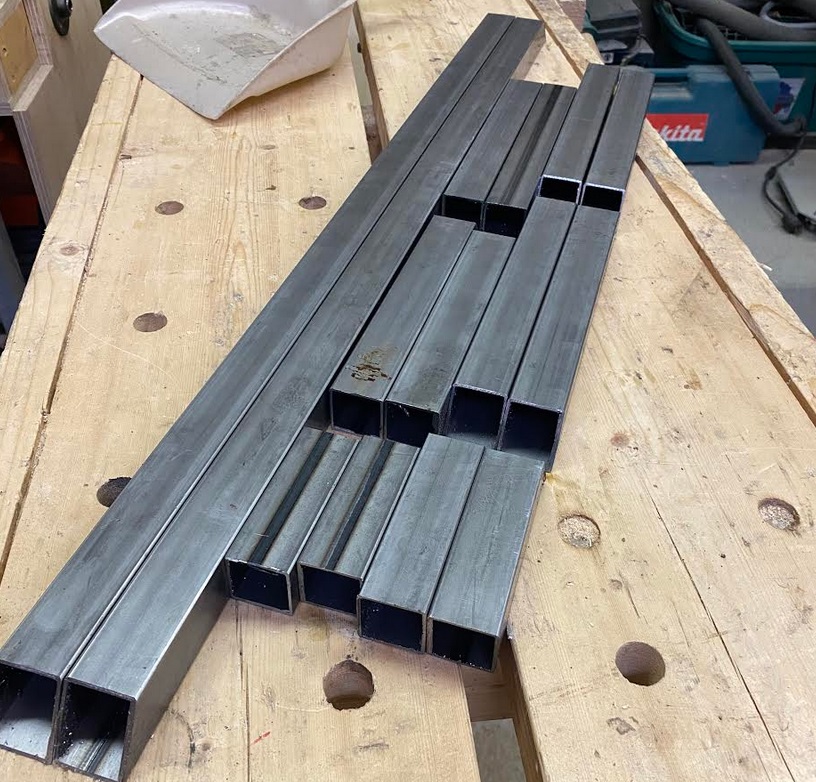
Angled cuts
With the jig done, I began making the required angled cuts on the metal bandsaw. I also laser cut a couple of jigs to set the saw up at the right angles… Since some of the cuts I had to make were at a steep angle, I ensure that the piece was held tight by replacing the locking washers on the vice - Which at the point we got the machine had almost become flat washers.
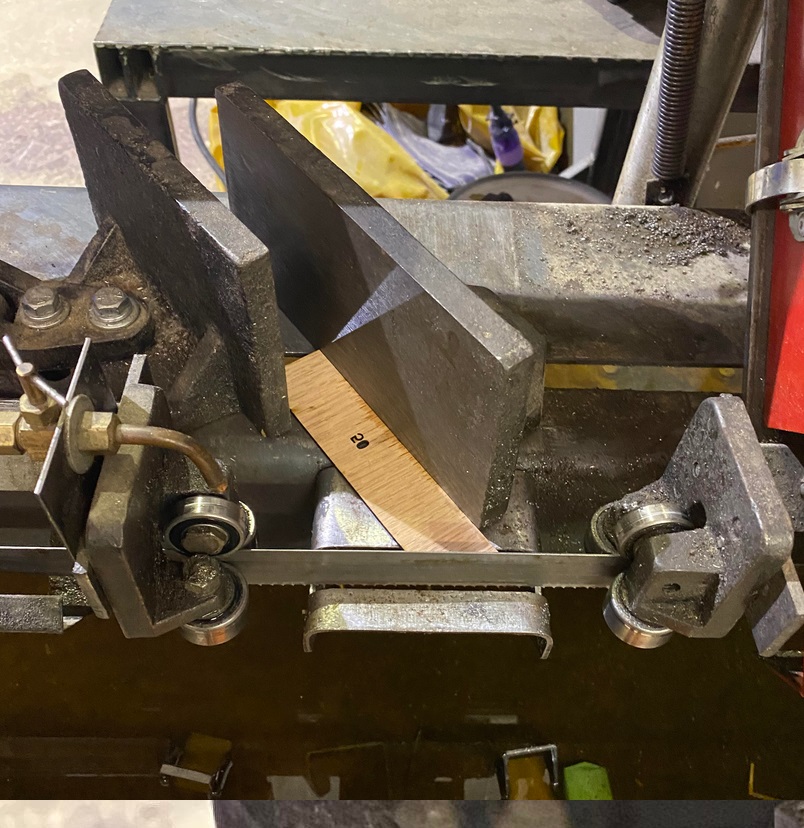
Satisfying shot of all the angled cuts that were made…
Next steps!
Making holes and coping tubes
I’d need to make holes into the square tubes to accept steering rods and head tubes as well as cope the tubes themselves to be able to weld to other parts.
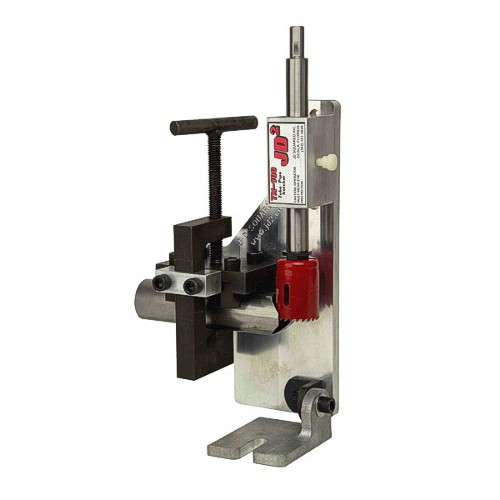
I’ve tried drilling a few holes with some of the hole saws we have but I’ve found the resulting torque on the drill always brings the head out. I’ve been using the plasma cutter to make these cuts instead by using a laser cut jig again with features offset by 8mm (thanks for this @Rob_MacKenzie)
There is a popular tube coping calculator that can be used to print out a guide you can tape around a tube you are looking to cope after inputting some parameters… https://metalgeek.com/static/cope.pcgi This would require me to go in later with a cutoff disk and sand it to the required smooth curves.
Alternatively, if I’m making curved features with a laser cut jig, I’m wondering if the coping pattern can be 1. Stretched out along the circumference 2. Relief cuts made to allow wood flexibility and 3. Wrap the wood around the tube to create an edge for the plasma cutter to make the required cut… This seems like an interested idea worth testing out just for the sake of it ![]()
Welding things together!
Since the Bike frame I got was a cromoly frame, I’ve decided to use TIG welding to joint the steel parts to the cromo frame. The interwebz suggest using ER70S2 as a filler material for this (I’ve probably purchased too much of this material, please feel free to use it if you need it)… @Metal_Janet also suggested making a bunch of test welds to dial in the settings so I can safely make some mistakes…
The electrification part
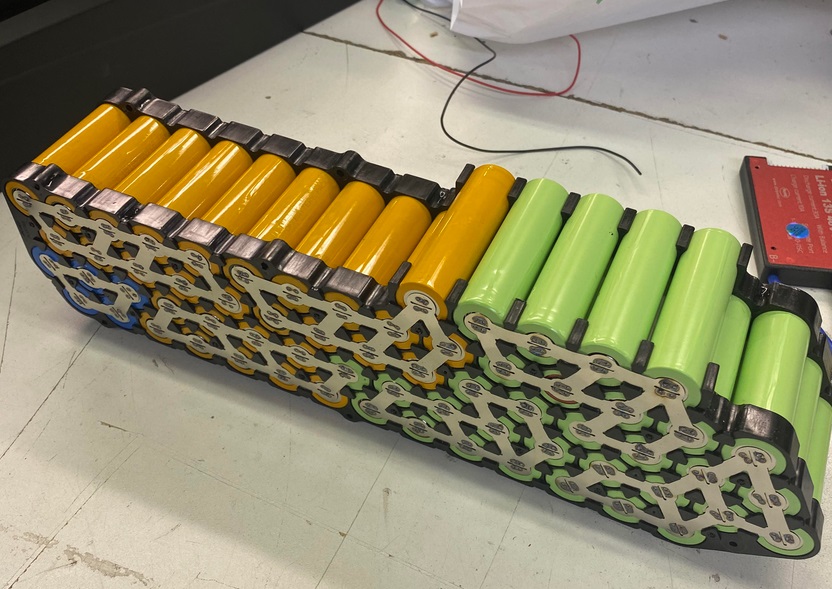
Custom Battery Pack
From a pack of cells that I got from @Brian_Stubbs, I built this 13s5p chonky boi putting out 48V, 702 Wh battery. I’ve held them in a hexagonal cell case and spot welded everything together using stamped nickel strips. The next steps involve connecting a battery management system to these cells, insulating, shrink wrapping and placing them inside a hailong case.
Hub Motor, Motor Controller etc
This is all TBD, but I love what Grin Technologies do so I’ll probably be getting their phaserunner motor controlled with a hub motor that has a locked clutch. This enables regenerative braking, which I’m rating as super important and almost a must have on this build. The rotors and disc pads will heave a sigh of relief.
I’ll try to update this build log as I get up to more stuff in the coming weeks! LMK if you have any questions ![]()