I found myself with a sudden need for a walking cane, so logically I skipped the store and decided to build myself one out of driftwood.
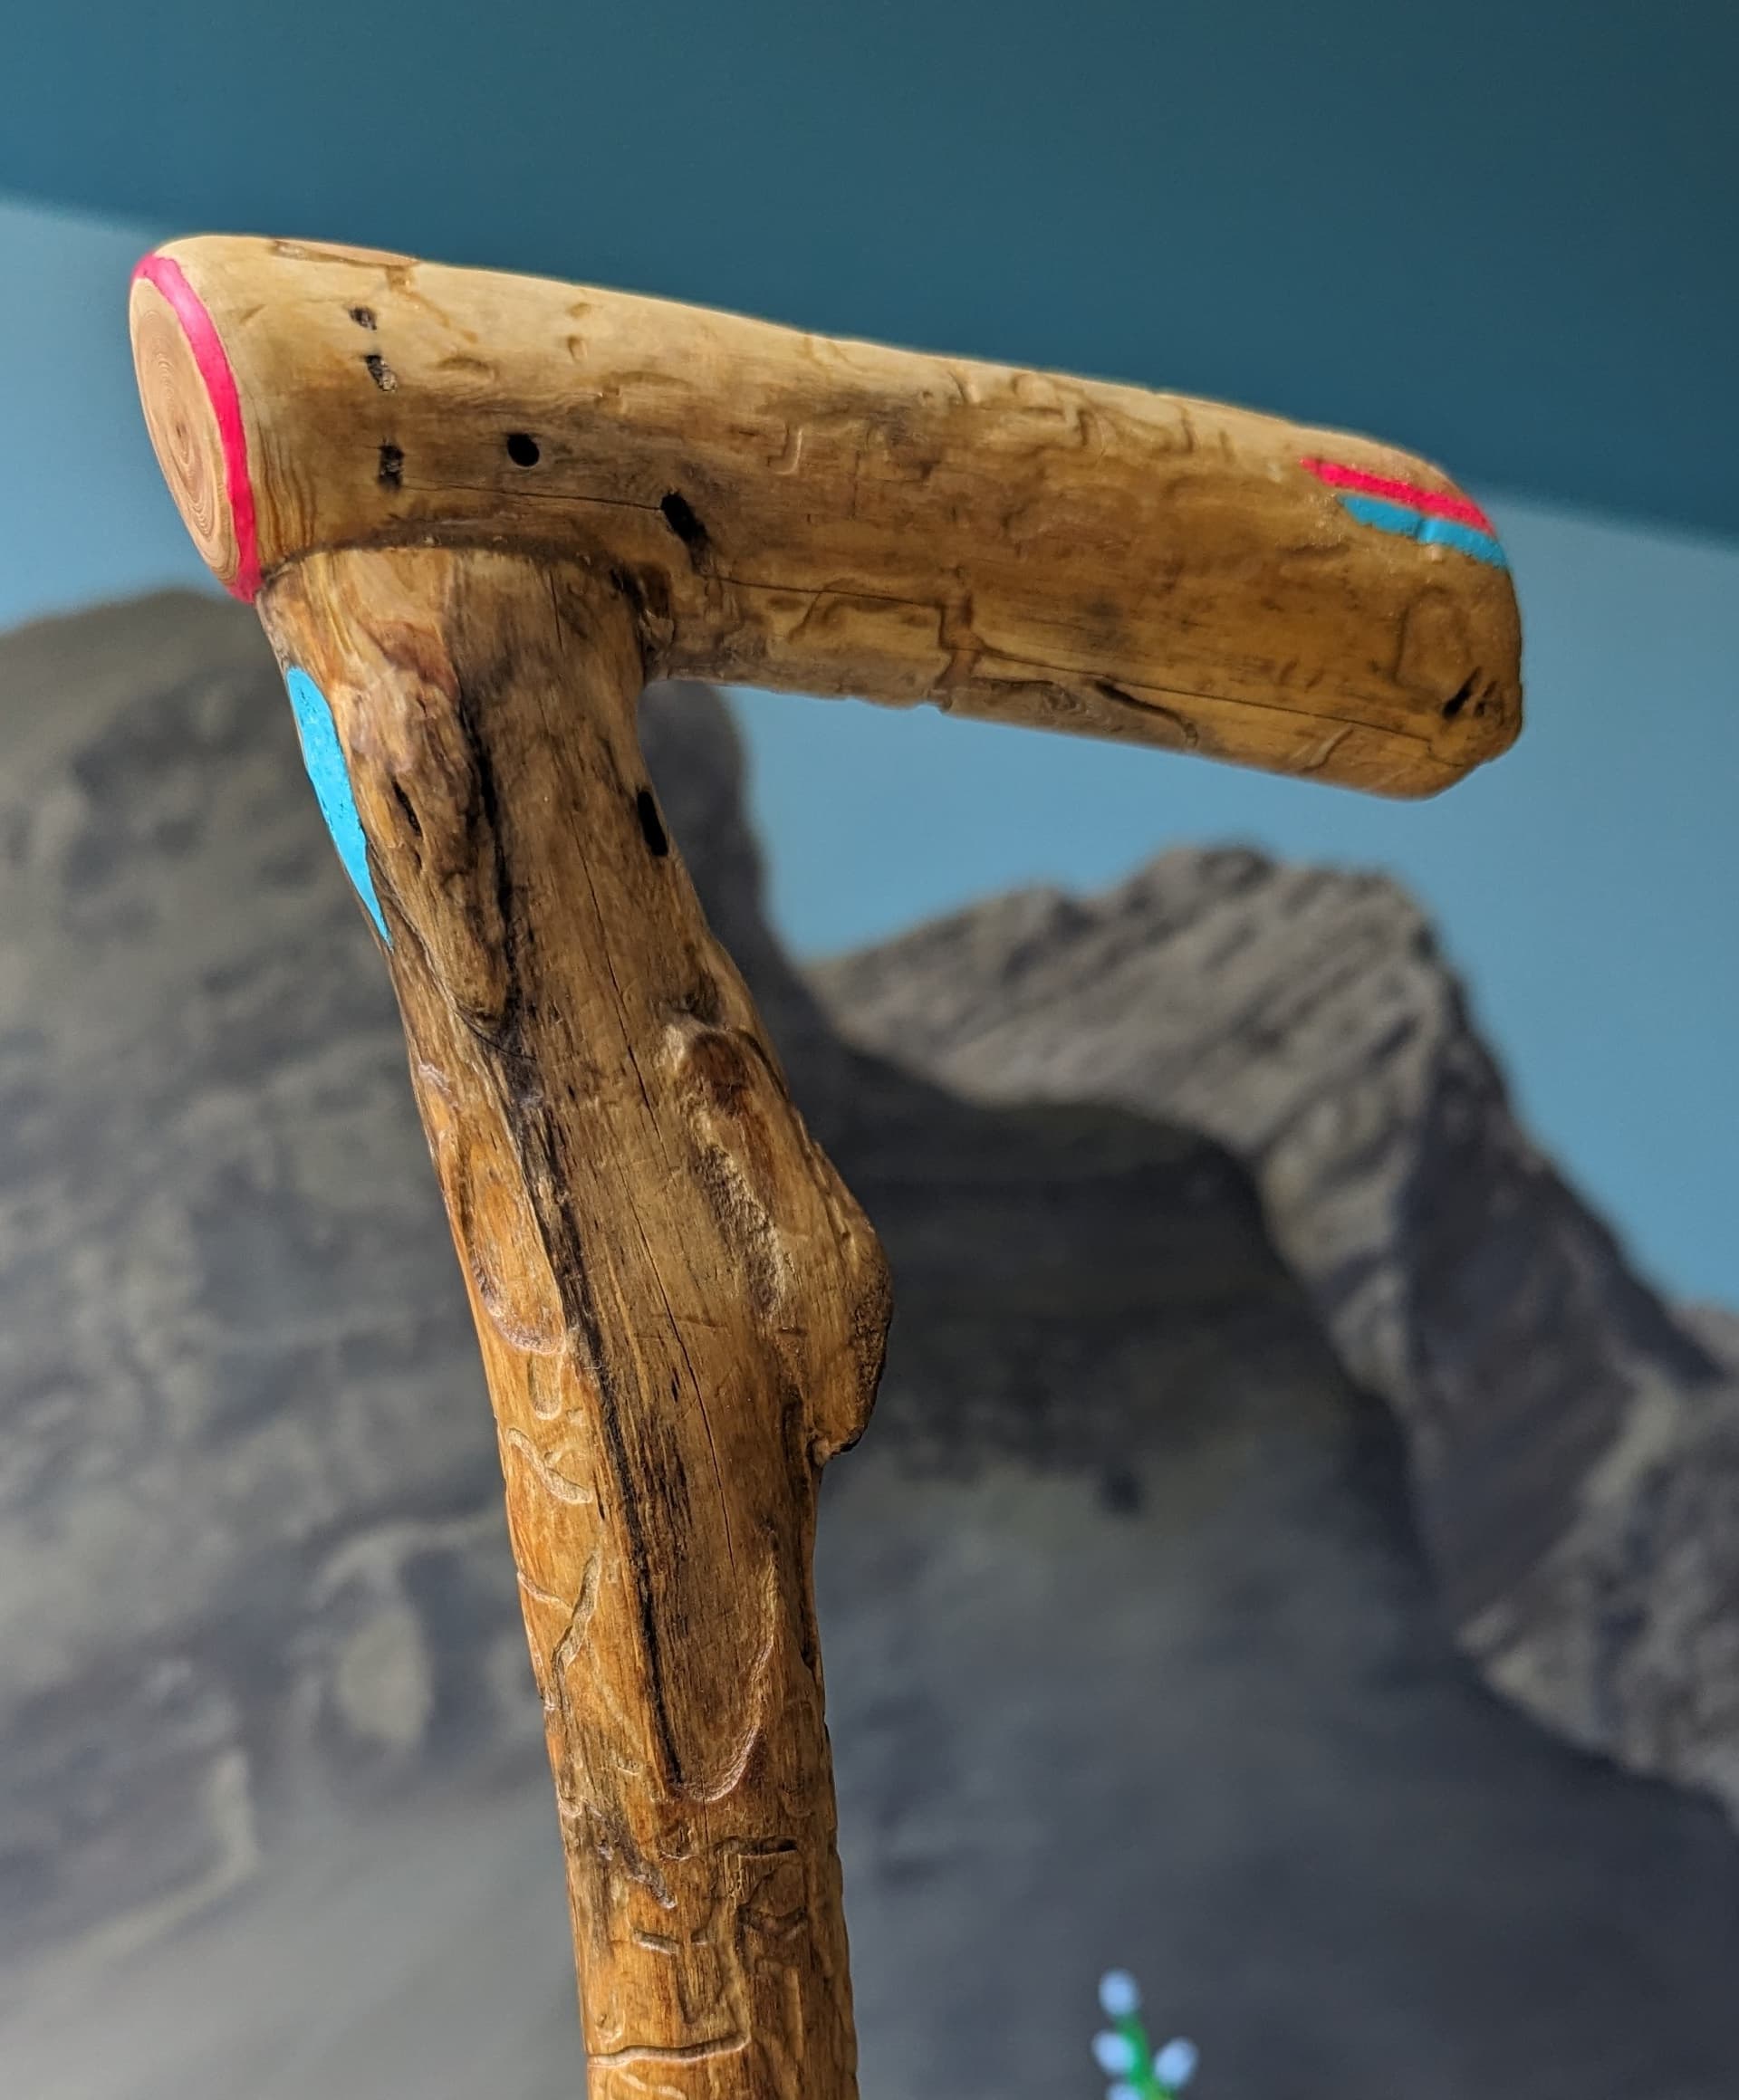
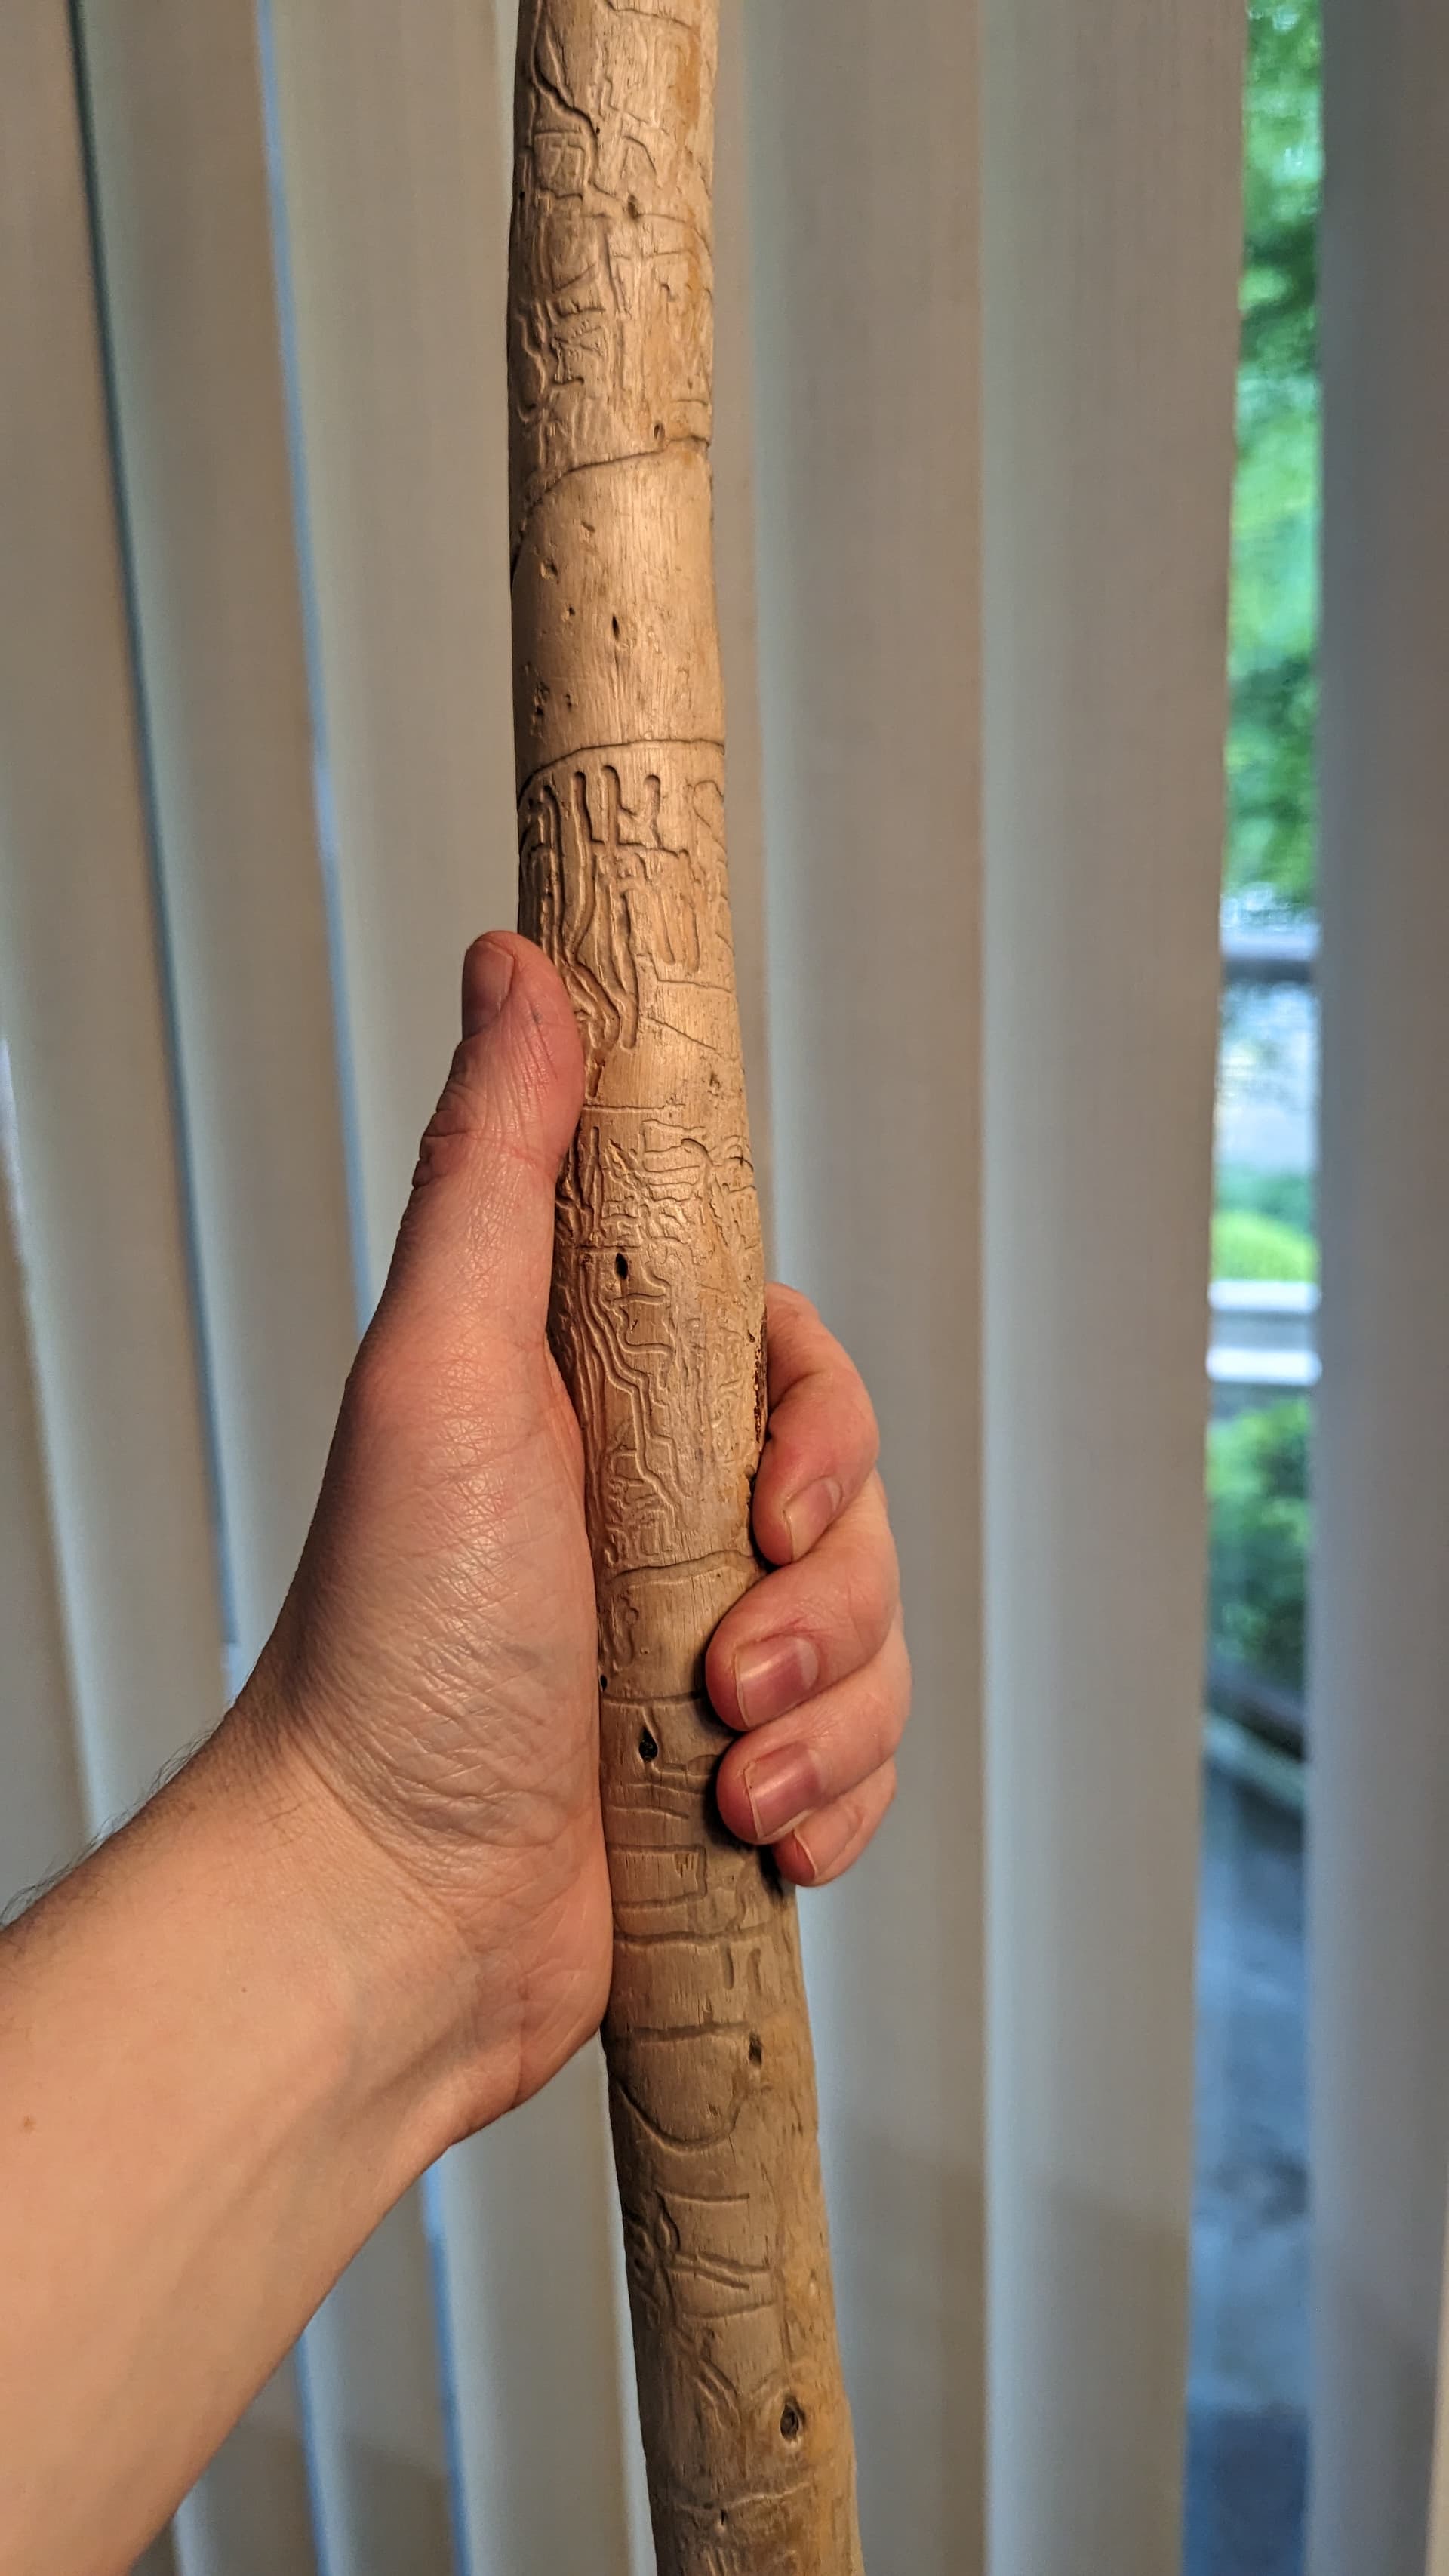
Specifically this chunk of heavily beetle scared driftwood I pulled off a beach a year ago in the Gulf Islands. Fun fact, those lines are galleries where the beetle carved a channel, laid eggs and left fungus snacks for the kids, more fun bark beetle facts here
(also you only get to see part of the stick because I never remember to do before shots)
It was an awkward length and just a bit to short to make a walking stick out of but it was perfect for a cane.
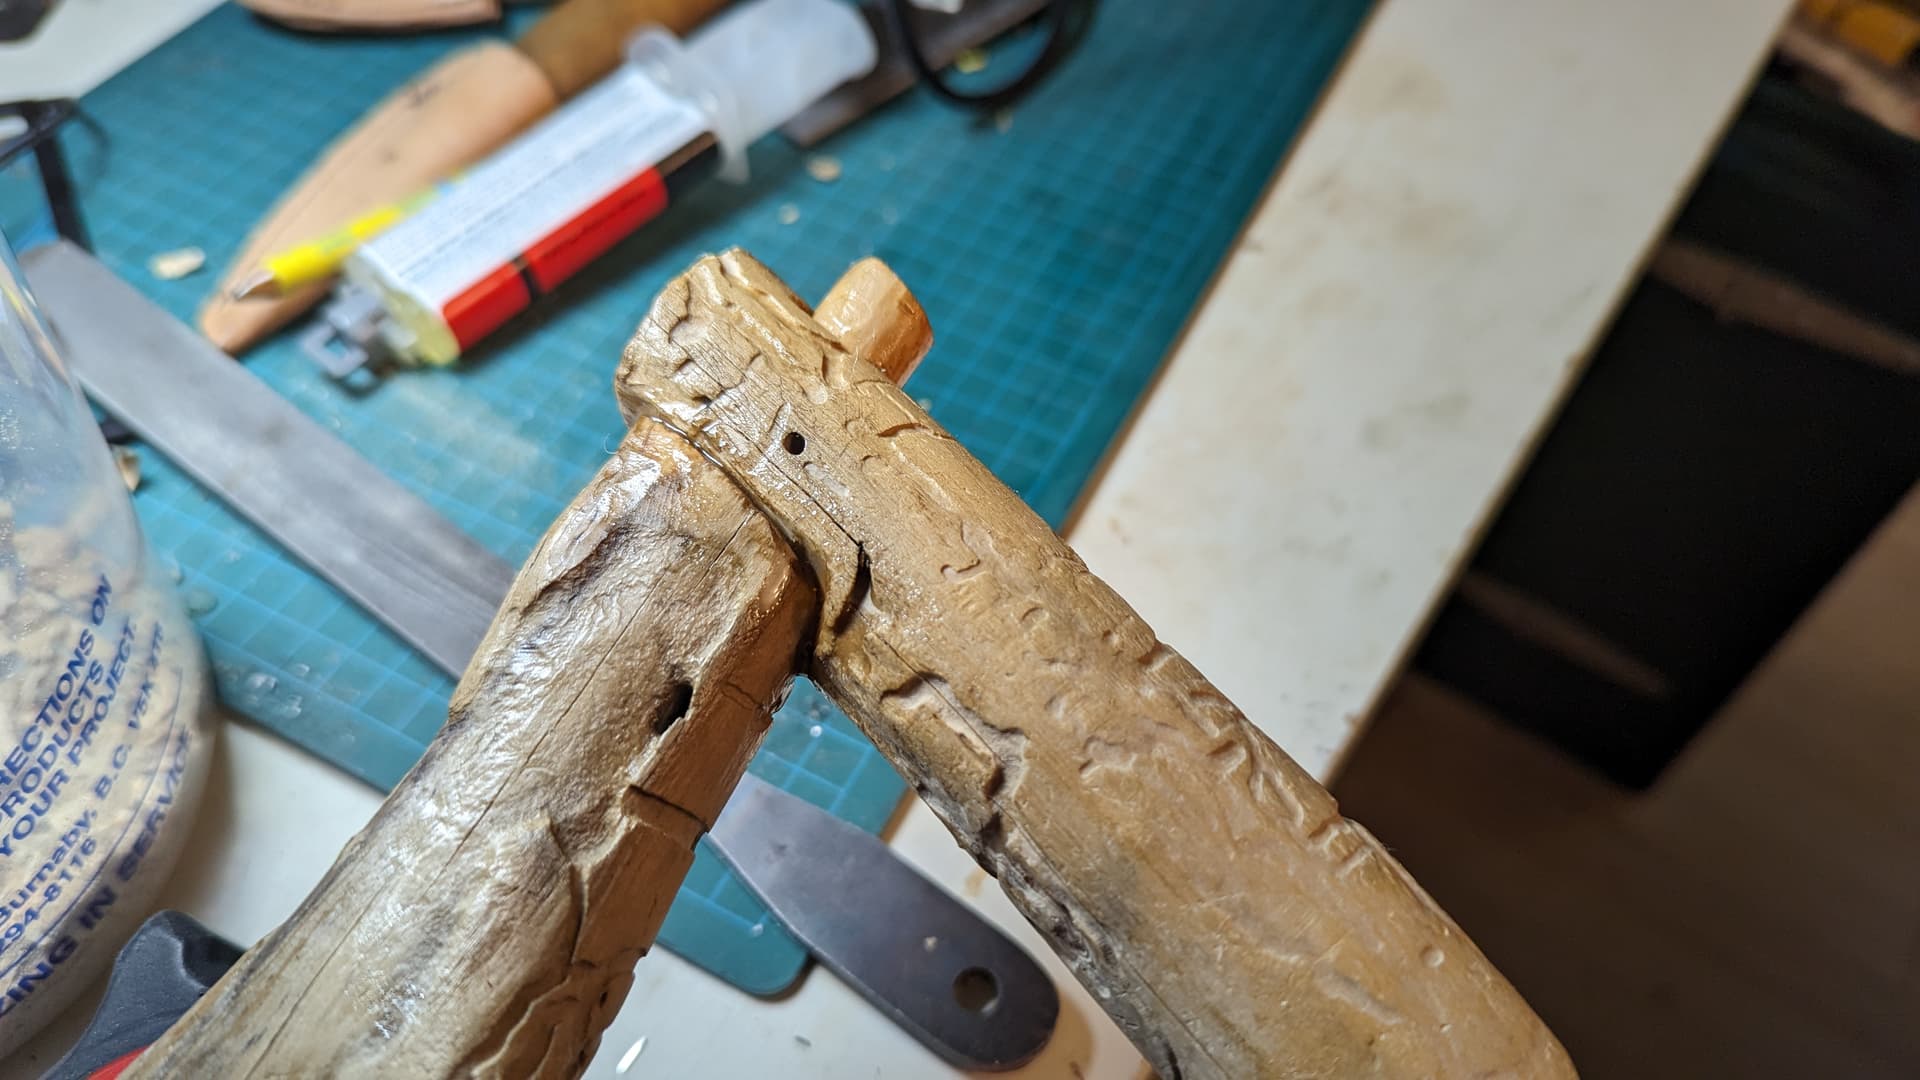
I started by cutting a chunk off the end and drilling a hole using an screw tipped auger bit. Which caused regrets, turns out screw tipped augers might not be the best for fine joinery as they put a lot of stress on the thing being drilled. I stopped before I cracked the wood any more in half and used a twist drill to pilot the hole.
I also drilled the hole at an angle, so the tenon would follow the grain and be stronger as a result. Its also a more fun metal workout.
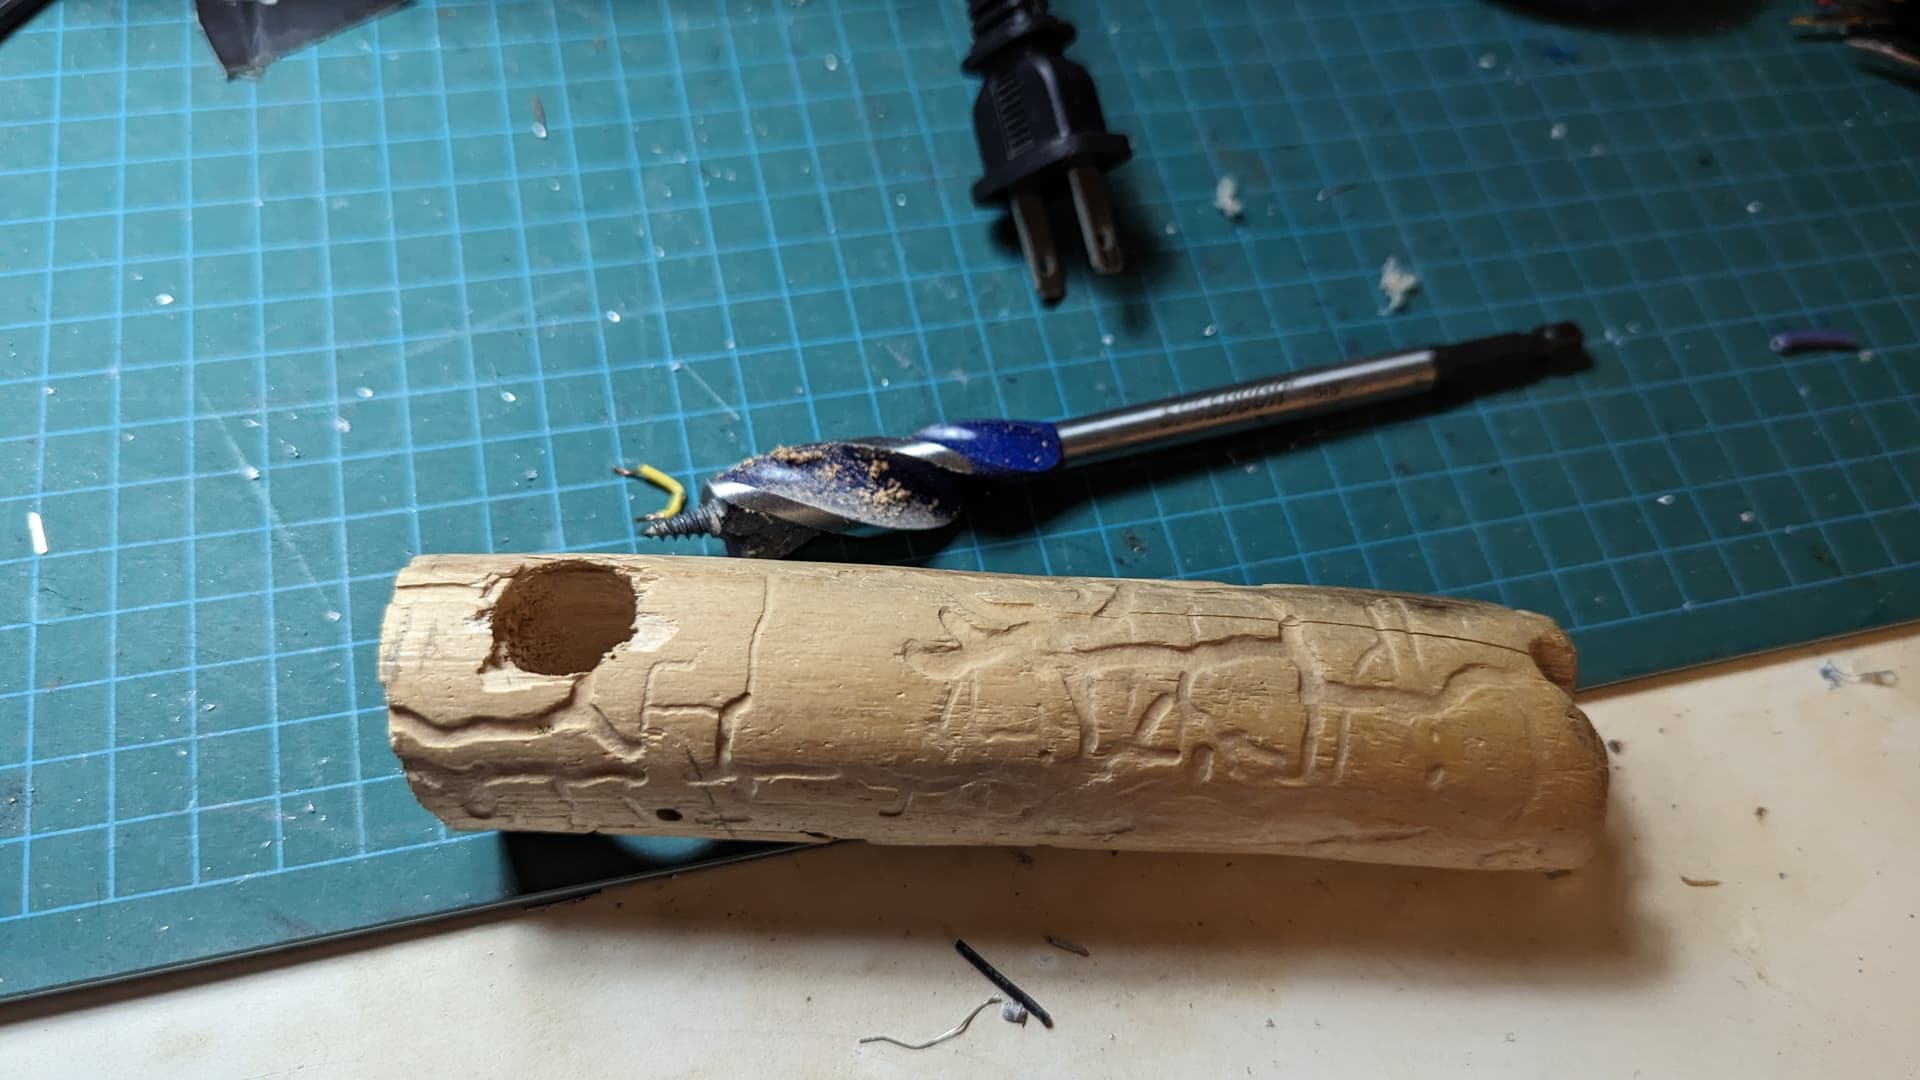
I roughed the tenon out with a saw before switching to a carving knife. I got it to a pretty close fit by test fitting it into the hole, giving it a wiggle, and then cutting off everything that looked shiny.
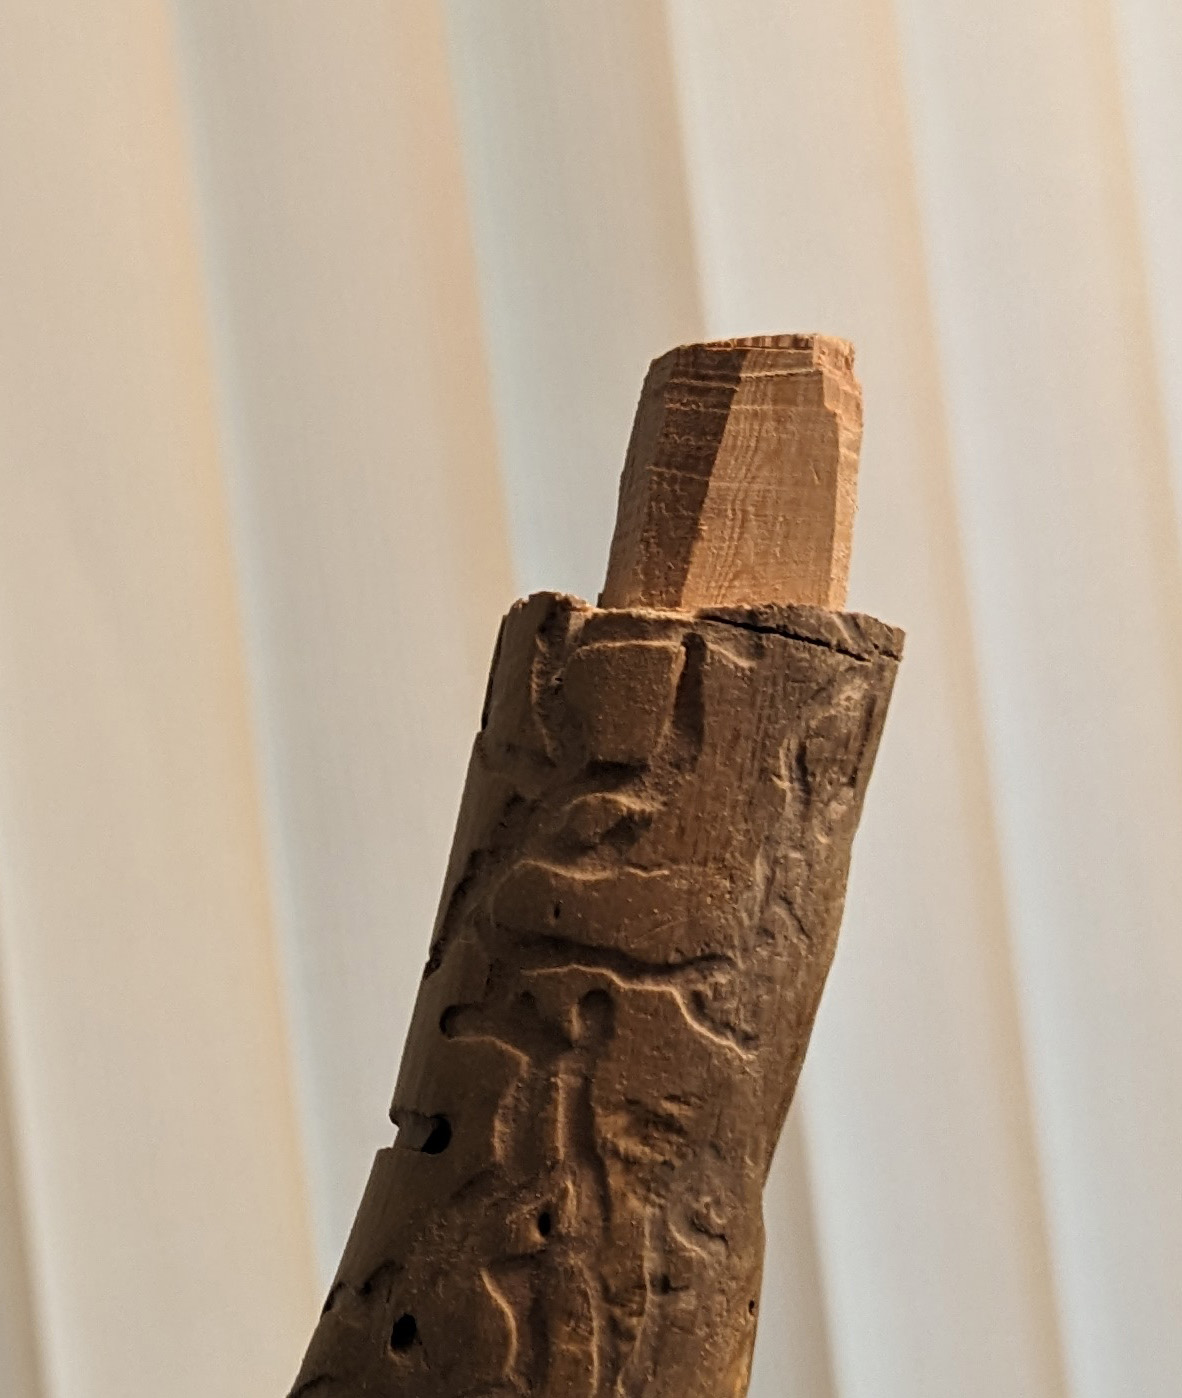
Anywhere I ended up over cutting, or ‘clearancing’. I put back by introducing the sawdust to Mr Epoxy Resin and slathering it all in there with a few fillets for good luck. I think I went back for a second pour in a couple spots after this photo.
Cut off the tenon, and scape any areas of epoxy over ooze (I can’t seem to glue anything without it ending up EVERYWHERE).
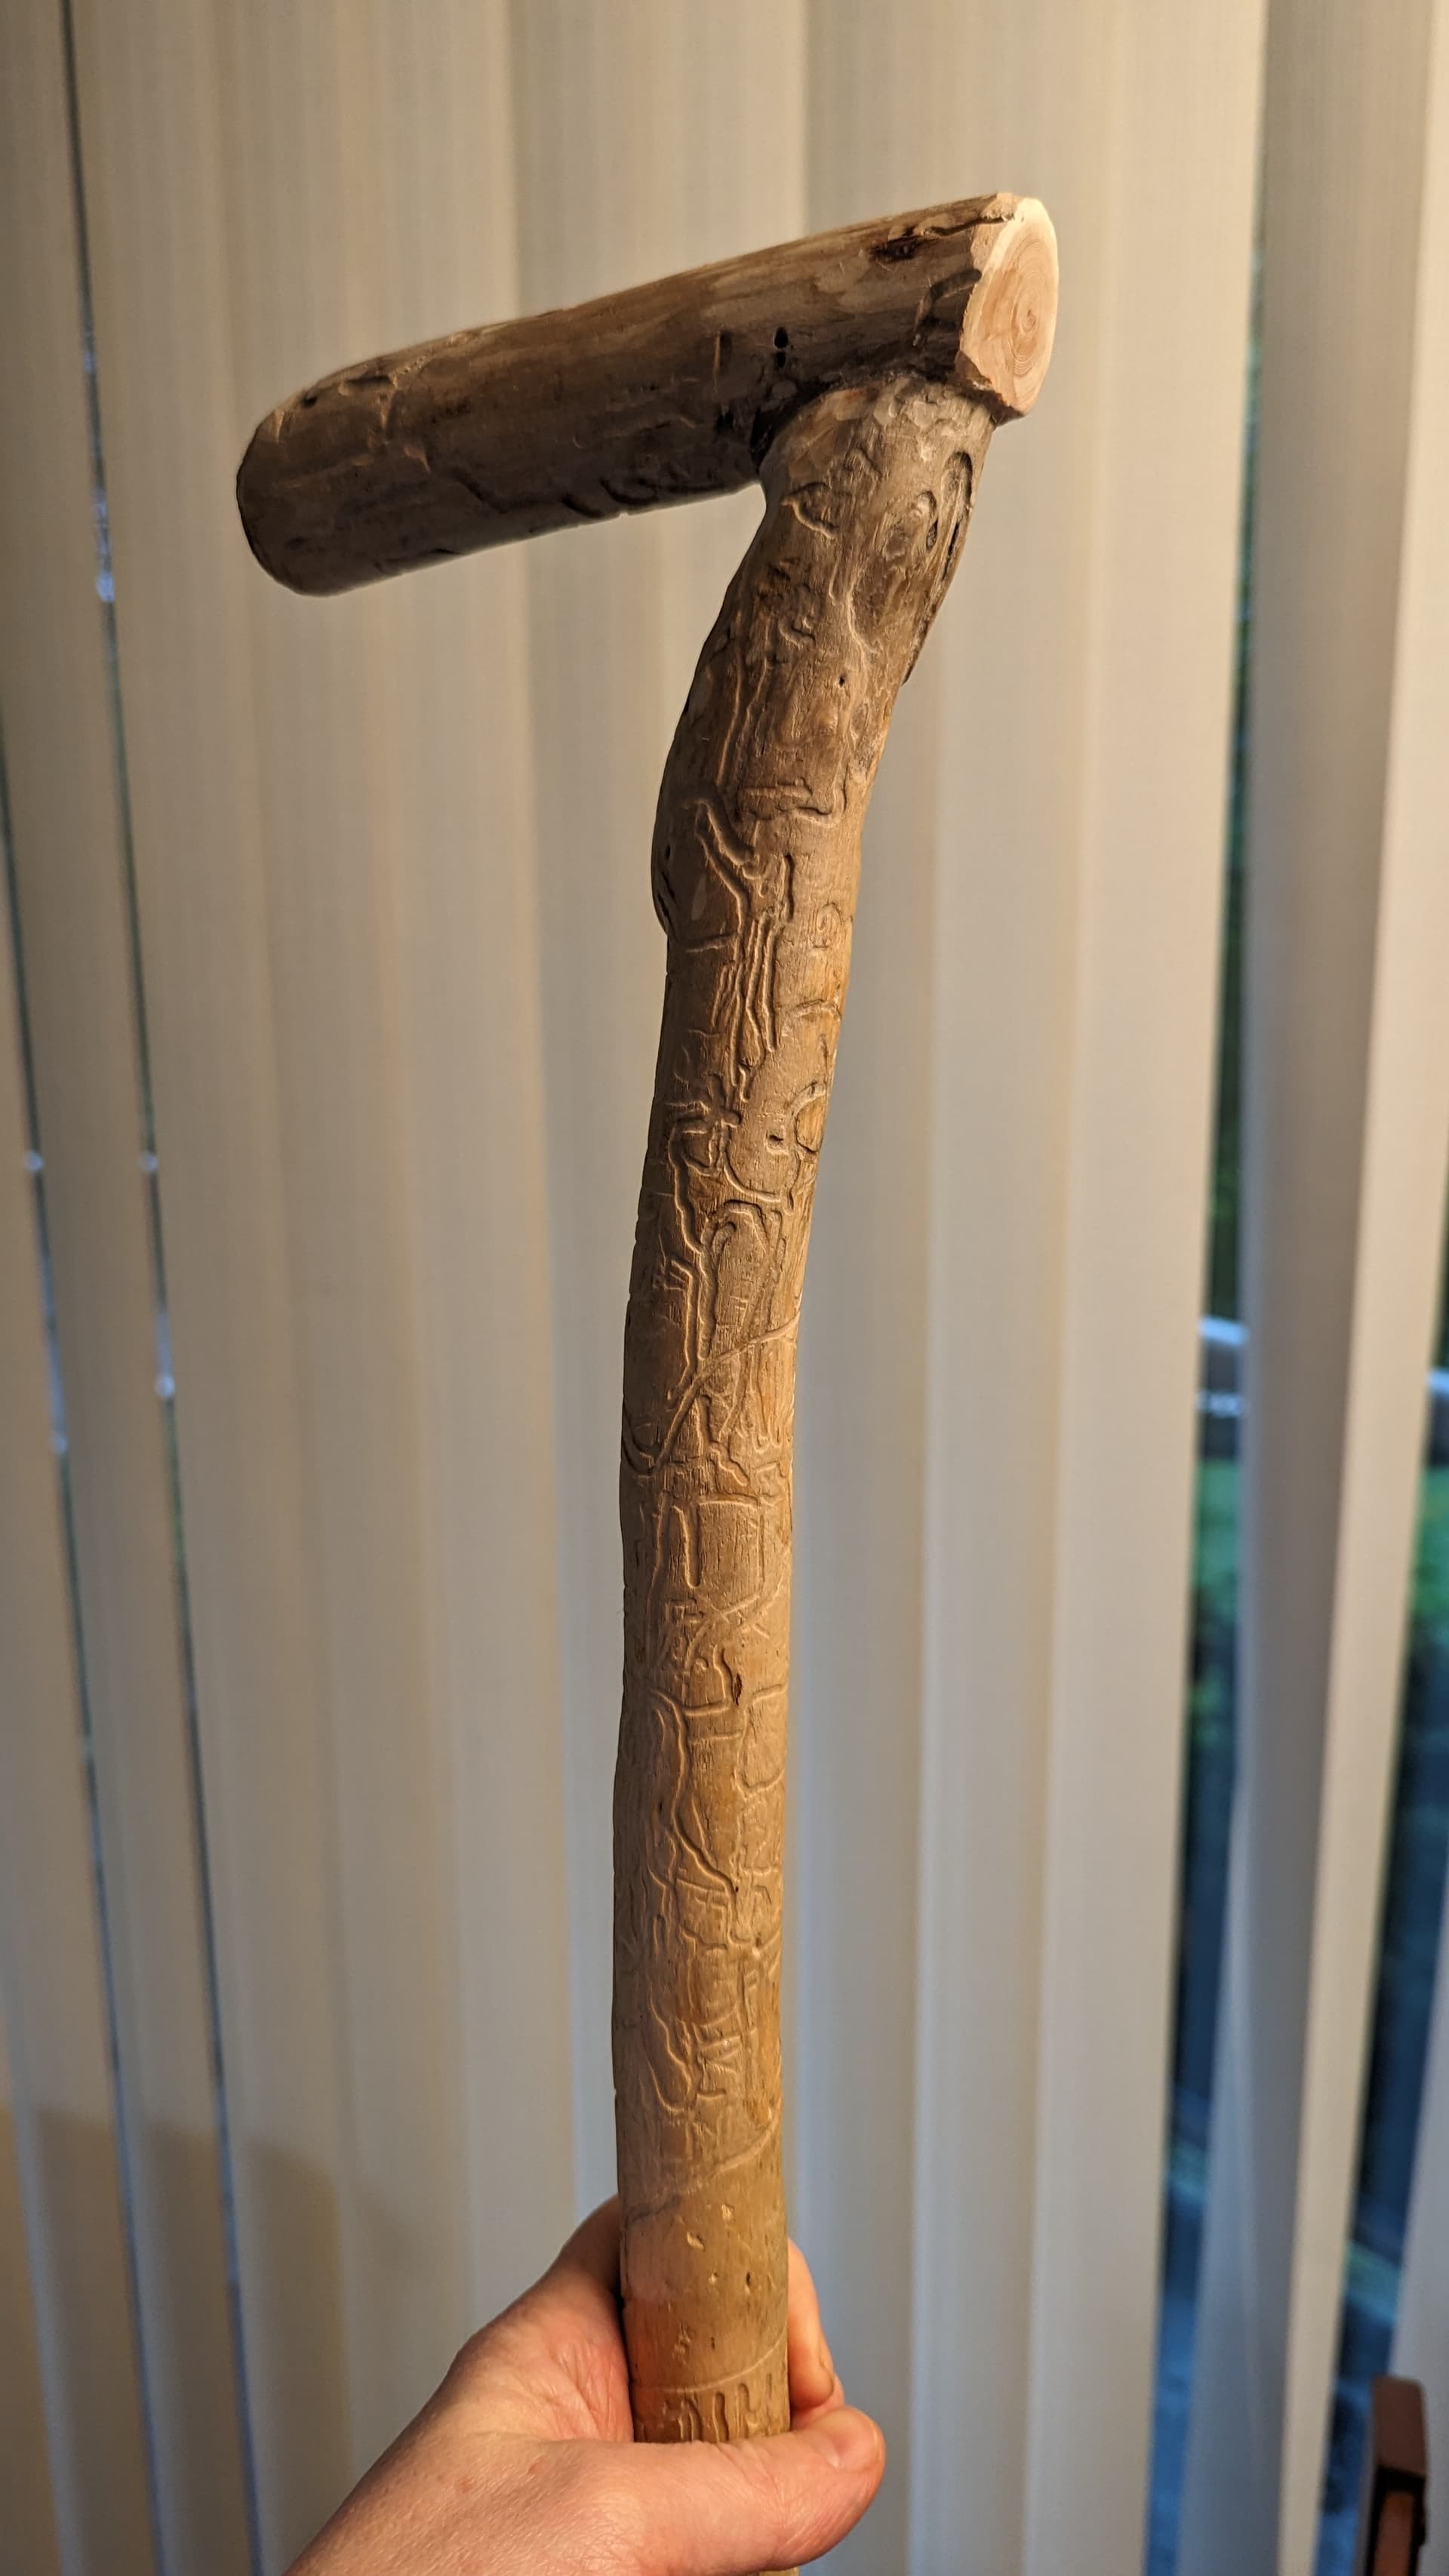
Bam its a cane handle, especially after I carve off everything that feels like a hotspot when I hold it (thanks Greg for that tip) :
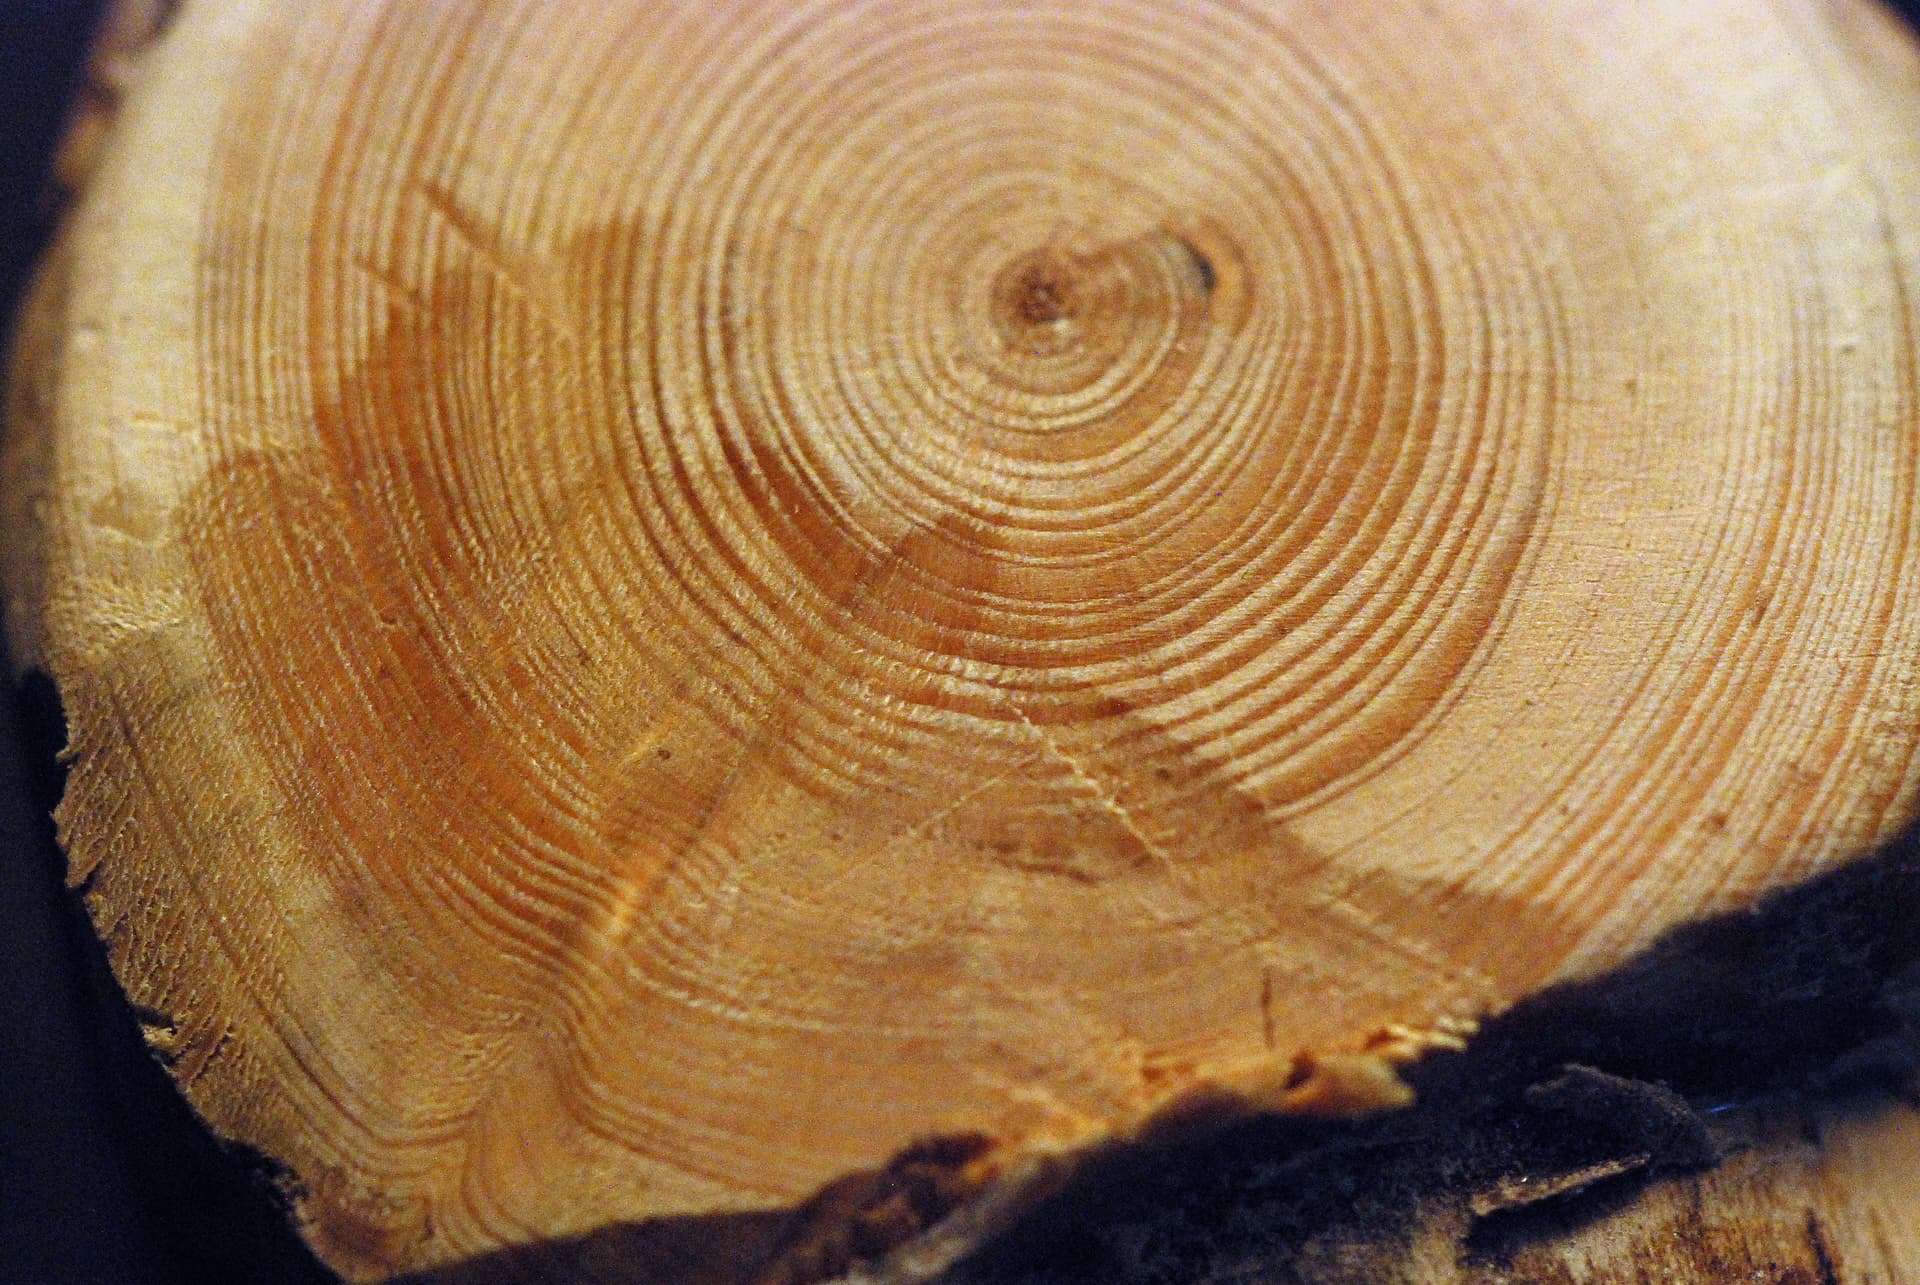
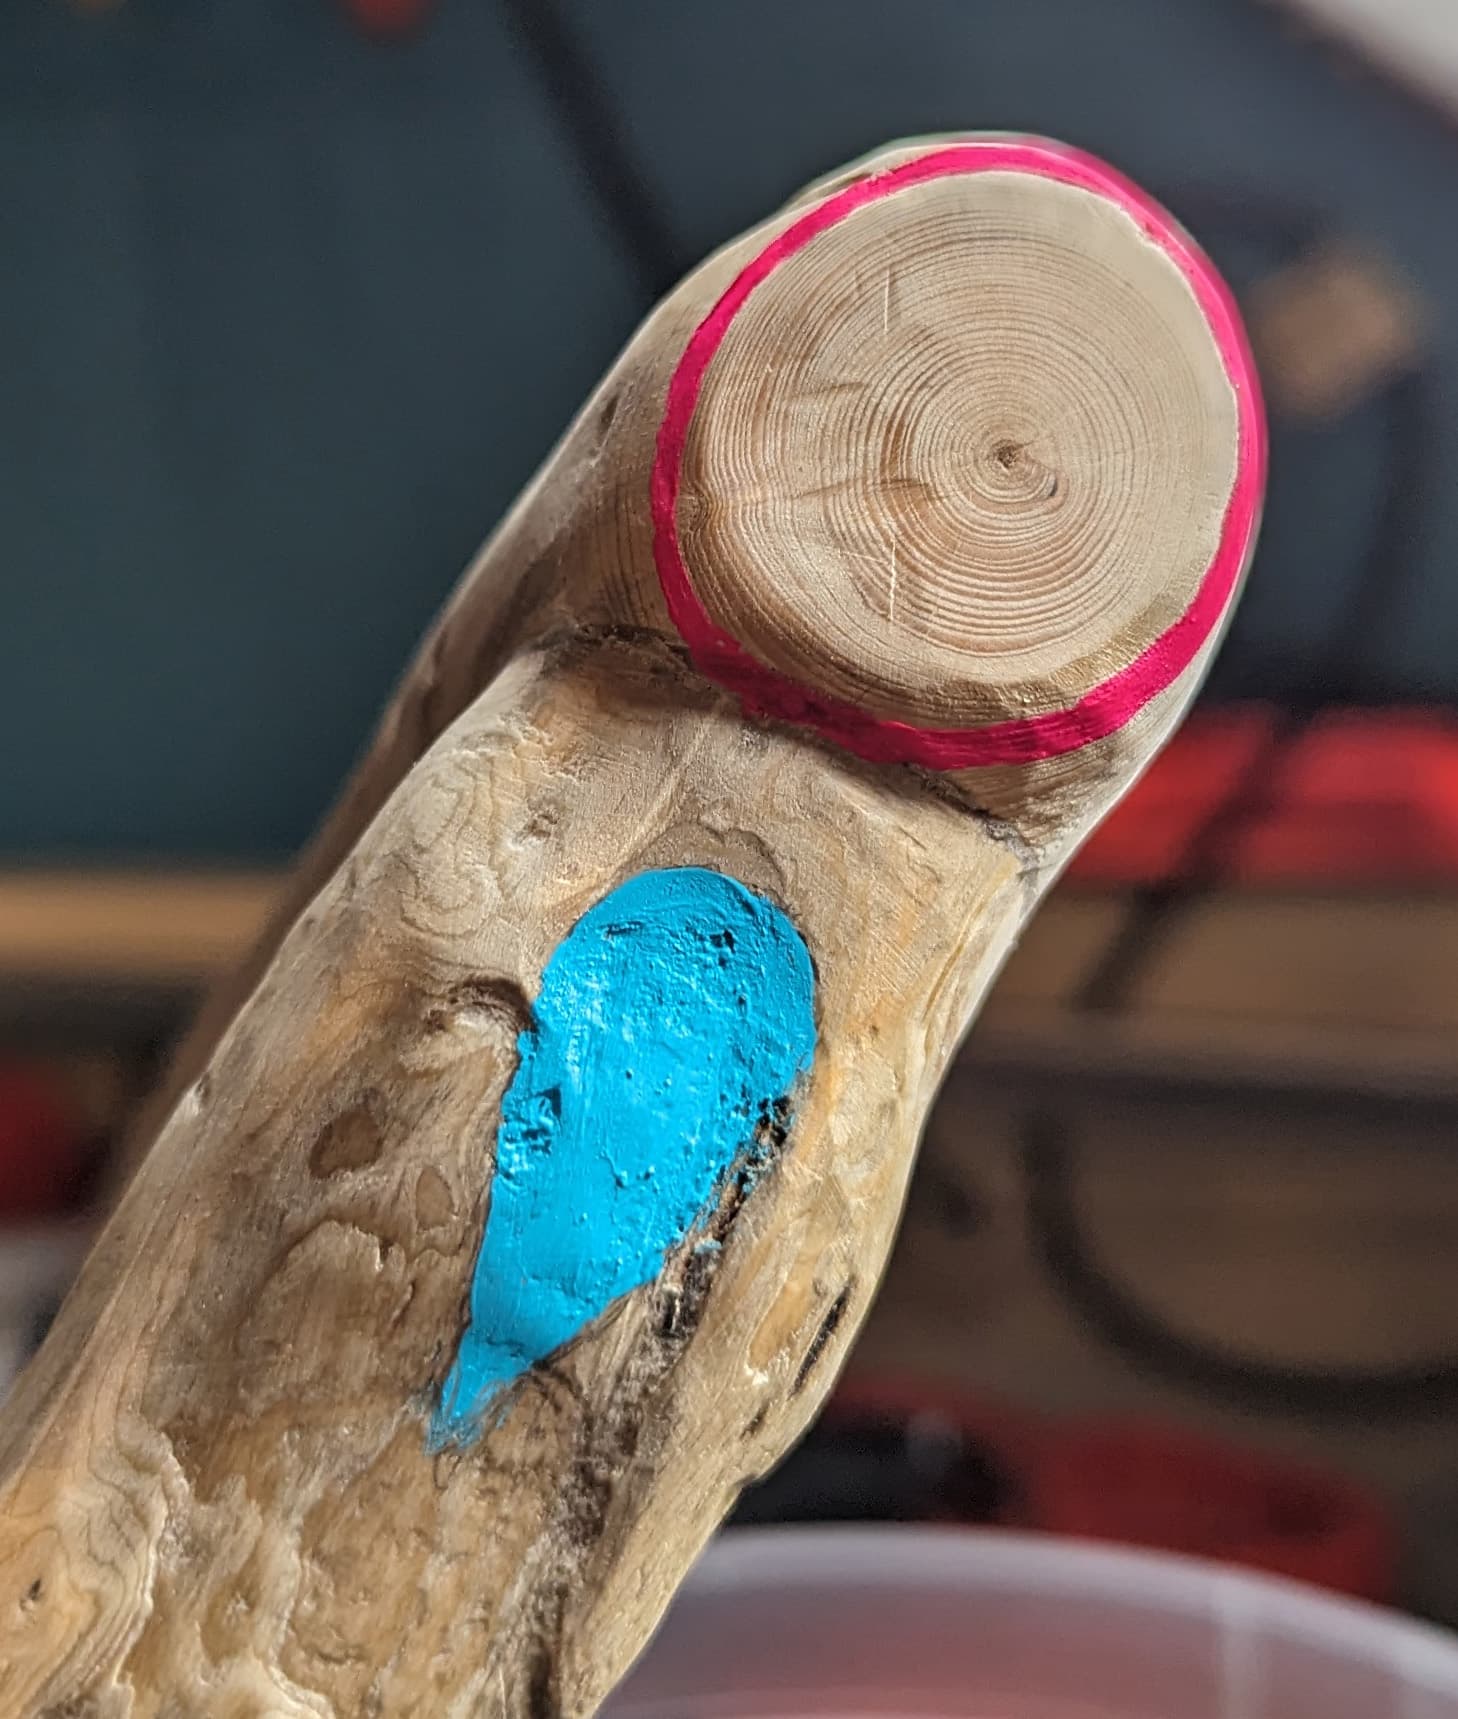
At this point I realized that this chunk of wood is around 67 years old (prove me wrong), its only an inch and a quarter in diameter. So I am thinking it came from a rough neighborhood, or a mountain top.
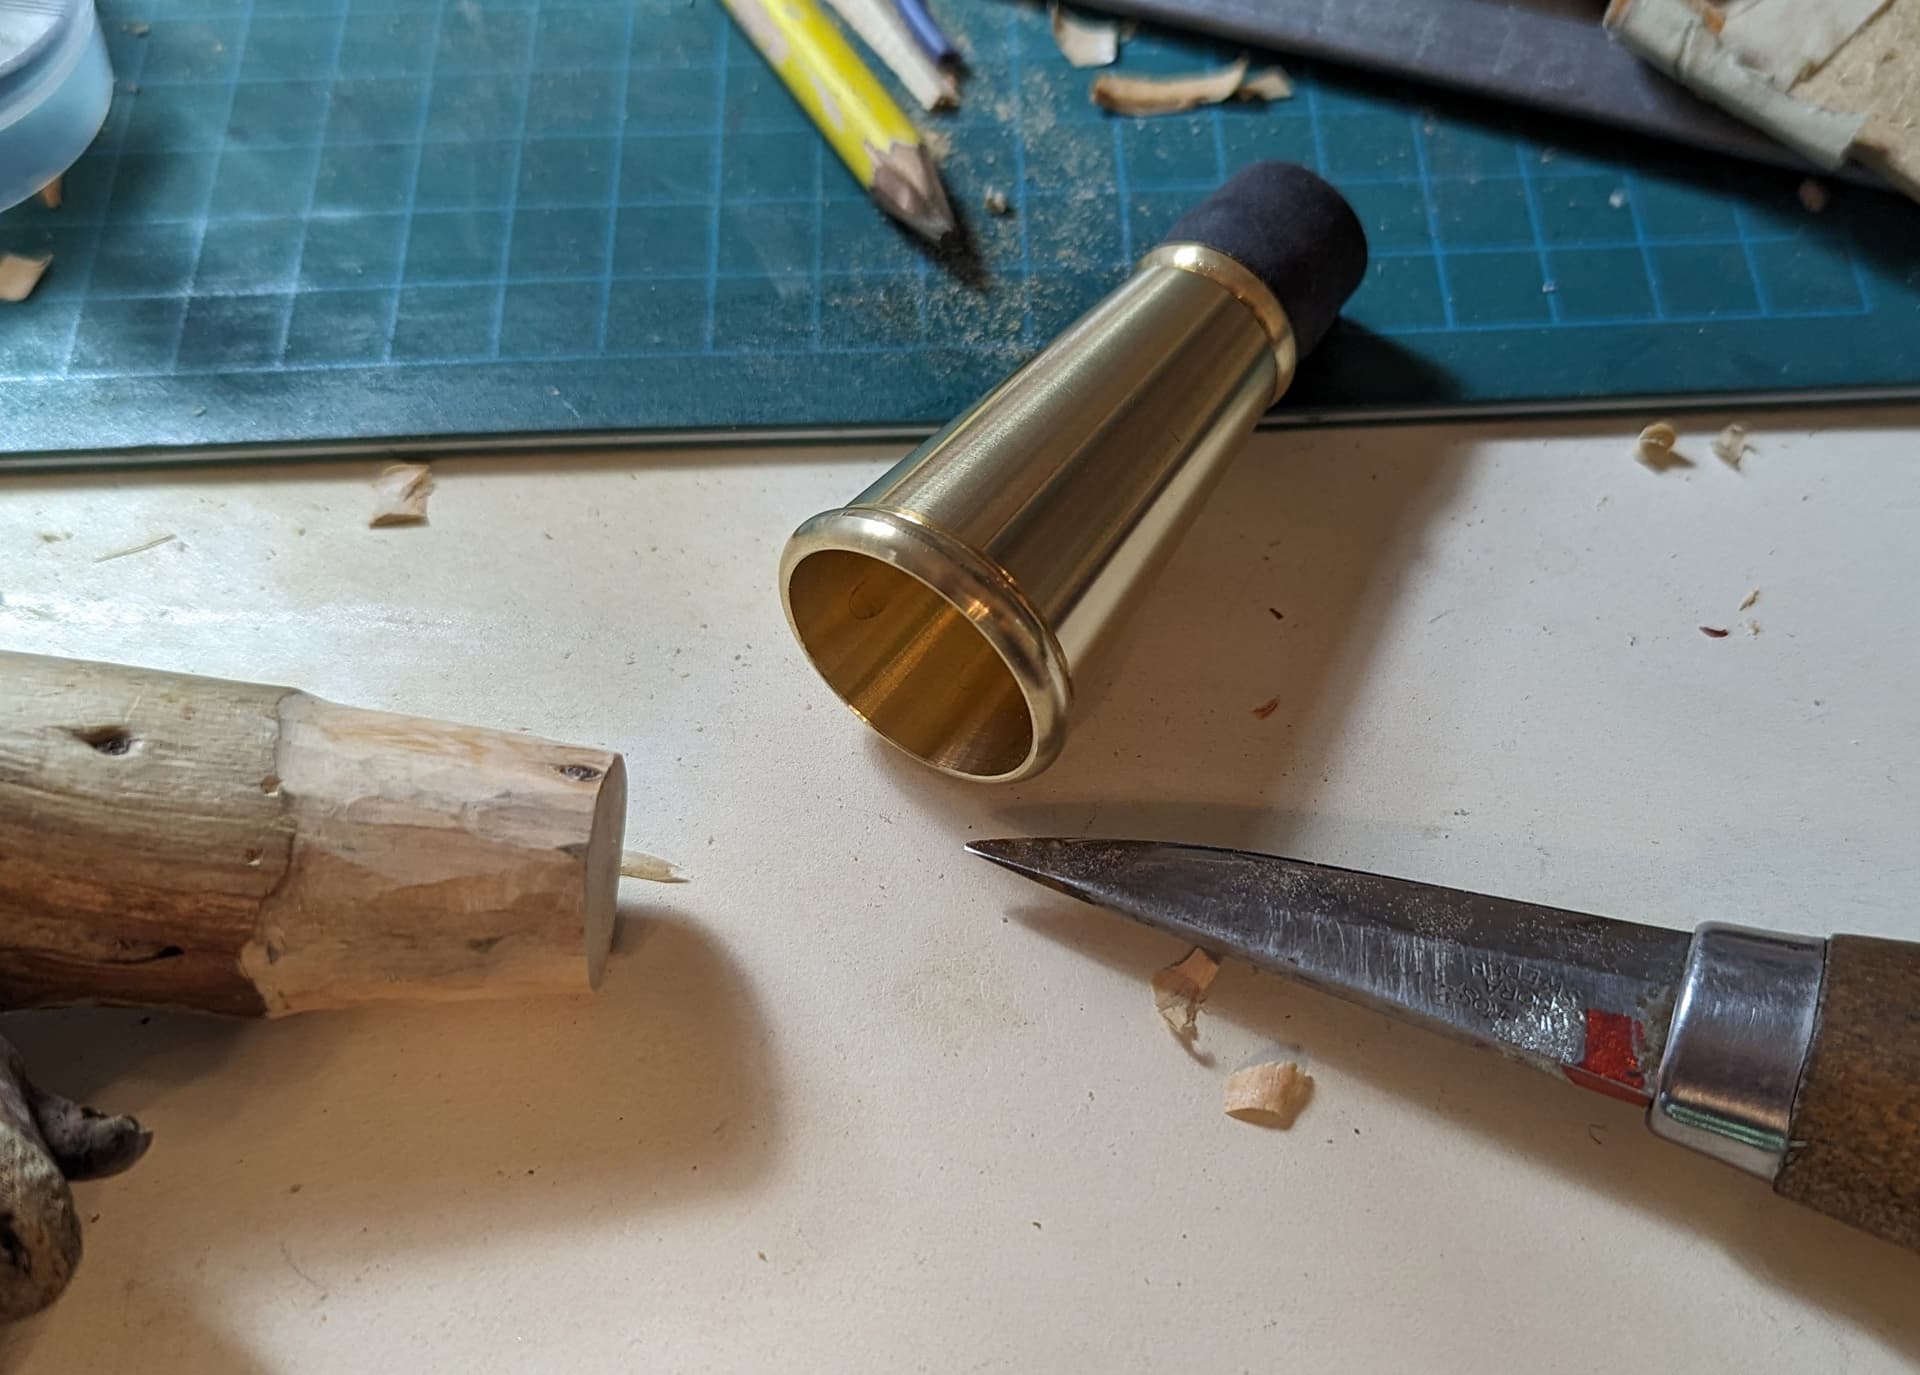
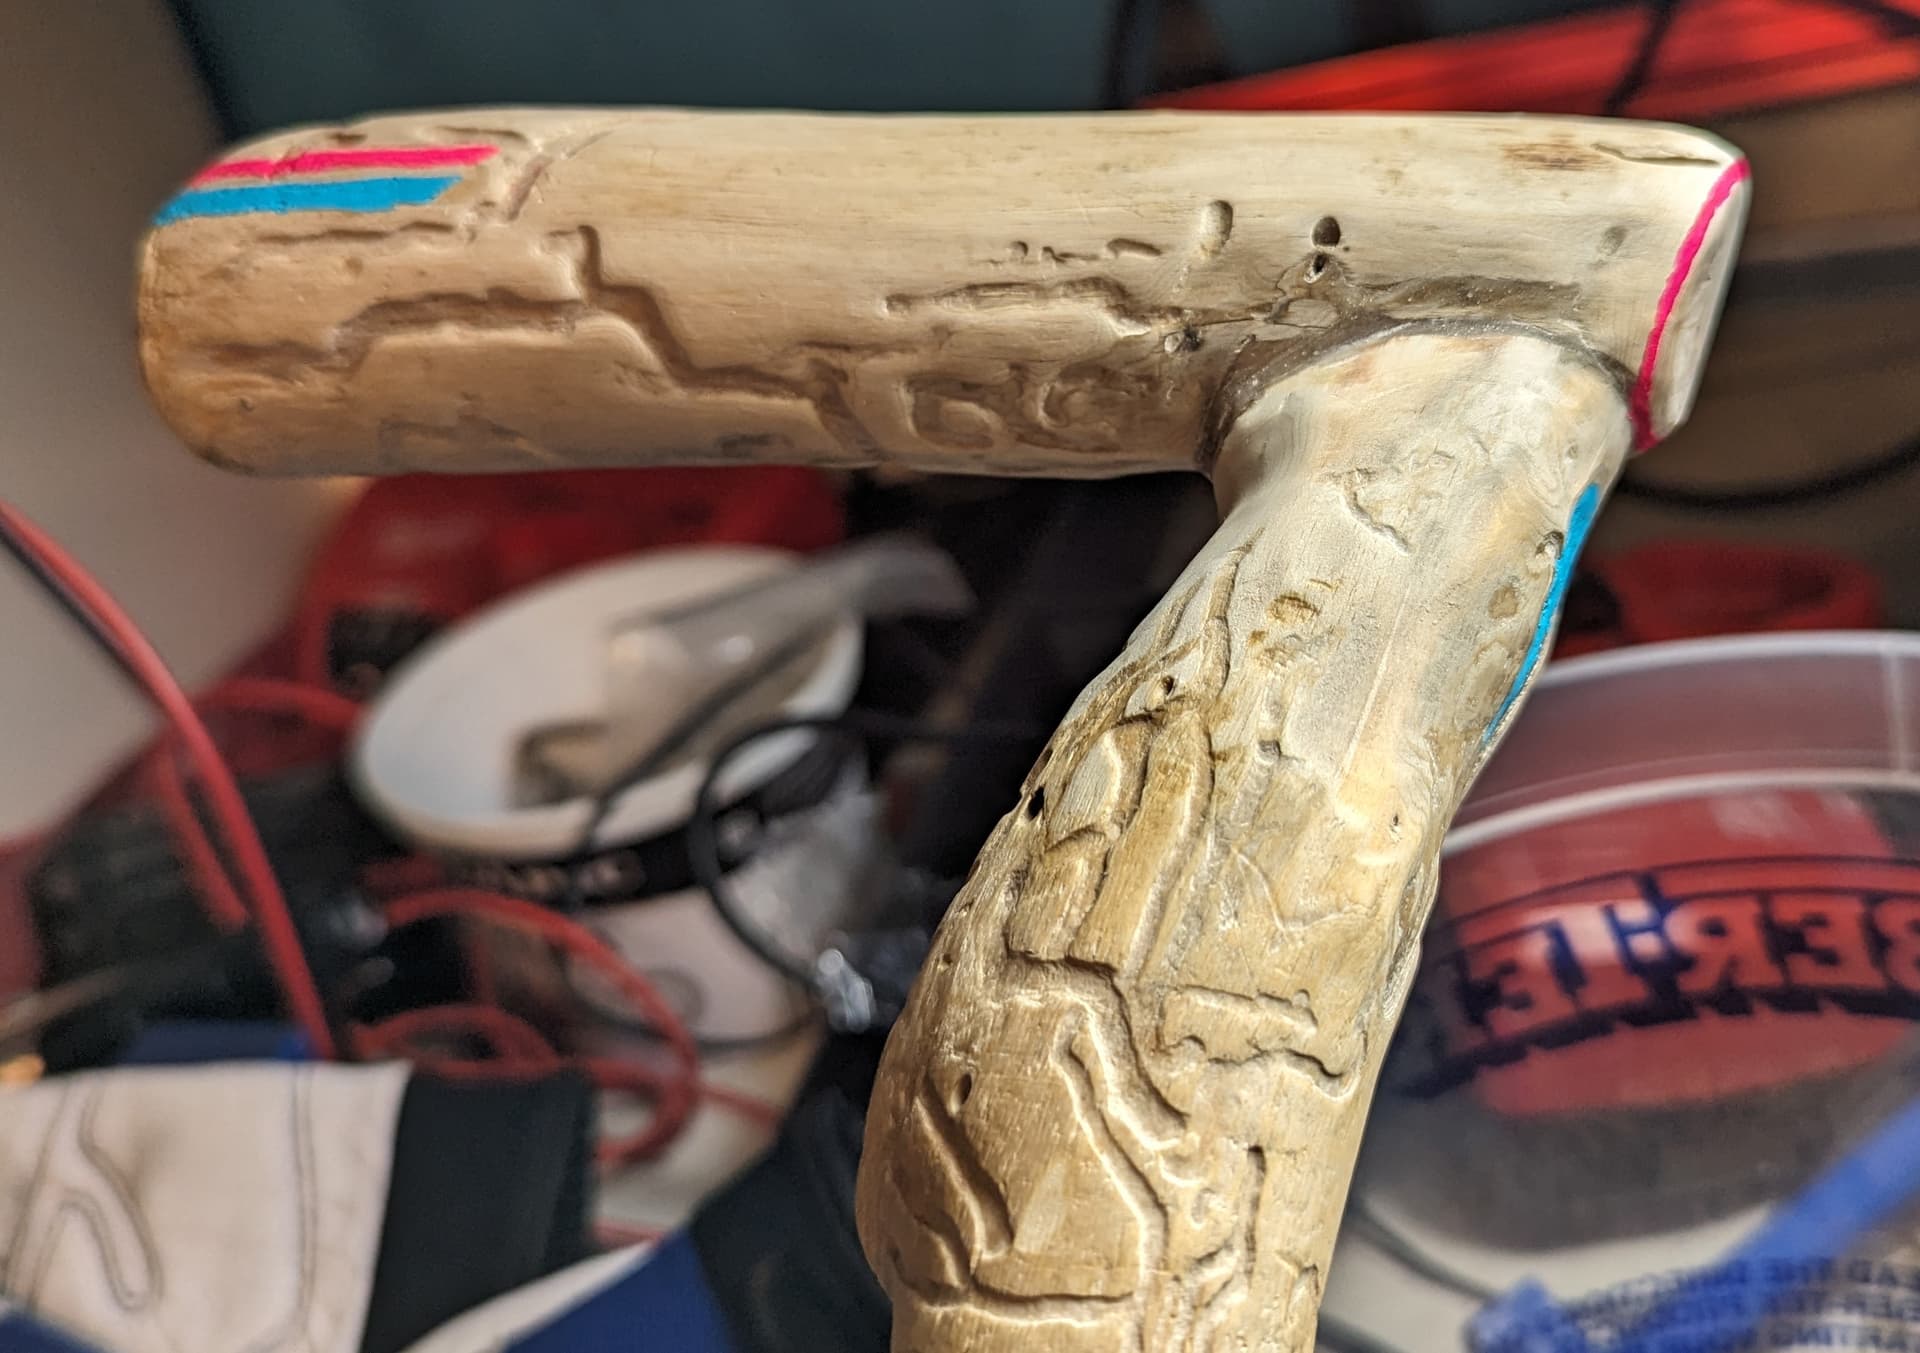
I also did the same carving process to fit the ferrule. (this one is from lee valley, its shiny).
Last step before finishing, I wanted to add some color, Janet painted the ring at the top because my hands aren’t that steady.

Next stop, wood finish.