…And that’s how the first Dalek came about.
4 Likes
Still haven’t hooked it up to the controller this go-around, but I think you should be able to move it into a position, save it to the memory, and then return to that position later. And by doing that with a whole bunch of points, you have created a repeatable job that the arm can do.
The scripting language has some features like loops (so you can actually repeat something a bunch of times) and relative offsets (like, tighten a screw, move 50mm to the left, tighten a screw again).
Measure the hole pattern on the end of the arm! Plz post in here. Need someone to CAD up a torch holder. Maybe start with a sharpie holder. Or, maybe not, I dunno, I’m not your mom. YOLO
4 Likes
Plasma cutter is great, but if we want a safer, lower stakes option, I was thinking of attaching a camera.
Project Update 1
Three days ago I stumbled upon the robot arm, I read through the history of the thing and wanted to figure out how to get the thing to move.
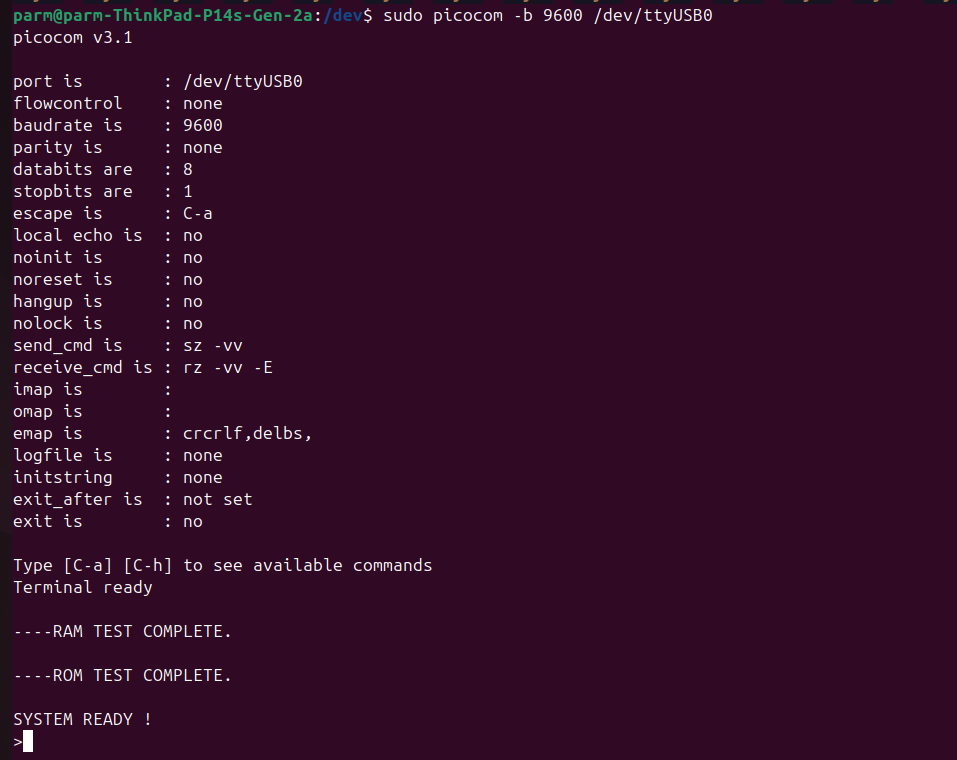
first off you gotta connect the giant computer thing to your laptop via a micro usb
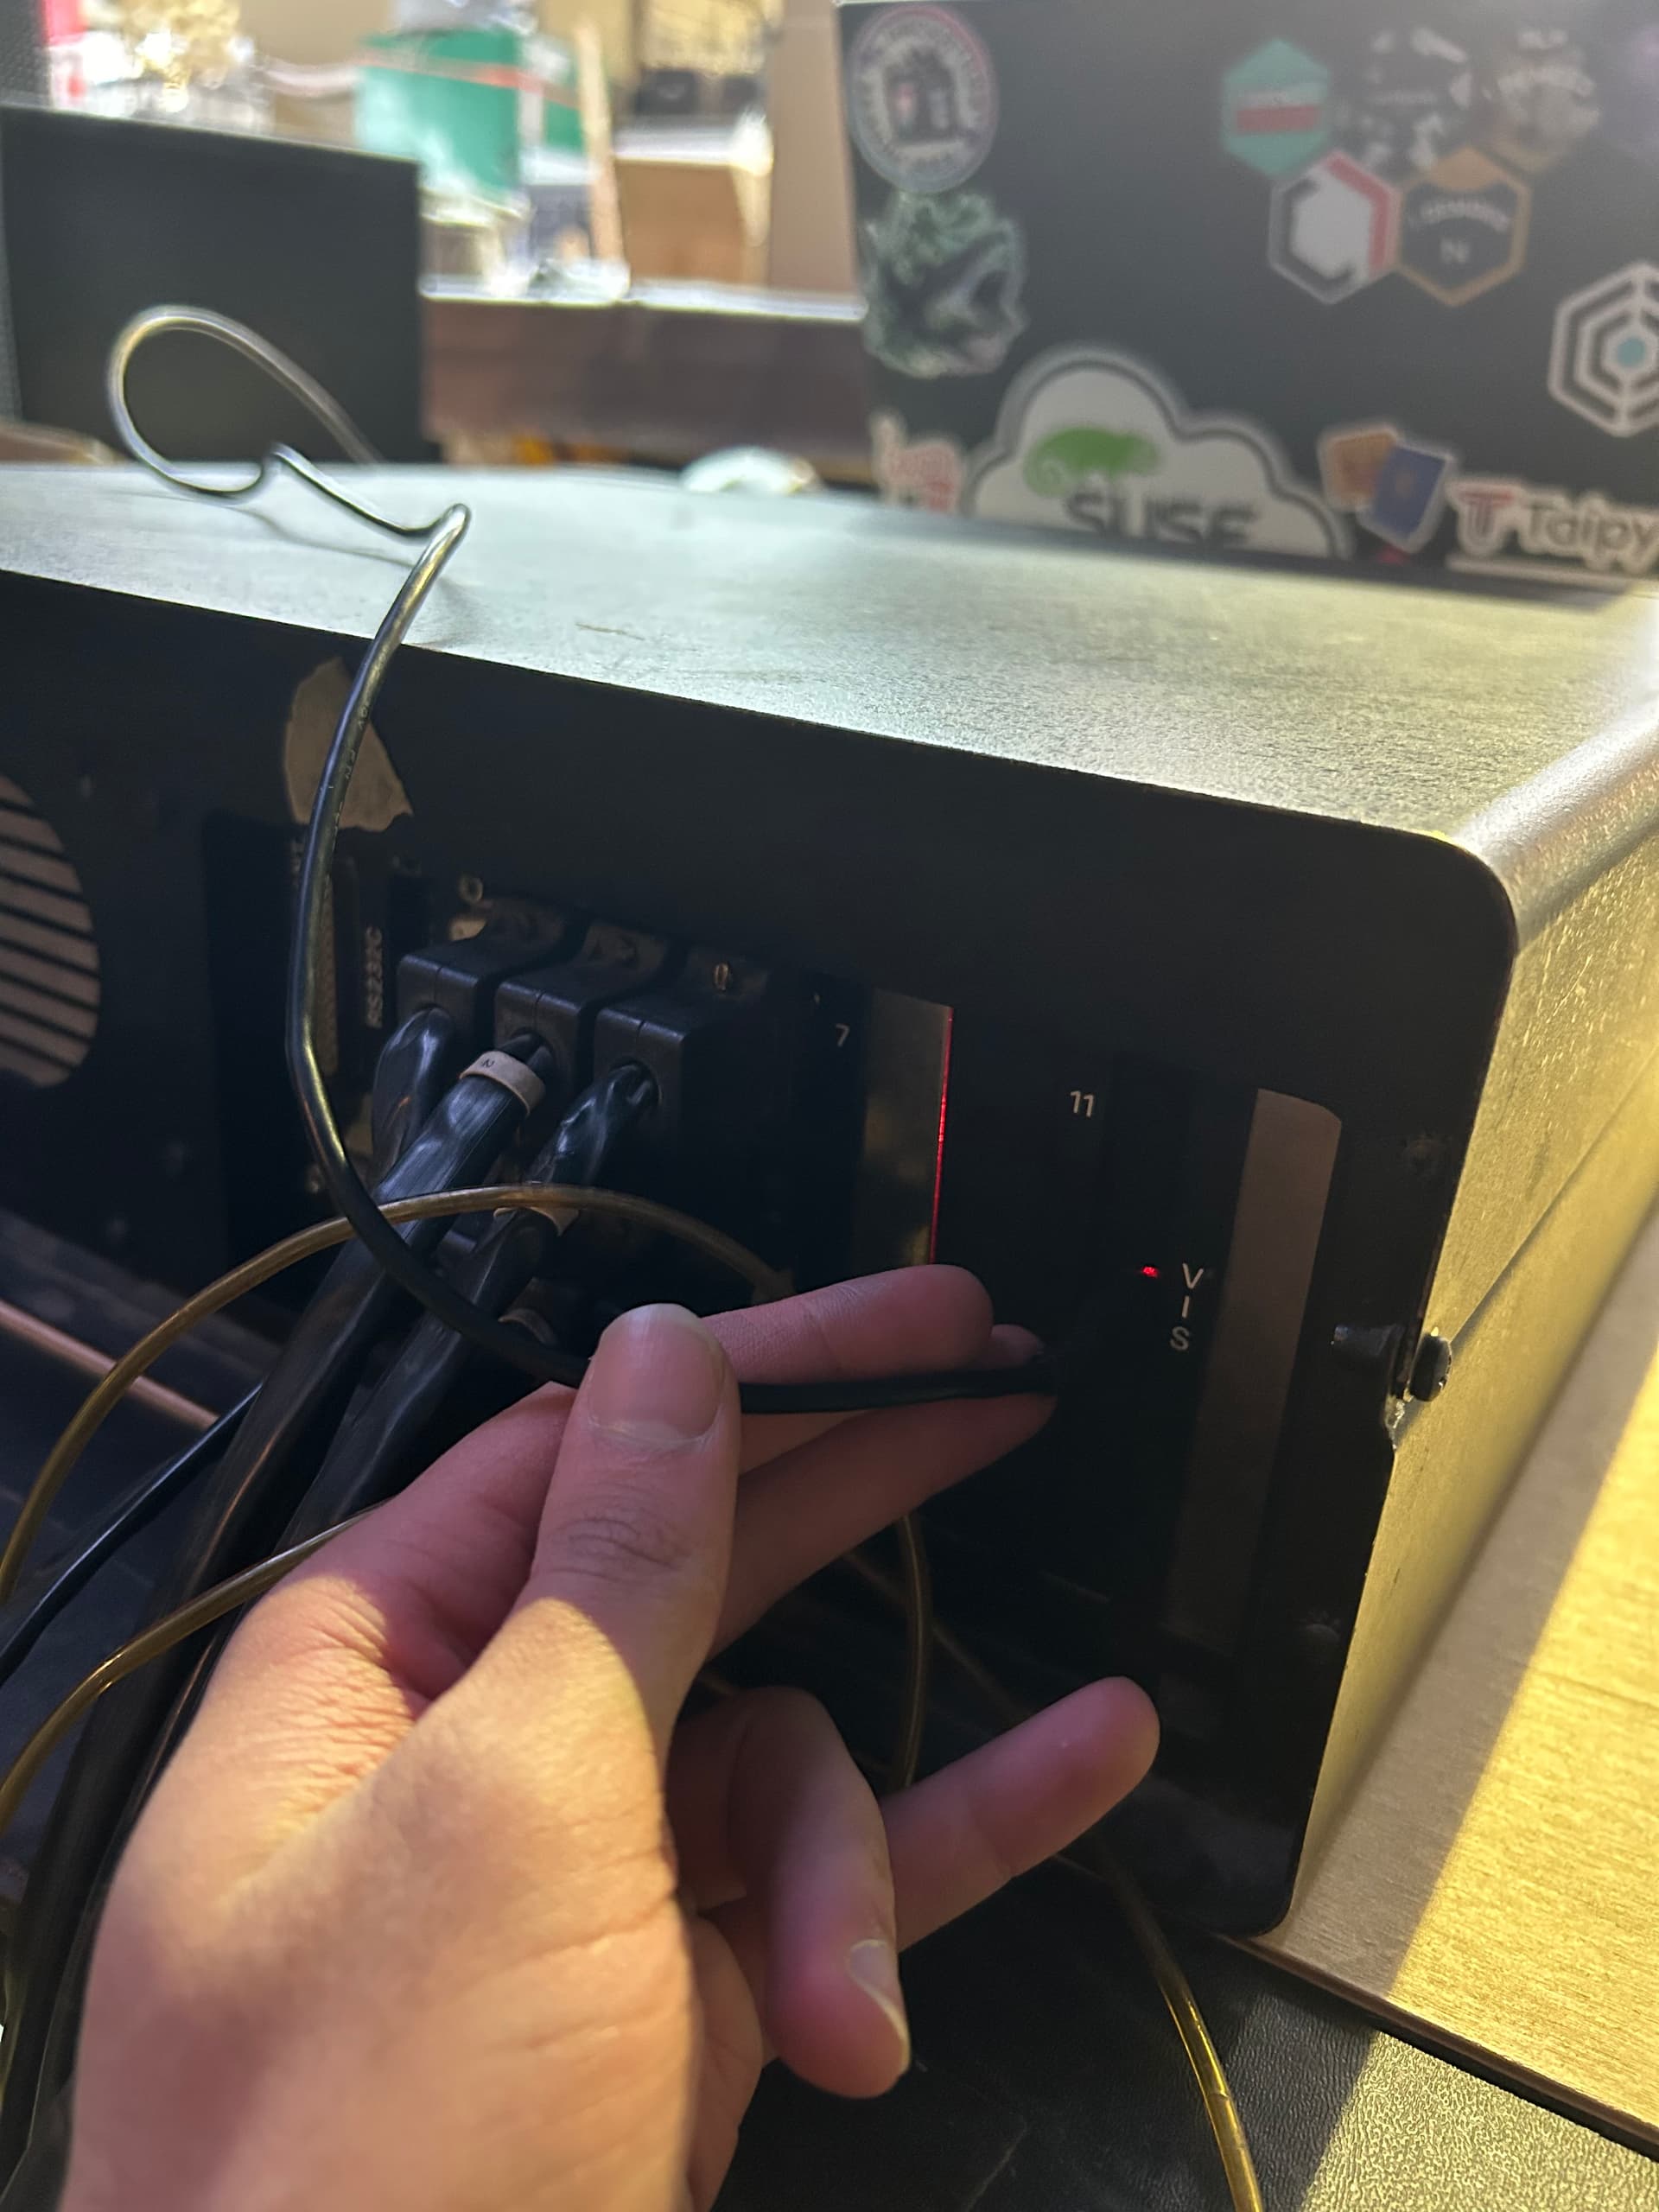
Make sure you grab a cable that supports data transfer, look at the pictures below, when i say group A I’m referring to cables in the first picture and group B for the second
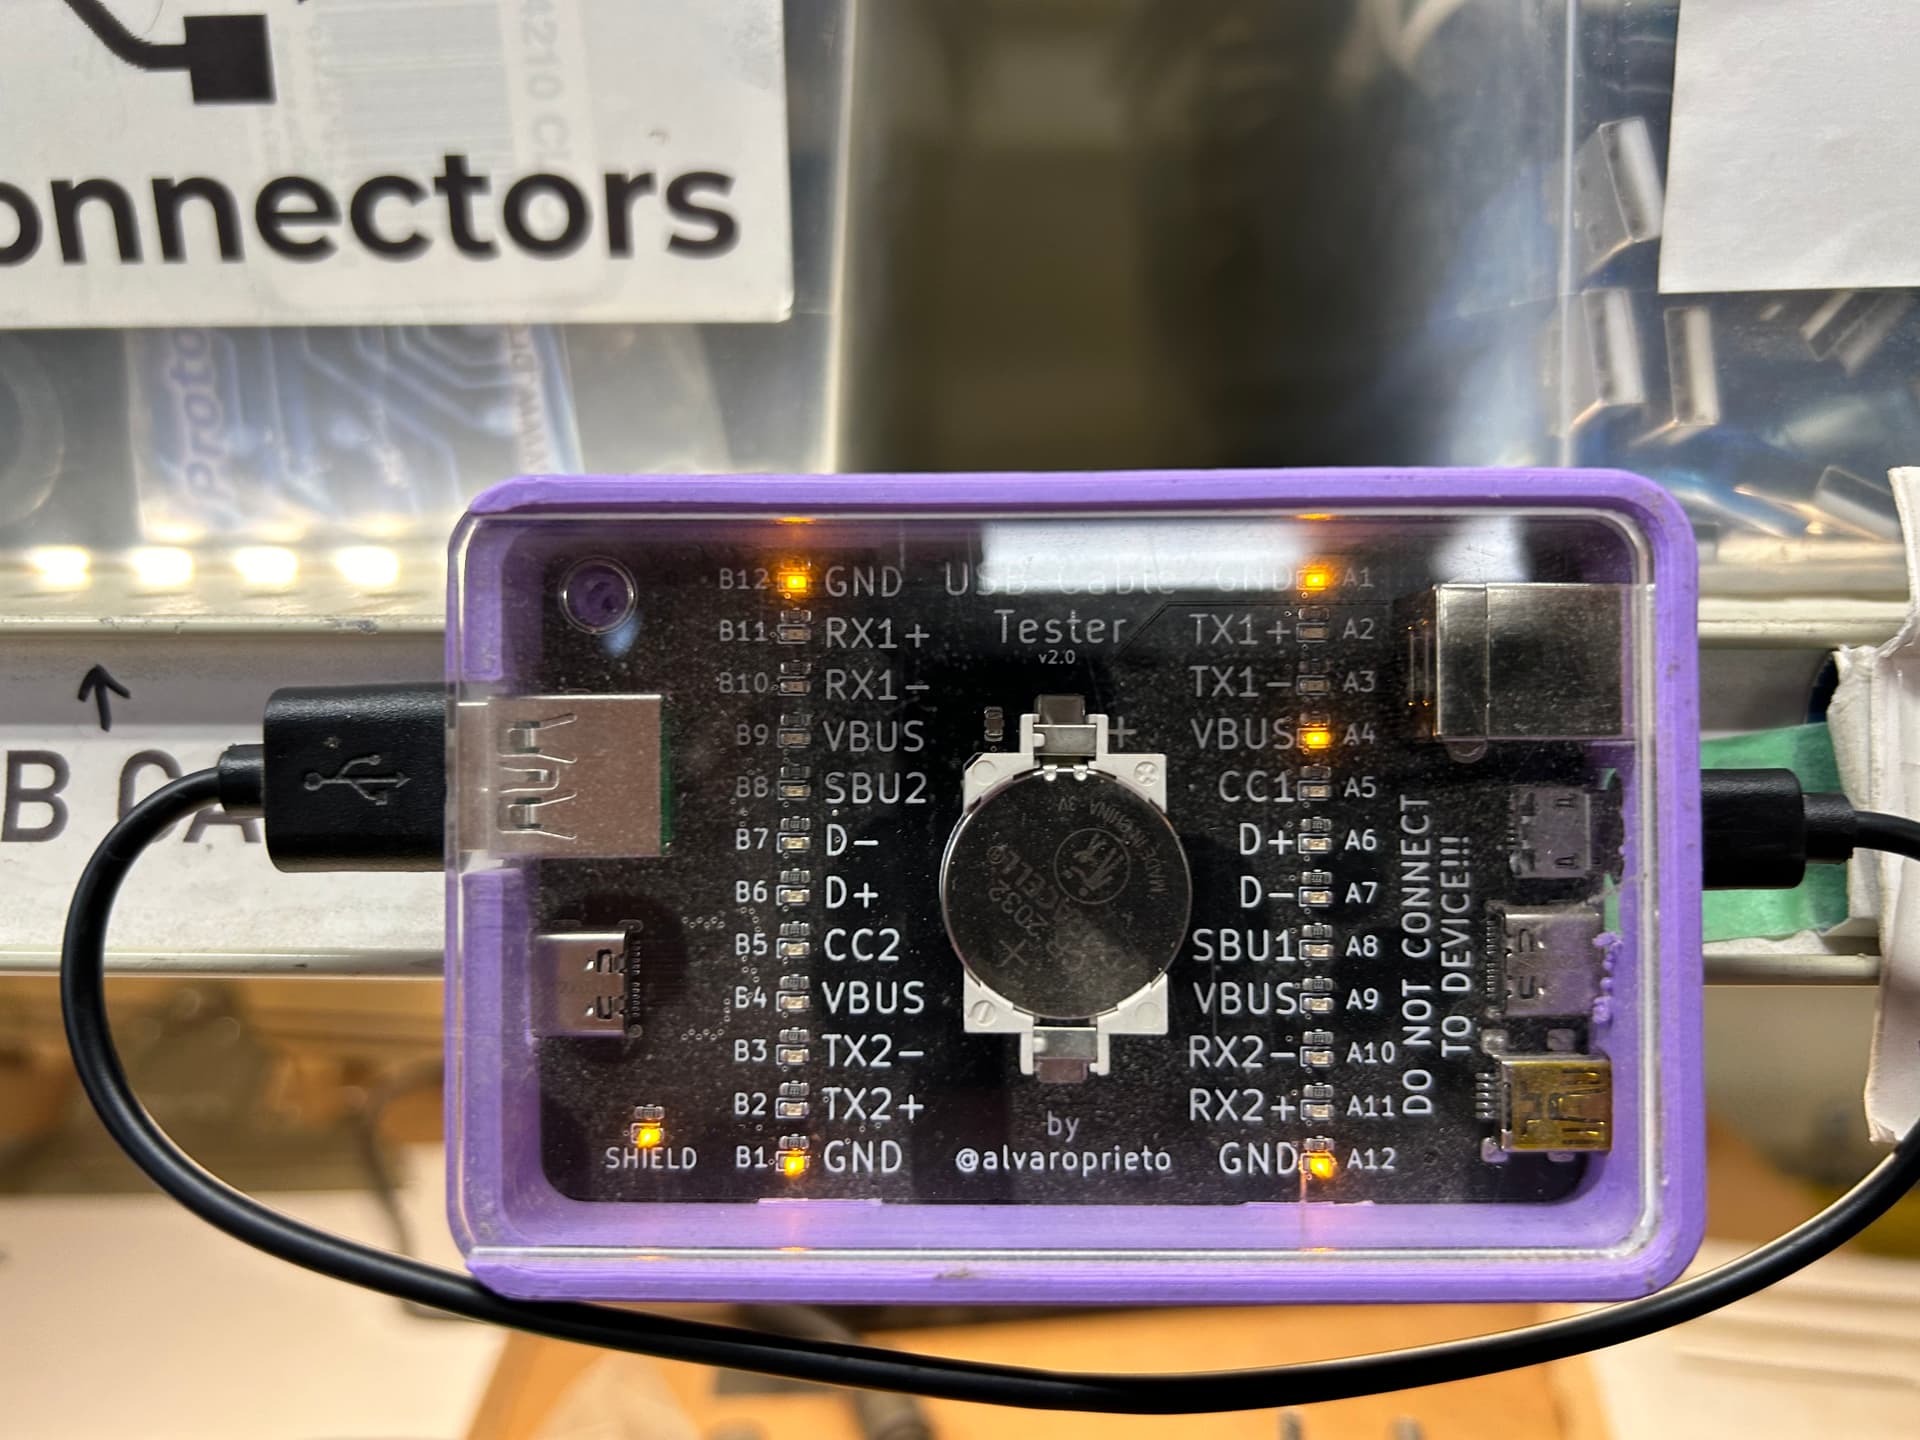
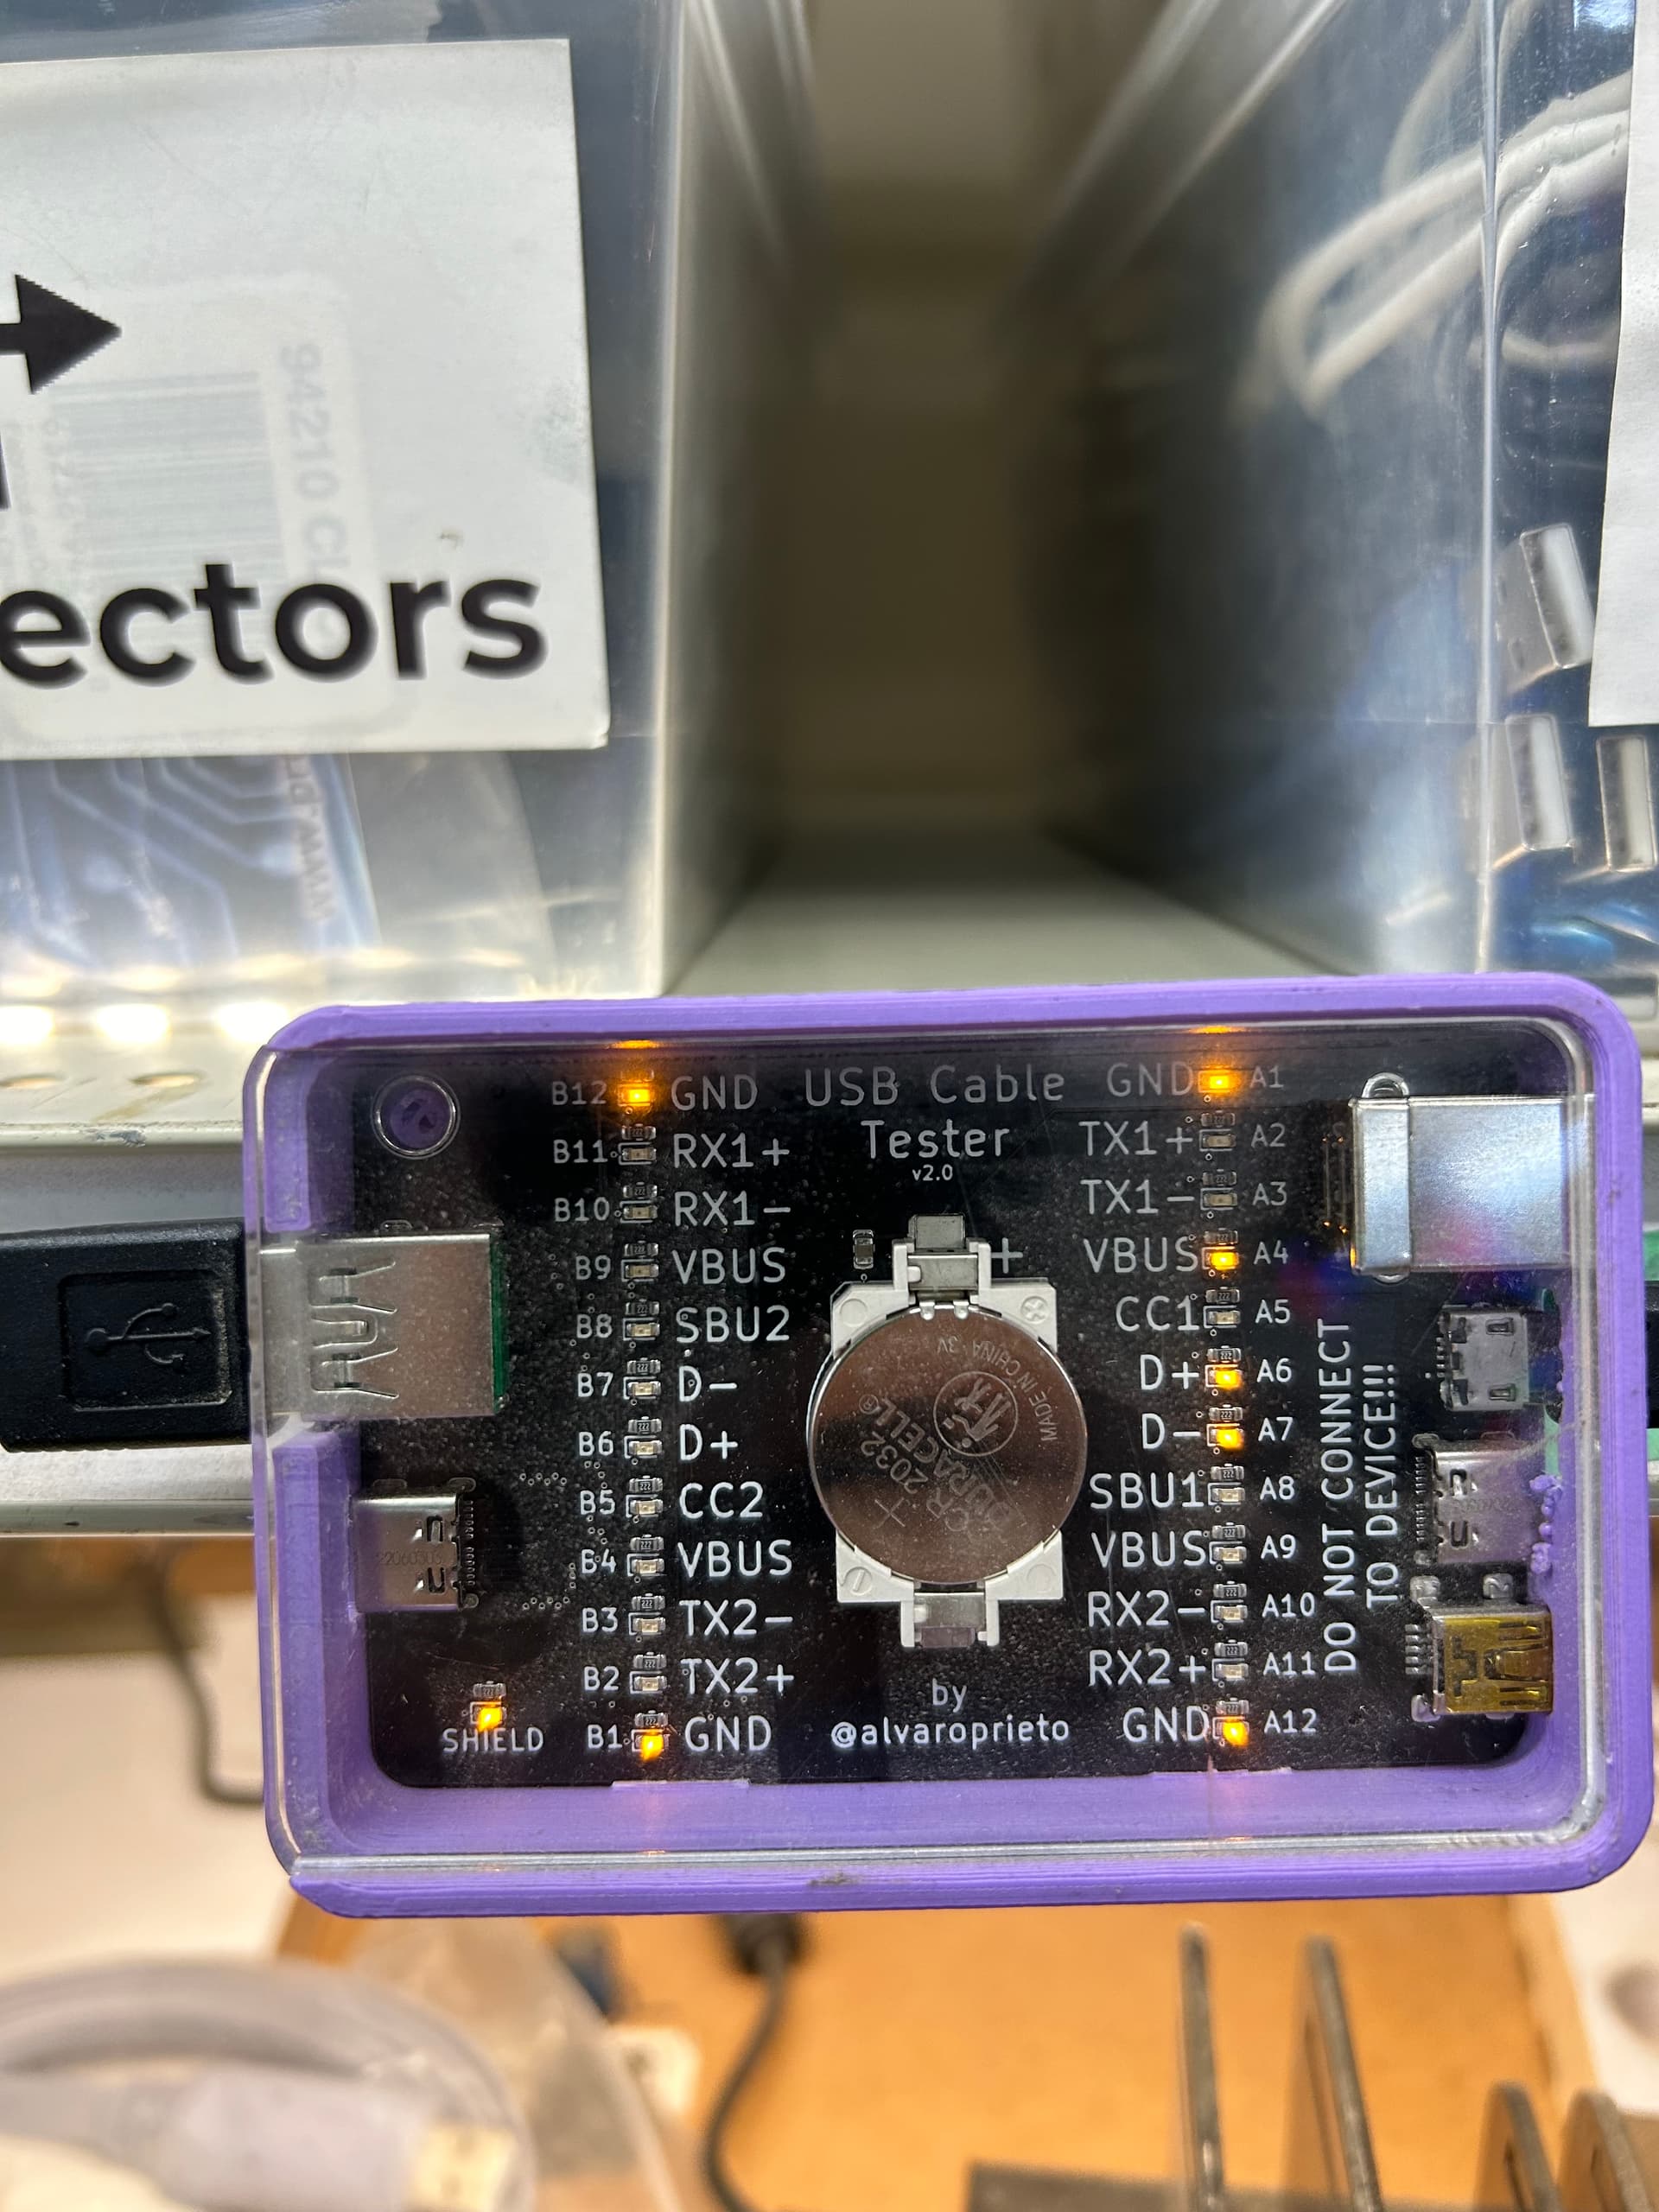
I’ve never used a USB tester before but its clear to see that these two cables have different lights on. Most of the cables in the micro USB bin are a part of group A. i was really lucky to find a cable with D lights enabled. I think D stands for Data because when i run lsusb on my Ubuntu Linux terminal with group a cable i get the following
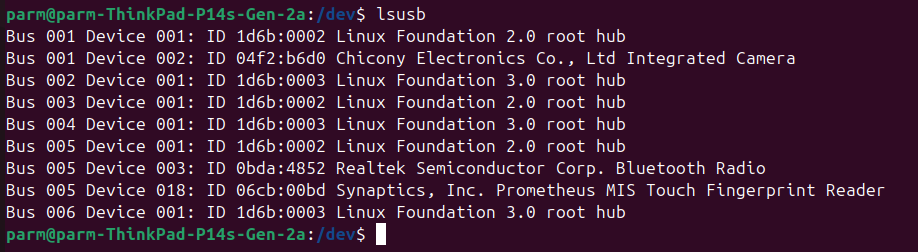
and when i use a cable in group B i get the feedback that Silicon Labs CP210x uart bridge is connected
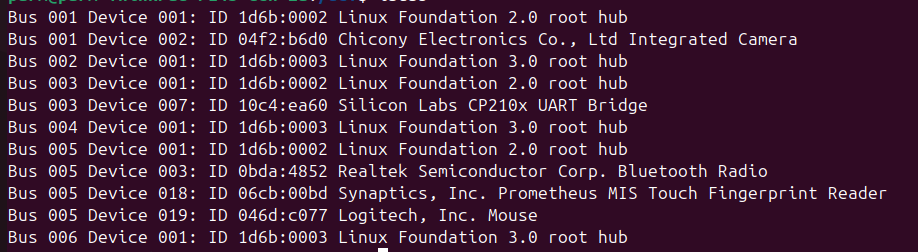
this confirms my suspicion than only microusb cables of group B will allow me to connect to the robot.
once connected you gotta download a program called picocom, like so
once connected you gotta download a program called picocom, like so

i already had it installed so you’ll probably get a longer terminal output
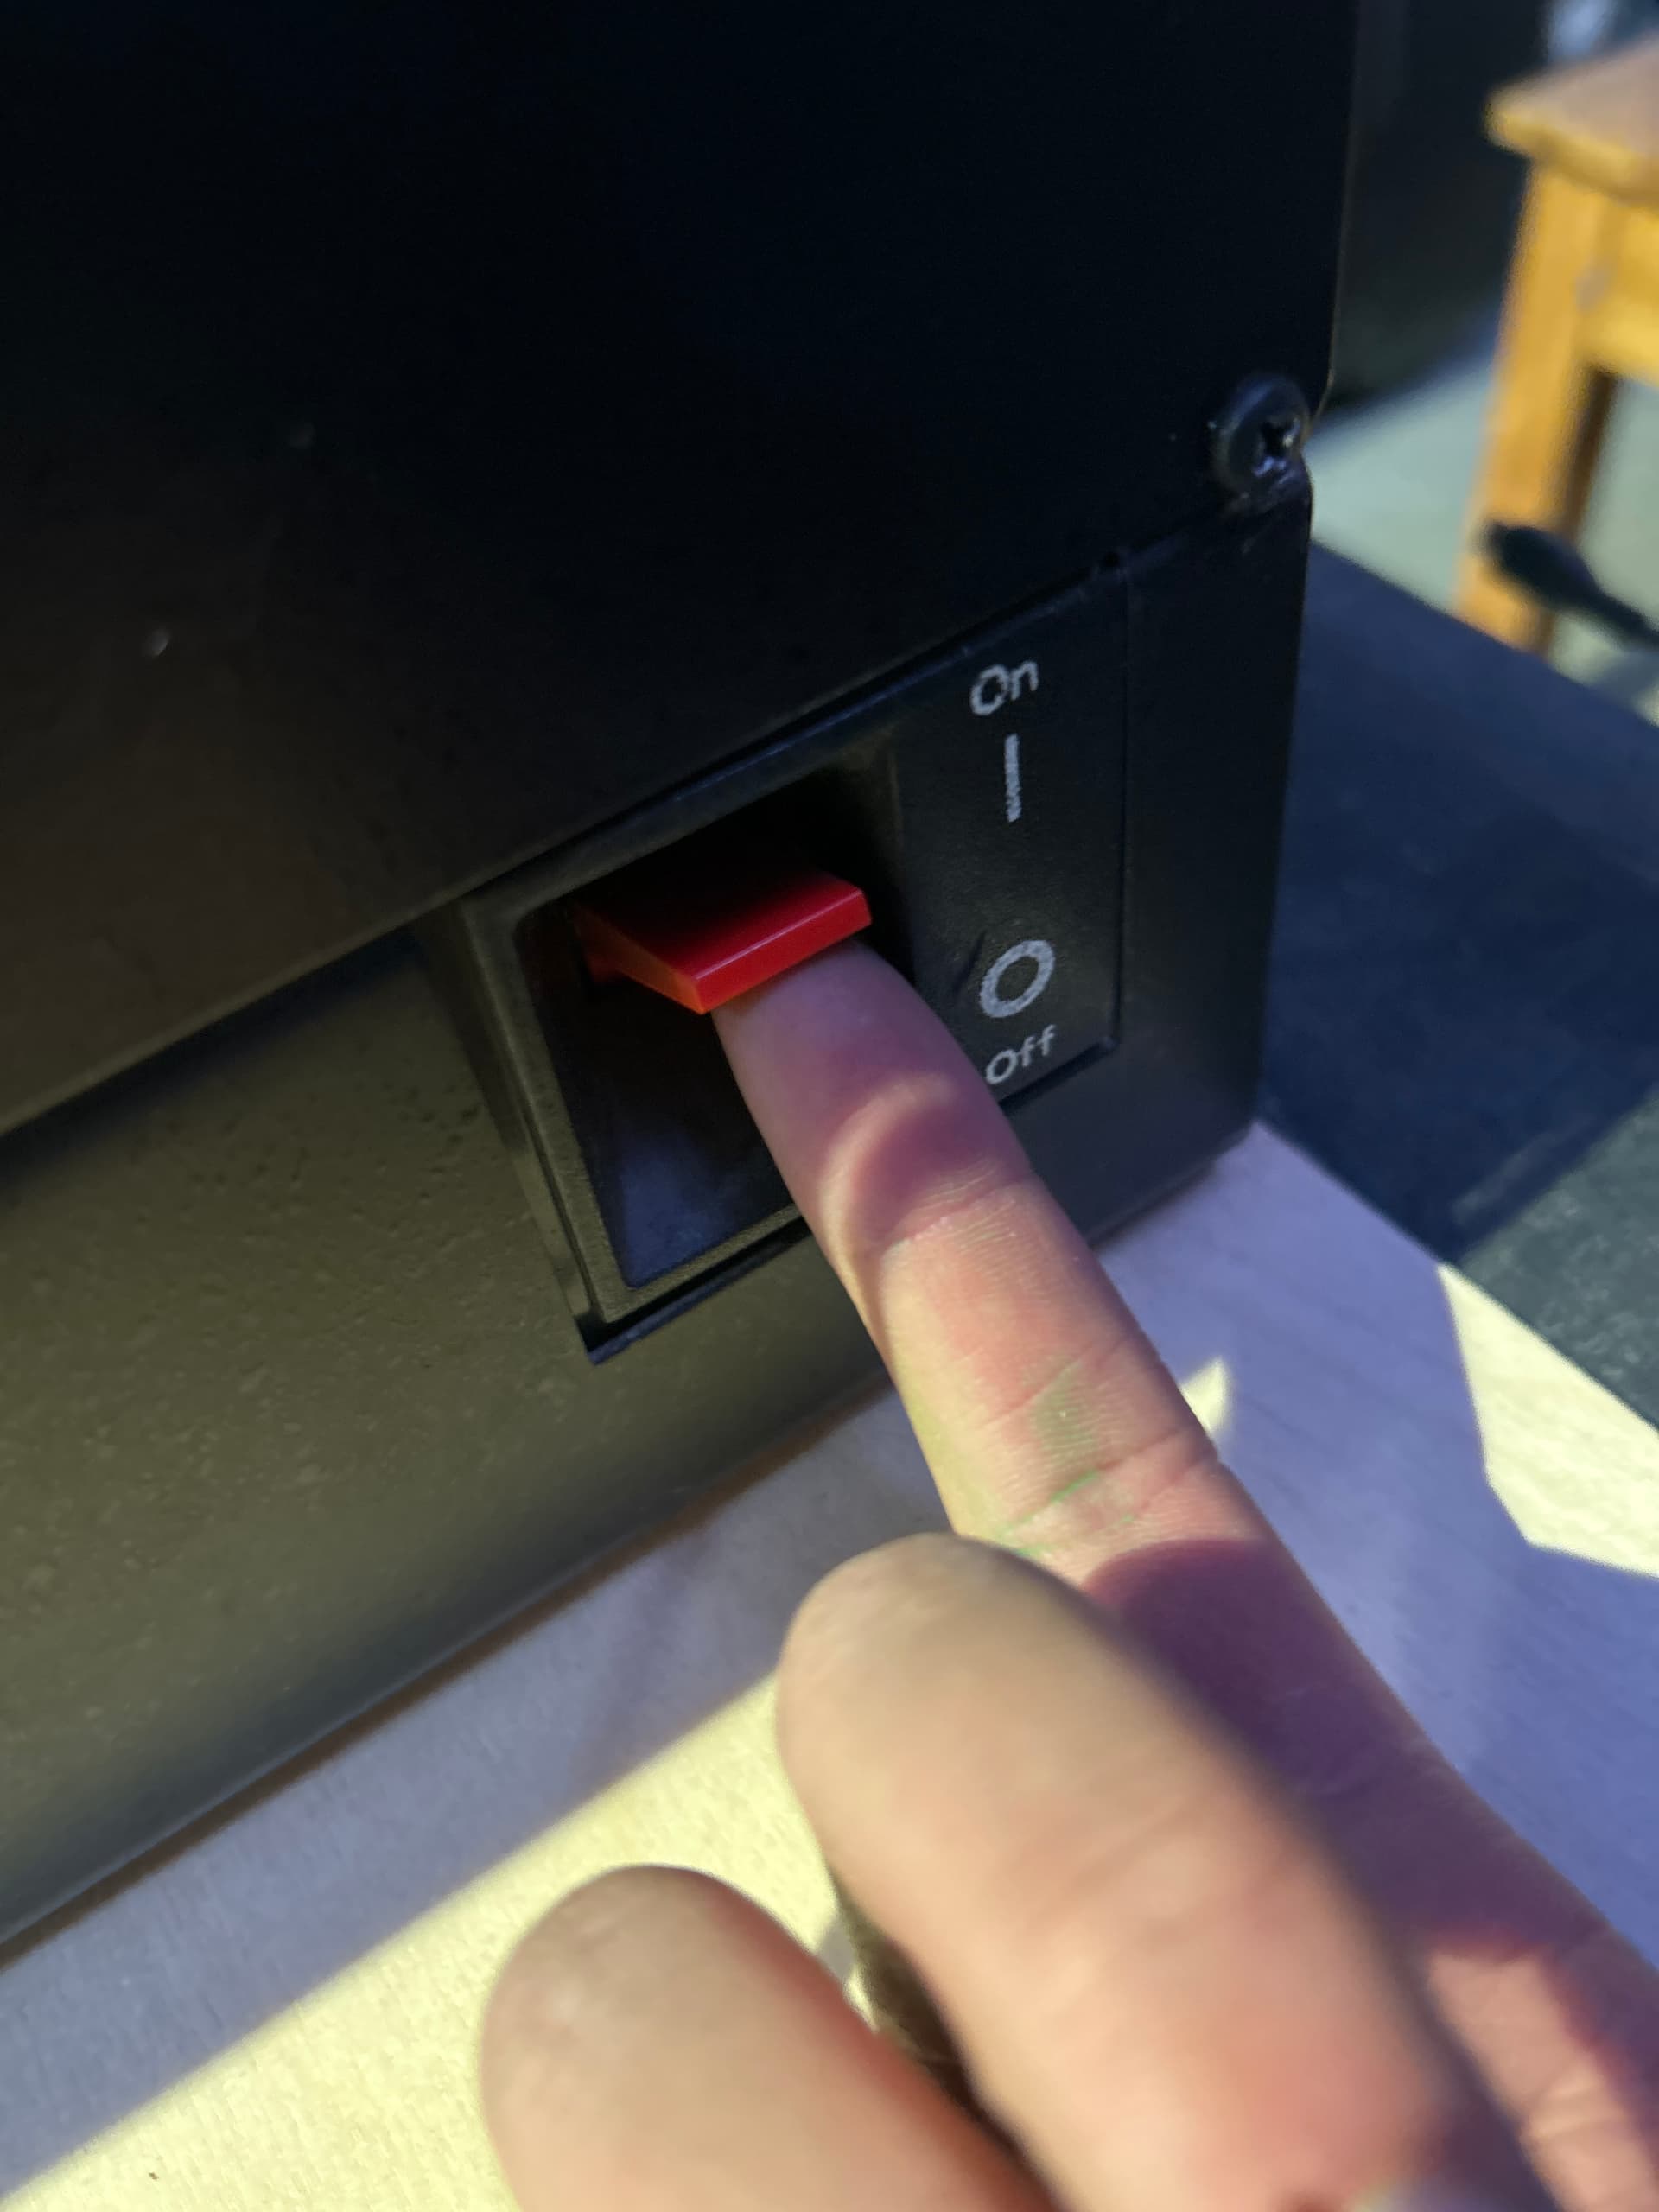
now that you can picocom installed and are connected to the machine turn it on with the red switch
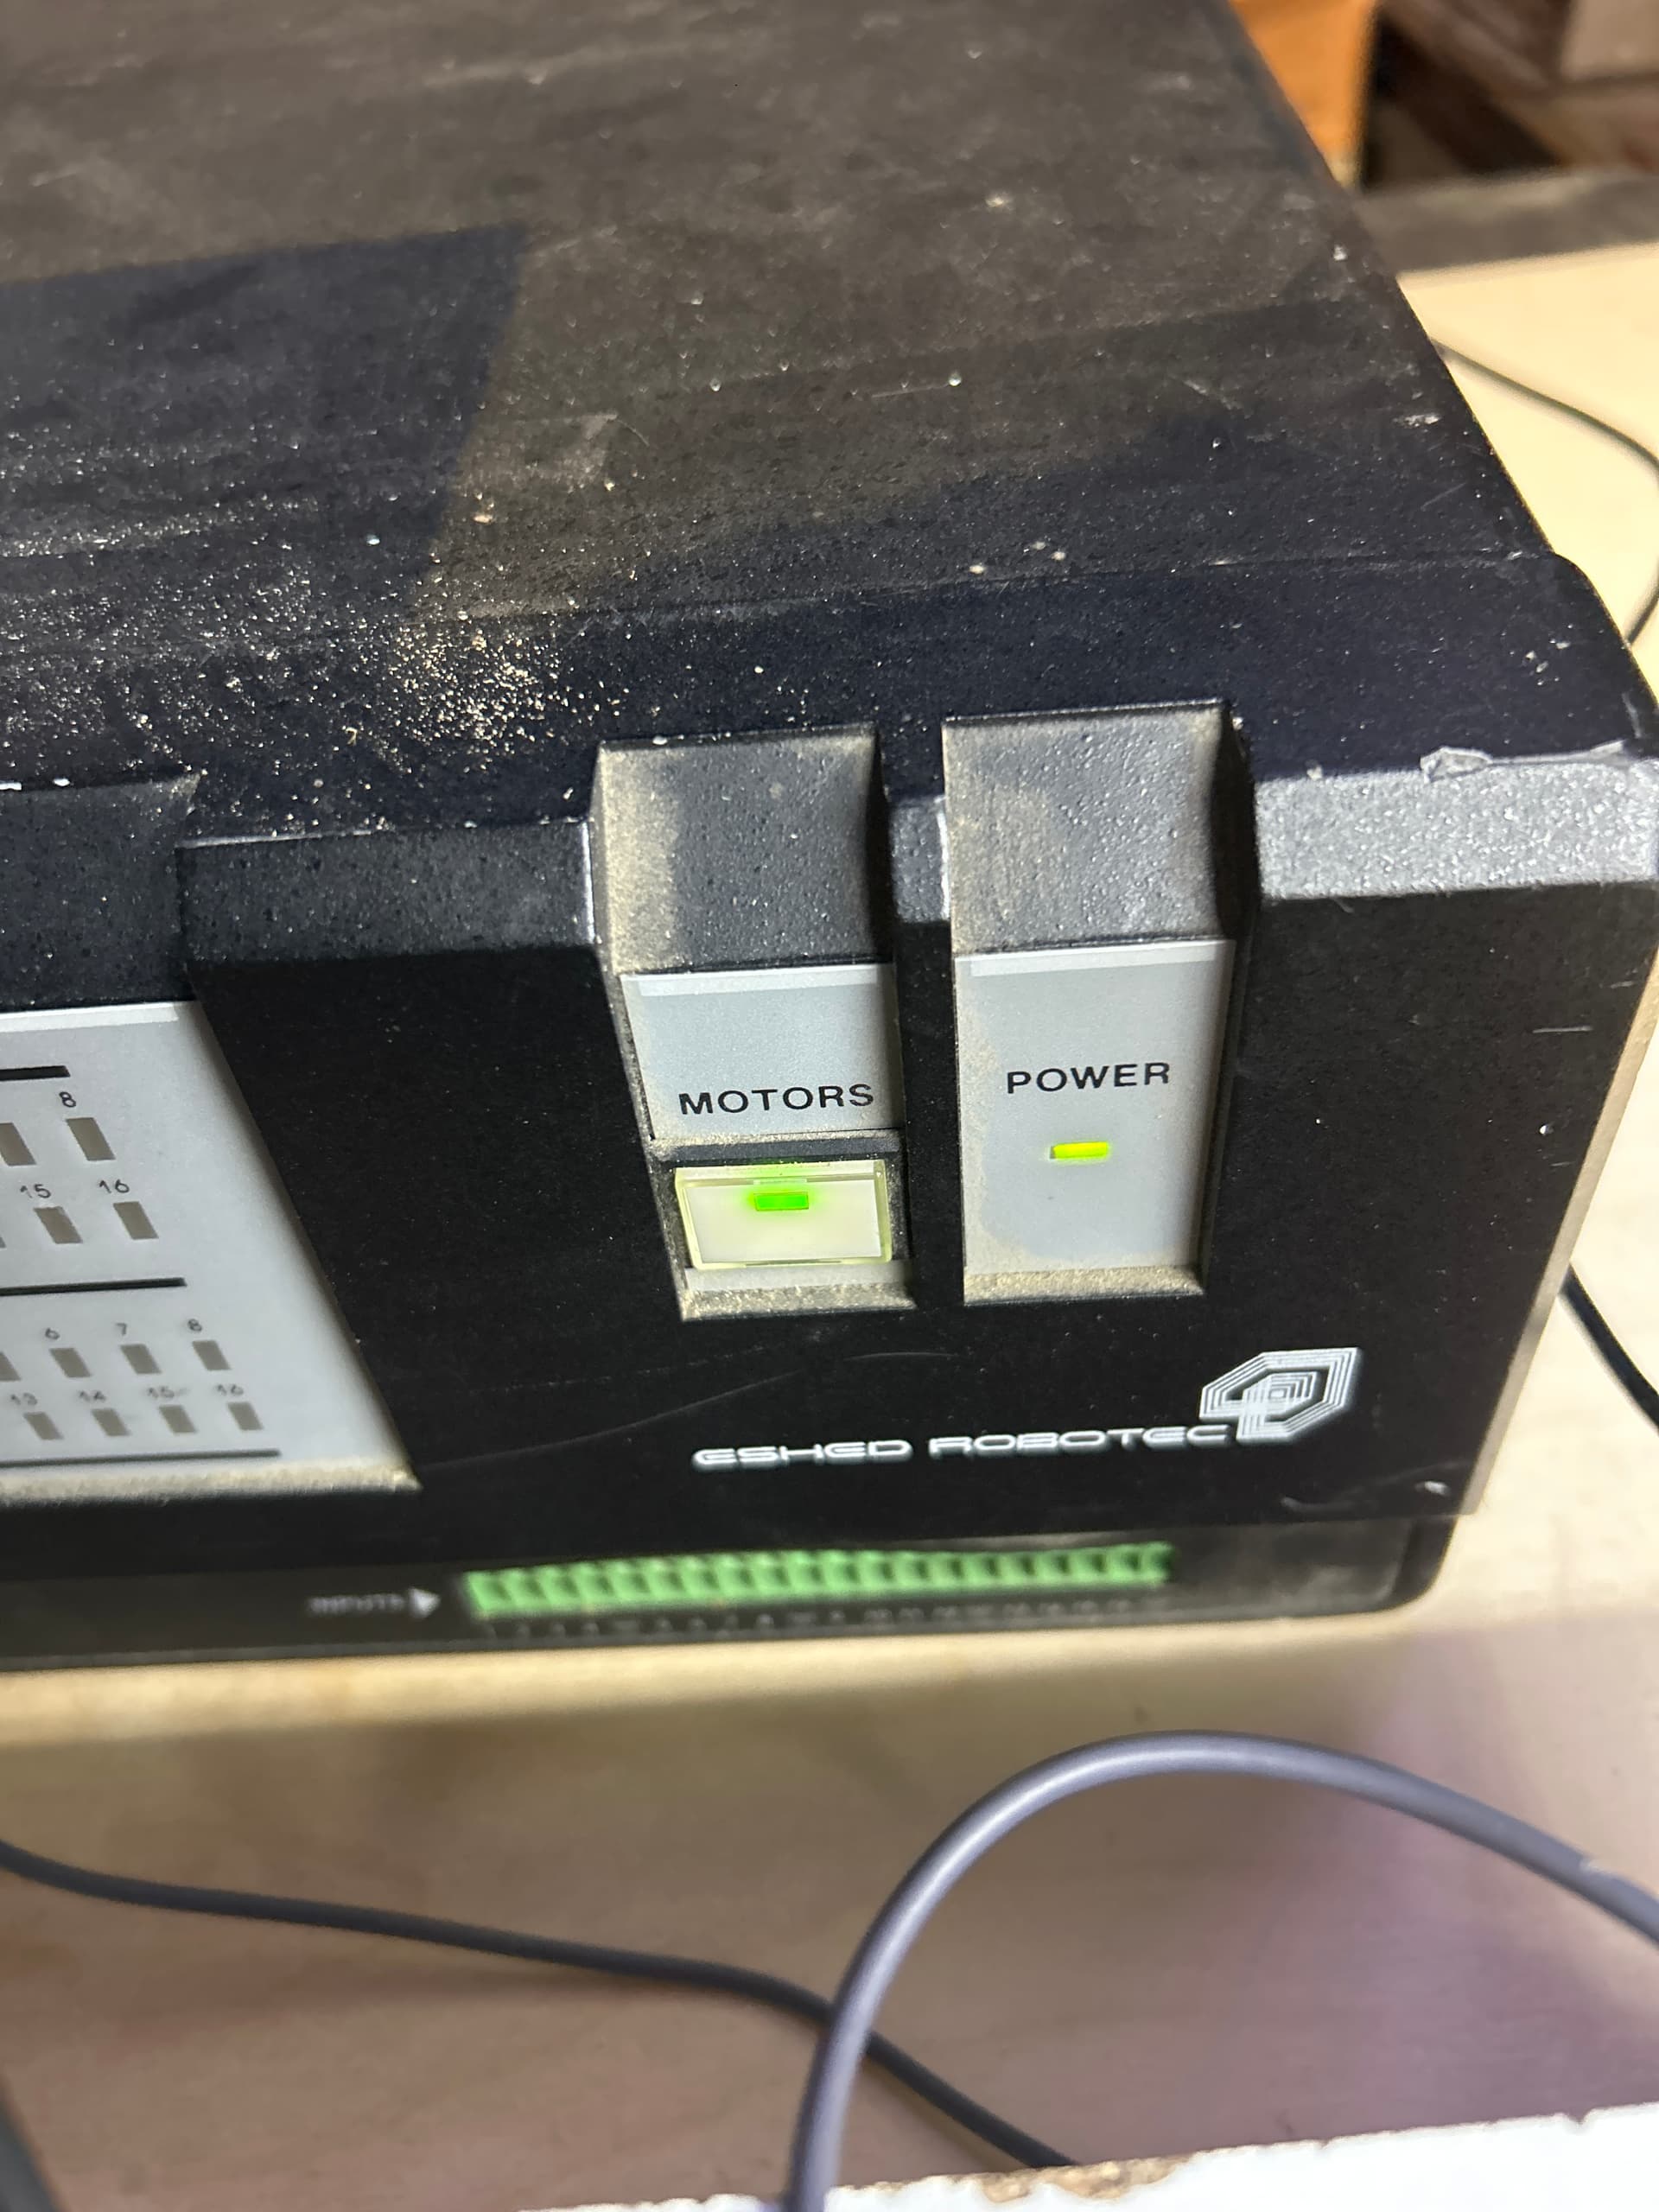
make sure the motors button is enabled
and then from here just enter the command (Note /dev/ttyUSB0 is not deterministic meaning it wont always corrospond to USB0)
![]()
ill break this down, sudo is root access, picocom is the name of the program we are trying to run -b 9600 means we are running it with a baudrate parameter of 9600 and the last one the name of the file associated to the serial adapter of the robot. As mentioned before it isnt guarented to be USB0 you can check what it is by changing directories to the /dev folder on your ubuntu machine. heres how to find that
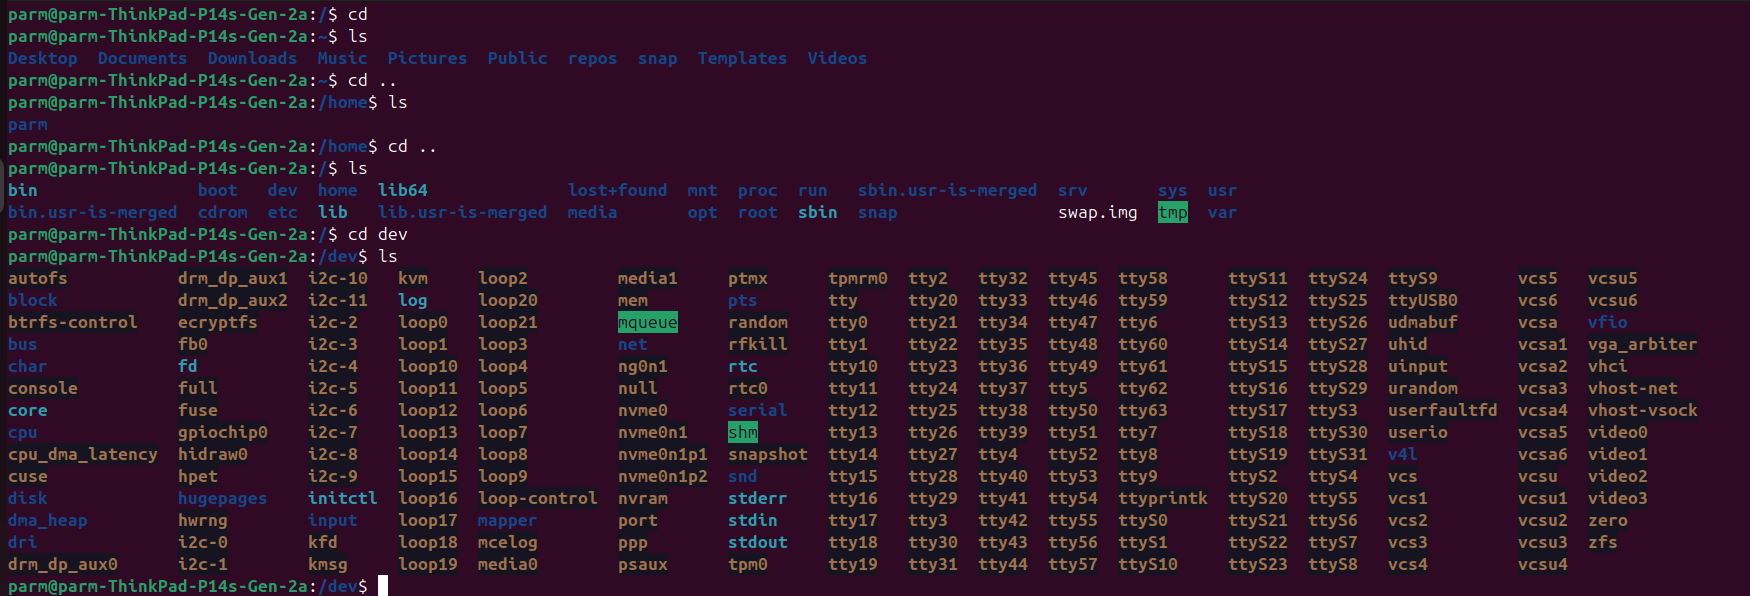
there is a lot of stuff in the dev folder so filter the list directory command with the
** wildcard start stuff

like that. if you don’t believe me that tty/USB0 refers to the robot take the usb plug out type
here’s me taking the usb out and in notice that tty/USB0 disappears then reappears when i plug it in

additionally here is proof that it changes occasionally had it change to USB1 the other day as i was testing the axis’s

great lets slap the command down and give it a rip. if the emergency stop button is on it will pause at terminal ready and the moment you unclick it, its gonna say Ram test complete and be ready for Advanced programming Language commands. if it doesn’t update to ram test complete when you turn it on initially try toggling the emergency stop button on the front of the box that usually does the trick.
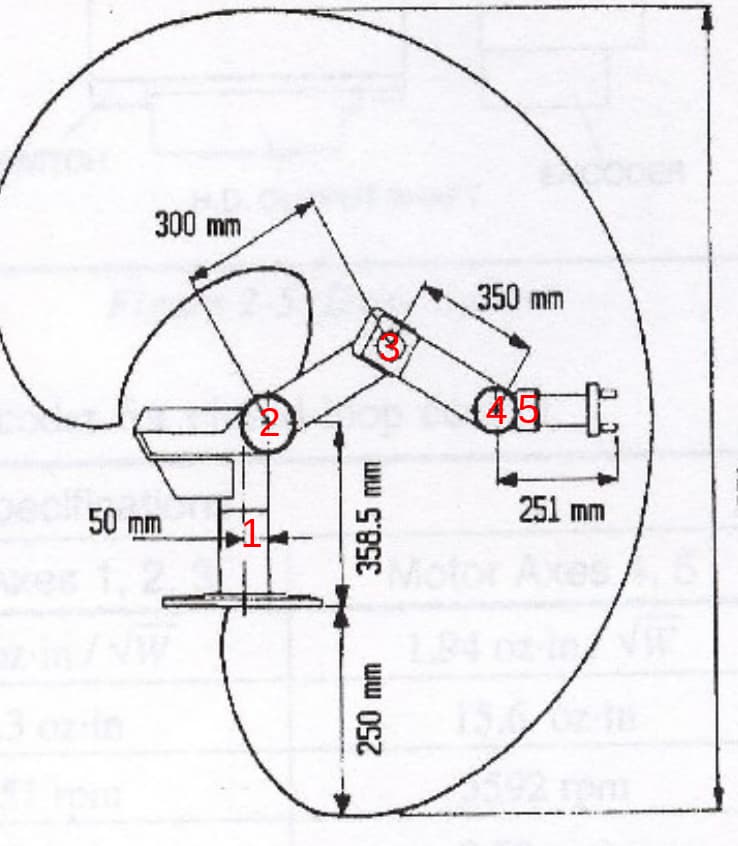
here is a diagram illustrating the axises of the robot.
according to the manual @Jarret found when you operate the robot you gotta home it first
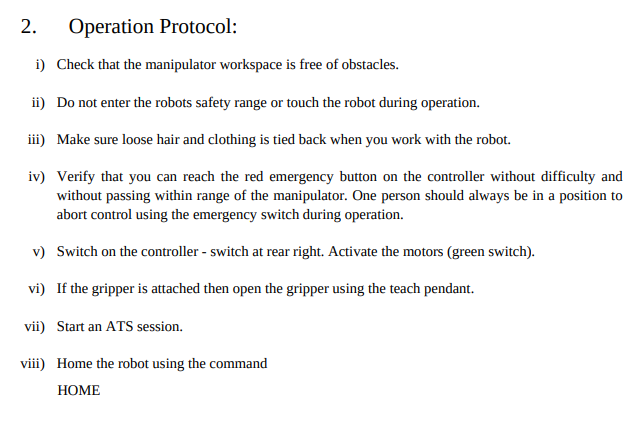
if you got to this stage of the tutorial you’ve just successfully completed step vii. the problems start when we look at step viii…
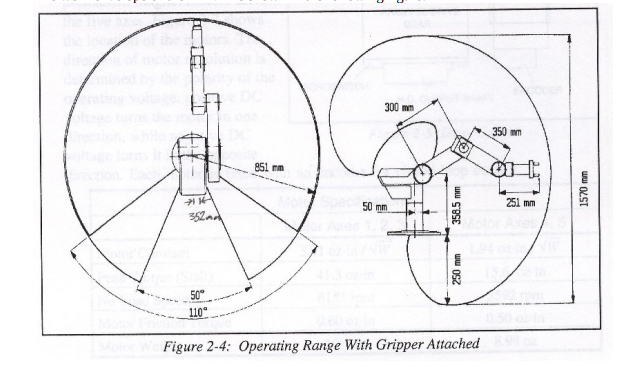
when you type the home command i’m thinking the robot is meant to go through its full range of motion then end in the position in the following diagram
however doing this causes the robot to fail on certain axis’s. my hypothesis is that if we can home each individual axis, the home command will work properly.
consider n to equal the set of numbers 1-5 . typing
home n
will home a particular axis. as of me righting this the only axis that works is axis 5. I figure that we cant program the arm until we fix the broken axis’s.
Problems to solve
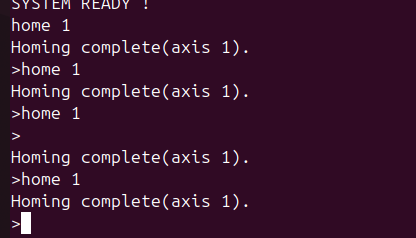
according to the console the home fn completes. as expected. however in order to test axis 1 and all other arises more rigorously i need to figure out how to move the axis’s to specific positions.
Things done
- so far we checked the limit switches of axis 2 and they work.
Things to Try
After experimenting with John and Jonathon possible solutions are
- checking the validity of the wires
Plan for tomorrow
read the docs for advanced machine language linked here and figure out everything i need to know about movement
4 Likes
I think the images may not be working on your post.
i think i fixed it
I believe if you add your user to the “dialout” group you won’t need to sudo to access the USB serial port.
Modern systems (including yours, it looks like) will populate /dev/serial with more predictable and human-friendly links to the actual device node. Under /dev/serial/by-id based on the USB identifying information, or under /dev/serial/by-path based on the bus path (physical topology). Generally a bit easier than trying to figure out if you have a ttyACM or ttyUSB and what number it is. If there’s only one USB serial device you can usually just do /dev/serial/by-id/* instead (shell will expand to a single filename).
2 Likes
Well guys, 5 days into trying to fix the robot I have messed up. really really really badly. I opened it apart to see how the thing really works. None of the axises would work properly and the software was a mess causing the arm to move unpredictably whenever i activated the servos. One thing lead to another and I ended up disassembling all the innards of the robot, going against all warnings. I’d like to say this is all that i did but it gets worse. without asking, which i probably should’ve on this forum, I cut the wires to the DE9 connectors, While i was doing this i was thinking i’d just replace it with a more modern cable. but i forgot how long the history was for this project and it wasnt on me to just start tinkering and changing stuff I’m so sorry @Jarrett you’ve been working on this since 2015 and I’ve effectivily undone 6 years of progress…
but i will fix things im gonna get this arm working no matter what.
2 Likes
anyways if anyone wants more frequent updates in the arm ill be in the vhs-robot section of slack
wish me luck, ill need it
2 Likes
Thanks for tinkering!
2 Likes
To set up a more stable relationship between the USB serial device and the /dev/devicepath you can create a udev rule that specifies the device matching using its vendor ID, product ID, serial number, device class, and even which USB port it is connected to. The second part of the rule specifies the group and path to the device.
1 Like
dang has it already been 9 days? Anyways time for a progress update.
First off I fixed and tested all the cables I cut (thanks Warren for helping me test). They are ready to be plugged back into the robot.

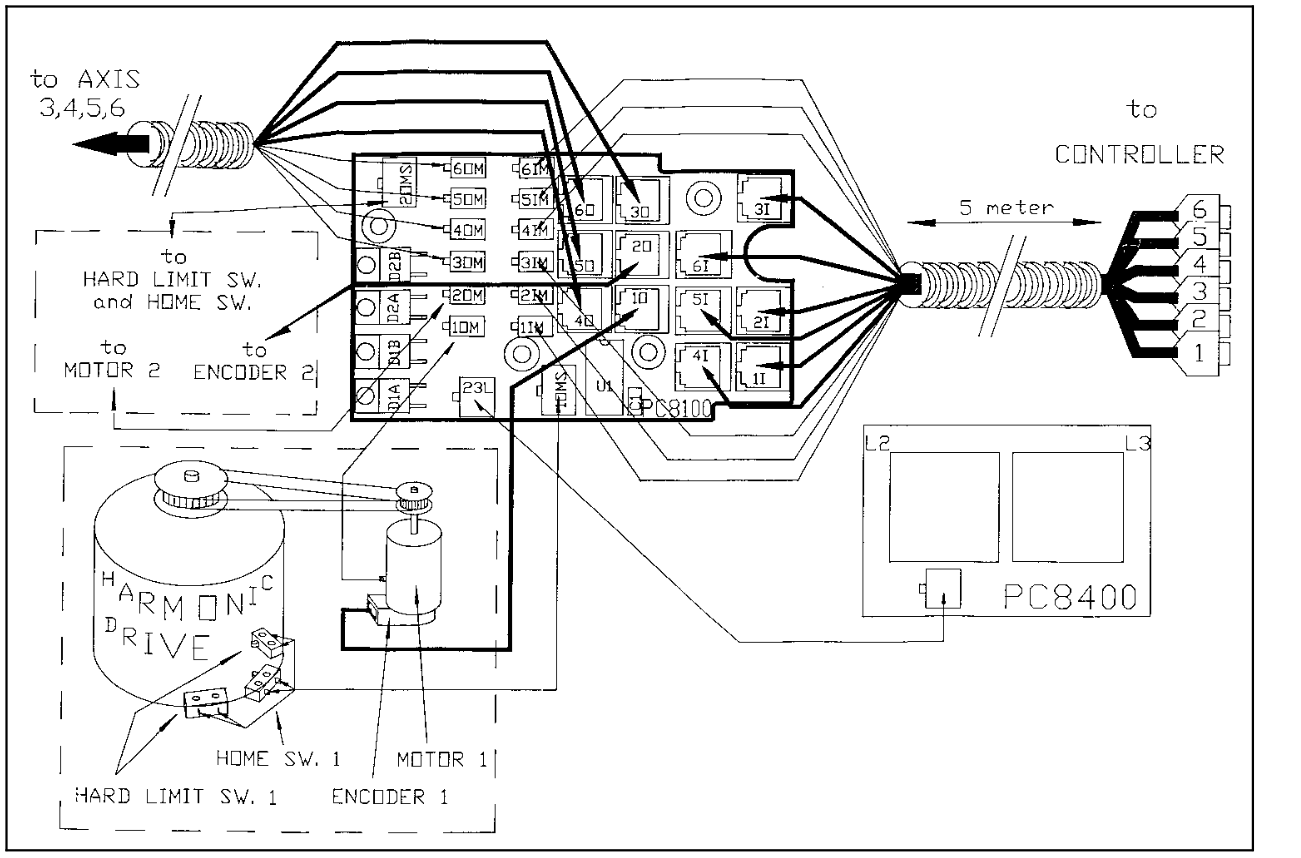
Speaking of which i found a diagram in a manuel, showing me all the connections I need to make, so figuring out where things go should be a cake walk
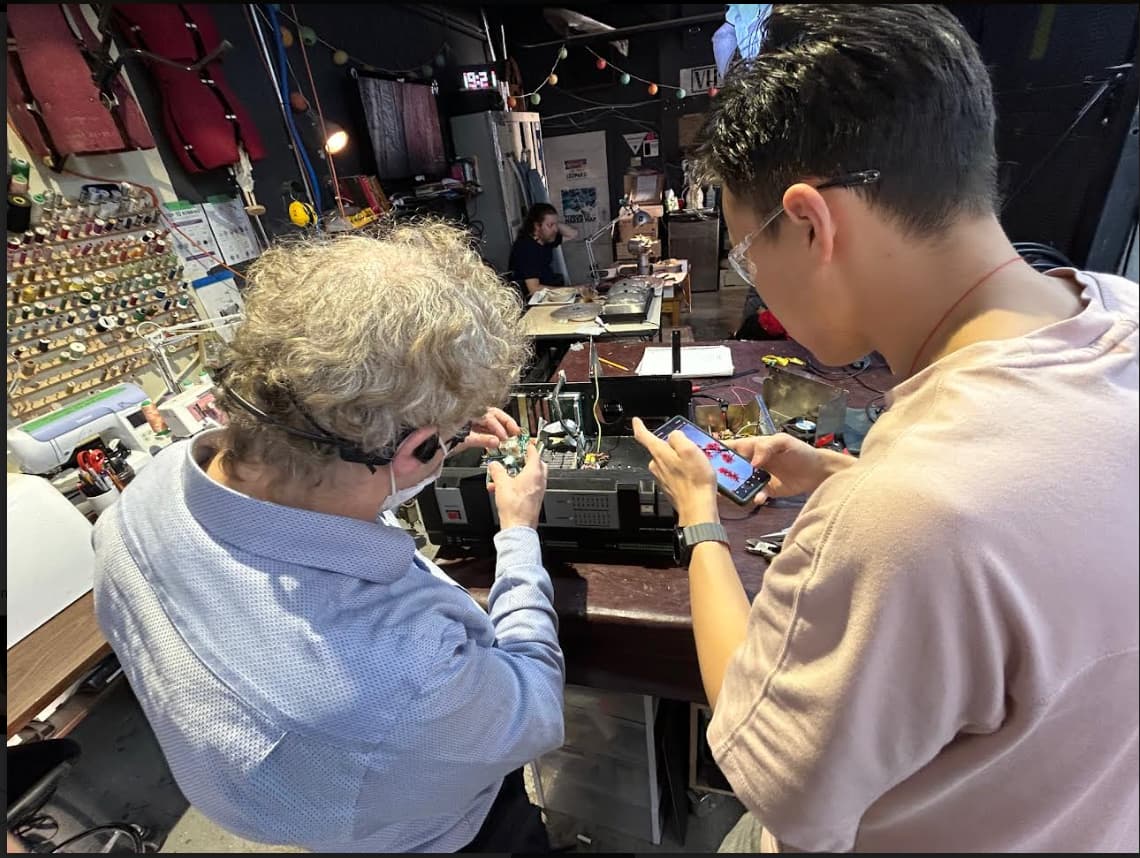
On tuesday Tengis and Tim helped me learn about an electrical issue in the powersupply of the controller.
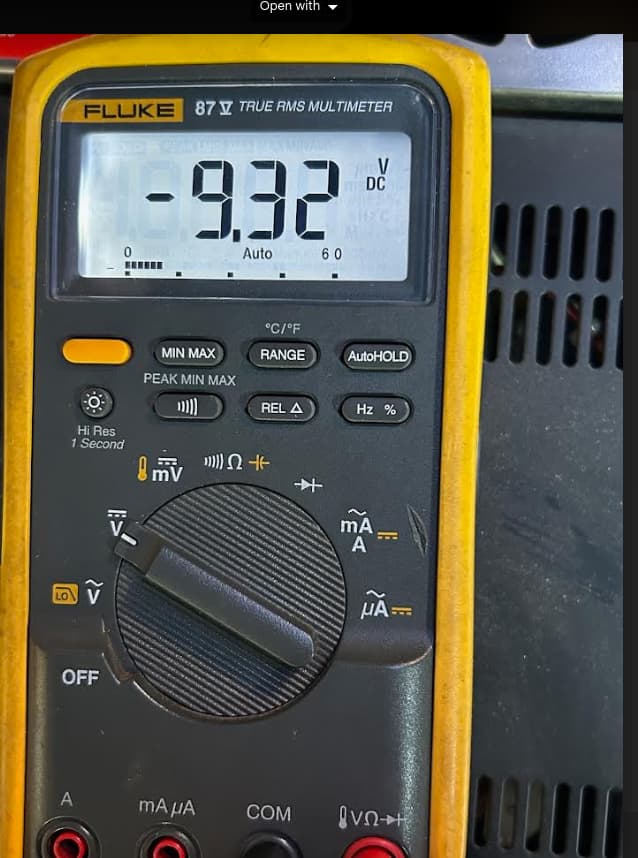
Turns out the power supply for the controller was outputting Faulty voltages. All of output cables we tested under performed in voltage output.

blue being as bad as being 3 Volts down from expected!
We then opened up the supply and got to see the real nuts of bolts of the thing
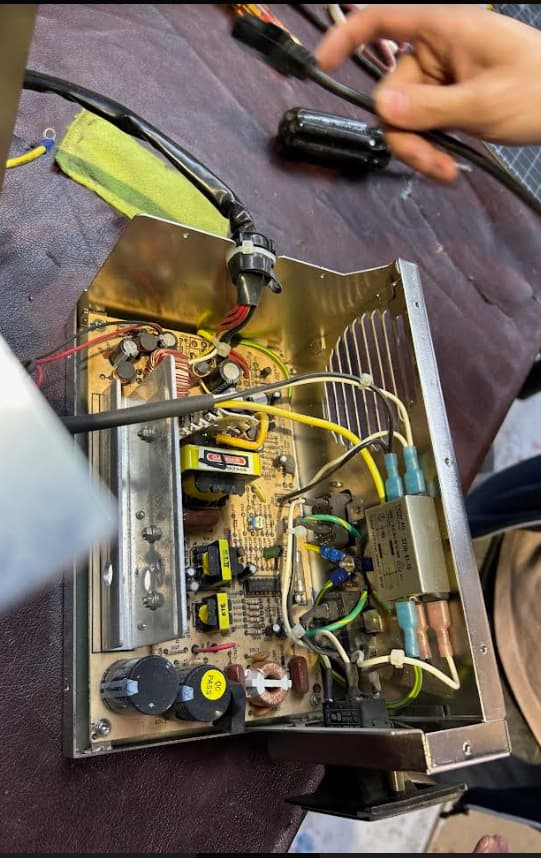
after some rigous testing we found many capacitors were faulty.
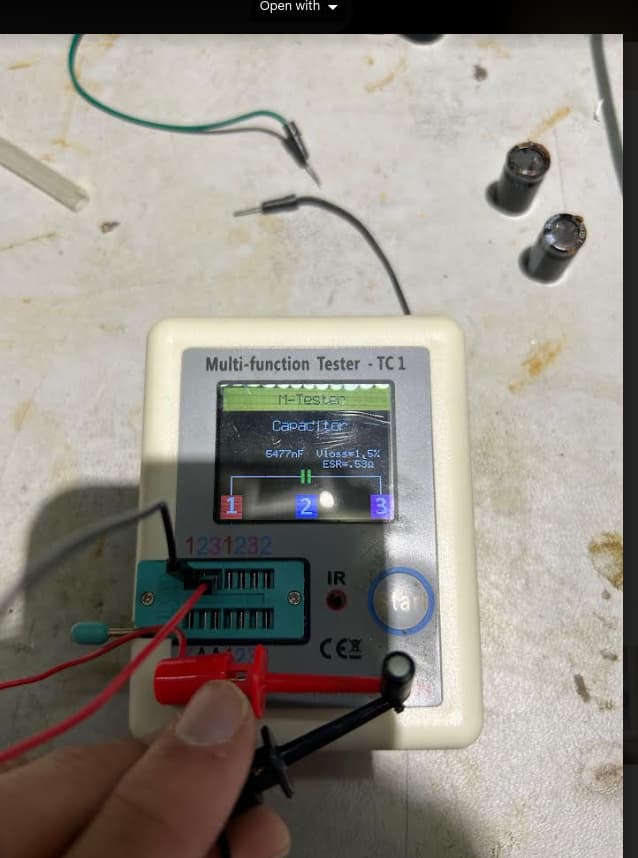
replacing them and retesting lead to improvements in the power supply output however tengis took it home to his workshop for further fixing.
Future Plans
Once i get the powersupply back and the cables rewrited i found some interesting sections in the manual regarding trouble shooting. once i go through that i’ll have a better idea about what else other than the faulty power is going wrong in the robot
3 Likes
interesting i’ll need to take a closer look at this, thanks for sharing
1 Like