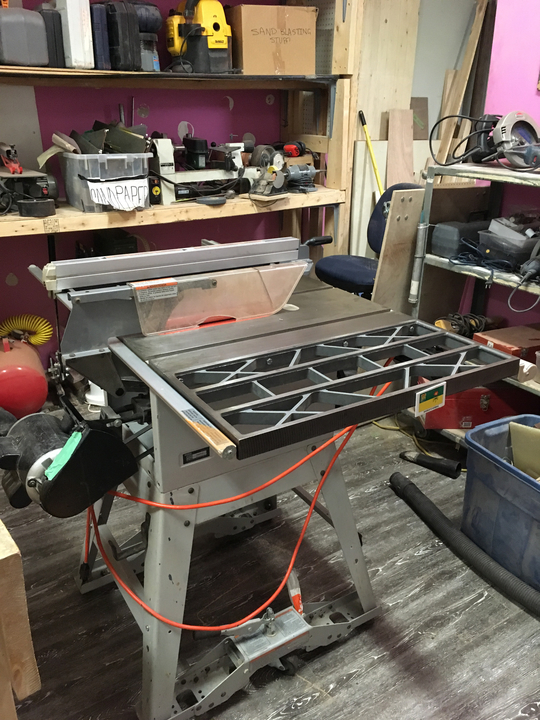
If you haven’t seen it yet, @Hekseskudd provided a new table saw! Its basically about as stout of a jobsite saw that you can get before you get into cabinet saw territory; I’m very excited! Last night @laftho and I did some cleanup and assembly. Below you can see what it looks like
The big benefits of this saw over our last:
Heavier (heavy saws are generally more stable and that translates to cut quality)
Safety Equipement (blade guard, riving knife, kickback pawls, and more accessible switch
Taller (the last saw was a lot lower than is comfortable to use, and comfort also can translate to safety)
Larger work surface (easier to work with larger materials
Metal surface (flatter, and allows for magnetic guides and other tools such as indicators)
Generally better construction (safer, better quality operation, etc).
We now have a few things that need to happen:
Wiki needs to be copied from current table saw entry to new table saw entry and updated to match new info
Table saw needs to be validated as good to use. @Stevemopolis would you be willing to take a look and make suggestions for our new saw?
We need to deal with the old saw. @ninetynein, you are the champion for that saw, were you also the original donor? If you were the donor, would you like it back, otherwise, do you have a suggestion on what we should do with it?
Adjust power cord holders to be more logical.
Remove rust on under-side of table (near the front)
After using it last night for a ramp project, I would say that the new table saw has no downsides compared to our old saw. We should remove the old one with an appropriate method.
Any suggestions on an appropriate method?
Should we sell it? Does the original donor want it back? Should we offer/trade it to VTL?
Hang-on, I just bought a new blade for the (I guess) old saw, are we talking about the big table saw that was sitting on a wooden tablething? Also I couldnt get it to 45deg angle, so my project is not quite finished. Will my blade fit this new saw?
The entire guard assembly comes off with a thumbscrew behind the back of the table.
We can get (or make) a 4" flange to mount below the saw; this would allow us to upgrade to a dust collection that is actually useful, I personally found the old saw’s dust port to be like sucking a lake through a straw. Any thoughts?
This sounds like the config in the manual.
Should be the same as the other saw, right? We can keep those tools and mount to the side.
Dust collection with these open backed contractor saws is not ideal. I have seen one solution to the rear saw sealing of dust as being a bag that fitted around all the components and then sealed to the cabinet back. Then a plastic funnel to 4 inch ducting placed below the saw cabinet bottom. If you just place the duct in cabinet bottom without covering the back an enormous amount of dust escapes and makes the whole process futile.
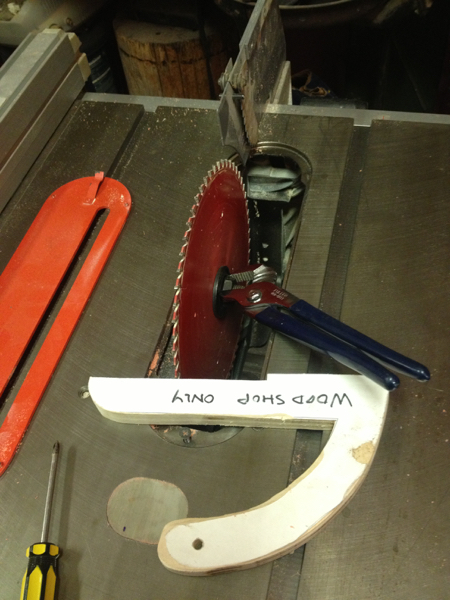
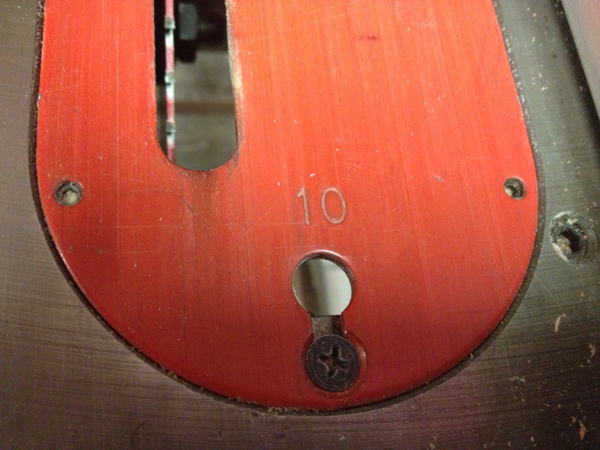
I couldnt change the blade on the new saw, there is no place to put the wrench between the motor and the blade, there is obviously a nut on the outside. Someone suggested jamming a piece of wood between the blade and the frame; now Im thinking to clamp the blade with a hand clamp to stop it rotating. I also noticed the throatplate is not level with the rest of the table, even after cleaning, theres sort of dip to the right of the blade - this could affect your ripping (esp of narrower pieces of wood). The old tablesaw had a nice level plate and table.
There is little online about changing the blade, other than someone mentioning jamming a piece of wood to lock the blade so it can be changed. Model no. is RIDGID TS2424_0.
I found that after raising the blade to max height that I was able to loosen the nut with a pair of pliers quite easily. Holding the push stick under a tooth seemed to work for loosening. Tightening seems a little more problematic as you mentioned but levering the push stick against the cutting edge of the blade (not the side) seemed to provide enough tension for torquing
I swapped the throat plate from the old saw to this one and it seems good now. Note that if the bottom holding screw is too tight it will cause the plate to bow upwards. Also there are 4 hex screws in the four corners of the plate that can be adjusted to level it.
Hey Mark, thanks for that. I did notice that screwing it down hard caused bowing, but forgot to mention it. (I eased off the pressure as best I could)
Never noticed the adjustment (hex) screws! [So that will help]
I hung up the tablesaw wrenches from the old saw, on a hook behind (or part of ) the workbench. (This bench was I believed moved to accommodate the new/large bed of the Wood/CNC machine, not sure what its called exactly)
the single fastener holding the plate down shouldn’t be cinched tight, it just acts as a pin for the plate to be slid along when taking it on and off, not the best design.