@Big_Mak Yeah that’d be my concern as well. I’ve poked around a bit checking out the different designs available on the market, and the next step up from lever operated seem to involve some sort of pneumatic air multiplier that works with a standard air compressor, such as: http://www.mediummachinery.com/index.html (which puts out 13500 PSI!). From the video, it doesn’t look as if it injects the plastic prticularly quickly either, so perhaps a bottle jack could turn out to be fast enough.
If a bottle jack works, it can potentially simplify the entire build since the bottle jack itself would encompass most of the moving parts (lever, vertical movement), and we would just need to build a stiff and strong frame with no moving linkages. I did up a crude drawing showing what I mean.
a
Essentially the piston would be stationary, and the bottle jack would push the mold and melt chamber into it, as opposed to the other way around. Perhaps this design would need a way to clamp the nozzle to the mold.
@Daniel_DeGagne That’s actually the design I referenced in the “design our own” link - it looks very well thought out.
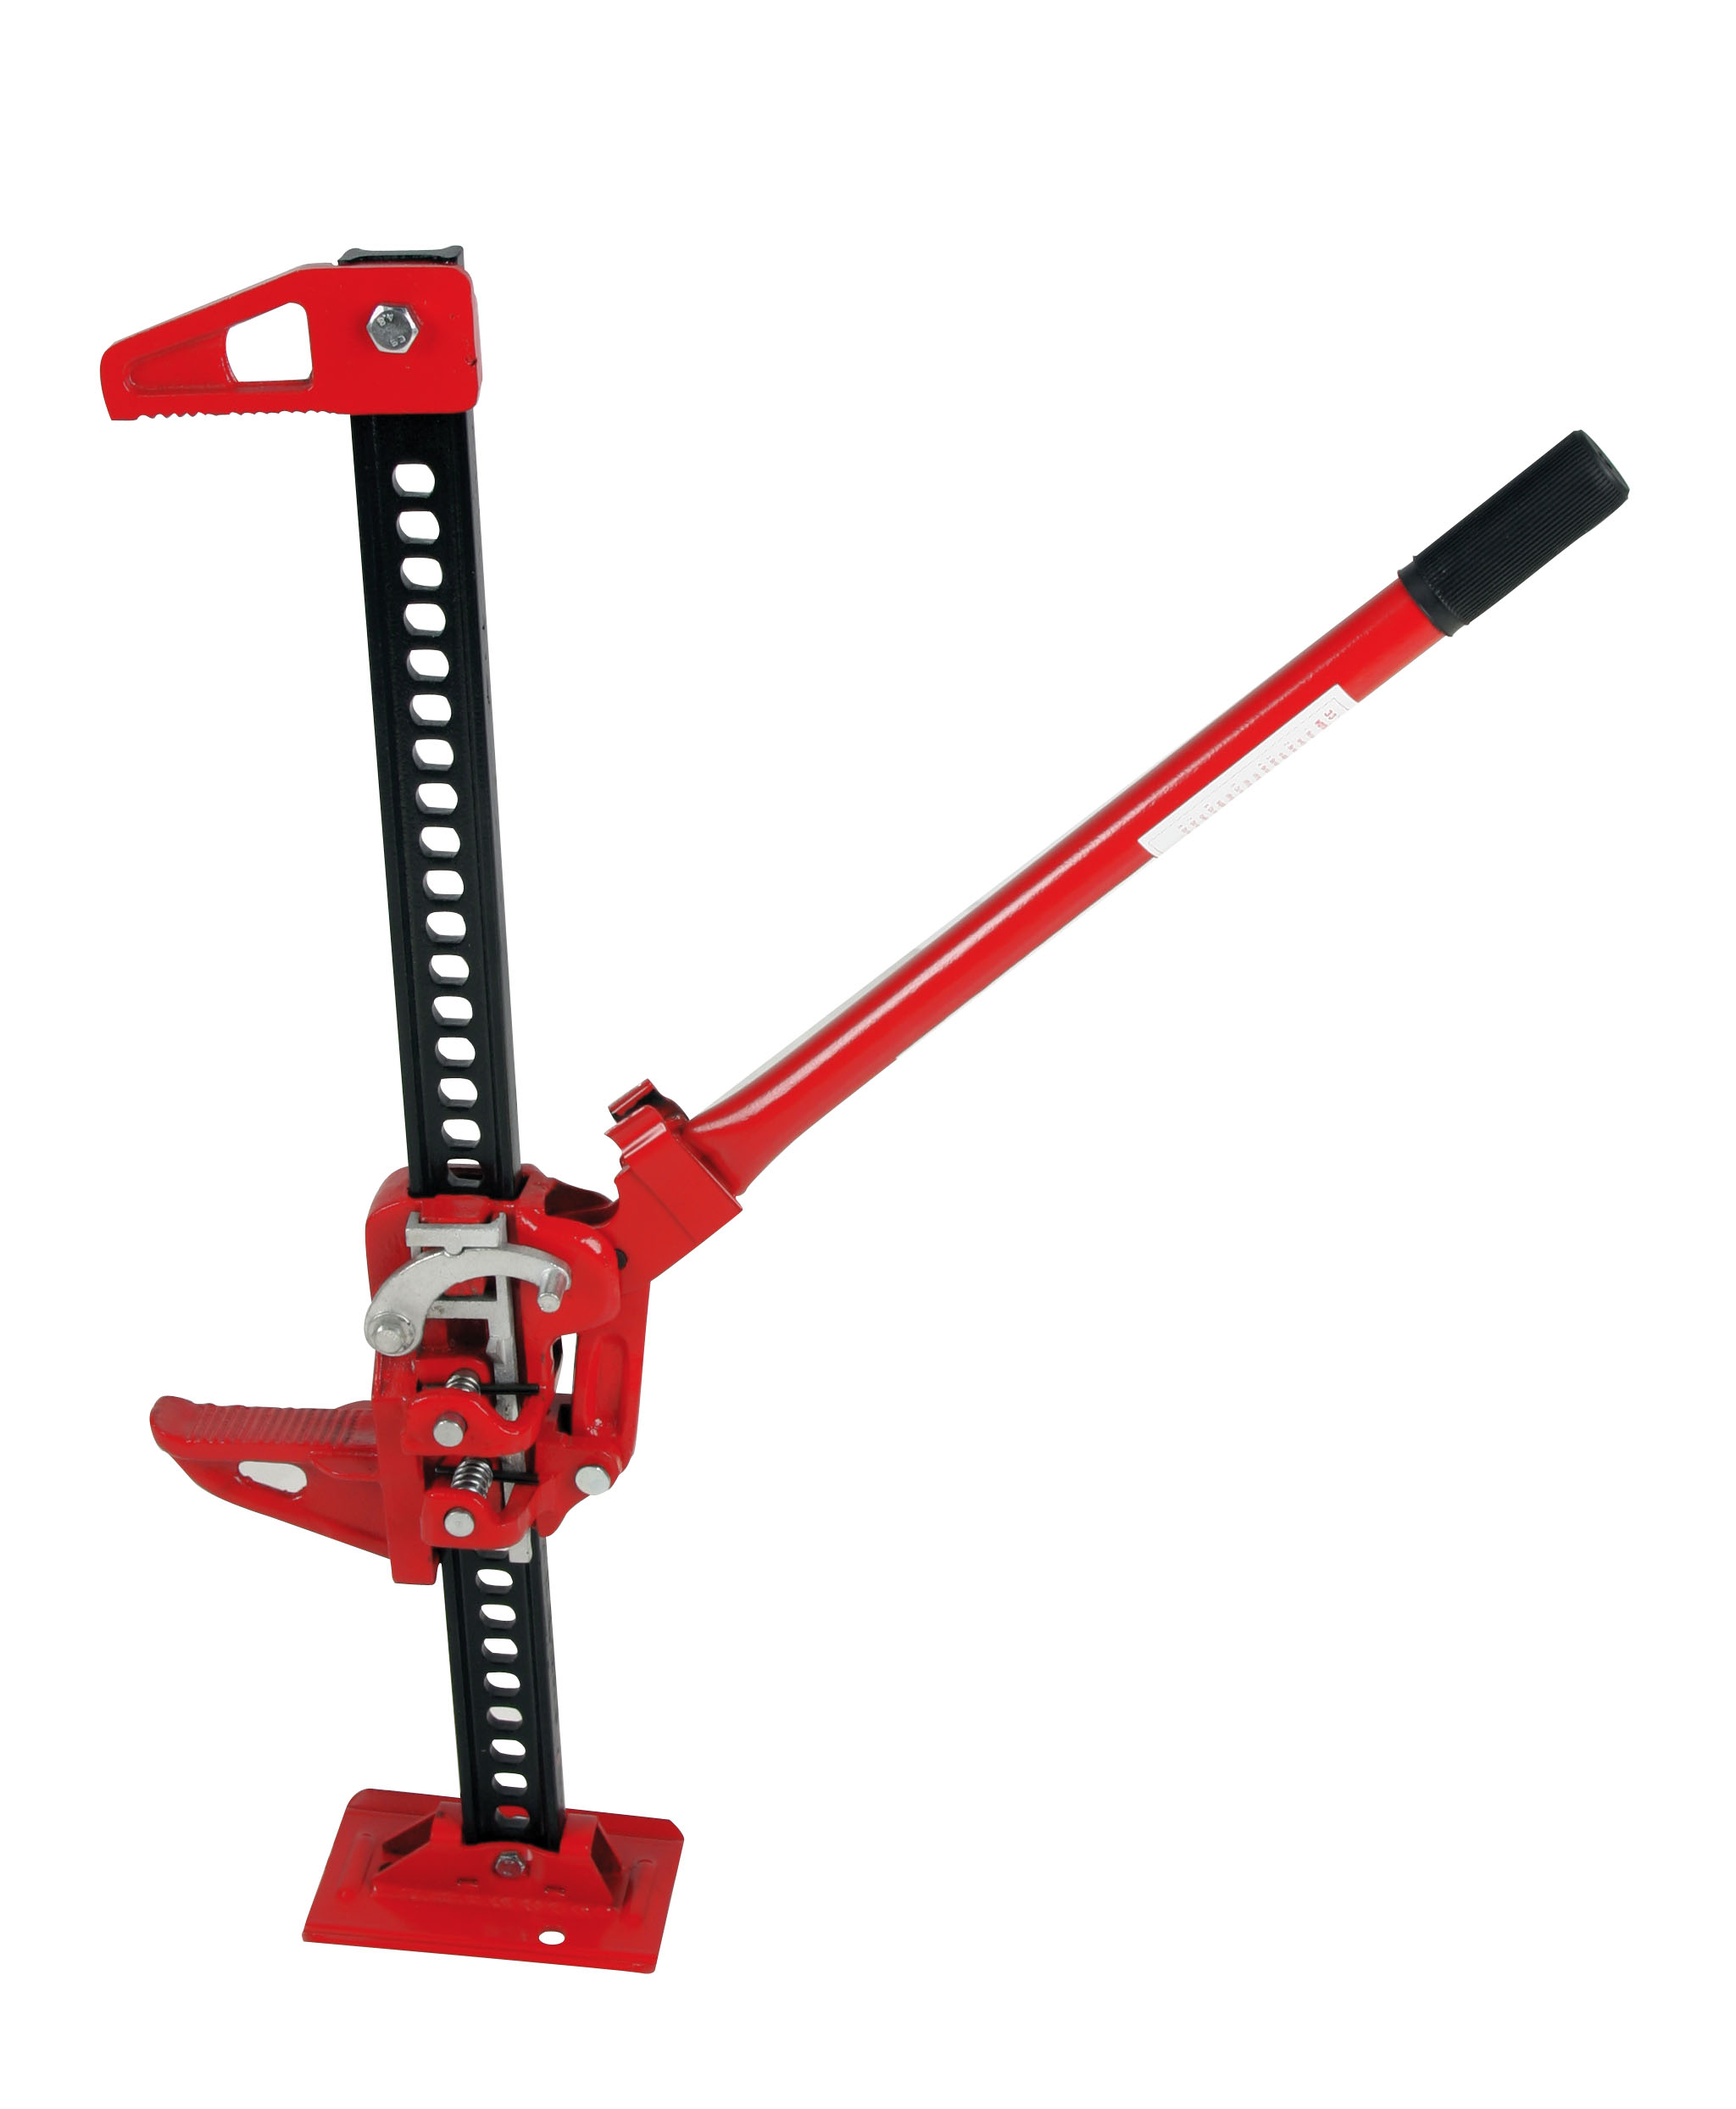
Neat bottle jack design! If the bottle jack is too slow, you ‘could’ use a “farm jack”. It might be kinda wonky… Maybe. But I’ve jacked trailers with these before, and it only takes one or two pulls to move it several inches. They also kinda sketch me out as they are soo heavy and awkward.
The hi lift jackall, as we call it in Ontario. Just need to remove the foot
and head mountings with a boat it to the apparatus.
One warning, jackalls can apply incredible force.
And as result the kick of the arm flying up can knock your teeth out. I
have personally checked barn floors with those things. Like many farm tools
a little training will save some injuries.
See that little quick release. Knock that out with a hammer or wrench used
used as hammer.
Hi lift jackalls cost about $80. And have shear pin typicality designed to
4 tons.
I think the idea of using a jack is worth exploring, and I’ve spent a fair amount of my spare time trying to think of reasons the design wouldn’t work and have been coming up empty.
That said, since it seems like nobody here has worked with plastic injection machines before, I feel like I “don’t know what I don’t know”, so perhaps for our initial build we should stick with a tried and proven design as a starting point - a minimum viable product so to speak. Afterwards, we can decide if we want to improve the design (or perhaps it will work well enough that a revision won’t be needed at all.)
Since it sounds like there are arbor presses at the space already (thanks for the info @Daniel_DeGagne) , I think the scorchworks design linked earlier adapting an arbor press would allow for the easiest build without compromising frame rigidity, and similar to the jack design we’re offloading all the moving parts to something that is readymade and sturdy:
There will still be some machining involved, such as the adapter piece, and parts we need to source (the mold clamp/vise), but I think this is a good, relatively fast way to get our collective feet wet.
That’s a great way to put it! Thinking it over, I think we can design parts in a way that’s frame agnostic anyway (except for maybe the adapter), so it doesn’t really matter as much as I thought. I poked around more and KMS has a 12 ton hydraulic press that’s basically a bottle jack and a frame (!) for $150 (!!), which looks to be a great option too.
I picked up the Gingery eBook and it’s a bit of a let down and will probably be returning it for a refund. It comes off as a bit outdated and underdesigned. What I initially thought based on pictures to be a pressure gauge (which would be amazing) turns out to be an oven thermometer.
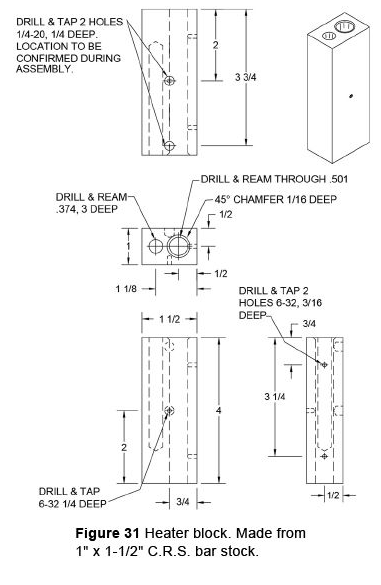
The main item I was looking for were the heat chamber and nozzle dimensions, since that’ll affect the injection volume and pressure. I’ve attached a drawing below - it’s not clear from the book how the author arrived at these dimensions and whether he’s done any calculations or testing, but it remains a good starting point:
If you are planning on coming please confirm here, so I have an idea of how much space to create. If it’s 3-4, we can hover around the granite table and sketch stuff just on regular paper, otherwise I’ll grab a flip chart!
Still on for 2 tomorrow. We’ll work on b size paper. Then I can scan our work and post either here or the wiki or both. I’m not the sole guy driving this. Just a facilitator and providing a venue.
I may be machining some 3d printer parts while you are there.
I’ve scanned and attached the notes that Gonazar was kind enough to take. Mine and Daniel’s I think would be unintelligible for anyone but ourselves.
For those that couldn’t make it, have a look and provide us some feedback.
We have some items that we would need to decide before we proceed with a design.
1 - would be Shot Size(How much material will we be able to inject at one time) If we go too big the heating cycles will take a while.
2 - Find some reasonably priced heater cartridges. Thought of using ones that are used in 3D Printers, concern with this was that they wouldn’t affect much of the chamber. The selection of these will also affect what we use to control the unit.
3 - for an injection Nozzle, we thought about using a nozzle from Filablot. http://www.filabot.com/collections/components/products/filabot-extrudert-nozzles?variant=513607873 They are cheap, and we can modify the nose to suit our requirements.
4 - To regulate the pressure for each shot we suggested to use a torque wrench on the press.
5 - we need to come up with a feeder system. Gravity of some sort.
6 - we want to use up to 4 thermistors possibly more to allow us to control the heat in the system and mitigate the chances of any runaway heater cartridges.
Any of you who were there note that I missed anything, add it!
We should probably schedule another session maybe at the space.
Sit down with all the stakeholders and figure this out asap, imo. All other calculations in this project derive from this.
Line up a bunch of 3D printer frogs, Raspberry Pi cases, and stop motion maquettes to decide on a good size you want to shoot for. Then drop them in a bucket of water to get the displacement volume.
Heater wire! Like in a hairdryer or toaster. Use line voltage AC with an SSR to control the average power. This will be hotter, more efficient, cheaper, and easier to power than any heater cartridge. A little more terrifying, but you’re already planning on pumping sticky molten hot plastic through a homemade pressure vessel, so what’s a little more voltage?
